
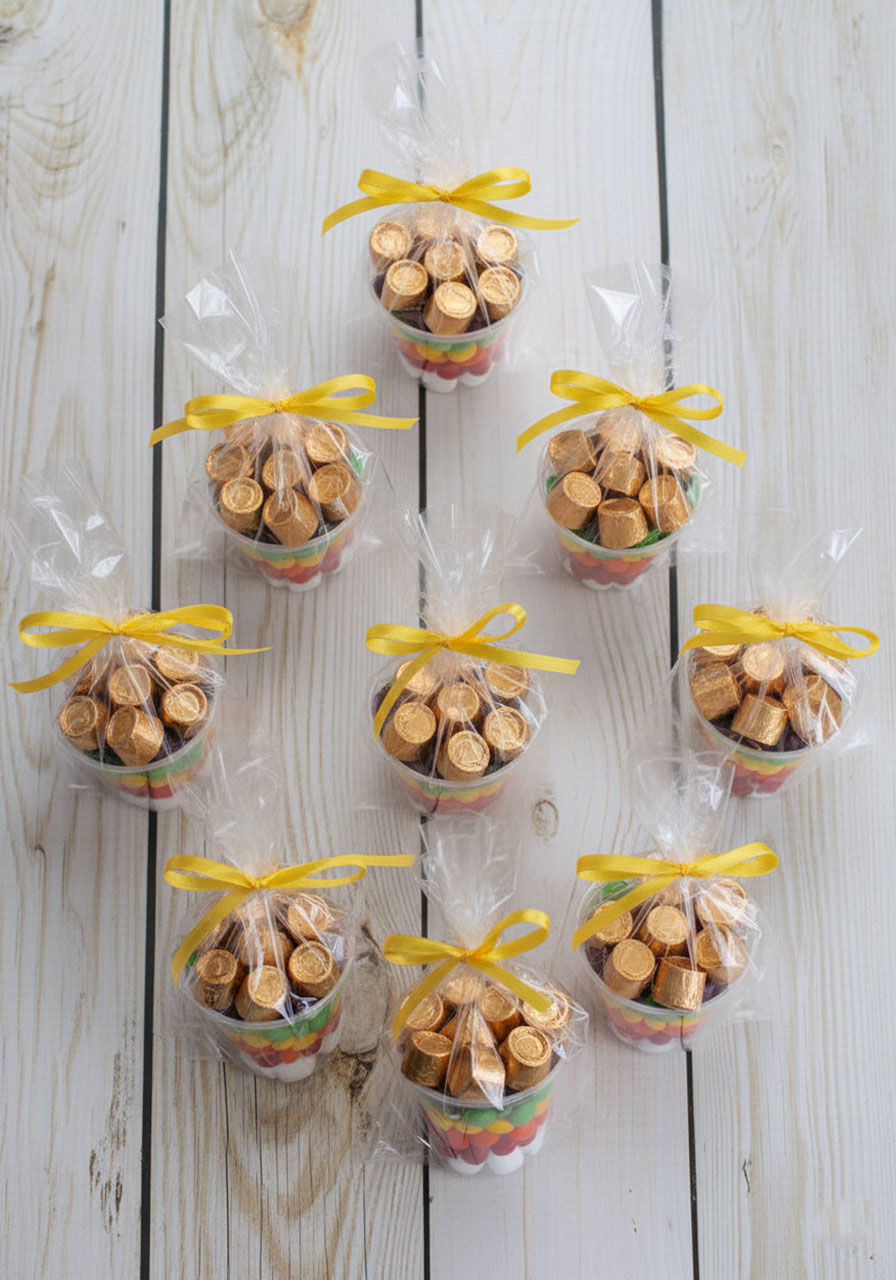
Looking for a St. Patrick’s Day treat that’ll have your kids squealing with excitement and won’t leave your kitchen looking like a glitter bomb exploded? These rainbow snack cups are about to become your new go-to party project.
Here’s why parents and teachers absolutely love these: they’re mess-free (yes, really!), they come together in under 20 minutes, and they double as a sneaky educational activity. Plus, they look like you spent way more effort than you actually did – which is basically the holy grail of party planning.
Why These Rainbow Snack Cups Are a Game-Changer
Let’s be real: most St. Patrick’s Day crafts involve food coloring that stains everything it touches or glitter that you’ll be finding in July. Not these beauties.
Here’s what makes them brilliant:
Your kids get to practice color sorting while building their cups (hello, hands-on learning!). Even older kids love the satisfying process of layering each color perfectly. And the best part? When you’re done, everyone gets their own perfectly portioned treat – no fighting over who got more candy, no sticky fingers grabbing from a communal bowl.
These cups work beautifully for classroom parties, playdate snacks, or even as take-home favors. Wrap them up with a ribbon and suddenly you’re the Pinterest-worthy parent who “has it all together.” (We won’t tell anyone it took you less than half an hour.)

What You’ll Need
Here’s the full supply list with a cost breakdown, because we know you’re watching that party budget:
Clear 5-ounce portion cups – $1.50 per pack
Clear cellophane treat bags – $1.00 per pack
Ribbon (cut into 13-inch strips) – $0.25
41 oz. bag of Skittles – $7.50
20 oz. bag of Rolos – $5.00
Mini marshmallows – $0.50
Total cost: $15.75 for 10 cups (that’s just $1.57 per cup!)
Not bad for something that looks this impressive, right?

How to Build Your Rainbow Snack Cups
Step 1: Sort Your Skittles by Color
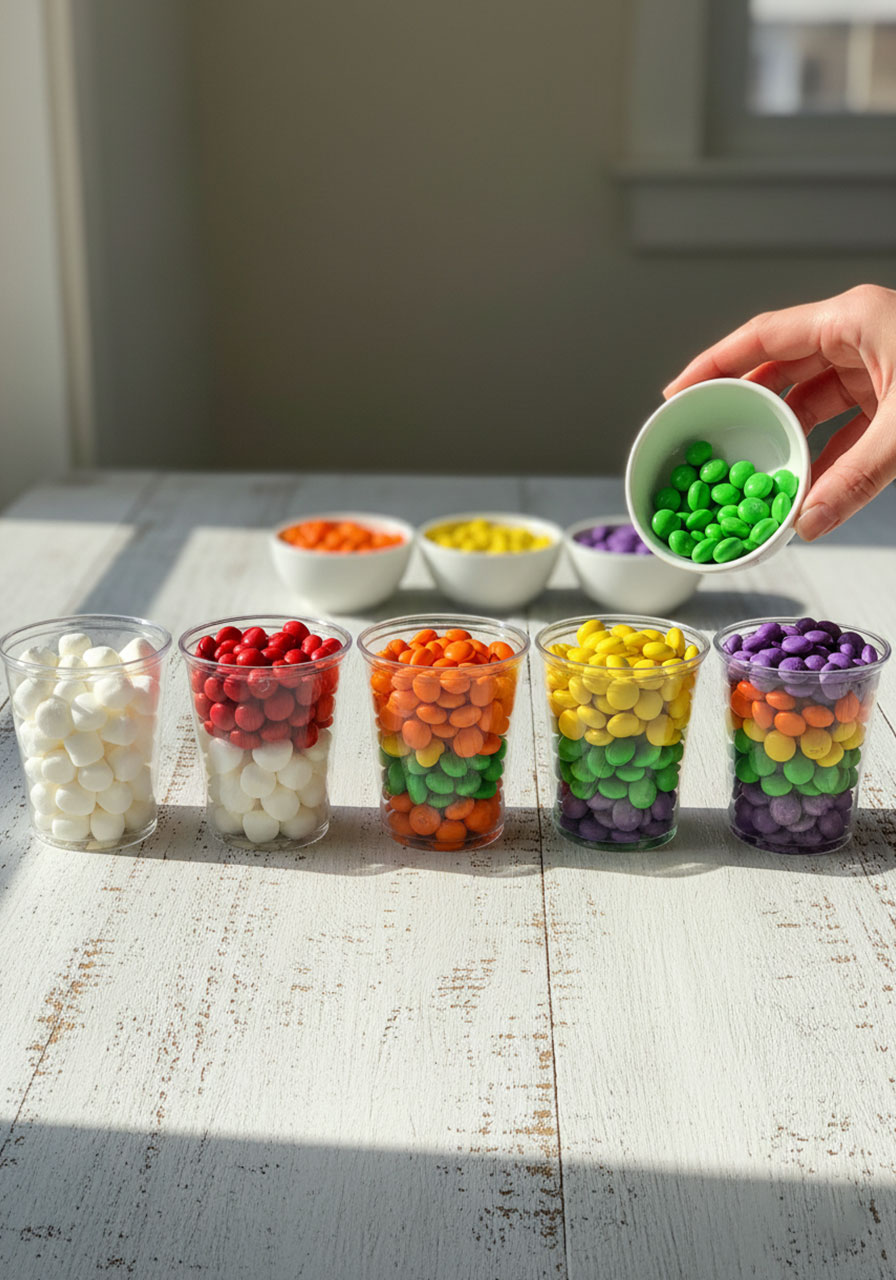
Dump out your Skittles and separate them into color groups: red, orange, yellow, green, and purple. This is where you can put your kids to work – they’ll love it, and you can call it “fine motor skills practice” if anyone asks. (Pro tip: Skip the brown Skittles or save them for snacking while you work!)

Step 2: Start with Your “Clouds”
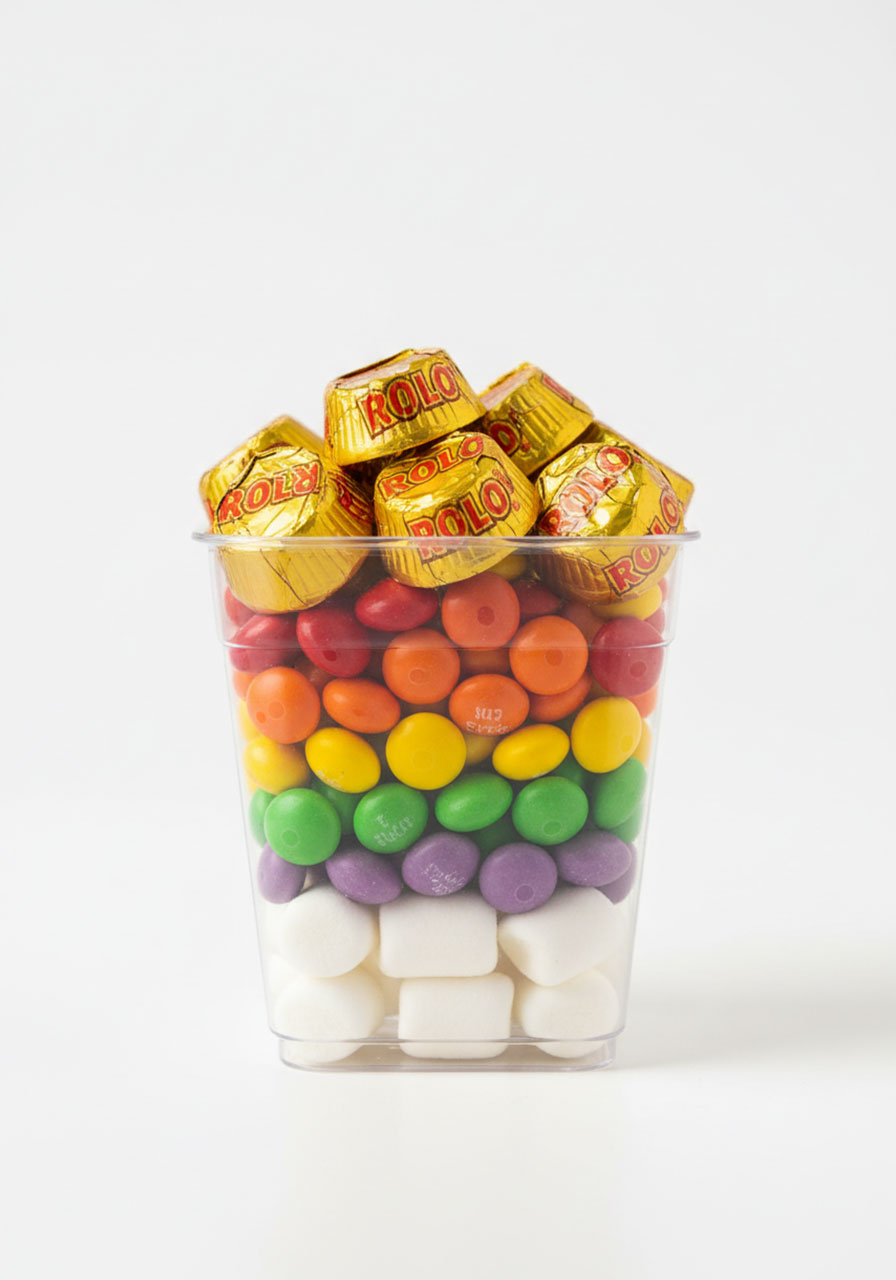
Line up your 10 clear cups and add a single layer of mini marshmallows to the bottom of each one. These are your fluffy white clouds at the base of the rainbow.

Step 3: Build Your Rainbow Layers
Now comes the fun part! Add your Skittles in rainbow order, one color at a time:
1. Red layer on top of the marshmallows
2. Orange layer next
3. Yellow in the middle
4. Green above that
5. Purple at the top
Make each layer nice and even – you want those gorgeous stripes to show through the clear cups!
Step 4: Add the “Pot of Gold”
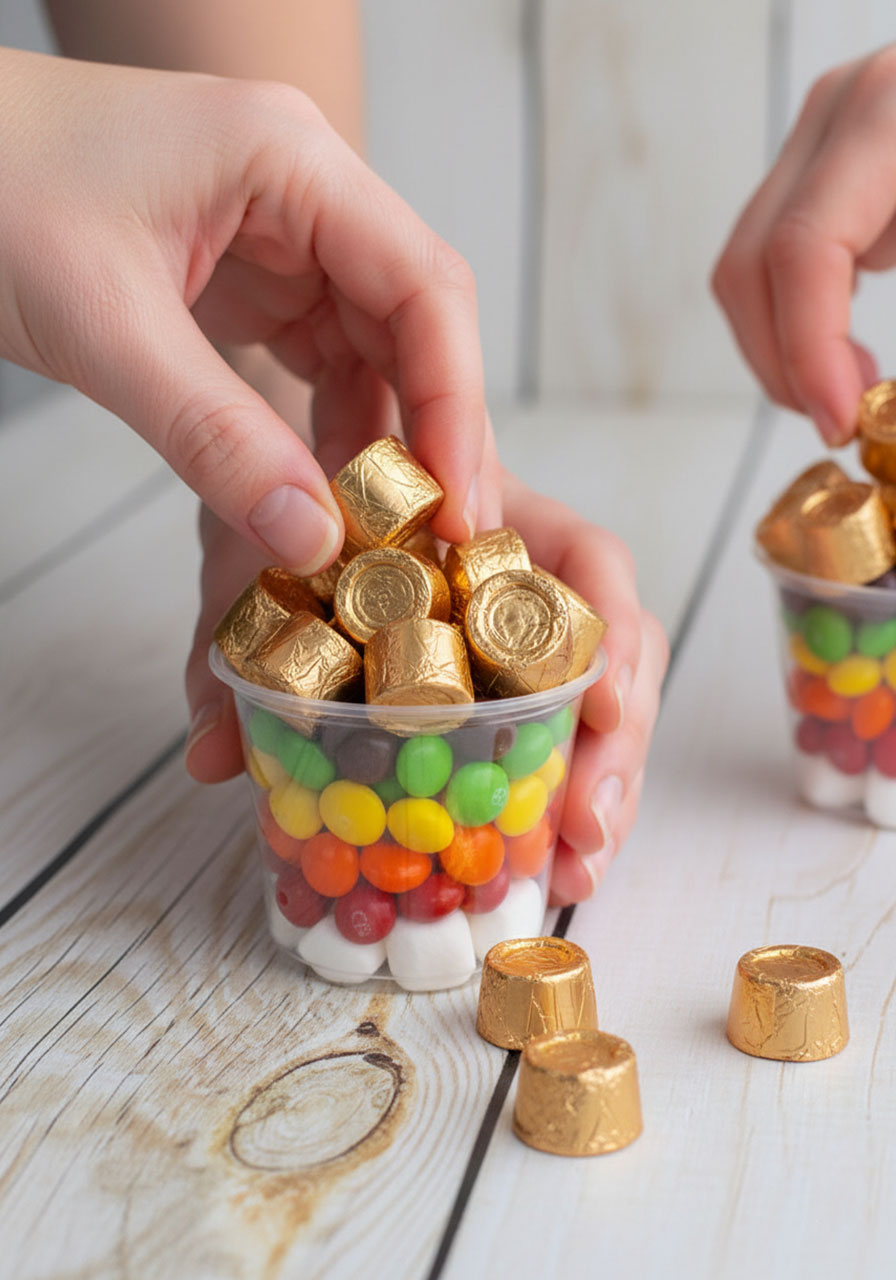
Top each cup with Rolos as your pot of gold. Don’t worry if they stick up slightly above the rim – that’s totally fine and actually makes them look even more abundant!
Step 5: Package Them Up
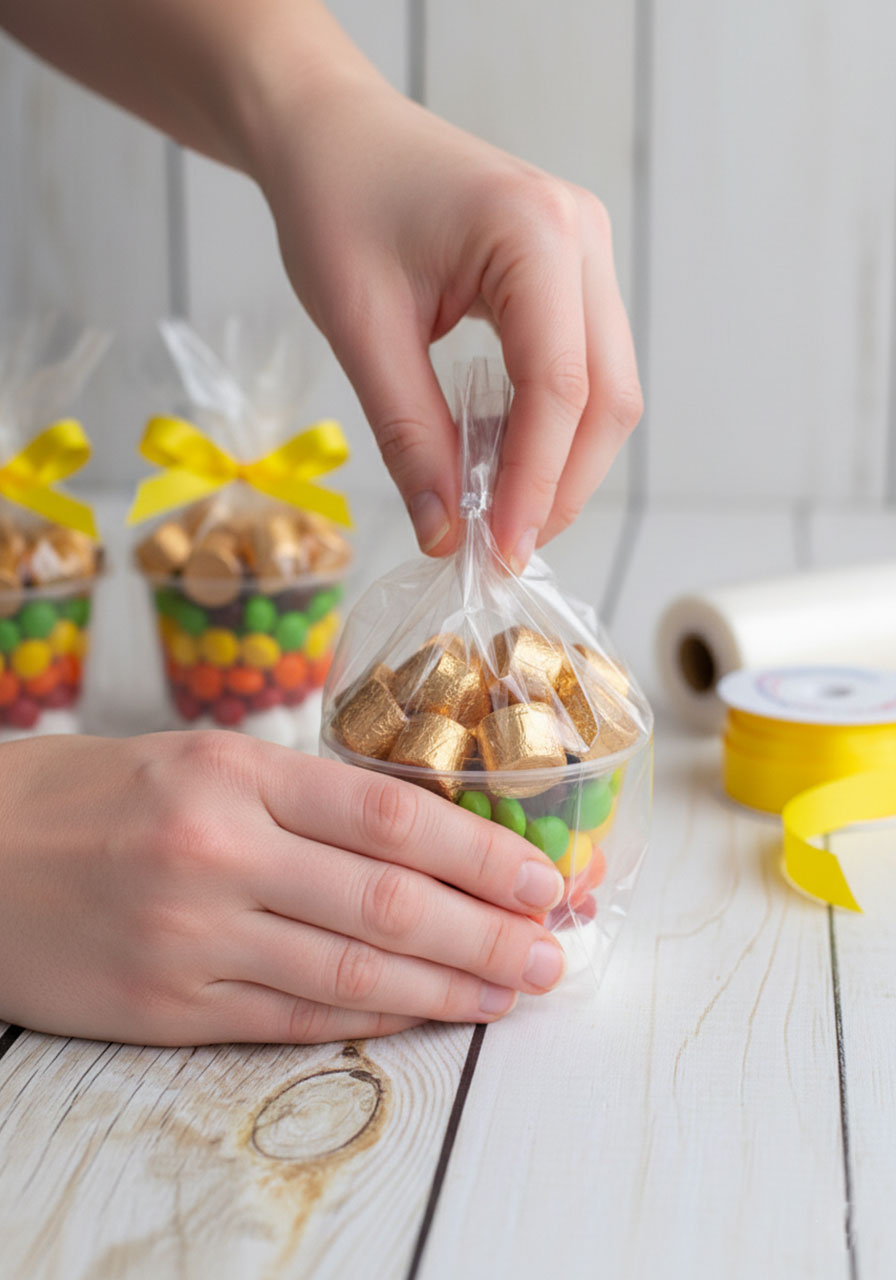
Slide each cup into a clear treat bag and tie it closed with a cheerful ribbon. Yellow ribbon screams “pot of gold,” but green works great too for that St. Patrick’s Day vibe.

Pro Tips from the Trenches
Make it a party activity: Set up an assembly line and let kids build their own cups. They’ll be so proud of their creations, and you get 20 minutes of focused quiet time.
Substitute freely: No Skittles? Use Sixlets, M&Ms, or any colorful candy you can find. Same goes for the Rolos – chocolate coins, Hershey’s Kisses, or even gold-wrapped candies work perfectly.
Teach while you treat: Talk about the colors of the rainbow (ROY G. BIV, anyone?), practice counting, or discuss the legend of leprechauns and their pots of gold. Learning never tasted so good!
Prep ahead: You can assemble these up to two days before your party. Just keep them sealed in the bags so everything stays fresh.

Why Teachers Love These
If you’re a teacher reading this, you already know the struggle of finding classroom treats that are allergy-friendly, budget-conscious, and actually fun. These cups check all those boxes. You can easily make substitutions for dietary needs, and the visual impact is worth way more than the minimal effort required.
Plus, the color-sorting prep work? That’s a legitimate learning center activity right there. Have students sort the candies during center time, then assemble the cups together as a class reward. Boom – you’ve just turned snack time into a lesson plan.

The Bottom Line
Sometimes the best ideas are the simplest ones. These St. Patrick’s Day Rainbow Snack Cups prove that you don’t need elaborate recipes or fancy supplies to create something kids will remember. You just need a little creativity, some colorful candy, and maybe 20 minutes of your time.
So grab those supplies, rope in your little helpers, and get ready to be crowned the reigning champion of St. Patrick’s Day treats. Your kitchen will stay clean, your kids will stay happy, and you’ll have picture-perfect party favors that look like they came straight from a professional bakery.
Now that’s what we call a win-win-win situation.

More St. Patrick’s Day Party Ideas to Keep the Fun Rolling:
Rainbow Pot of Gold Craft: The Fine Motor Activity That Actually Looks Amazing
Magical St. Patrick’s Day Skittles Rainbow Science (Ready in 5 Minutes!)
Shamrock Wand St. Patrick’s Day Craft: The Magical Activity That’ll Have Kids Dancing Around All Day
Make This Adorable Scrape Painting Shamrock Windsock (Kids Will Go Crazy for It!)
The Genius 5-Minute Shamrock Craft That’ll Blow Kids’ Minds (Using a Bell Pepper!)
Fingerprint Rainbow Pot of Gold Craft: A St. Patrick’s Day Keepsake Kids Will Love Making
Stunning St. Patrick’s Day Chalk Pastel Art That’ll Make You the Coolest Parent or Teacher Ever
The Ultimate St. Patrick’s Day Fluffy Slime Recipe (That Actually Works!)
