
If you’re looking for a craft that’s equal parts adorable, educational, and totally mess-with-pride-worthy, you just found it. This ice cream cone name craft checks every single box – and kids absolutely love it.
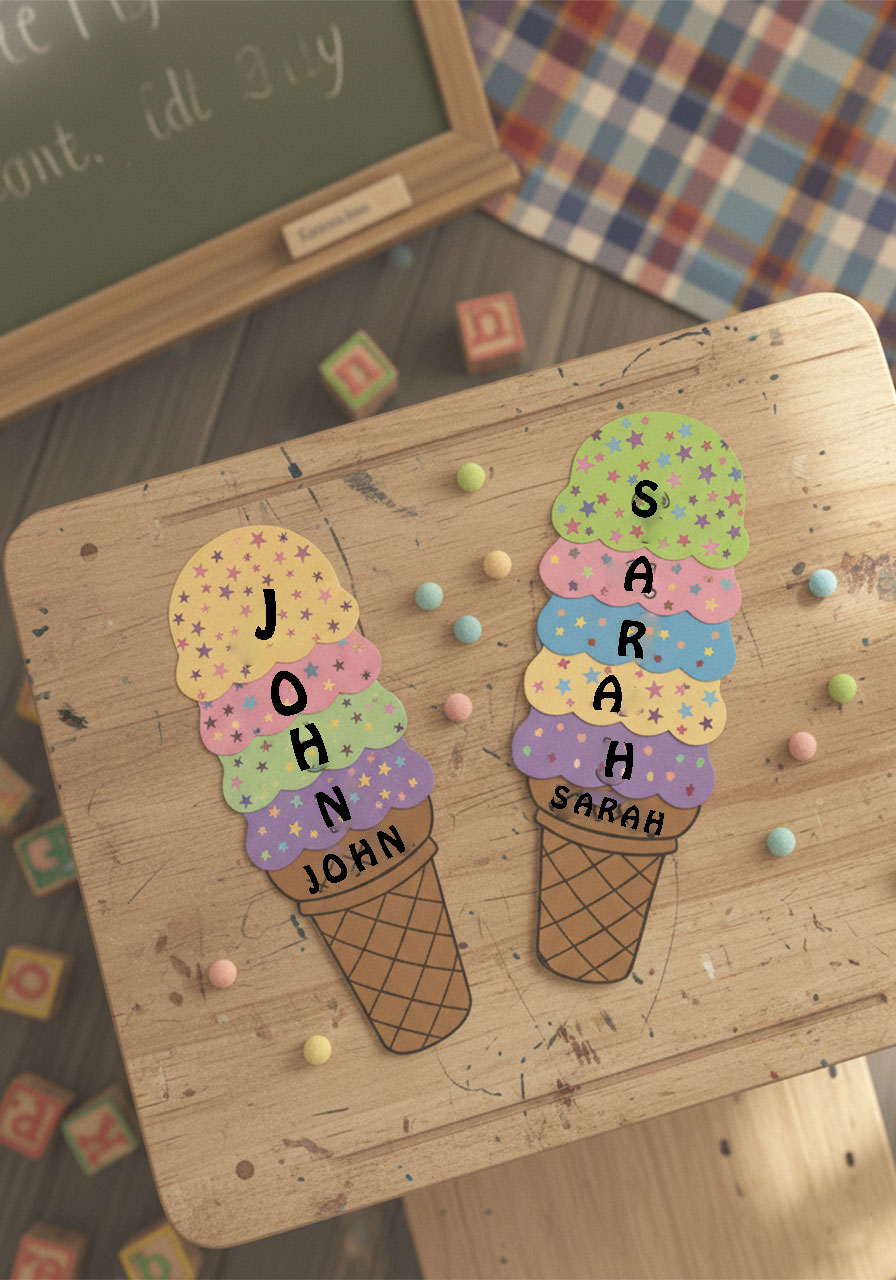
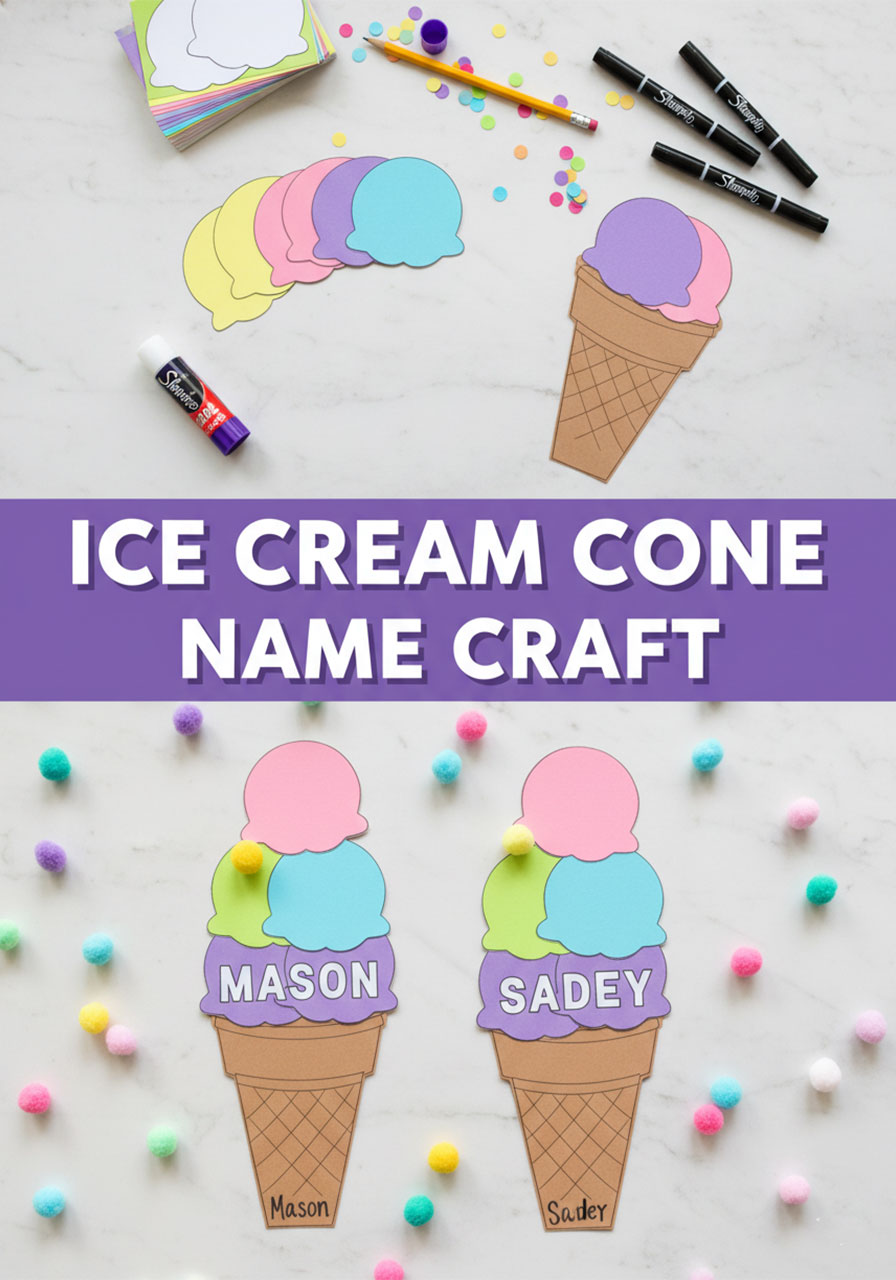
Each colorful scoop gets its very own letter, stacking up into a sweet tower that spells out your child’s name. It’s hands-on, it’s personal, and it turns learning into something they actually want to do.
Whether you’re a mom setting up a summer activity, a teacher planning a classroom project, or someone who just loves a good craft day, this one is a guaranteed hit.
And here’s the best part – you only need a handful of supplies you probably already have at home.
Let’s scoop right in! 🍦
Why You’ll Love This Ice Cream Cone Name Craft
This craft isn’t just pretty to look at (though it really, truly is). It’s a powerhouse of early learning disguised as pure summer fun.
Kids practice spelling their names one letter at a time, which builds name recognition and letter awareness in a way that feels like play – not school.
The hands-on process of tracing, cutting, gluing, and decorating also strengthens fine motor skills. Little fingers get a real workout, and they won’t even notice because they’re too busy admiring their creation.
Best of all, the finished craft is completely personal. Every child ends up with something uniquely theirs – a tall cone for a long name like “Sebastian,” a petite little stack for “Mia.” No two look alike, and that’s what makes them so special.
Display them on the fridge, the classroom wall, or even frame them as a keepsake. These are the kinds of crafts you hold onto.

What You’ll Need
Gather these supplies before you get started, and you’ll be set up for a smooth, stress-free crafting session.
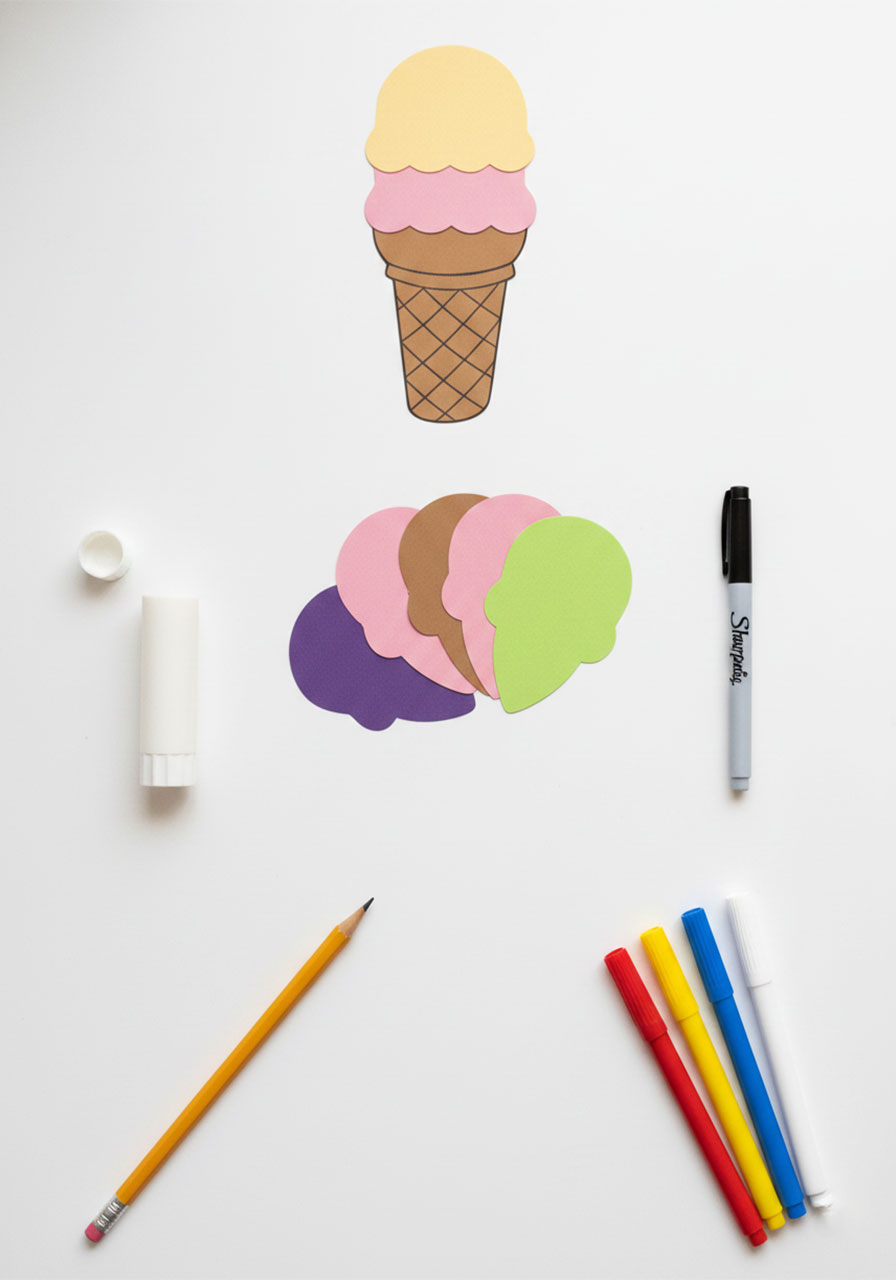
Ice Cream Cone Template – The printable template is available at the bottom of this post. It includes the cone shape and a scoop template to trace.
Brown Cardstock – This is for printing the cone template. One sheet is all you need.
Colorful Cardstock or Construction Paper – Pick bright, fun colors for the scoops! You’ll need one scoop per letter in the child’s name, so grab a few different shades.
Pencil – For tracing the scoop template onto your colorful paper.
Scissors – Kid-safe scissors work great here, especially if little ones are helping cut.
Glue Stick – Perfect for layering and assembling the scoops onto the cone.
Black Sharpie or Marker – For writing the letters on each scoop, bold and clear.
Acrylic Paint Pens (Optional) – Want to take it to the next level? Add colorful sprinkle dots to each scoop! This step makes the craft look extra polished and is so much fun for kids to do themselves.
That’s it! No fancy supplies, no special tools. Just simple materials that come together into something seriously adorable.
How to Make the Ice Cream Cone Name Craft
Follow these steps and you’ll have a finished craft in no time. The whole process takes about 20–30 minutes, making it perfect for a busy afternoon.
Step 1: Print and Cut Out the Template
Start by printing the template onto brown cardstock. This gives you the cone shape with that classic waffle pattern already printed on it – no drawing required!
Carefully cut out the cone shape. Then cut out the scoop template piece as well. You’ll use this as a stencil in the next step.
Step 2: Trace and Cut the Scoops
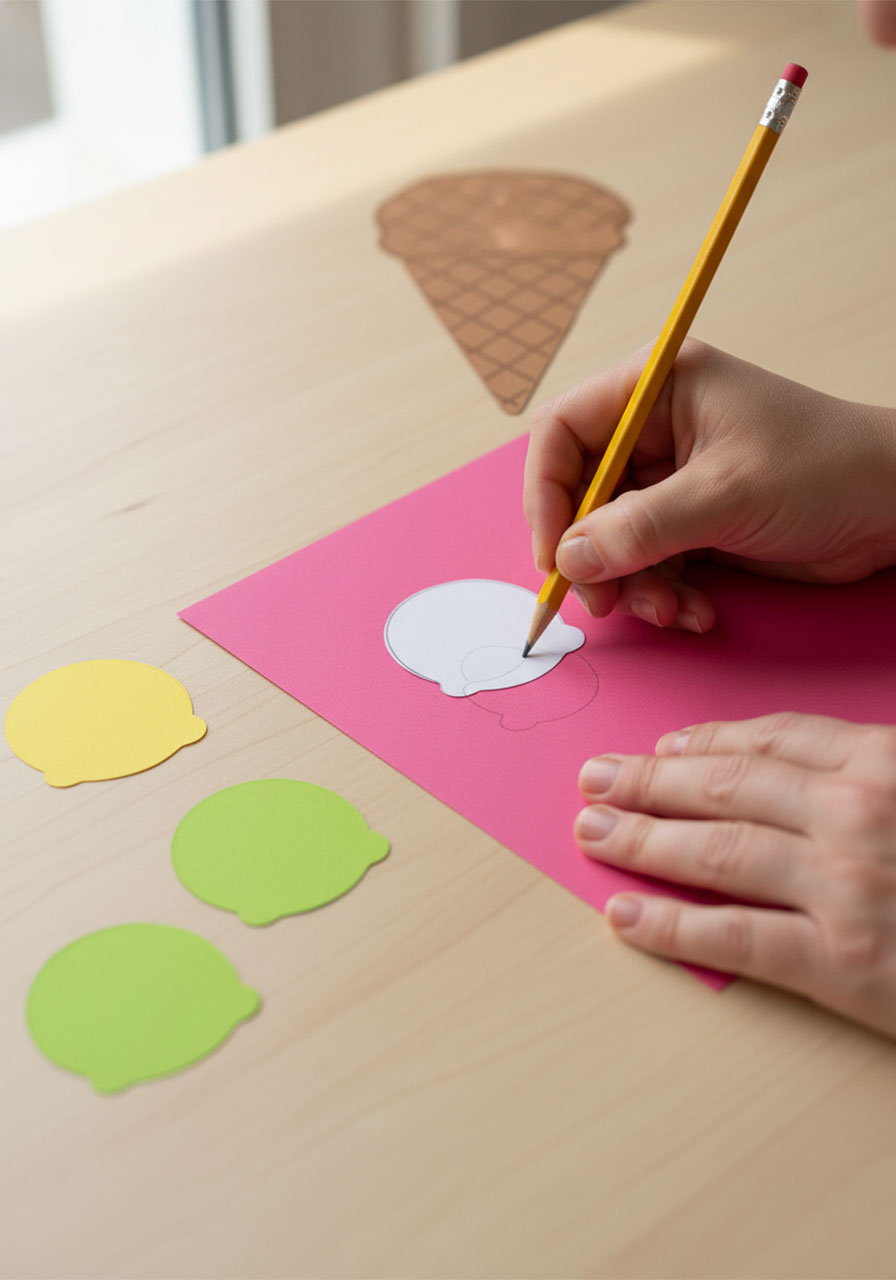
Now here’s where the color magic begins! Take your scoop template and trace it onto your colorful cardstock or construction paper.
You need one scoop for every letter in the child’s name. So if you’re making this for a child named “Lily,” trace and cut four scoops. For “Christopher,” you’ll need eleven!
Mix and match colors to make it as vibrant and fun as possible. The more colorful, the better.
Step 3: Assemble the Ice Cream Cone
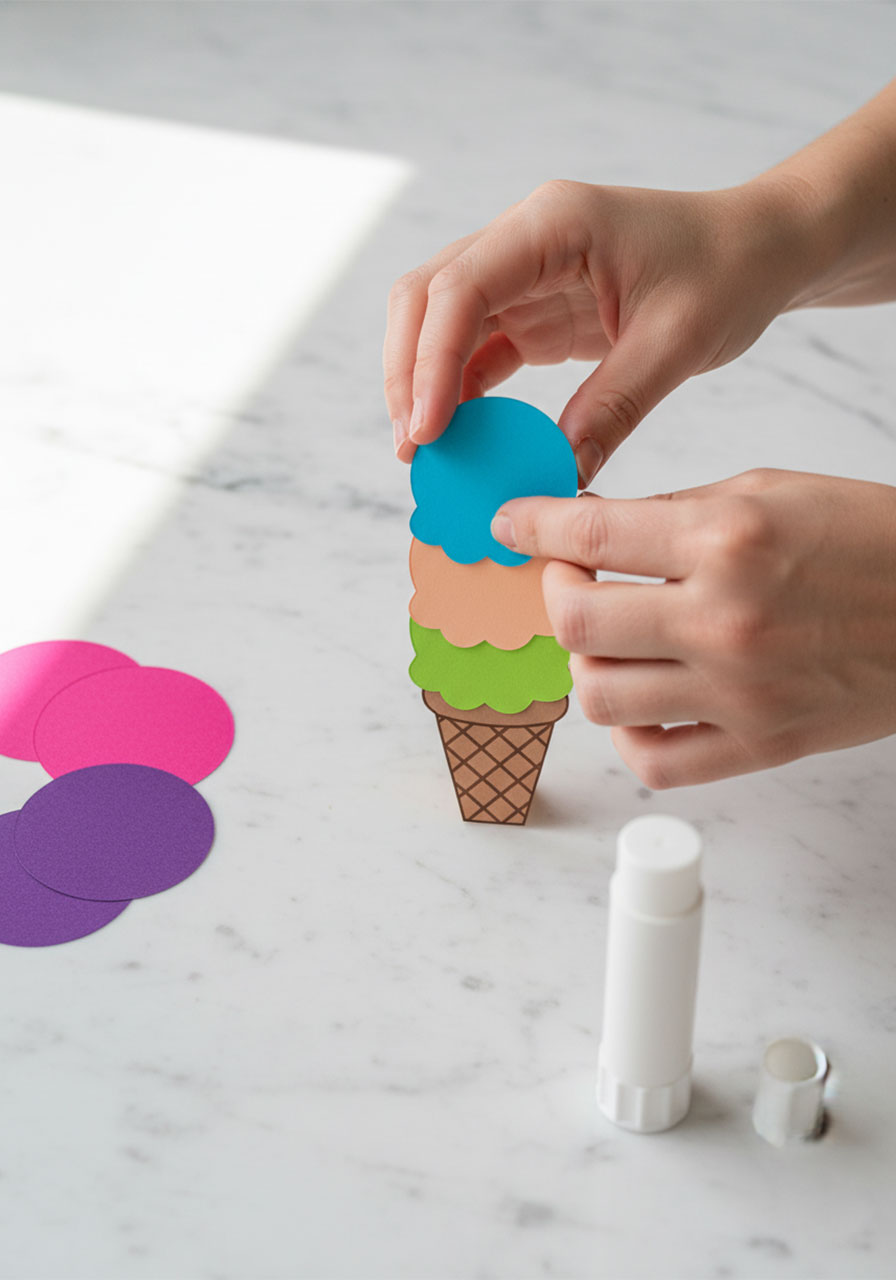
Time to build that tower! Start with your cone at the bottom and begin gluing the scoops on top, stacking them one by one.
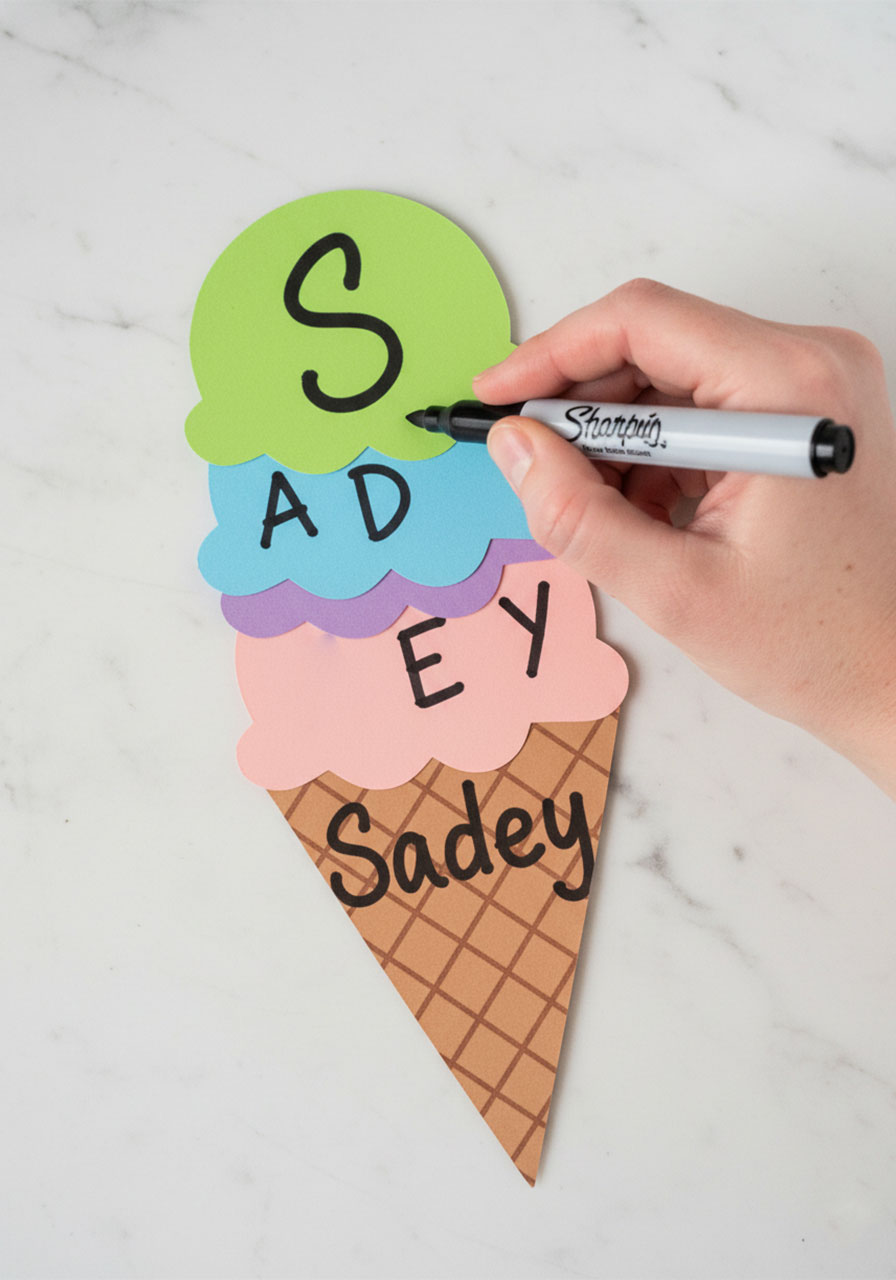
Overlap each scoop slightly over the one below it, just like a real stacked ice cream cone. Leave enough space in the center of each scoop for a letter – about an inch of visible space works perfectly.
Press each scoop firmly and let the glue set for a moment before adding the next one.
Step 4: Write the Letters
Grab your black Sharpie and write one letter per scoop, starting from the top scoop down.
Write in large, clear letters so they’re easy to read. For an extra-sweet finishing touch, write the full name across the cone at the bottom as well. It makes the craft look complete and polished – like something straight out of a classroom display!
Step 5: Add the Sprinkles
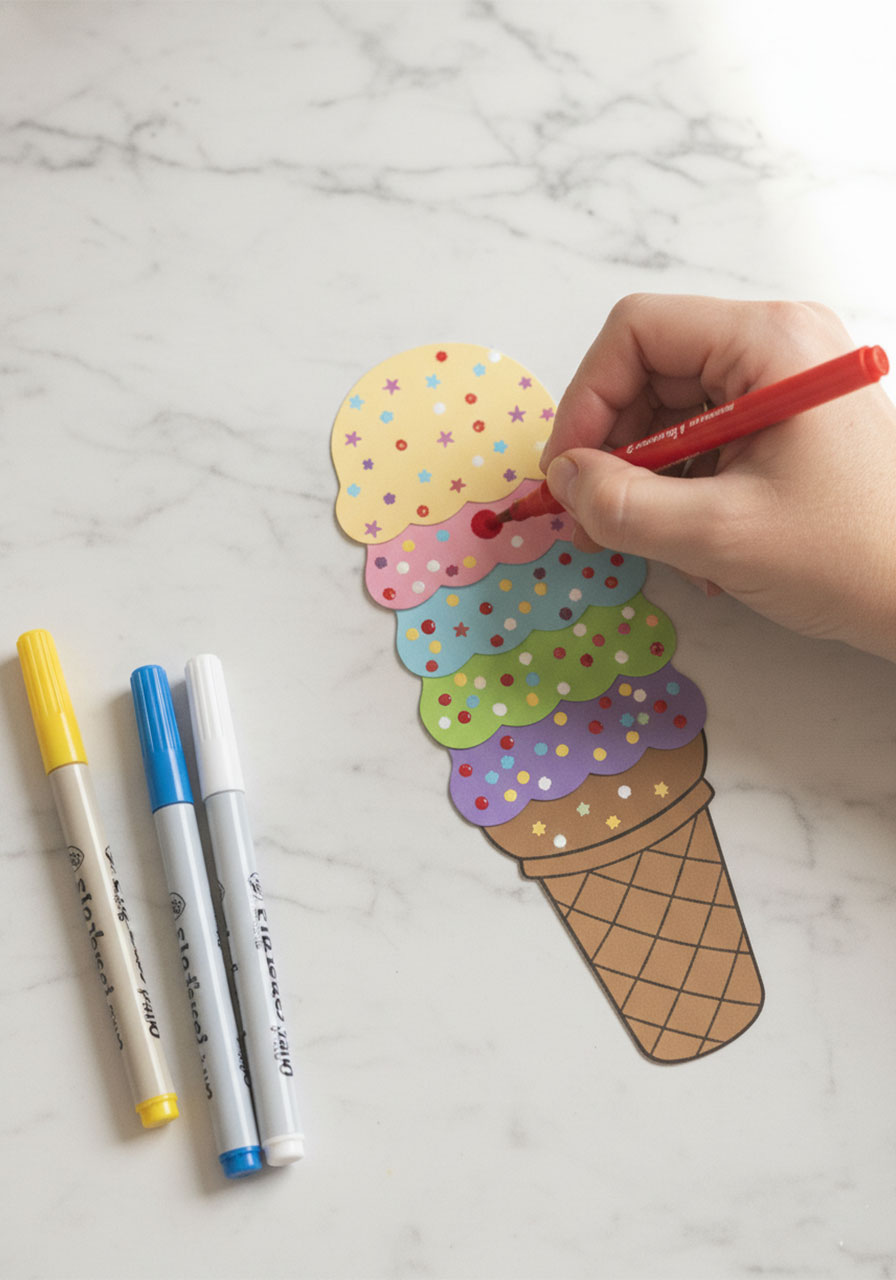
This is the step that turns a good craft into a great one. Using acrylic paint pens, dot colorful sprinkles all over the scoops.
Alternate colors for each dot – red, yellow, blue, white – scattered randomly across each scoop. It only takes a minute, but it makes the whole thing look like it belongs in a craft magazine.
Let everything dry fully, and you’re done! 🎉
Tips for Making This Craft Even Better
A few little tricks that make a big difference:
Use bright, contrasting colors for the scoops. Avoid putting similar shades next to each other – the more contrast between scoops, the more visually striking the finished craft looks. Think hot pink next to lime green, or yellow next to purple.
Let kids pick their own scoop colors. This tiny bit of ownership makes them so much more invested in the craft. They’ll be proud to show it off when they had a say in how it looks.
Write the letters before gluing if you’re nervous about spacing. You can always pencil in the letters first to test placement, then go over with the Sharpie once you’re happy with it.
For younger children, pre-cut the scoops. Let them focus on the gluing, writing, and decorating – the parts that are most developmental and most fun for little hands.
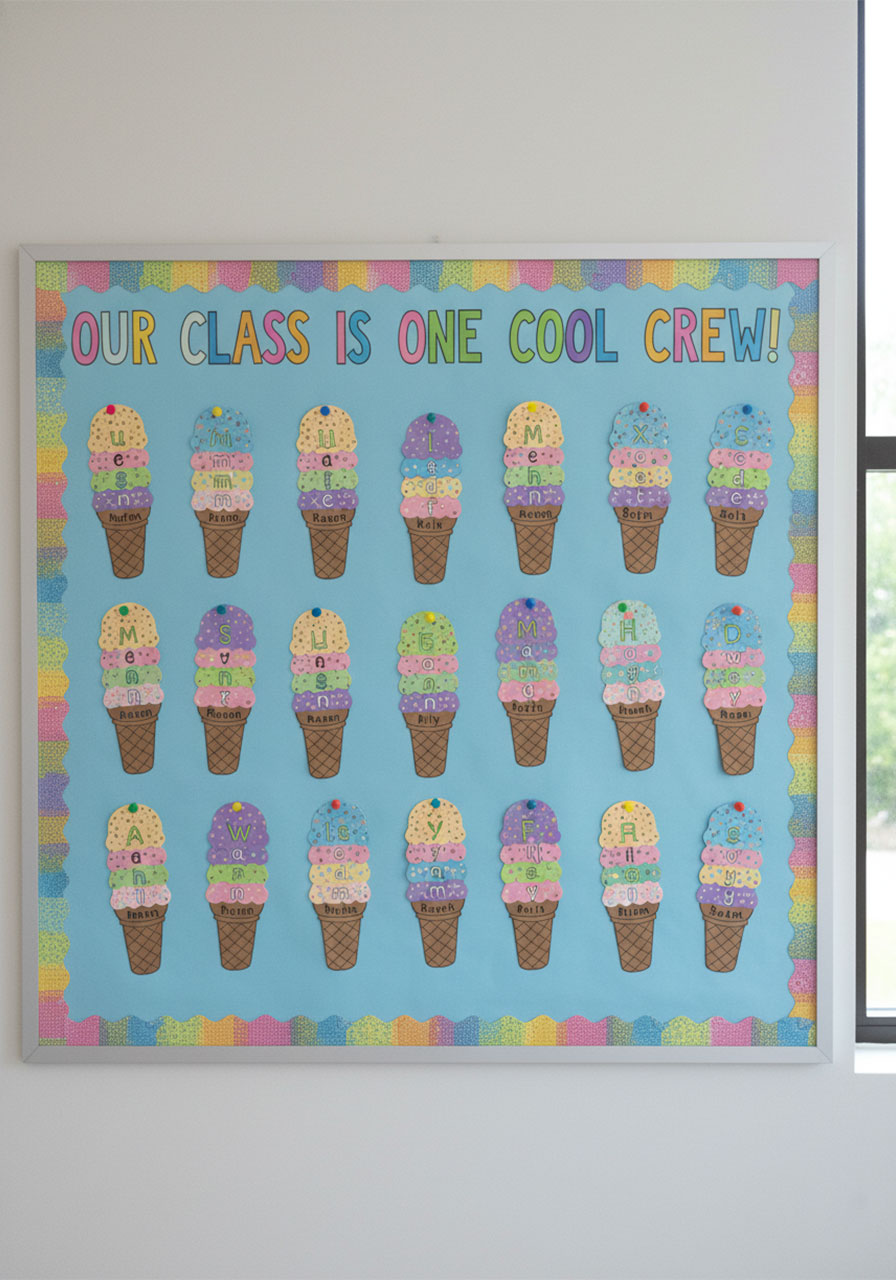
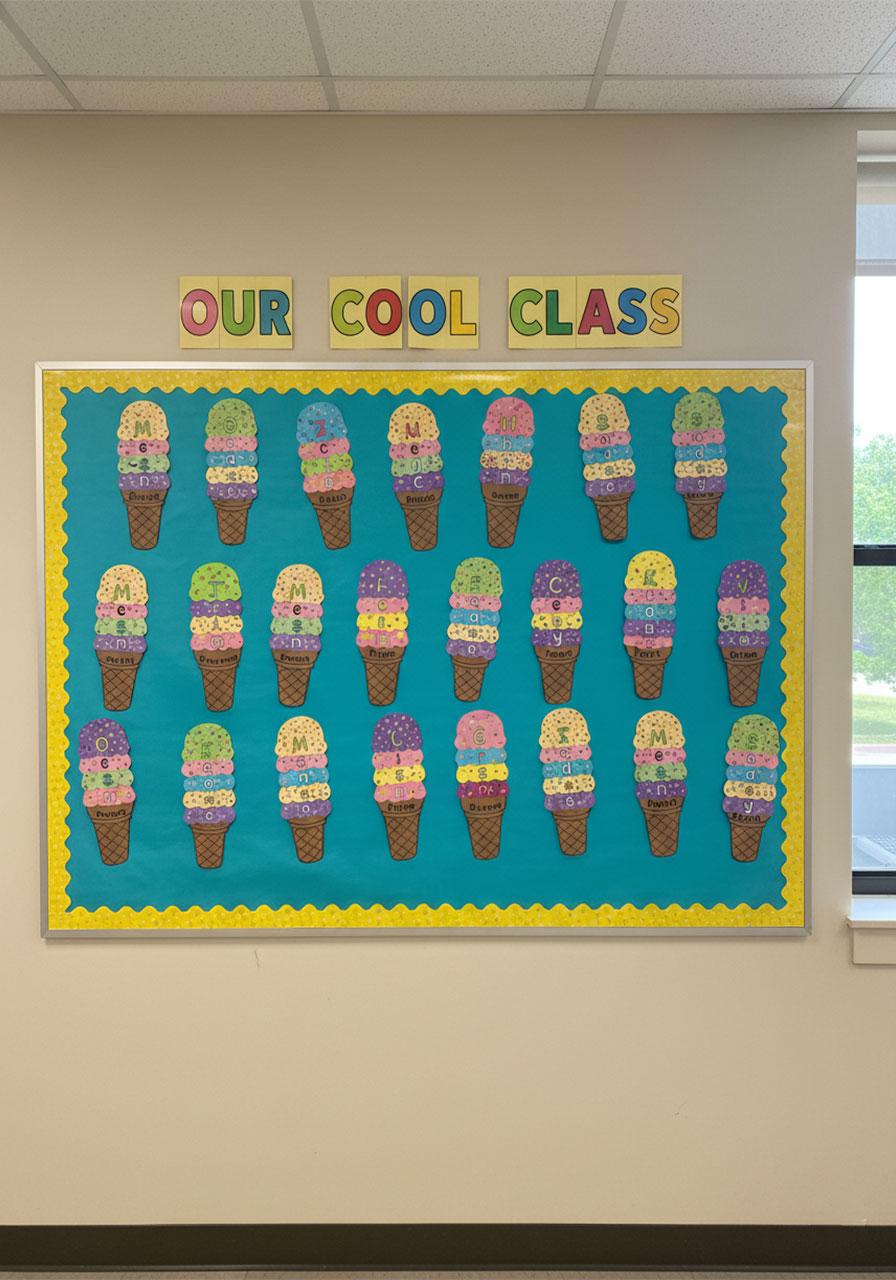
Turn this into a classroom activity. Imagine a whole bulletin board covered in these. Every child’s name spelled out in their own colorful ice cream tower. It’s the kind of display that stops parents in their tracks at open house night.
Fun Variations to Try
Once you’ve made the classic version, there are so many fun ways to mix things up!
Sight Word Cones: Instead of spelling a name, write one letter of a sight word on each scoop. A great way to practice spelling words like “love,” “play,” or “home.”
Number Scoops: Write numbers or simple math facts on each scoop instead. Perfect for a math-themed activity day.
Affirmation Cones: Write one positive word on each scoop – things like “kind,” “brave,” “strong,” “loved.” It’s a beautiful way to build confidence and a wonderful keepsake for kids to keep in their room.
Bible Verse Cones: Write one word of a short, meaningful Bible verse on each scoop. It’s a sweet and creative way to help kids memorize scripture. A verse like “God is love” becomes a colorful, hands-on reminder of truth they can display in their room.
Prayer Cone: Write something to pray for on each scoop – family, friends, school, kindness. A gentle, visual reminder to lift those things up in prayer throughout the day.
What Age Is This Craft For?
This craft is ideal for preschool through early elementary – roughly ages 3 to 7.
For younger preschoolers (ages 3–4), an adult can do the cutting and writing while kids focus on gluing and painting the sprinkles.
Kindergarteners (ages 5–6) can usually handle all the steps with a little guidance, especially the writing – which is great practice for letter formation.
First and second graders can take on the whole project independently and love the creative freedom of choosing their own colors and decorating their scoops.
It scales beautifully to whatever level of independence the child is ready for.
When to Make This Craft
Honestly, any time is a good time for an ice cream craft. But here are some especially perfect occasions:
Summer break – It’s thematic, it’s seasonal, and it’s a wonderful way to keep little minds engaged during the long weeks off.
Back to school – Start the year off with a name craft that helps teachers and classmates learn everyone’s names. Display them on a bulletin board for instant classroom community.
Birthday parties – Set up a craft station where kids make their own ice cream name cone as a party activity. They leave with a personalized keepsake instead of a loot bag full of candy.
Summer reading programs – Pair this craft with a summer reading theme for a hands-on activity that reinforces literacy skills.
VBS or Sunday school – Swap out the name letters for Bible words or affirmations and you’ve got a craft with a beautiful, faith-filled message kids will treasure.
Before You Go
This ice cream cone name craft is one of those activities that just makes everyone happy – kids love making it, grown-ups love watching those little faces light up, and the finished results are genuinely frame-worthy.
There’s something so sweet about seeing a child recognize that those colorful scoops spell their name. That little moment of connection – between letters and identity, between craft and confidence – is everything.
We hope you and your little ones have the most wonderful time making this together. When you’re done, we’d absolutely love to see it! Share a photo in the comments or tag us – nothing makes our day quite like seeing your finished creations.
Happy crafting! 🍦✨
More Summer Craft & Activity Ideas to Keep the Fun Rolling:
How to Make the Cutest Beaded Pipe Cleaner Dragonflies (Kids Will Absolutely Love This!)
Easy Paper Bowl Jellyfish Craft Kids Will Absolutely Love (No Paint Needed!)
Handprint Pineapple Craft – Printable Template for Kids
Summer Popsicle Tissue Paper Craft For Kids (So Easy, So Cute!)
Sandcastle Texture Summer Art Project for Kids (Easy & So Much Fun!)
Handprint Fish Puppet Craft: The Cutest 20-Minute Activity Your Kids Will Beg to Do Again
