
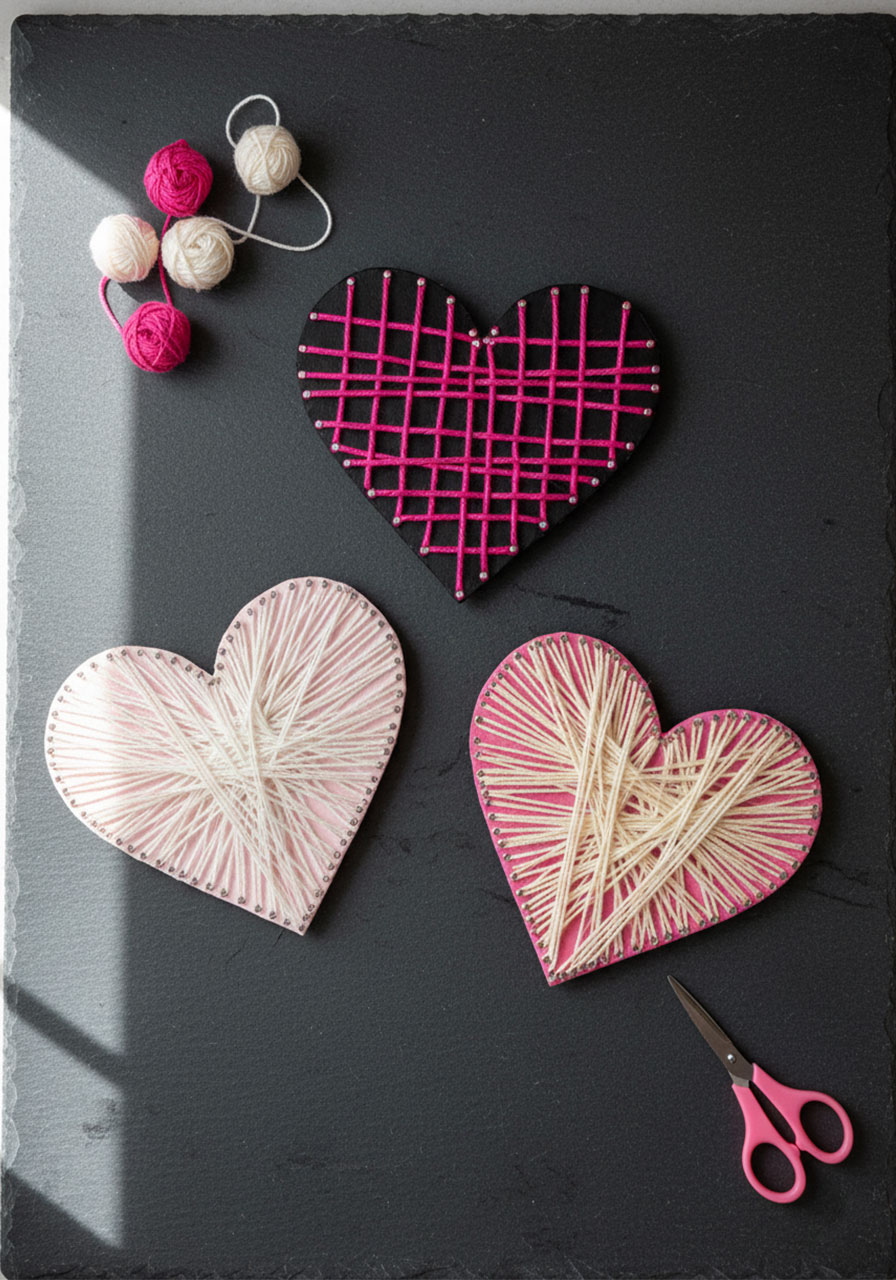
Transform simple cardboard and yarn into stunning Valentine’s Day decorations – no woodworking skills or fancy tools required!
Looking for a Valentine’s craft that’s actually fun to make and looks impressive when you’re done? You’ve found it. This cardboard heart string art project delivers all the wow factor of traditional string art without any of the hassle of hammering nails into wood.
Trust me, once you see how easy this is, you’ll wonder why anyone bothers with the complicated version. All you need is cardboard (hello, free Amazon box!), some colorful yarn, and about 40 minutes. The result? Gorgeous geometric heart designs that look like you spent way more time and money than you actually did.
Best for: Valentine’s Day decorations, rainy day crafts, creative gifts, kids ages 8+
Time to Make: 40 minutes (including drying time)
Skill Level: Beginner-friendly
Why You’ll Love This Craft
Here’s the genius behind this project: instead of wrestling with hammers and nails, you’re cutting little notches into cardboard. These notches hold your yarn in place as you wrap it around and around, creating those mesmerizing geometric patterns that make string art so addictive.
The best part? You’re totally in control of the design. Want a starburst pattern? A grid? Something completely random and abstract? Go for it. There’s no wrong way to string your heart, and experimenting with different patterns is half the fun.

What You’ll Need
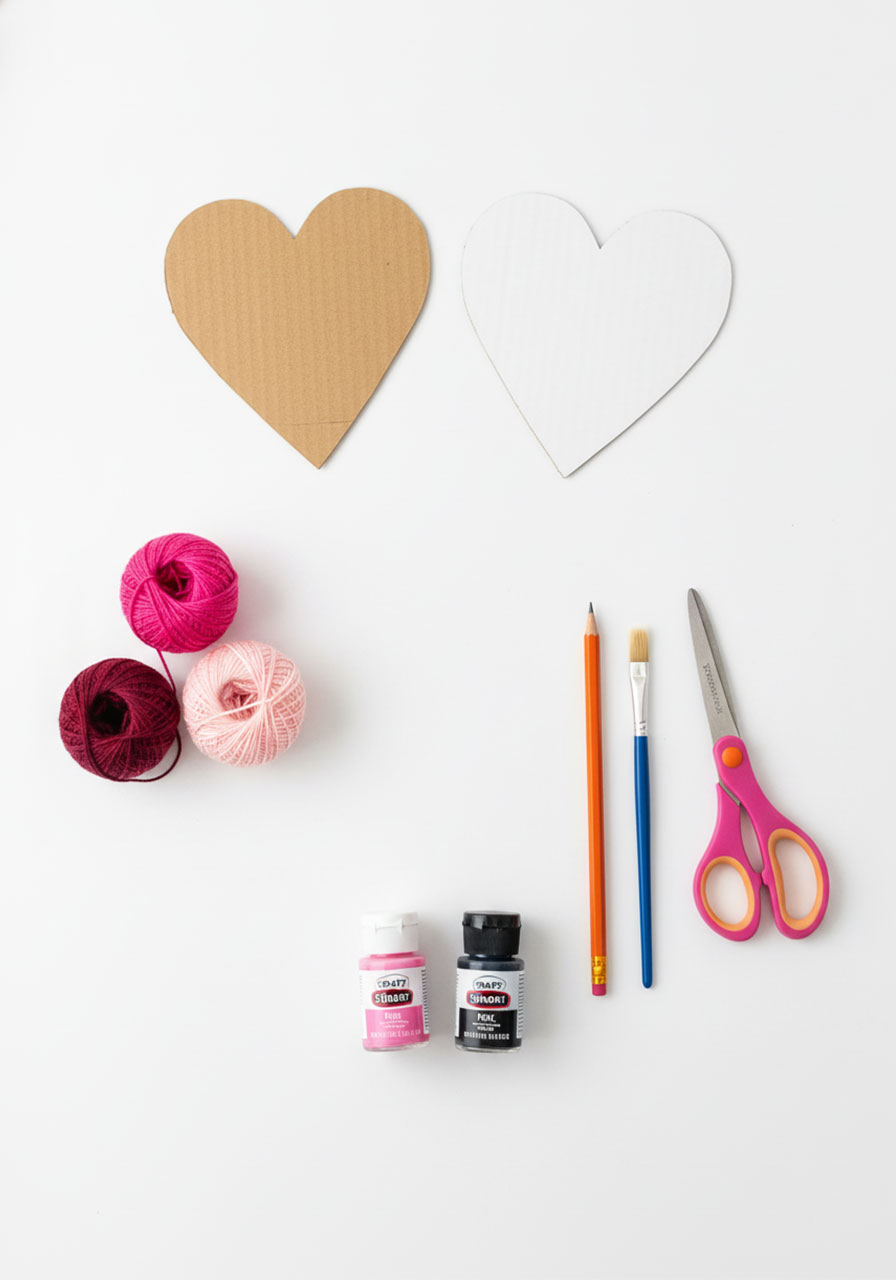
Paper (for your template)
Pencil
Scissors (sharp enough to cut cardboard)
Cardboard (cereal boxes work great, or use that pile of Amazon boxes)
Fine yarn or string (2-3 colors look amazing!)
Acrylic paint and paintbrush (optional, but it makes your hearts pop)
Hairdryer (optional, for speeding up paint drying)
Pro Tip: Choose yarn colors that contrast with your cardboard color for maximum visual impact. Pink yarn on black cardboard? Chef’s kiss.

Cute Valentine Day Treasure Hunt Printable for Kids and Preschoolers
Instant download = Valentine’s Day saved at the last minute – Forgot to plan something special? Buy now, print in 5 minutes, become the hero parent.
30-60 minutes of pure entertainment – Kids stay happily busy solving clues while you finish dinner, wrap up work, or just enjoy your coffee hot.
No craft store runs, no supplies needed – Everything’s done for you. Just print on regular paper and hide around spots you already have (fridge, couch, bed).
Cupid storyline they’ll talk about for months – Way more memorable than another box of chocolates. Grandparents: this is the visit they’ll never forget.
Under $10 beats a babysitter – Keeps multiple kids engaged together with zero screen time. Siblings actually cooperate for once.

Romantic Valentine Scavenger Hunt Printable for Couples and Adults – Cupid’s Mischievous Adventure
Way better than dinner reservations – Skip the overpriced restaurant crowds. Create an intimate, playful experience at home that actually feels personal and memorable.
24 flirty clues = built-in foreplay – Romantic riddles leading around your home build anticipation and laughter. Way more fun than another box of chocolates gathering dust.
No awkward “”what do we do now?”” moments – Everything’s scripted but feels spontaneous. Perfect for couples who want romance without the pressure of planning it themselves.
Under $15 beats flowers that die in 3 days – Create a memory you’ll both laugh about for years. Add your own surprise at the end (jewelry, getaway reveal, or just champagne and you).

Conversation Heart Bulletin Board Classroom Decoration Set
130+ pieces = complete Valentine’s display in ONE box – No extra shopping trips or piecing together mismatched decorations.
Reusable for years – Sturdy cardboard that teachers confirm holds up, unlike flimsy paper that tears after one use.
Instant student engagement – Familiar conversation heart design captures attention and creates classroom buzz.
5-minute setup – Adhesive included. Transform your space faster than your morning coffee break.
Blank hearts = bonus teaching tool – Use for student names, vocabulary, or kind messages beyond just decoration.

Valentines Day Gifts for Kids – 24 Pack
24 pre-packaged valentines = ZERO prep work – Already assembled with cards attached. Just sign names and you’re done in minutes.
Candy-free option parents actually thank you for – No sugar rush, no red dye, no allergy worries. Kids still get excited, classrooms stay calm.
Keychains kids actually USE after February – Clip to backpacks and they’ll play tic-tac-toe for months. Way better than crushed candy hearts in the trash.
Under $1 per student – 24 complete valentines for less than a box of store-bought cards, but looks like you spent way more effort.
Four designs included – No awkward “”why did they get that one?”” moments. Every kid gets a fun variation with matching pun cards.

Valentines Day Gifts for Your Loved One
Custom photo + personalized text = looks way more expensive than it is – Recipients think you spent hours designing something unique. You just uploaded a photo and typed their name.
Doubles as functional night light – Not just décor gathering dust. Customers rave it’s the perfect bedroom glow without being too bright.
Clear, vibrant photo quality that lasts – Shatterproof acrylic with UV printing means colors stay vivid for years, unlike cheap frames that fade by next Valentine’s.
USB-powered, zero hassle setup – Plug in, flip switch, done. No batteries to replace, no complicated assembly that sits in the box for months.
Perfect last-minute gift that feels thoughtful – Arrives ready to give. Looks like you planned ahead even if you’re ordering the week before Valentine’s Day.
How to Make Your Cardboard String Art Hearts
Step 1: Create Your Heart Template
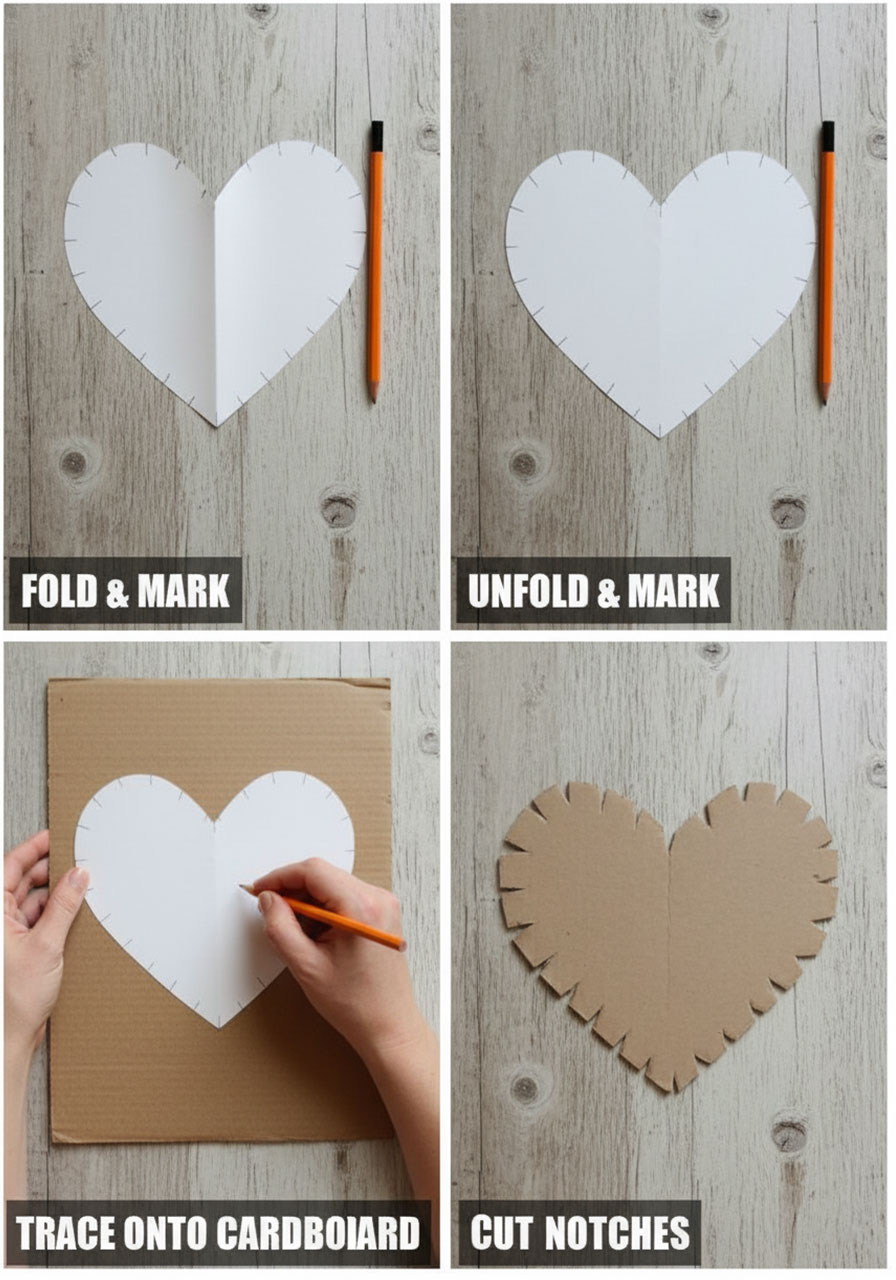
Fold a piece of paper in half and cut out a heart shape. This ensures your heart is perfectly symmetrical (no lopsided love here!).
Now for the important part: Make evenly spaced marks around the entire edge of your paper heart. Use your finger width as a spacer to keep them consistent – you’ll want about 20-30 marks total, depending on your heart size. These marks are where you’ll cut notches in your cardboard.
Step 2: Transfer to Cardboard
Place your paper heart on the cardboard and trace around it. Don’t forget to transfer all those notch marks to your cardboard, too. Use your pencil to make clear marks where each notch will go.
Step 3: Cut Out Your Heart
Cut out your cardboard heart, then carefully cut a small V-shaped notch at each mark you made. Make your notches deep enough to hold several layers of yarn – about 1/4 inch deep works perfectly. This is crucial because you’ll be wrapping yarn through these notches multiple times.
Pro Tip: Take your time cutting clean, even notches. Trust me, sloppy notches mean slipping yarn, and nobody wants that frustration mid-craft.
Step 4: Paint (Optional but Awesome)
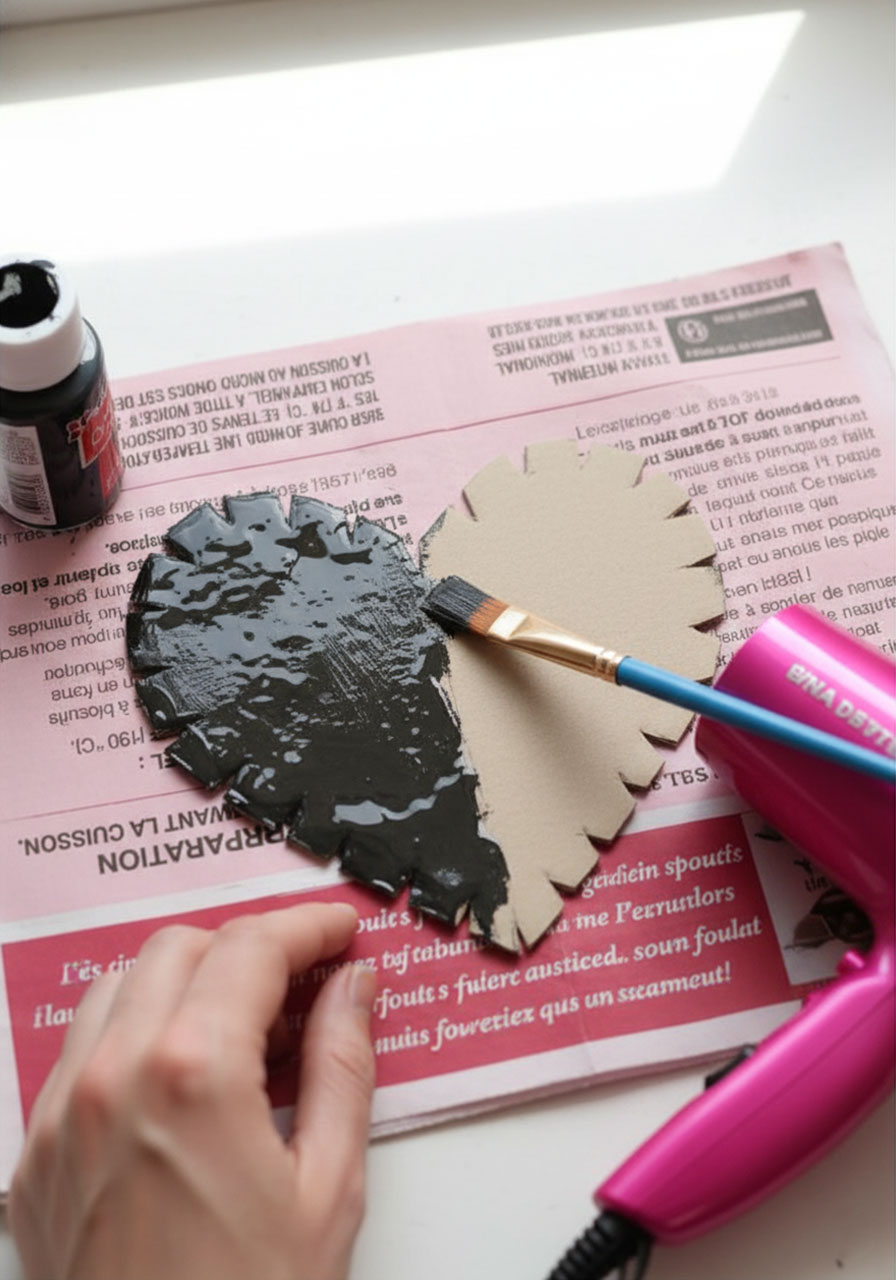
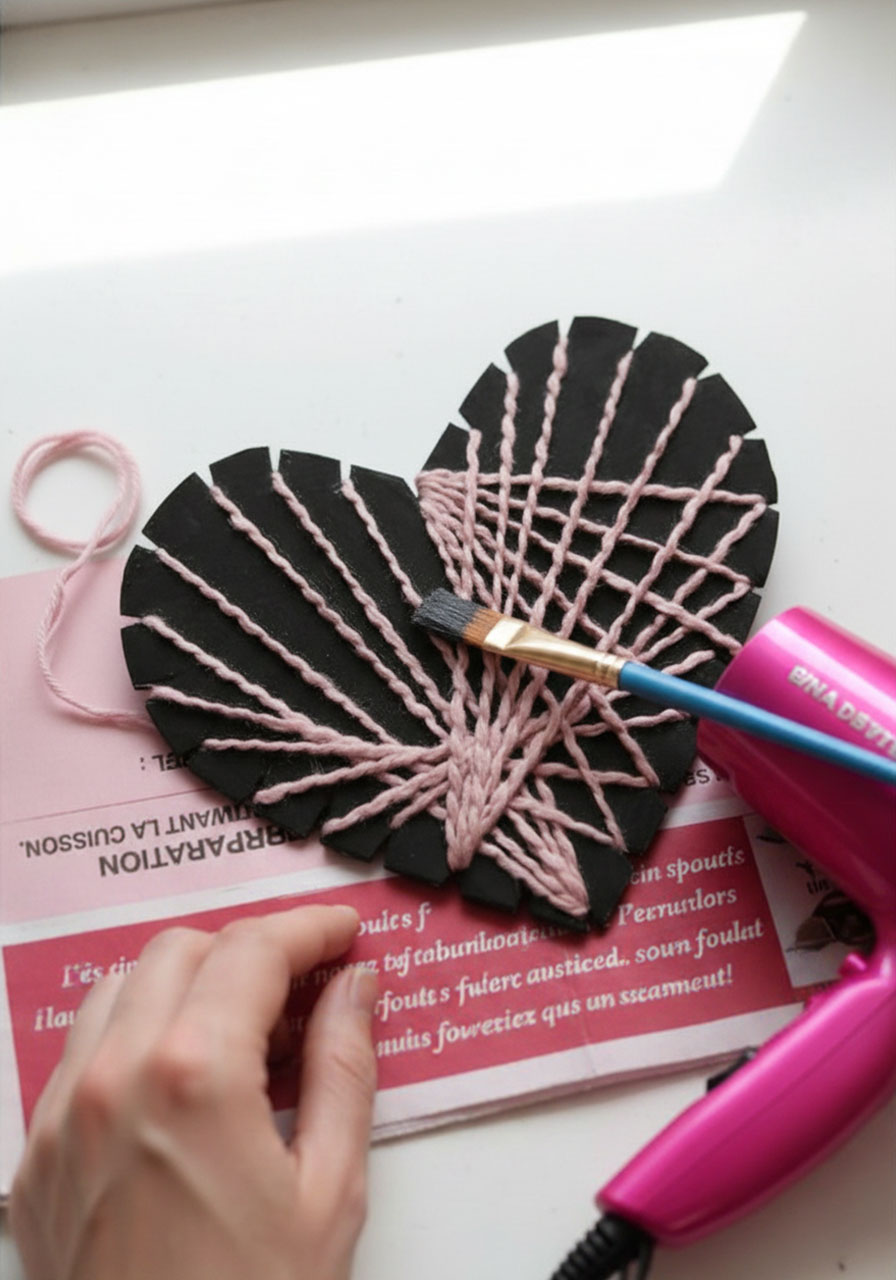
If you’re painting your heart, do it now and let it dry completely. This is where you can get creative with color combinations. Black hearts with bright pink or white yarn look super modern. Pink hearts with white yarn give off sweet Valentine vibes.
Time-Saver Hack: Use a hairdryer on low heat to speed up drying time. You’ll be stringing in minutes instead of waiting around.
Step 5: String Your Heart
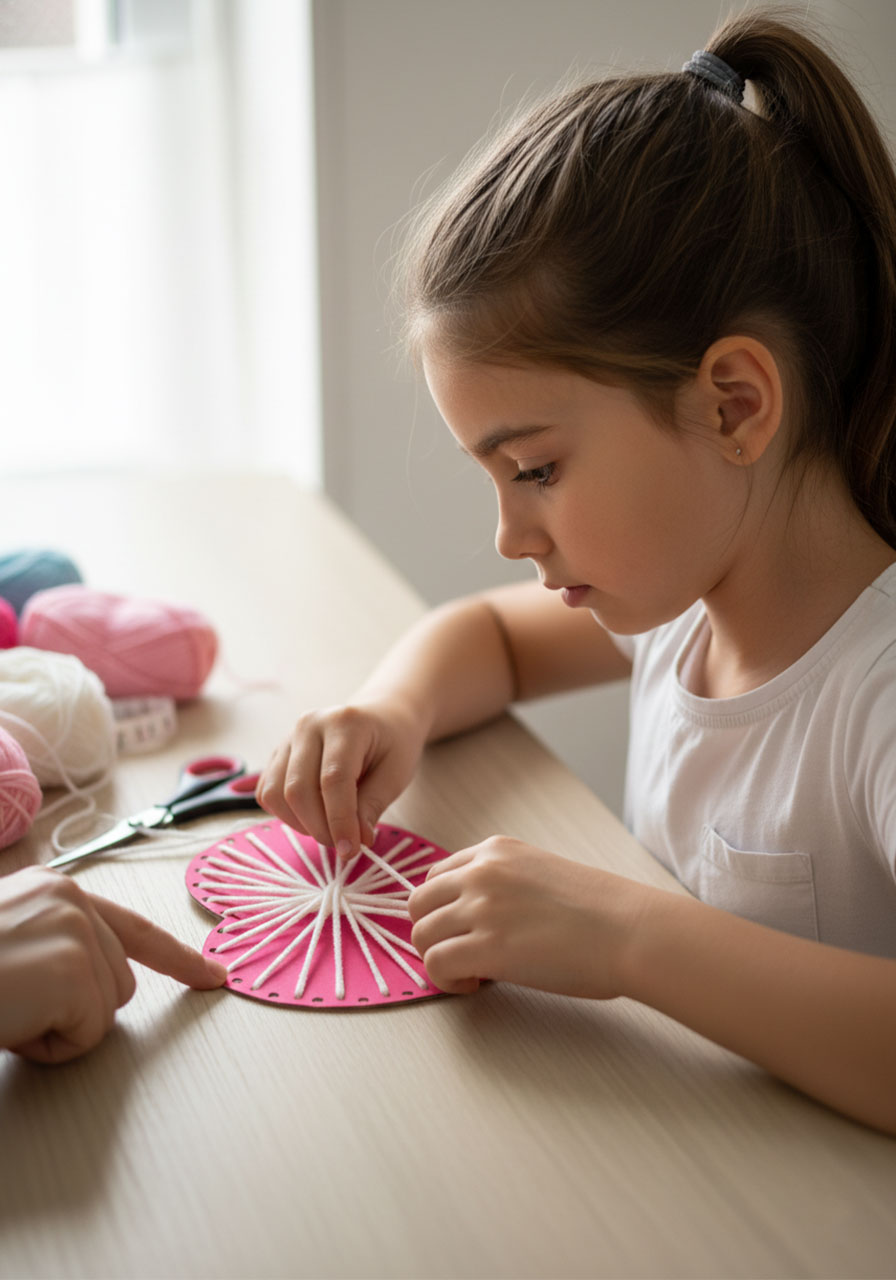
Here’s where the magic happens! Leave about 6 inches of yarn hanging behind your cardboard heart (you’ll need this tail later). Now start wrapping your yarn around the heart, pulling it deep into each notch as you pass over it.
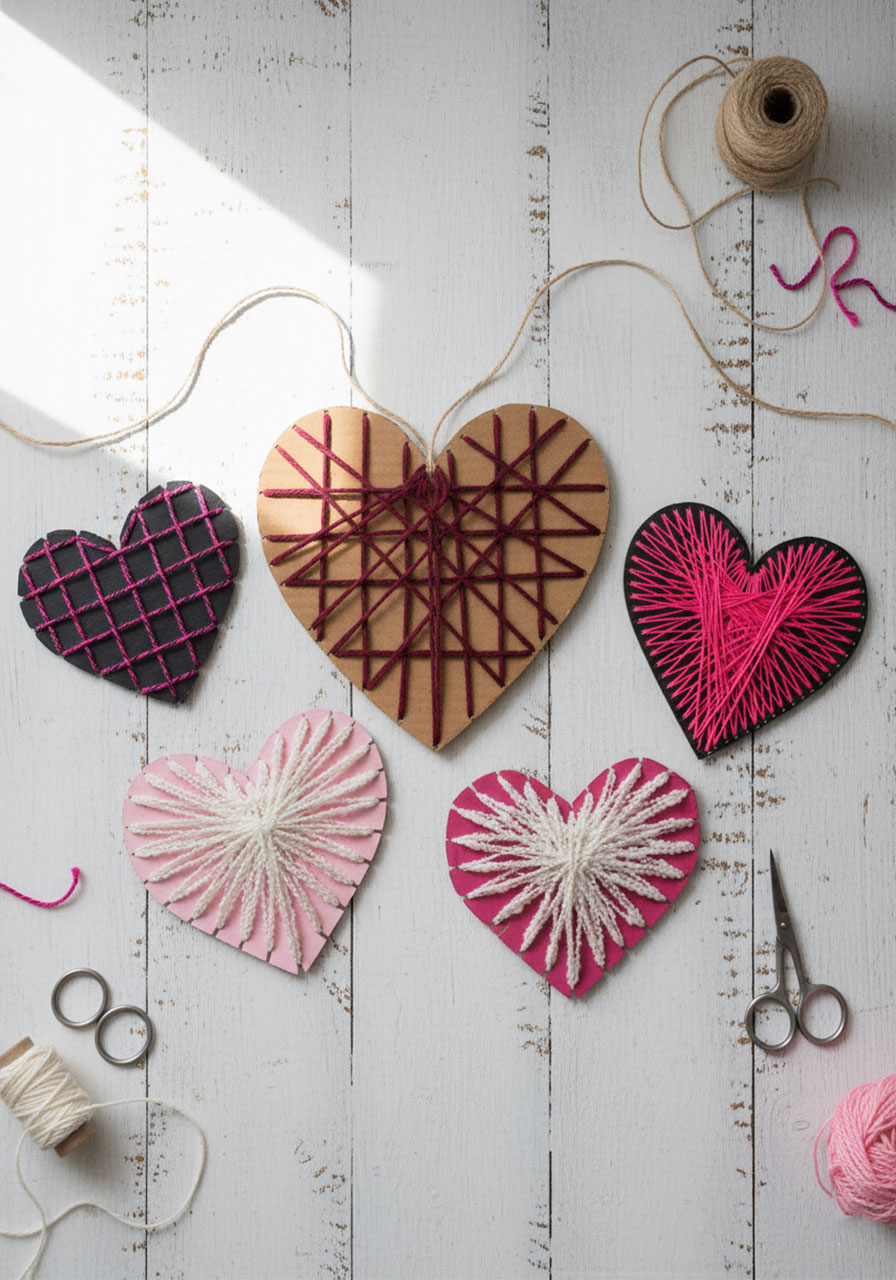
The secret to great patterns: Think about your design as you work. Here are three proven approaches to try:
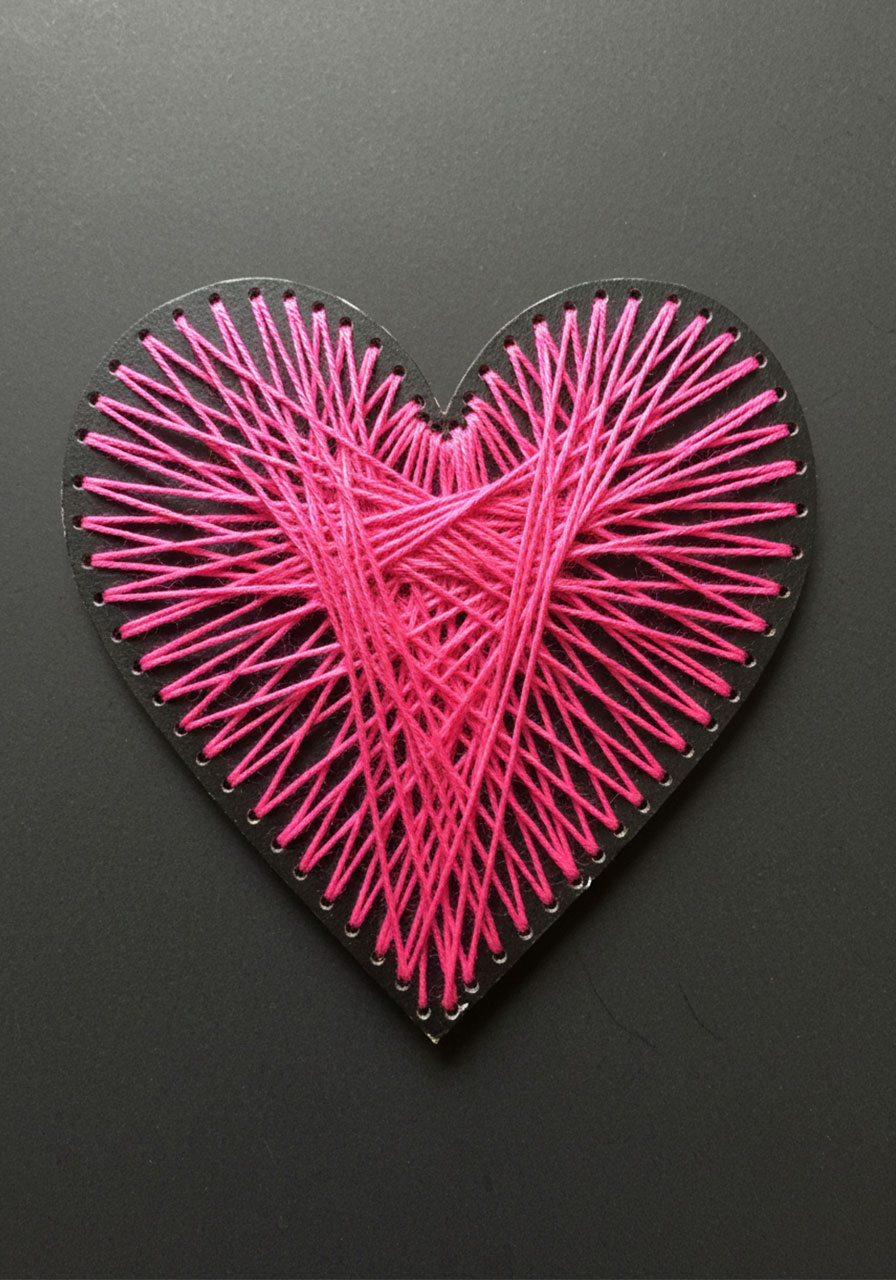
1. The Starburst: Pick one notch as your anchor point. Keep returning to this same notch while connecting it to different notches on the opposite side. This creates that gorgeous radiating pattern.
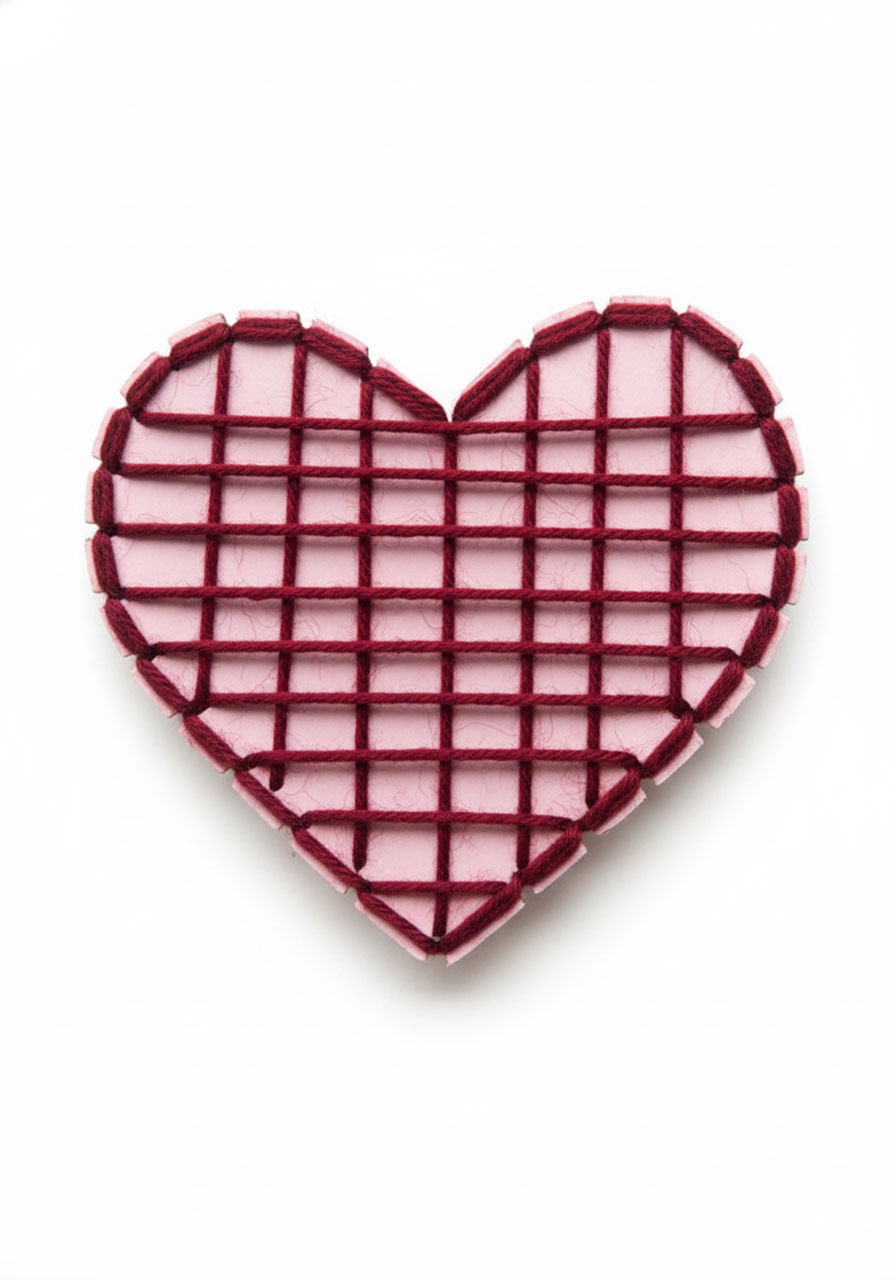
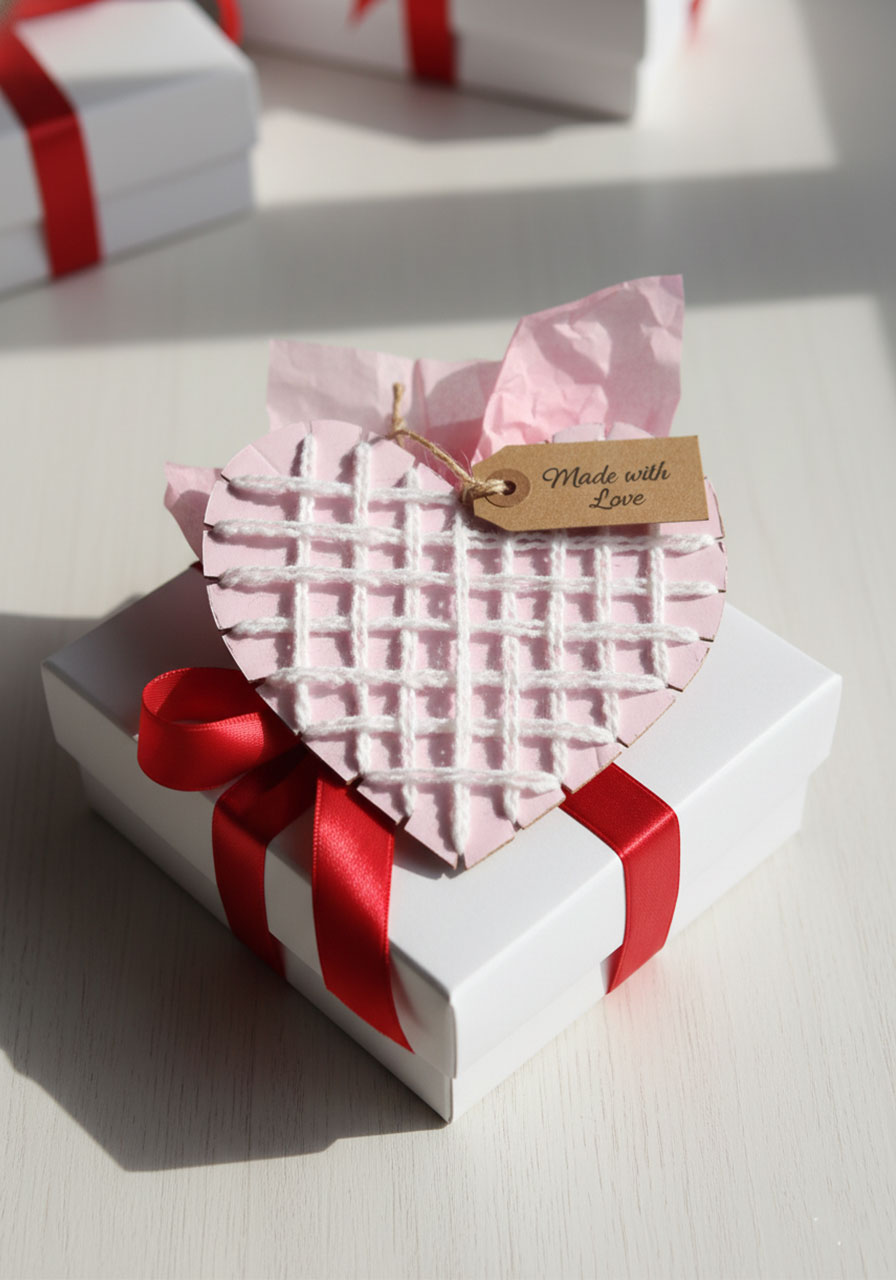
2. The Grid: Work back and forth across the heart, moving one notch over each time you cross. Then do the same thing vertically. Add a border by wrapping around the edge notches.
3. The Random (But Not Really): Skip notches as you go around, creating diagonal lines that crisscross. There’s no set pattern, but it always looks intentional and cool.
Step 6: Finish It Off
When you’re happy with your design (or when you run out of yarn), cut your string, leaving another 6-inch tail. Flip your heart over and tie both tails together in a tight knot. Trim the excess if you want a cleaner look.
Design Ideas That’ll Inspire You
The Classic Pink Grid Heart: Wrap horizontally across the heart, then vertically, then finish with a border around the edge. It’s structured, pretty, and very satisfying to make.
The Black & Pink Starburst: Use a black painted heart with hot pink yarn. Pick your center notch and branch out to create explosive rays of color. This one is a showstopper.
The Sweet Valentine Bloom: On a pink heart, use white yarn to create a flower-like pattern by wrapping from center notches outward in a circular motion.
Pro Tips for String Art Success
Tension matters: Keep your yarn taut as you wrap. Loose yarn creates a floppy, sad-looking design. Tight yarn creates crisp, clean lines.
Layer it up: Don’t be shy about passing over the same notches multiple times. The more you layer, the more defined your pattern becomes.
Mix colors: Start with one color, then add a second color over the top for dimension. A white base with pink accents over it? Stunning.
Make it a garland: Create several hearts in different sizes and colors, then string them together for adorable Valentine’s Day bunting.
Why This Craft Actually Works for Everyone
This isn’t just a “keep the kids busy” activity (though it definitely does that). It’s genuinely fun and surprisingly meditative once you get into the rhythm of wrapping. Plus, you’re actually exercising some serious brain power – planning patterns, problem-solving when your design isn’t quite right, and developing that all-important hand-eye coordination.
Younger kids (ages 6-7) might need help with the cutting, but they’ll love the wrapping part. Older kids and teens can handle the whole project independently and will probably come up with designs you never thought of. And adults? We love this because it’s actually relaxing and you end up with something Instagram-worthy.
The Bottom Line
Cardboard heart string art is one of those rare crafts that delivers on its promise: it’s easy, it’s affordable, and it looks way more impressive than the effort required. Whether you’re making Valentine decorations, creating handmade gifts, or just looking for a creative way to spend an afternoon, this project has you covered.
So grab that cardboard from your recycling bin, raid your yarn stash, and get ready to make some seriously adorable hearts. Your friends are going to ask you where you bought them – and you’ll get to say you made them yourself.
Ready to try more creative string patterns? Start with one heart, master your technique, and before you know it, you’ll have a whole collection of geometric masterpieces decorating your space!
More Valentine’s Day Party Ideas to Keep the Fun Rolling:
Valentine Science Magic: Grow Sparkly Heart Crystals Overnight
27 Exciting Minute to Win It Games to Celebrate Valentine’s with Fun
11 Creative Valentine Door Decorations for Classrooms That’ll Make Everyone Say “Aww!”
28 Amazing Valentine Crafts to Try Right Now!
3 Easy Heart Painting Ideas That’ll Make You Look Like a Creative Genius
46 Easy Valentine’s Day Crafts for Kids That’ll Make Their Hearts Skip a Beat
16 Galentine’s Day Party Ideas That’ll Make Your Squad Say “Yasss!”
As an Amazon Associate, we may earn a commission from qualifying purchases at no additional cost to you.
