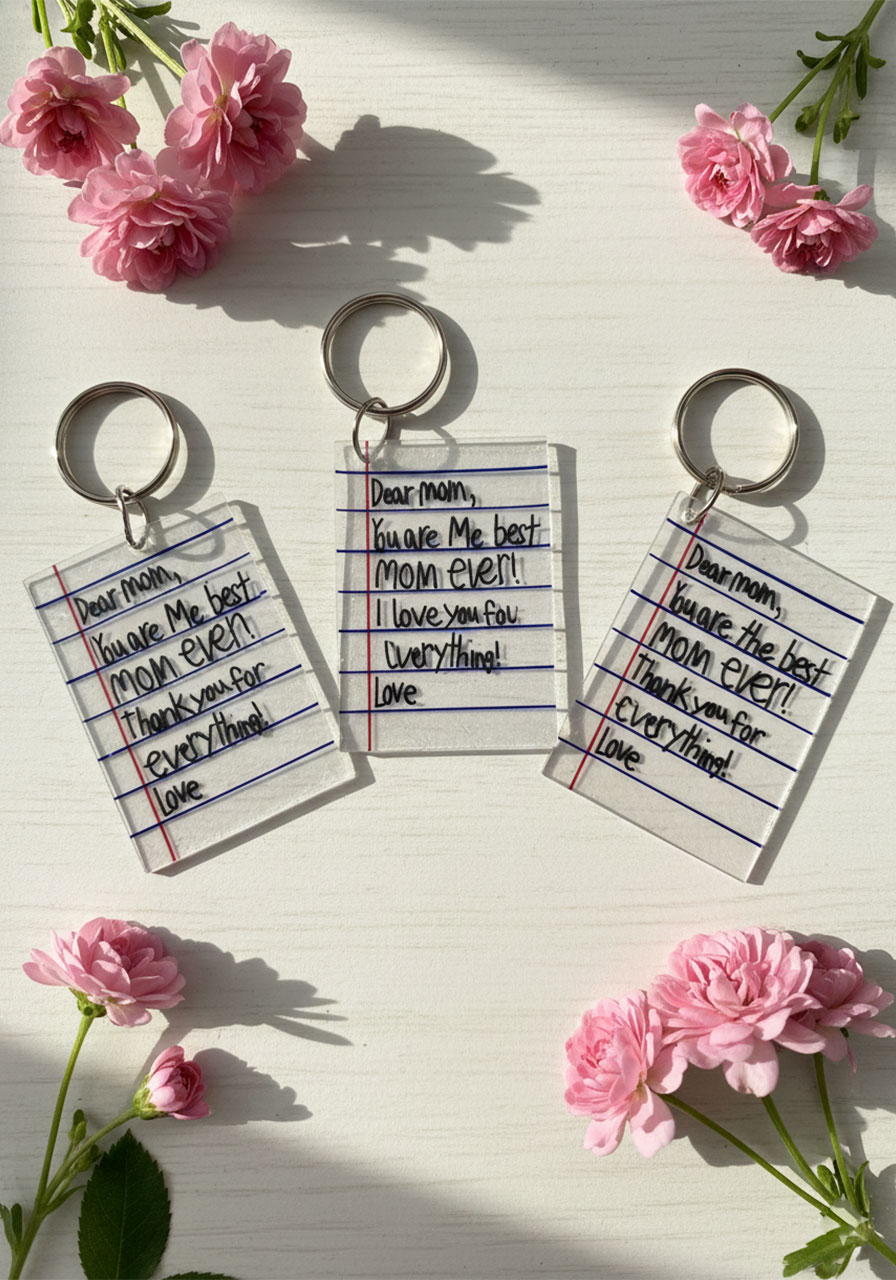
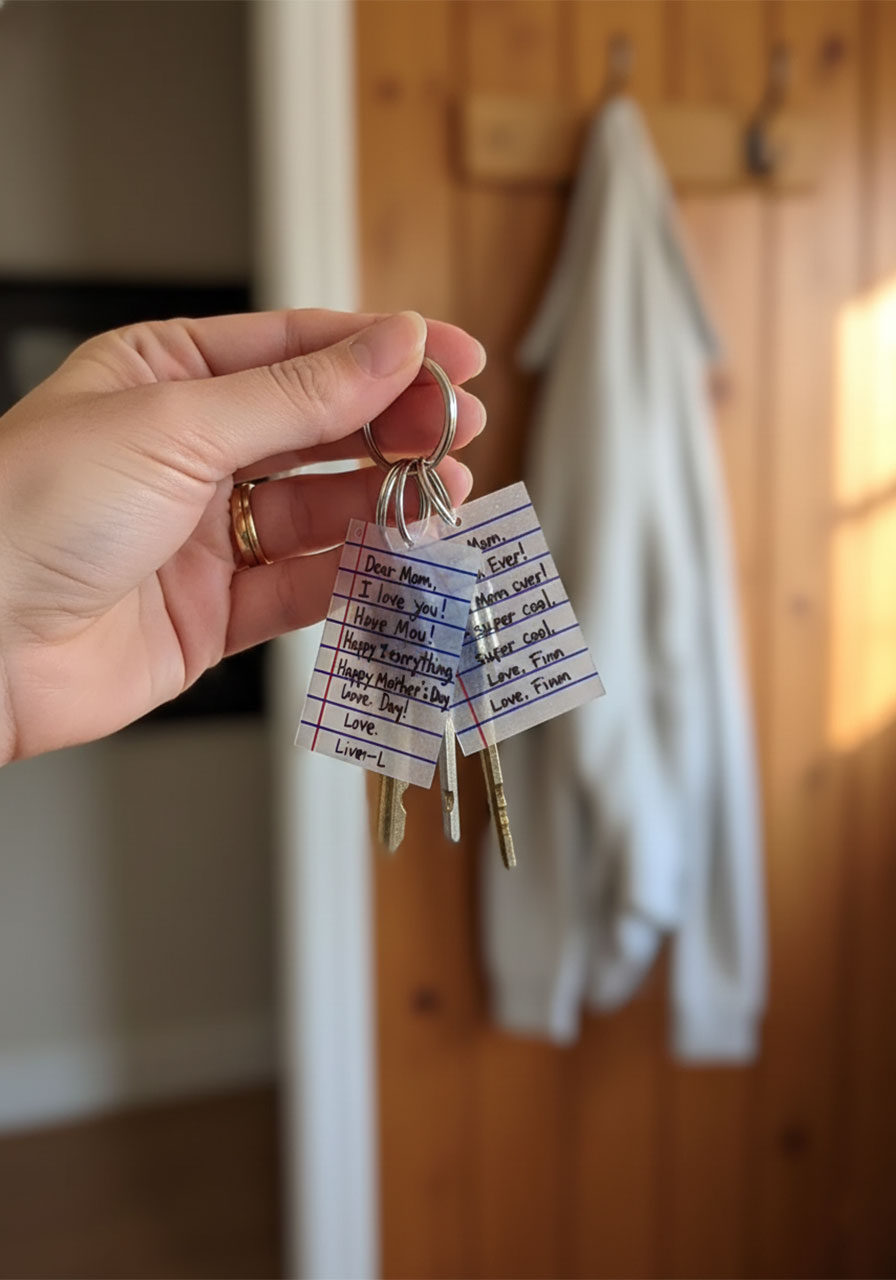
Picture this: Mom reaches for her keys every single morning and sees her child’s handwriting – their actual, wobbly, seven-year-old handwriting – right there on her keychain. Not a photo. Not a printed card tucked in a drawer somewhere. The real thing, shrunken down and made permanent.
That’s the magic of these DIY “Notebook Paper” Shrink Plastic Keychains. They look exactly like a tiny handwritten note on lined paper, but they’re hard, durable, and ready to live on a set of keys for years. Moms love them. Grandmas lose their minds over them. And the best part? Kids can make them at home or in the classroom with minimal supplies and maximum heart.
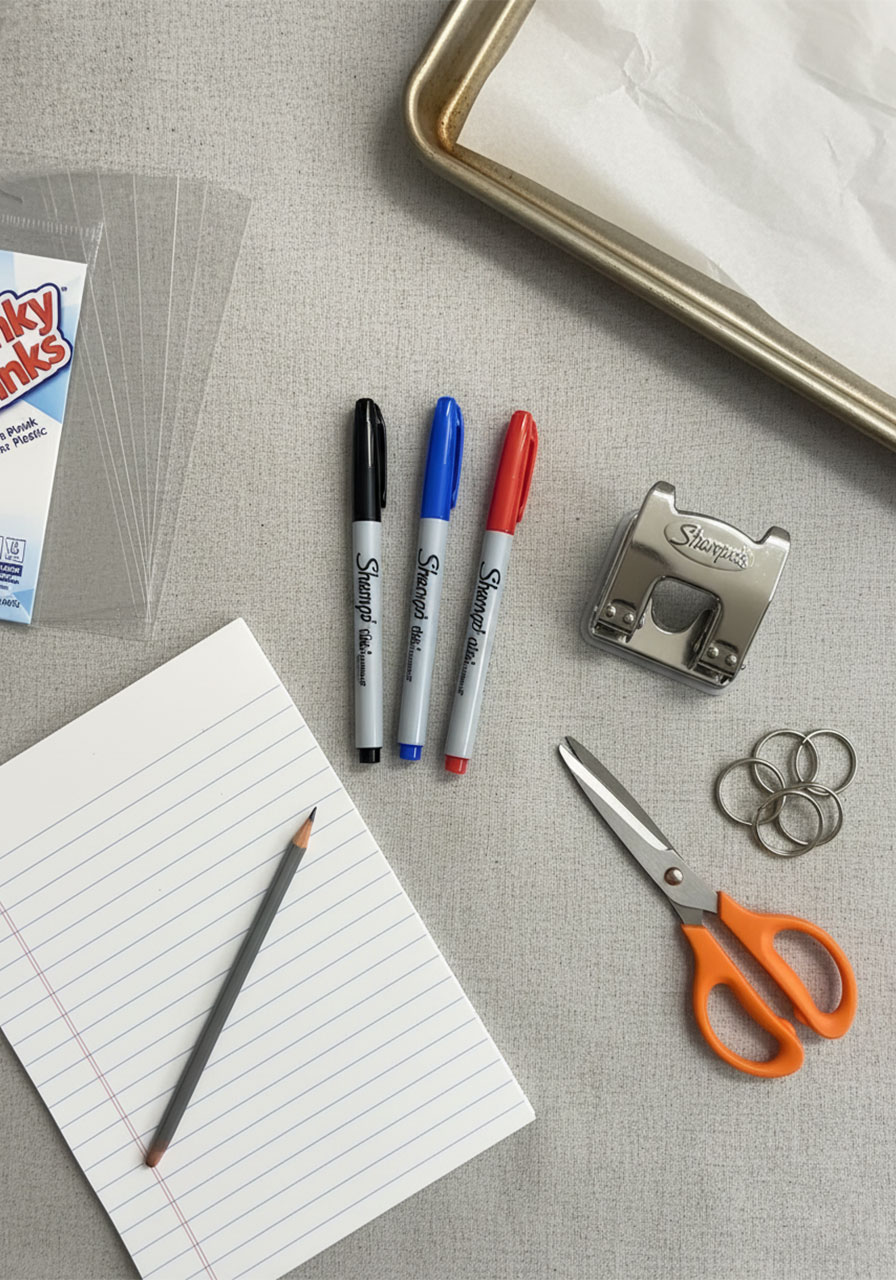
Here’s everything you need to pull this off – whether you’re a parent doing a quick weekend project or a teacher crafting a batch for the whole class.

What You’ll Need
Shrink Plastic Sheets – Look for the clear/crystal variety (often sold as “Shrinky Dinks” sheets). You can find them at craft stores or online. One package makes many keychains.
Permanent Markers – Fine-point Sharpies in black, blue, and red. These are your “notebook paper” colors.
White Paper + Pencil – For drawing the template the child writes on first.
Scissors
Hole Punch
Keychain Rings – Small split rings from any craft or hardware store.
Baking Sheet + Parchment Paper
Oven


How to Make Them: Step-by-Step
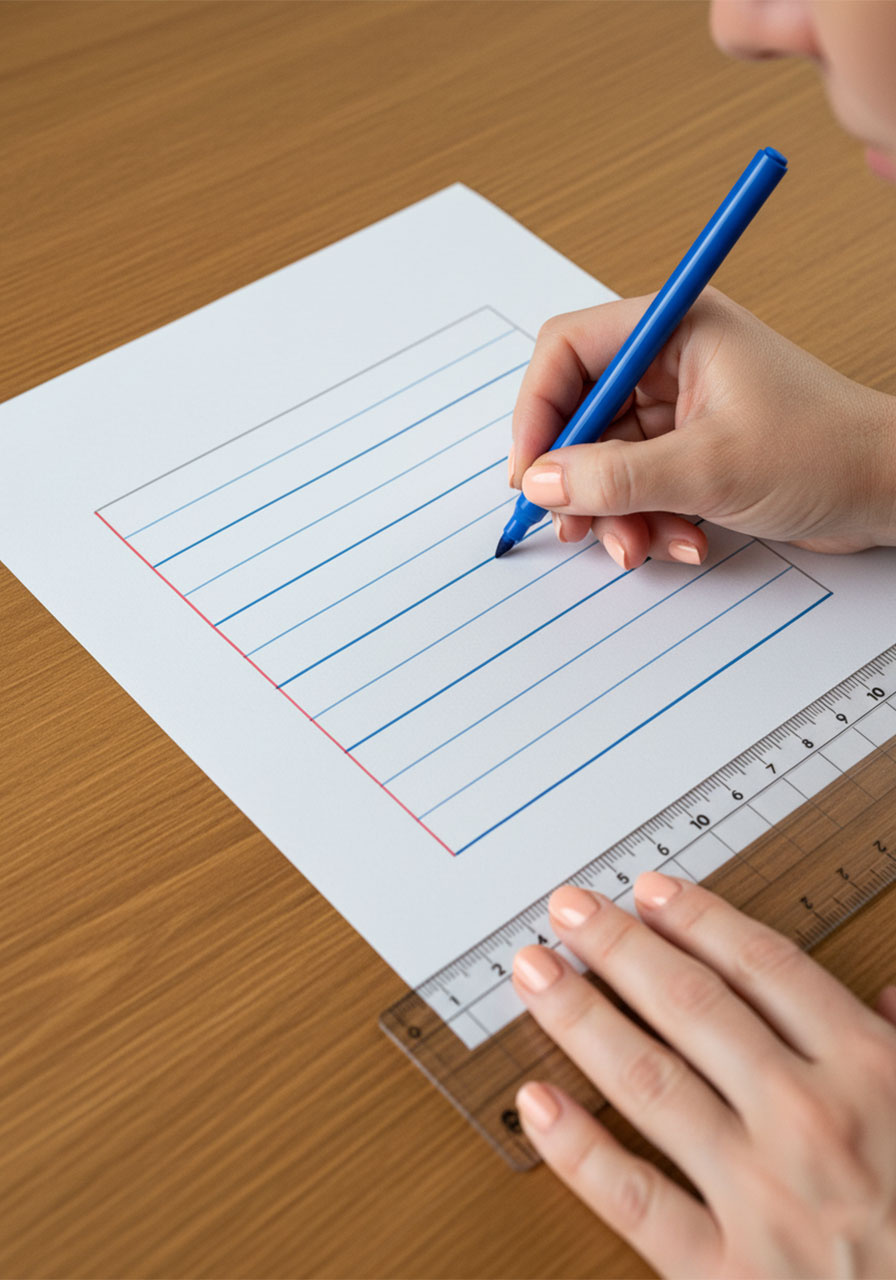
Step 1: Draw the Notebook Paper Template
On a regular piece of white paper, draw a rectangle roughly 4 × 5 inches. Inside it, draw evenly spaced horizontal blue lines and one red vertical line along the left side – just like a real piece of notebook paper. This is the template the child will write their message on first.
Pro Tip: If you’re doing this with a whole classroom, draw one master template and make photocopies. Every child gets a consistent, neat template to write on – and it saves you a ton of time.
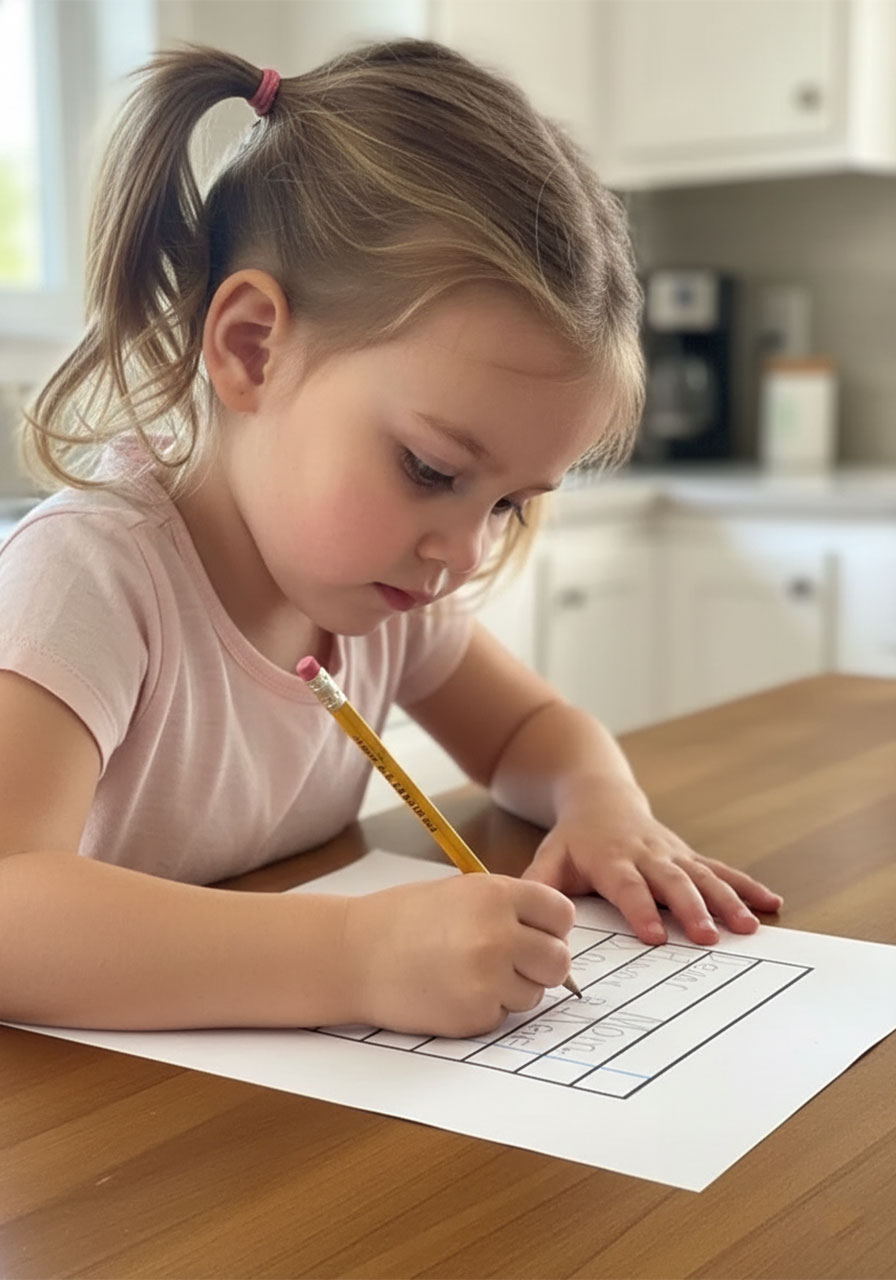
Step 2: Have the Child Write Their Message
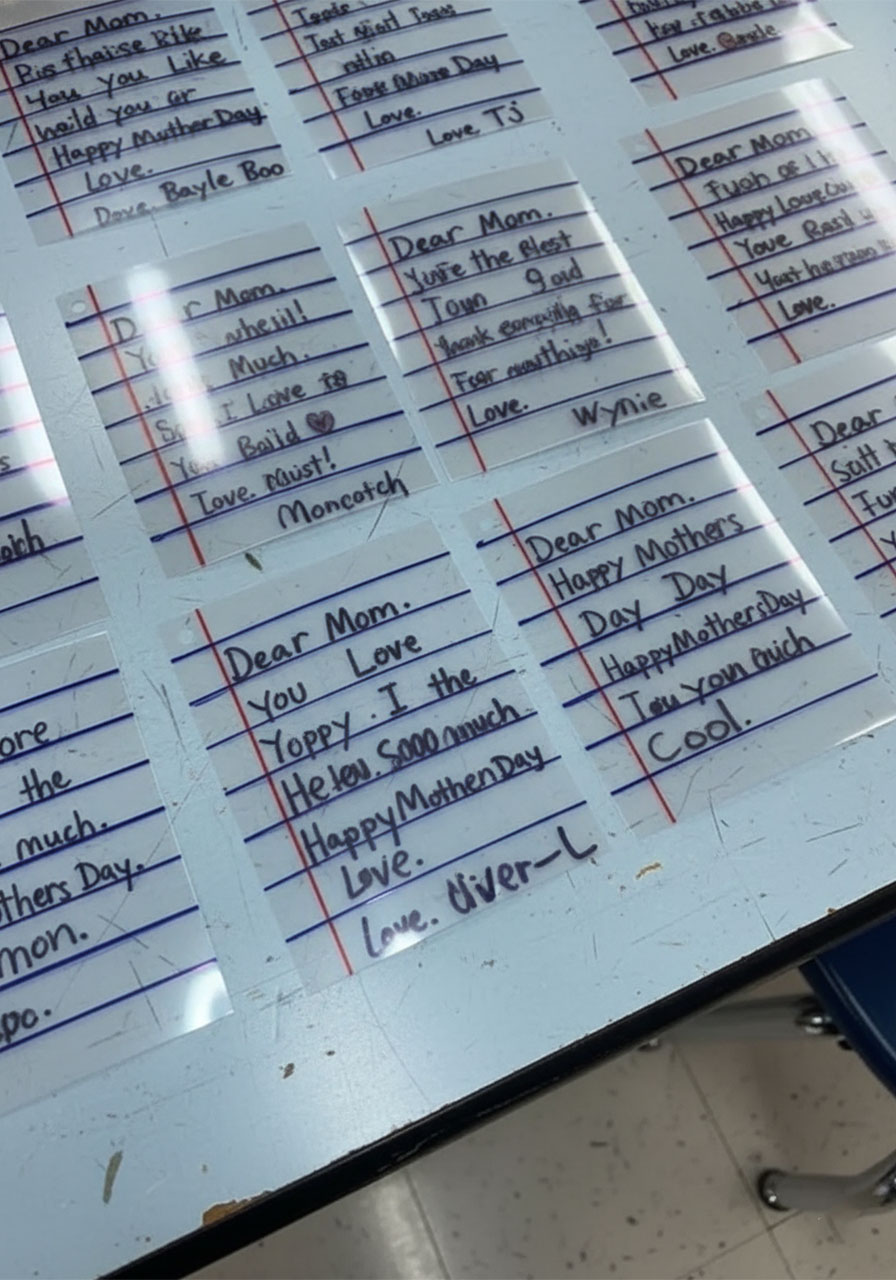
Hand the child the template and a pencil, and let them write their message inside the rectangle. Encourage them to fill the lines – the more authentic and “them” it looks, the better. Classics that work beautifully include:
“Dear Mom, You are the best mom ever! Thank you for everything! Love, [Name]”
“Dear Mom, Happy Mother’s Day. I love you Mom! Love, [Name]”
“Dear Mom, I love Mom. Mom Happy Mothers. I like ya cookin. You earned love. Love, [Name]”
Don’t correct their spelling. Don’t fix their letter sizing. The imperfect, childlike quality is exactly what makes this gift so precious.
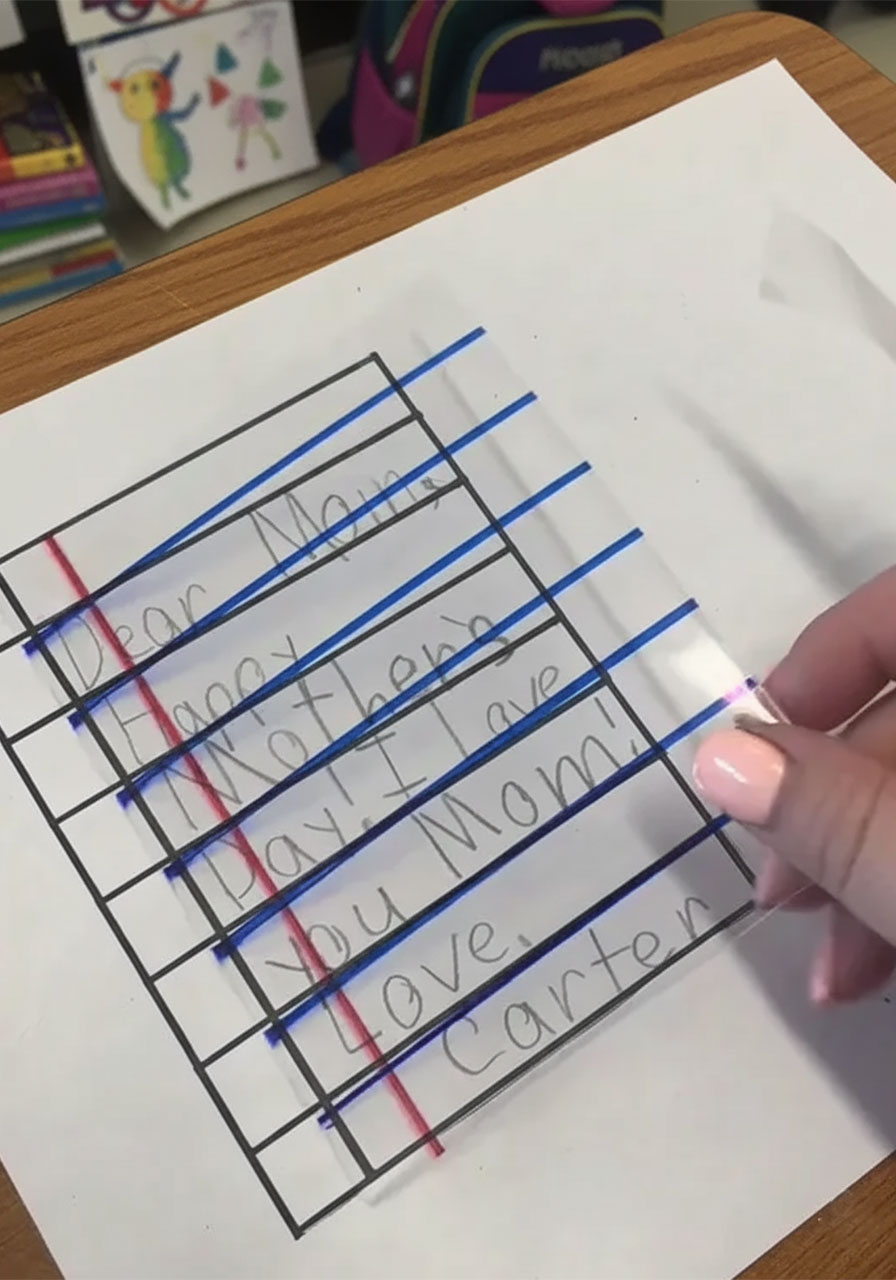
Step 3: Trace Everything onto the Shrink Plastic
Place a piece of clear shrink plastic directly over the paper template and tape it down so it doesn’t slip. Now trace with your permanent markers:
1. Use a blue Sharpie to trace the horizontal lines.
2. Use a red Sharpie to trace the vertical margin line.
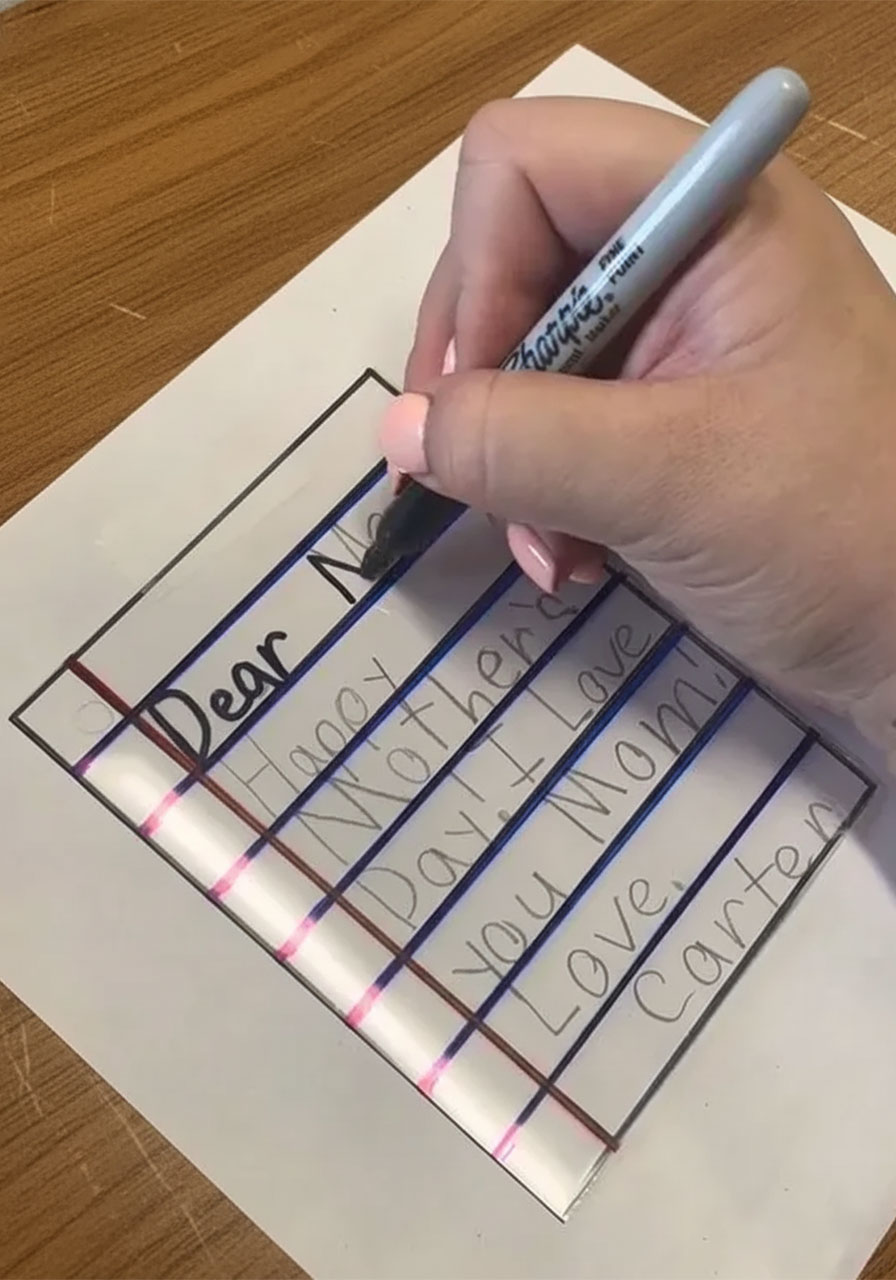
3. Use a black Sharpie to carefully trace the child’s handwriting.
Pro Tip: For younger kids (K–2nd grade), an adult should do the tracing step. The marker pressure needed to write on slick plastic is different from paper, and it’s easy for ink to smear. For older kids with steady hands, they can absolutely trace their own writing – and they’ll feel so proud of the finished product.
Step 4: Cut It Out and Punch the Hole
Cut out your rectangle along the edges. Then – and this is critical – punch the hole before baking. Use a standard hole punch and place the hole in one of the top corners of the keychain.
Why before baking? Because the plastic shrinks down to about ⅓ of its original size, and a standard hole punch creates exactly the right size hole for a keychain ring after shrinking. If you try to punch it after, the hardened plastic will crack.
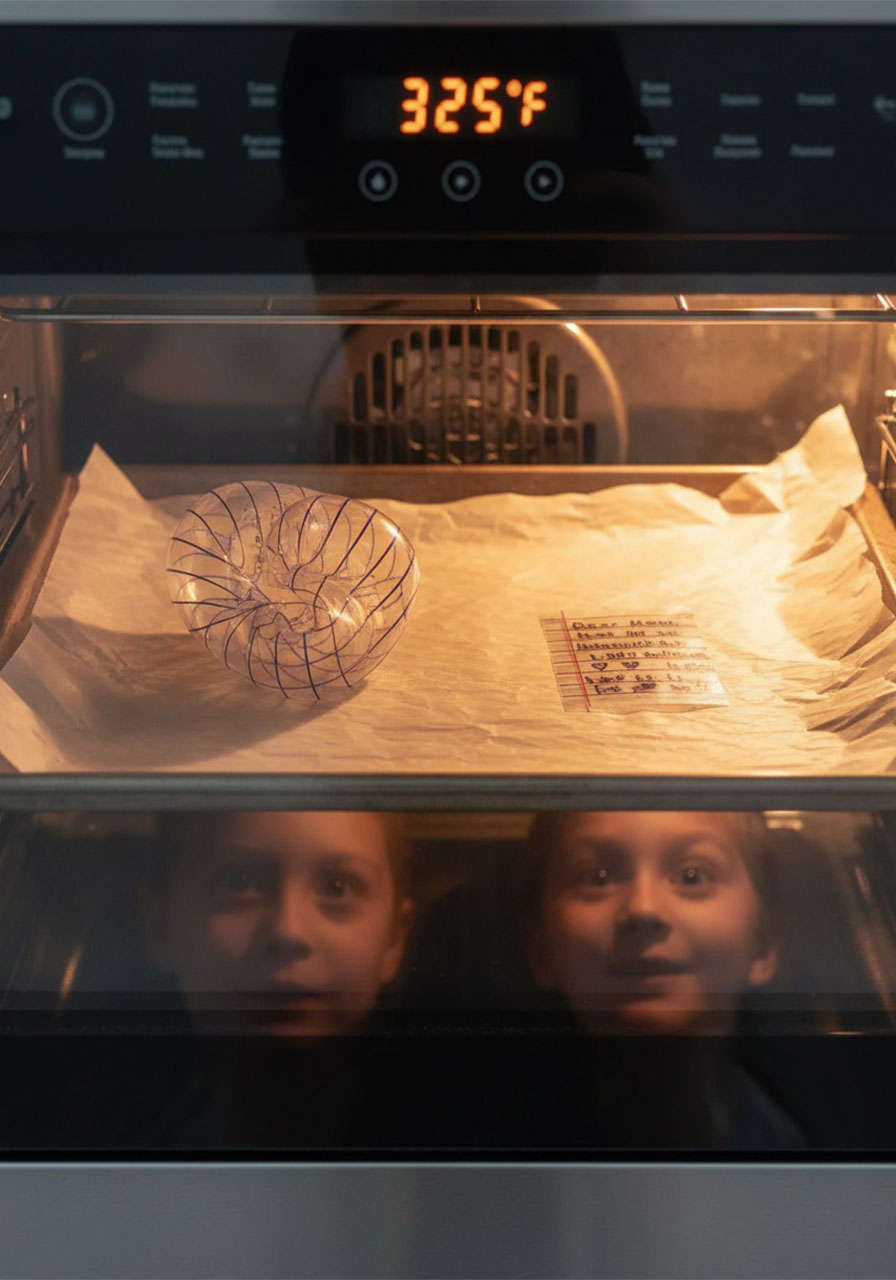
Step 5: Bake and Watch the Magic Happen
Preheat your oven to 325°F (165°C) – though always double-check the temperature on your specific brand of shrink plastic, as some vary slightly.
Place the pieces flat on a baking sheet lined with parchment paper. Slide them in and watch through the oven window. Here’s what will happen:
1. The plastic will start to curl and warp – it will look like it’s ruined. It is not ruined.
2. Keep watching. After about 2–3 minutes, it will flatten back out on its own.
3. Once it’s flat and still, it’s done. Pull it out promptly.
Kids absolutely love watching this part. If you’re doing this in a classroom, gather everyone around the oven window – the gasps and giggles are priceless.
Pro Tip: If a piece curls and sticks to itself, don’t panic. Put it back in for another 30 seconds. It will usually flatten out. If it’s truly stuck together, it’s a rare loss – but with a whole batch going in at once, you’ll have plenty of beautiful ones.
Step 6: Add the Keychain Ring
Once the keychains are cool and firm (this only takes a minute or two), simply thread a keychain ring through the hole. That’s it. Done. You’ve got a handmade heirloom.
Fun Presentation Idea: Tape the finished keychain to the inside of a handmade Mother’s Day card so it’s the first thing Mom sees when she opens it. It makes the reveal so much more special – and it’s a great way for kids to present it themselves.
Why This Craft Is Such a Hit
It preserves handwriting forever. Kids’ handwriting changes so quickly. This freezes it exactly as it was – wobbly letters, creative spelling, and all – at this one perfect age.
It’s actually useful. Unlike cards that end up in a drawer (or worse, recycled), this gift goes on Mom’s keys and gets seen every single day.
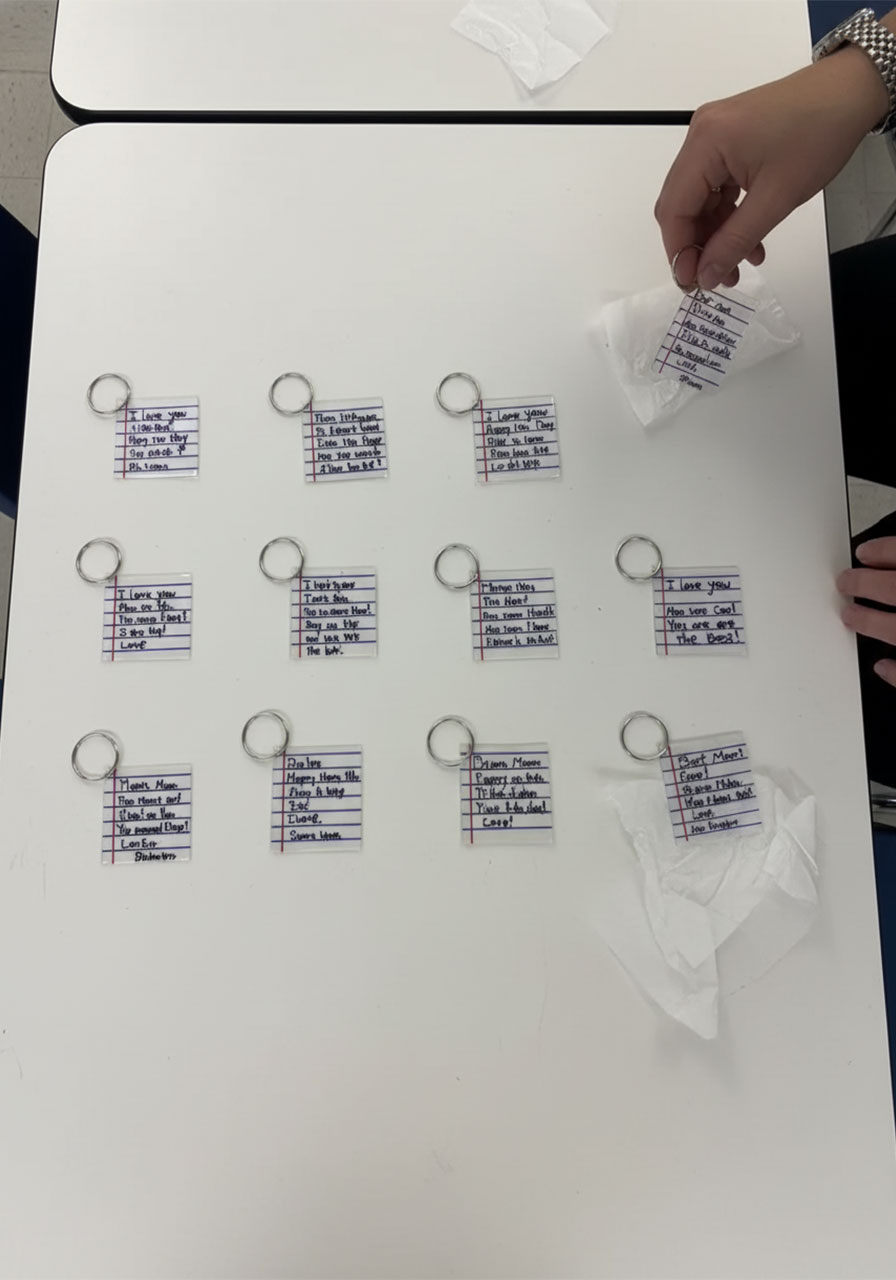
It’s incredibly affordable. One pack of shrink plastic sheets makes dozens of keychains, which makes it ideal for classroom projects where you need a gift for every student to bring home.
It works for all ages. Whether you’re working with a kindergartner or a fifth grader, this craft is adaptable. Younger kids write and adults trace; older kids can handle the whole thing.
With these little keychains in hand, you’re giving Mom more than a gift – you’re giving her a moment in time she can hold onto every single day. And honestly? That’s what the best Mother’s Day gifts are all about.
More Mother’s Day Ideas to Keep the Fun Rolling:
30+ Mother’s Day Crafts for Kids of All Ages
How to Make a DIY 3D “MOM” Pop-Up Card She’ll Actually Keep Forever
Bloom Her Away: How to Make a DIY Mother’s Day Flower Pop-Up Card
12 Hilarious Mother’s Day Games the Whole Family Will Love
How to Make a DIY Mini Paper Rose Bouquet (The Cutest Mother’s Day Gift That Lasts Forever!)
How to Make a DIY Heart Waterfall Card: The Sweetest Handmade Gift for Mom