

You already have everything you need for an amazing STEM lesson sitting right in your kitchen cabinet. That’s right – a simple stack of plastic cups is about to become your new secret weapon for engaging, hands-on learning that kids absolutely love.
Whether you’re a teacher looking for a quick brain break or a parent wanting to sneak some real learning into playtime, these cup stacking STEM challenges are your answer. They’re low-prep, high-fun, and packed with genuine science, engineering, and math skills that preschoolers will carry with them for life.
Ready to build something amazing? Let’s dive in.
Why Cup Stacking Is a Brilliant STEM Tool
Before we get to the good stuff, here’s why cups are such a fantastic STEM material for preschoolers – and why you’ll want to keep a bag of them stocked year-round:
Dirt cheap and everywhere. A bag of plastic or solo cups costs next to nothing and is available at any grocery store.
Instant engagement. Kids are naturally drawn to building and knocking things down. Cups tap right into that instinct.
Real STEM skills in disguise. Every time a child stacks, balances, plans, and problem-solves, they’re practicing engineering, physics, spatial reasoning, and math – without even knowing it.
Perfect for any setting. Works at home on the kitchen floor, in a classroom, or even outside. No special setup required.

What STEM Skills Do Cup Challenges Actually Build?
Here’s what’s happening under the hood every time your little builder picks up a cup:
Science: Kids discover gravity, balance, and cause-and-effect firsthand. Why does the tower fall? What happens when the base is too small?
Technology: They learn to think systematically – testing, tweaking, and repeating until it works.
Engineering: Planning a structure before building it, thinking about weight distribution, and solving “why won’t this stay up?” challenges.
Math: Counting cups, recognizing patterns, sorting by color, and recording data all happen naturally during cup play.
The Cup Stacking STEM Challenges
1. Classic Cup Tower Challenge
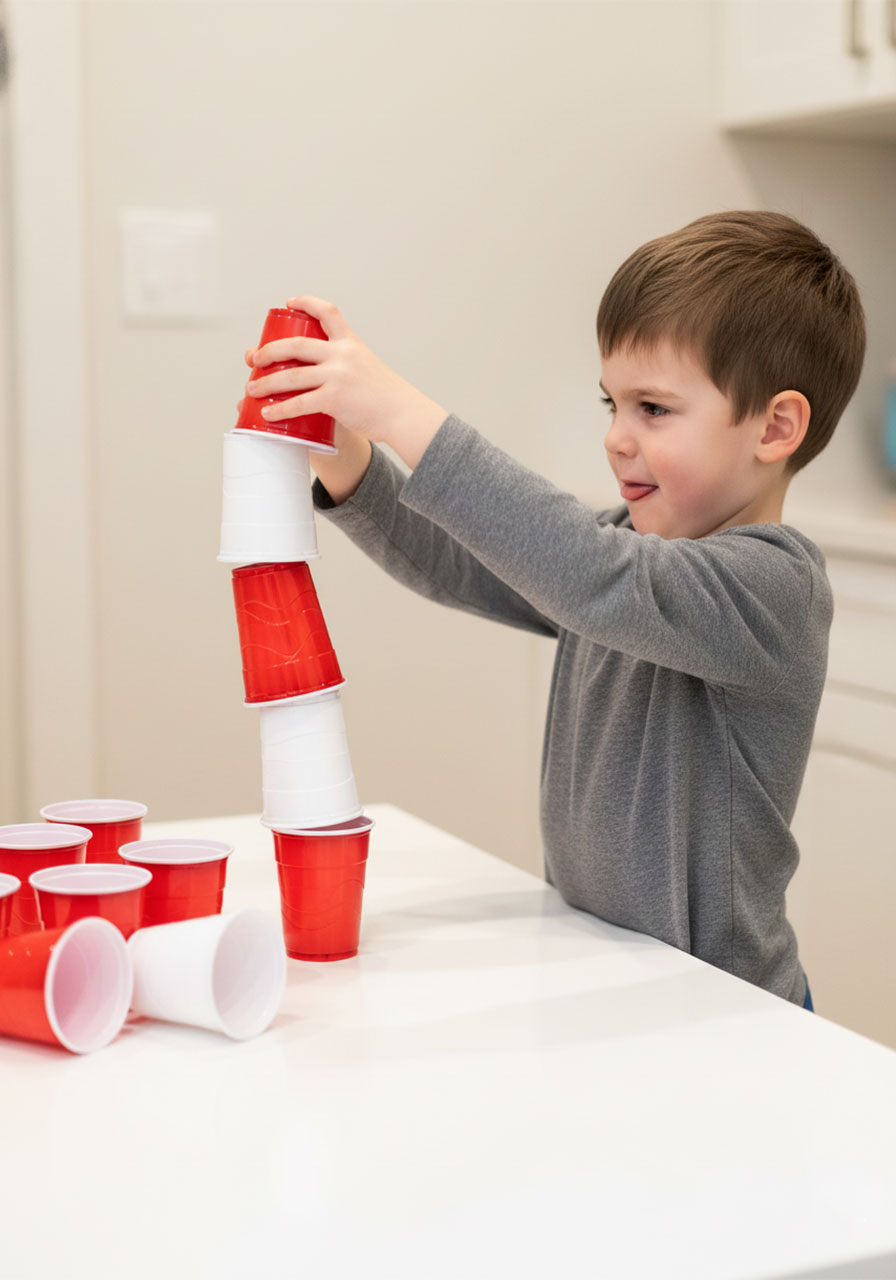
This is the one that started it all – and for good reason. It’s simple to set up, endlessly replayable, and teaches foundational engineering thinking in a way that feels totally like play.
Best for: Ages 3–6 | Indoors | Solo or small groups
Time: 10–20 minutes
STEM Focus: Engineering, balance, spatial reasoning
What You’ll Need:
10–20 plastic or solo cups (all the same size works best to start)
A flat surface (table or floor)
How to Play:
1. Give your child a pile of cups and a simple challenge: “How tall can you build your tower before it falls?”
2. Encourage them to stack cup on top of cup, rim-to-rim, to build upward.
3. When the tower falls (and it will – that’s the fun part!), ask: “What do you think happened? How could we make it stronger?”
4. Let them rebuild, experiment, and try again. There’s no wrong answer here.
5. For an extra challenge: see if they can build the tallest tower using exactly 10 cups.
Pro Tip: Once they’ve mastered a single tower, challenge them to build two towers the same height standing side by side. This introduces symmetry and measurement in the sneakiest, best possible way.
2. Cup Pyramid Challenge
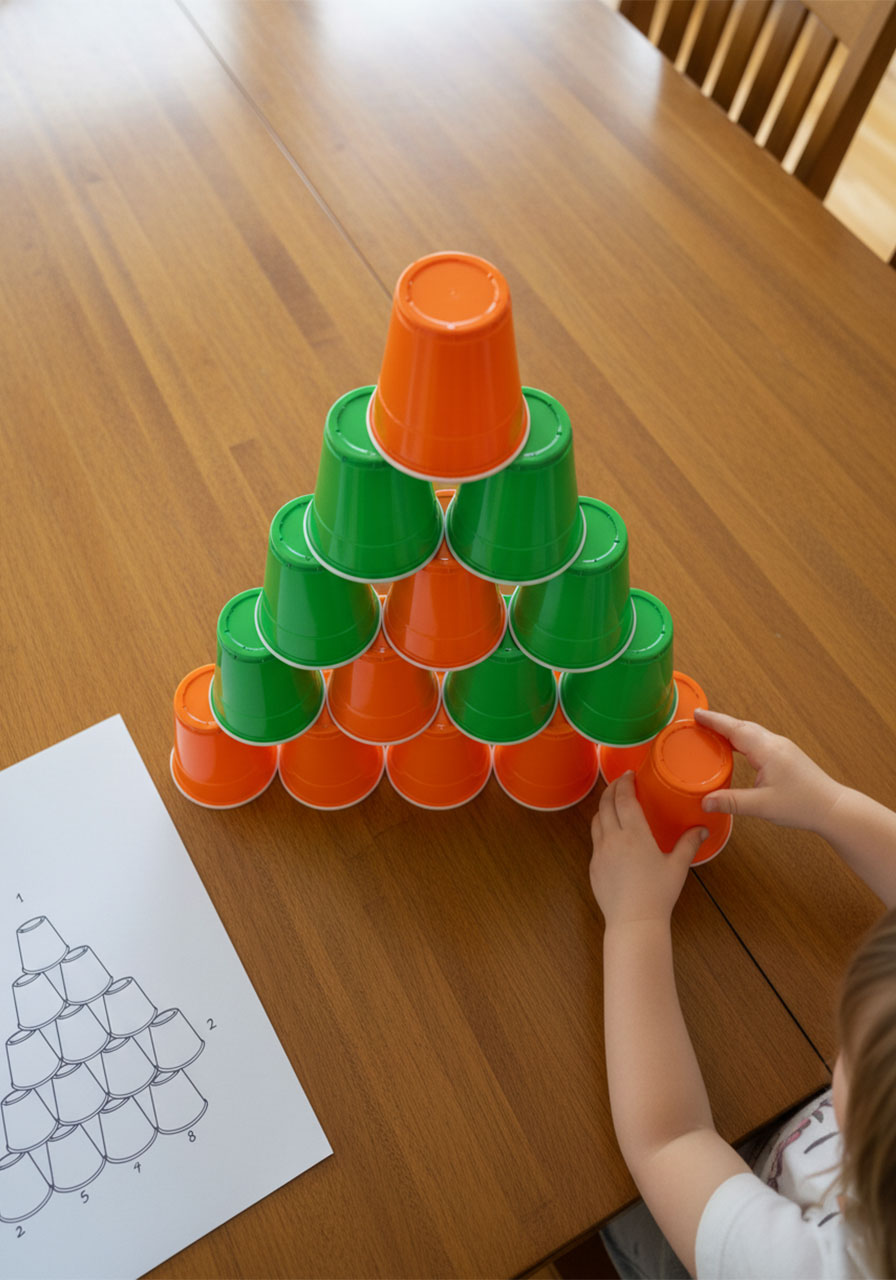
Step up from towers to pyramids and watch little engineering brains kick into high gear. This challenge requires your preschooler to think about patterns, count carefully, and plan their build before they start – a genuinely impressive skill for this age group.
Best for: Ages 3–6 | Indoors | Solo or pairs
Time: 15–25 minutes
STEM Focus: Patterns, counting, structural engineering
What You’ll Need:
10 cups for a classic 4-3-2-1 pyramid
A flat table or floor
How to Play:
1. Show your child the pyramid shape and explain that each row has one fewer cup than the row below it.
2. Start by placing 4 cups in a row as the base. Ask: “How many cups do we need for the next row?” Let them count and figure it out.
3. Layer 3 cups on top of the base row, then 2, then 1 at the top.
4. Once they’ve built it successfully, ask: “Can you build a bigger pyramid? What would the bottom row look like?”
5. For a color challenge: try building the pyramid using only one color per row.
Pro Tip: Have your child draw their pyramid plan on paper before building. This simple act of “design before build” is genuine engineering process thinking – and it’s adorable to see their blueprint sketches!
3. Storybook Cup Tower: Jack and the Beanstalk
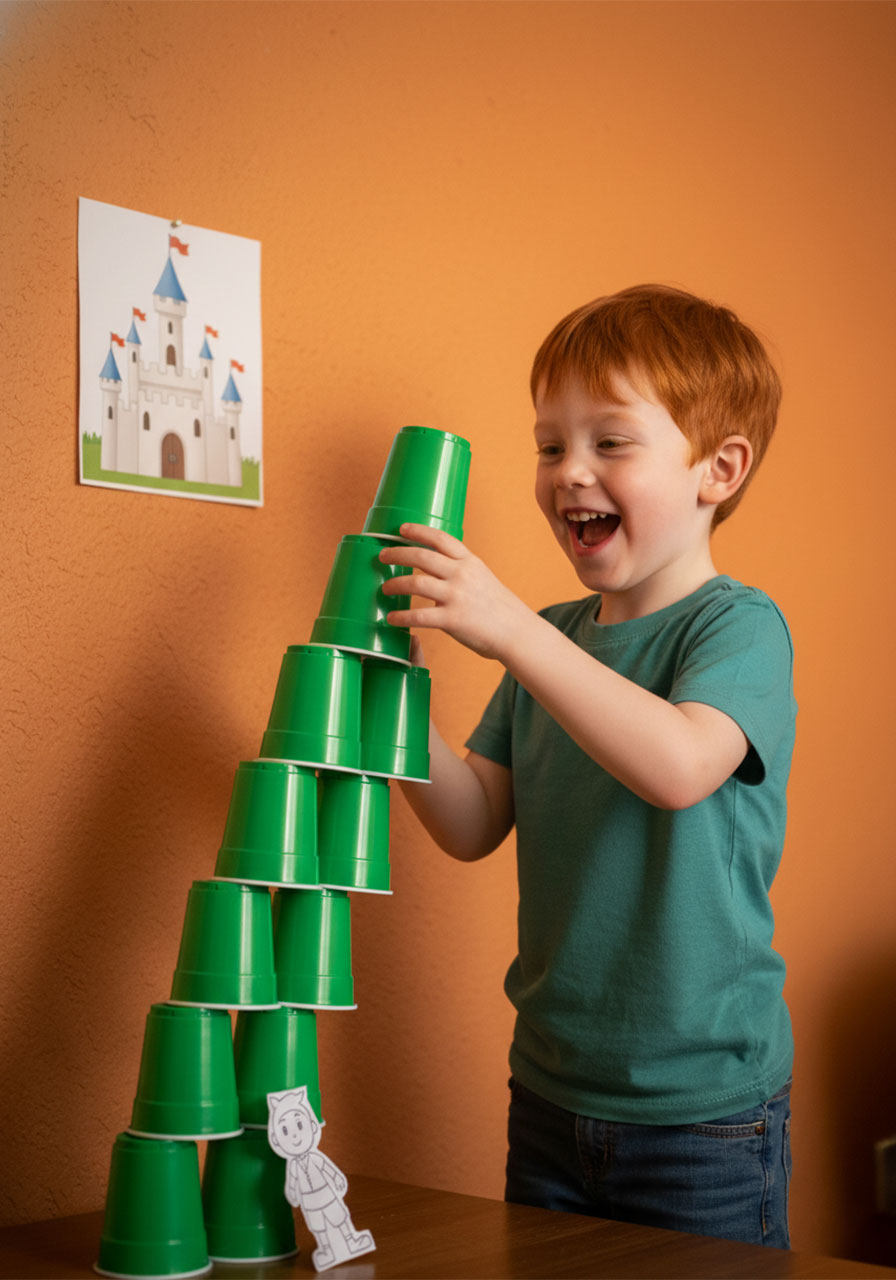
Take the classic cup tower and give it a storybook twist – and suddenly you’ve got a STEM challenge that even reluctant builders will jump up for. The idea is simple: your little engineer is Jack, and their mission is to build a beanstalk tower tall enough to reach the castle in the clouds.
Best for: Ages 3–5 | Indoors | Solo or small group
Time: 20–30 minutes
STEM Focus: Engineering, creative problem-solving, storytelling through building
What You’ll Need:
12–15 cups (bonus points if they’re green!)
A picture of a castle, beanstalk, or Jack drawn on paper – or just use your imagination together
A flat surface
How to Play:
1. Set the scene: “Jack needs to build a beanstalk tall enough to reach the castle. Can you help him?”
2. Place a “castle” picture (or a book) on a shelf or chair above the table to give your child a goal height to aim for.
3. Challenge them to build a cup tower that reaches the castle. Let them experiment freely – stacking rim-to-rim, base-to-base, or in a pyramid shape.
4. When the tower falls, ask: “What could Jack do differently to make his beanstalk stronger?” Encourage them to troubleshoot and try again.
5. Celebrate each attempt – the goal is the process, not perfection!
Pro Tip: This challenge works brilliantly as a paired activity. One child tells the story while the other builds – it layers in language, listening, and teamwork all at once.
4. Rainbow Cup Stacking Pattern Challenge

This one is pure magic for preschoolers who are working on colors, patterns, and following instructions – all wrapped up in a satisfying building challenge. Get ready to hear a lot of “I did it!”
Best for: Ages 3–5 | Indoors | Solo
Time: 10–15 minutes
STEM Focus: Patterns, color recognition, math, following multi-step directions
What You’ll Need:
Cups in multiple colors – red, orange, yellow, green, blue, purple (rainbow order!)
A simple pattern card you can make at home: draw or color rows of cups in a specific order on a piece of paper
How to Play:
1. Create your own simple pattern card: draw a 3-cup pyramid, coloring each cup a different color in a specific order (example: red on bottom-left, yellow on bottom-right, blue on top).
2. Lay out all the colored cups and the pattern card in front of your child.
3. Challenge them: “Can you build the pyramid to match the picture?”
4. Let them sort through the cups, find the right colors, and recreate the pattern.
5. Once they’ve matched it, flip the card over and try again from memory!
Pro Tip: Make it a data recording moment! After building, ask: “Which colors did you use?” and have them draw an X under each color they used on a simple hand-drawn chart. You’ve just introduced data recording to a preschooler. That’s incredible.
5. Cup Structure Architecture Challenge
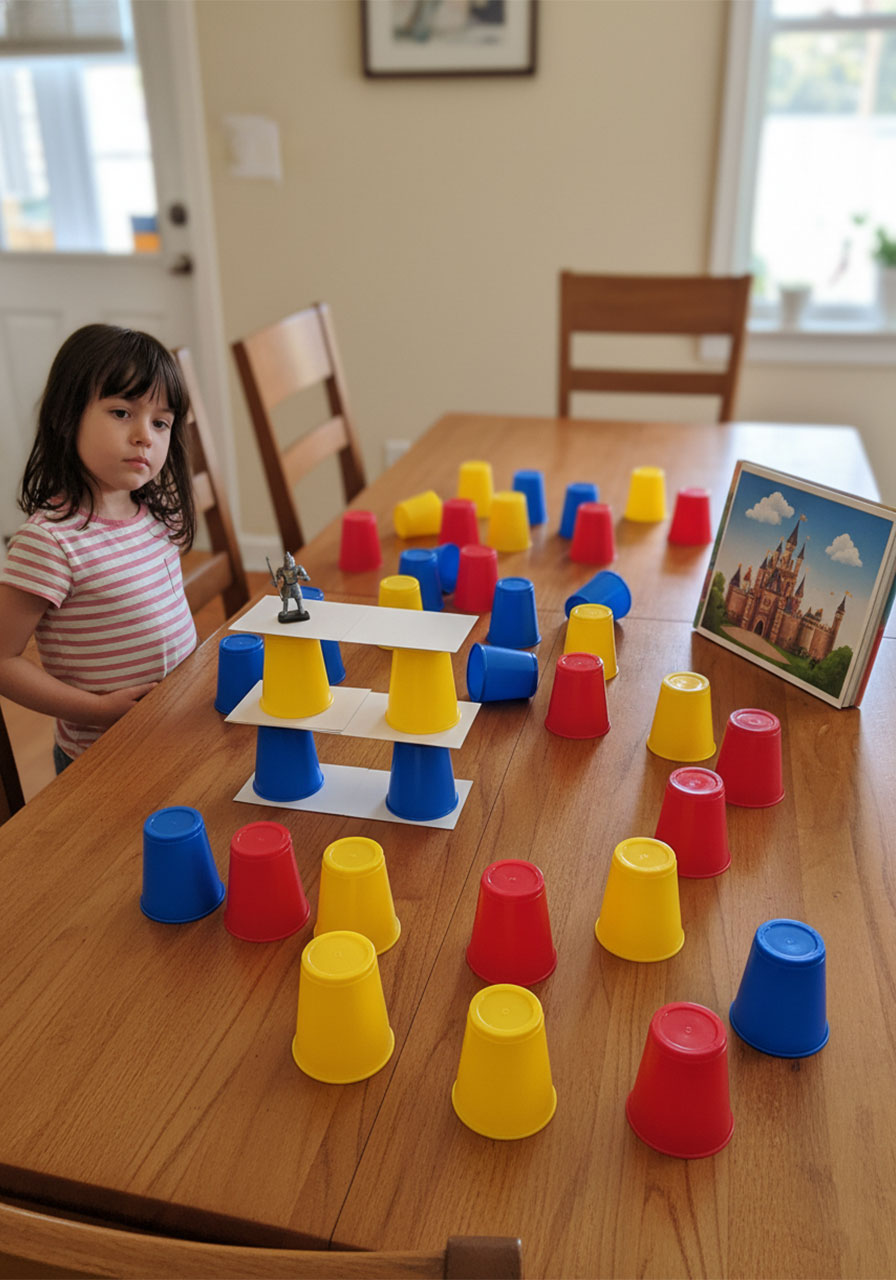
Ready to move beyond towers? This challenge invites preschoolers to think like architects – building not just up, but out, around, and through. The result? Creative structures that look wildly different every single time.
Best for: Ages 4–6 | Indoors | Solo or pairs
Time: 20–30 minutes
STEM Focus: Spatial reasoning, creative engineering, problem-solving
What You’ll Need:
20+ cups of various sizes (mixing sizes makes this more challenging and fun)
Optional: index cards or paper to use as flat “bridges” between cups
Optional: pictures of famous landmarks or buildings for inspiration (a castle, a bridge, a house)
How to Play:
1. Show your child a picture of a building or structure (a house, a bridge, an arch) and say: “Can you build something like this using only cups?”
2. Let them explore freely first – no instructions, just building. Notice how they naturally begin to problem-solve.
3. After a few minutes, introduce index cards or paper as “bridges” between cups, allowing them to create flat surfaces, roofs, and platforms.
4. Ask guiding questions: “What’s holding the roof up? What would happen if we moved this cup? How could you make a doorway?”
5. Challenge them to build something with at least two “floors” or levels.
Pro Tip: Invite your child to name their building and tell you who lives there. This creative storytelling layer makes the STEM experience even richer – and turns a building challenge into a full imaginative play session.
6. Cup Maze Challenge
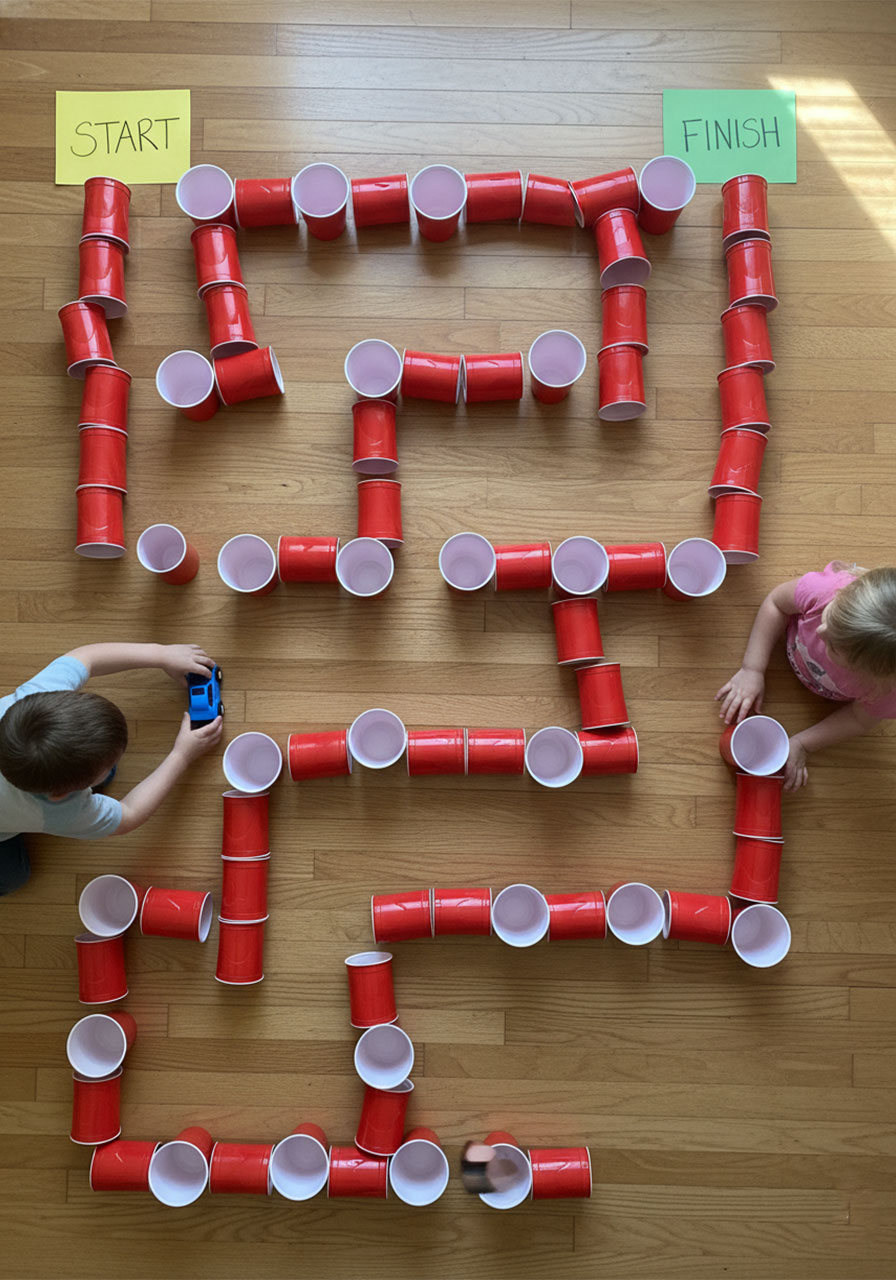
Who says mazes have to be on paper? This hands-on challenge has preschoolers designing and building their own cup mazes – then challenging a friend (or a toy car!) to find the way through.
Best for: Ages 4–6 | Indoors or outdoors | Pairs or small groups
Time: 20–30 minutes
STEM Focus: Spatial reasoning, planning, problem-solving, directional language
What You’ll Need:
20–30 cups
A flat surface with plenty of room (a table or the floor works great)
A small toy car, marble, or ball to navigate the maze
How to Play:
1. Show your child how to lay cups on their sides to create walls and pathways.
2. Challenge them to build a maze with a clear “Start” and a clear “End.” Ask: “How will we know where to enter and where to exit?”
3. Once the maze is built, let them navigate a small toy or ball through it from start to finish.
4. Then swap! If you’re working in pairs, have each child build a maze for the other to solve.
5. For an extra challenge: time how long it takes to get through the maze, then redesign it to make it trickier.
Pro Tip: Encourage the use of directional words as they guide each other through: “Turn left at the green cup! Go straight, then right!” This builds spatial vocabulary alongside the engineering skills.
7. Cup and Ball Run

This one is the holy grail of cup STEM challenges – the activity preschoolers will beg to do again and again. Building a ball run from cups requires serious planning, serious problem-solving, and a whole lot of “wait, let me try that again” energy. In other words: it’s perfect.
Best for: Ages 4–6 | Indoors | Solo, pairs, or small groups
Time: 30–45 minutes
STEM Focus: Physics, engineering, cause-and-effect, persistence
What You’ll Need:
10–15 plastic cups
A small ball (ping pong ball, marble, or small rubber ball)
Optional extras: cardboard tubes, hardcover books (for ramps), tape
A flat surface with plenty of room
How to Play:
1. Start by exploring: show your child how tipping a cup on its side creates a tunnel, or leaning it against something creates a ramp. Let them experiment freely for a few minutes.
2. Introduce the challenge: “Can you build a run so the ball travels through at least three cups before it stops?”
3. Encourage them to set up cups in a sequence – tilted for ramps, on their sides for tunnels, stacked to redirect the ball’s path.
4. Test it! Place the ball at the start and let it roll. Where does it get stuck? How can they fix it?
5. Keep extending: “Now can you make it go through five cups?” or “Can you make it travel in a circle?”
Pro Tip: This challenge works brilliantly in pairs or small groups. Assign roles – one child is the Builder, one is the Tester, one is the Idea Generator. Rotate roles after each successful (or unsuccessful!) run. Teamwork and communication skills level up immediately.
8. Cup Counting and Number Order Challenge

Here’s where we sneak some serious math into the fun. This challenge uses the natural appeal of stacking cups to build number recognition, counting, and sequencing skills – skills that will matter all the way through elementary school.
Best for: Ages 3–5 | Indoors | Solo
Time: 10–15 minutes
STEM Focus: Number recognition, counting, sequencing, one-to-one correspondence
What You’ll Need:
10 cups
A permanent marker
Optional: dot stickers in different quantities matching the numbers
How to Play:
1. Before the activity, write the numbers 1–10 on the outside of your cups, one number per cup.
2. Mix the cups up and hand them to your child. Challenge them: “Can you put the cups in order from 1 to 10?”
3. Once they’ve sorted them correctly, challenge them to stack the cups in order from 1 (bottom) to 10 (top). Can they do it without knocking them over?
4. For a bonus round: ask “Which number comes after 4?” or “Can you find the cup that is one more than 7?”
5. To add a hands-on counting element: put matching dots on each cup (1 dot on the “1” cup, 2 dots on the “2” cup, etc.) and have your child count the dots to sort them.
Pro Tip: Turn it into a data-recording moment by asking your child to write (or circle) the numbers in order on a piece of paper after they finish building. You’ve just combined engineering, math, and early writing in one activity. Educator win!
9. Cup Memory Match

This clever twist on a classic memory game turns cups into mystery containers – and preschoolers absolutely cannot get enough of it. It builds memory, concentration, and cognitive skills in a way that feels like pure play.
Best for: Ages 3–5 | Indoors | Pairs or small groups
Time: 10–15 minutes
STEM Focus: Memory, cognitive development, matching, concentration
What You’ll Need:
8 –12 cups
Small matching pairs of objects to hide underneath – think: two pennies, two erasers, two buttons, two crayons
A flat surface
How to Play:
1. Place matching pairs of small objects face-down on a table, then cover each one with an upside-down cup.
2. Let your child watch while you set it up, then mix the cups around slowly so they can try to track where things are.
3. Player 1 lifts two cups to reveal the objects underneath. If they match – hooray, keep them! If they don’t match, flip the cups back over.
4. Player 2 takes their turn. The player who finds the most matching pairs wins.
5. For younger preschoolers: start with just 4 cups (2 pairs). Add more as their confidence grows.
Pro Tip: Let your child be the one to hide the objects and set up the game for you. Taking on the “teacher” role builds their confidence, reinforces the concept, and honestly? Watching them try to trick you is absolutely priceless.
10. Color Mixing with Cups

Combine art and science into one gorgeous, sensory-rich activity that will have preschoolers making predictions, observing carefully, and gasping out loud when the colors change right before their eyes.
Best for: Ages 3–6 | Indoors (sensory table or outside) | Solo or small groups
Time: 15–20 minutes
STEM Focus: Science, observation, hypothesis-making, color theory
What You’ll Need:
Clear plastic cups (so kids can see the color mixing happen)
Water
Food coloring in red, yellow, and blue
An eyedropper or spoon for mixing
A tray or sensory table to contain spills
How to Play:
1. Fill three cups with water and add a different food coloring to each: one red, one yellow, one blue.
2. Ask your child: “What do you think will happen if we mix the red water and the yellow water together?” Let them make a prediction before you do anything.
3. Pour a little of the red and yellow water into an empty clear cup. Watch their face when orange appears.
4. Try the other combinations: blue + yellow = green, red + blue = purple. Let them predict each one before mixing.
5. Give them free exploration time with extra empty cups to mix their own combinations.
Pro Tip: After exploring, ask: “Can you mix to make brown? What combination might do that?” This pushes their thinking beyond the basic three combinations and introduces the concept of “too much of something changes the result” – a huge scientific idea in a tiny cup.
11. Cup Toss Challenge
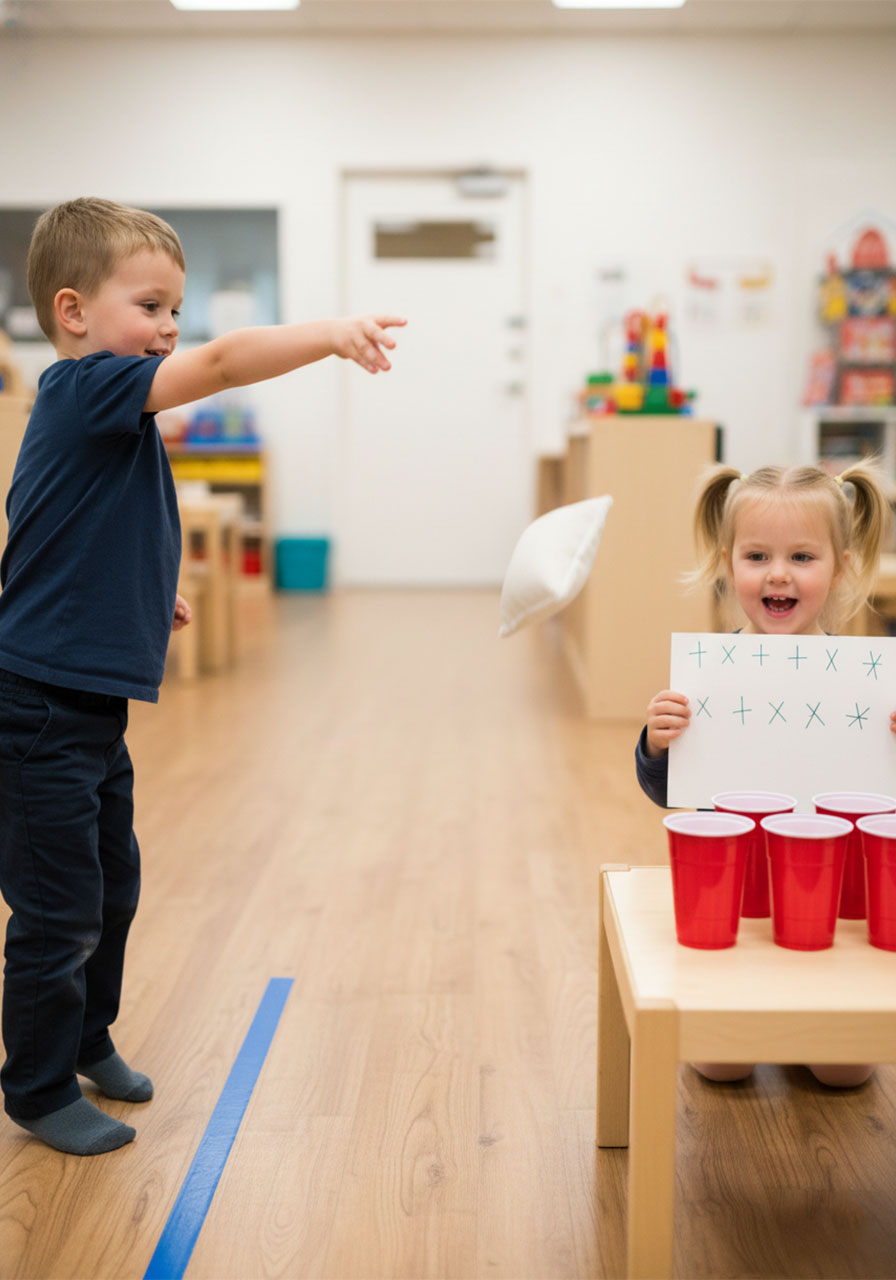
This one gets the whole body involved – because STEM isn’t just about sitting at a table! The cup toss challenge builds hand-eye coordination, introduces measurement and math, and gives wiggly preschoolers a way to channel their energy into focused, purposeful play.
Best for: Ages 3–6 | Indoors or outdoors | Solo or groups
Time: 10–20 minutes
STEM Focus: Measurement, counting, data recording, gross motor skills
What You’ll Need:
5–10 cups (solo cups work perfectly)
Soft balls, beanbags, or rolled-up socks
Tape or a rope to mark the throwing line
Paper and pencil for keeping score with tally marks
How to Play:
1. Set up cups in a row or cluster on the floor. Mark a throwing line a few feet away with tape.
2. Each player takes 5 turns trying to toss a ball into a cup. Record each success with a tally mark on paper.
3. After each round, count up the tally marks together and compare scores.
4. Move the throwing line farther back to increase difficulty. Ask: “Is it easier or harder now? Why?”
5. For a math extension: assign point values to different cups (1 point for the big cup, 3 points for the small cup) and practice adding up scores.
Pro Tip: Keep a simple “score sheet” going across multiple rounds. Over time, ask your child if they notice their score getting better. This is an early, concrete introduction to tracking progress and data – and kids love seeing their own improvement.
12. Cup Windsock Science Experiment
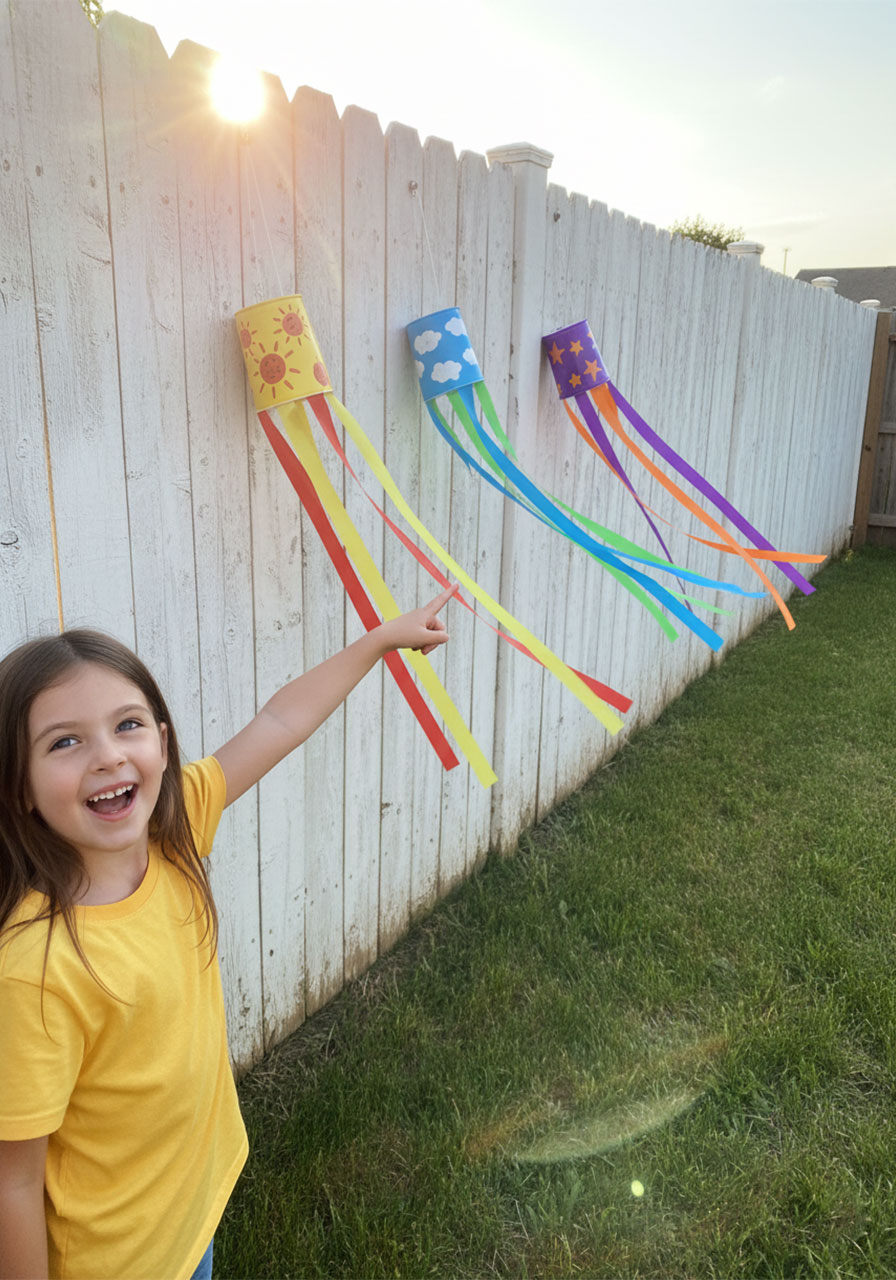
Take STEM outside with this fun, breezy activity that teaches preschoolers about wind, weather, and observation. Cup windsocks are quick to make and wildly satisfying to watch in action – especially on a breezy day.
Best for: Ages 3–6 | Outdoors | Solo or small groups
Time: 15–20 minutes to make, then ongoing outdoor observation
STEM Focus: Science, weather observation, cause-and-effect
What You’ll Need:
Plastic or paper cups (one per child)
Streamers, ribbons, or strips of tissue paper
Tape
Hole punch and string (to hang them)
Markers or stickers for decorating
How to Play:
1. Let your child decorate their cup with markers or stickers.
2. Tape 6–8 streamers or ribbon strips around the open bottom rim of the cup.
3. Punch a hole in the closed end and thread string through to hang the windsock outside (on a fence, a tree branch, or a porch railing).
4. Head outside and observe: “What is happening to the streamers? Why do you think they’re moving? What happens when we walk with it fast?”
5. On different days, check the windsock together: “Is it moving more or less than yesterday? Do you think it’s windier today?”
Pro Tip: Make this a multi-day science observation. Keep a simple “wind diary” where your child draws how much the streamers are moving each day (a little, medium, or a lot). Over a week, you’ve got a real weather observation journal. That’s next-level early science right there.
13. Cup and Straw Rocket Launch

Three, two, one – blast off! This simple, surprising activity introduces preschoolers to basic physics in the most delightful way: blowing into a straw and watching their cup rocket fly. Warning: this one will be requested on repeat.
Best for: Ages 3–6 | Indoors or outdoors | Solo or groups
Time: 10–15 minutes
STEM Focus: Physics (air pressure, force), cause-and-effect, prediction
What You’ll Need:
Small plastic cups (the little condiment-size cups work great)
Straws
Tape (optional, to seal any gaps)
How to Play:
1. Place a straw into a cup and hold the cup upside-down (closed end up, open end over the straw).
2. Hold the cup loosely – you want it to be able to fly off the straw when air pushes it.
3. Blow into the straw in one quick, sharp breath. The cup should launch into the air!
4. Ask: “What made it fly? Where did the force come from?” Let them experiment with blowing gently versus blowing hard. What’s the difference?
5. Challenge: have them aim at a target on the floor – a hula hoop, a piece of tape – and see who can land their rocket the closest.
Pro Tip: Let your child decorate their cup rocket before launch time. Rocket wings, flames, astronaut drawings – it turns a physics experiment into a creative project, and the pride in their decorated rocket makes the launch 10x more exciting.
14. Cup-and-String Telephone

This timeless activity is having a major STEM comeback – and for good reason. It’s the perfect way to introduce preschoolers to the concept that sound travels, and to spark real curiosity about how communication works.
Best for: Ages 3–6 | Indoors or outdoors | Pairs
Time: 10–15 minutes to make + ongoing play
STEM Focus: Physics (sound vibration), communication, cause-and-effect
What You’ll Need:
2 plastic or paper cups
A long piece of string (at least 5–10 feet)
A sharp pencil or skewer to make holes
How to Play:
1. Poke a small hole in the bottom of each cup.
2. Thread one end of the string through each cup’s hole and tie a knot on the inside so the string is secure.
3. Hand one cup to your child and hold the other yourself. Walk apart until the string is pulled straight and taut – this is important! A slack string won’t work.
4. One person puts the cup to their ear while the other speaks softly into their cup. Can they hear you?
5. Explore: “What happens if the string goes slack? What if you touch the string while someone is talking?”
Pro Tip: Start by having your child place the cup over their ear before you even connect the string – just to experience how the cup shape changes the sound they hear. That first moment of “whoa, everything sounds different!” hooks them completely before the real experiment even begins.
15. Cup Instrument Orchestra

Who knew cups could make music? This activity combines science and music in a hands-on sound exploration that will have your preschoolers tapping, drumming, and composing their very own cup orchestra.
Best for: Ages 3–6 | Indoors | Solo or groups
Time: 15–20 minutes
STEM Focus: Physics (sound, vibration), patterns, creative expression
What You’ll Need:
Cups of different sizes and materials (plastic, paper, glass if supervised)
A pencil or wooden stick for tapping
Optional: rice, dried beans, or sand to fill some cups
Optional: a rubber band stretched over the top of a cup
How to Play:
1. Line up several cups of different sizes. Tap each one with a pencil and listen: which sounds higher? Which sounds lower? Why do your child think that might be?
2. Fill one cup partway with water or rice and tap again. How does the sound change?
3. Try stretching a rubber band over a cup opening and plucking it. That’s a string instrument made from a cup!
4. Once they’ve explored the sounds, challenge them to create a simple rhythm pattern: tap, tap, tap… pause… tap, tap. Can they repeat it?
5. For group play: give each child a different cup “instrument” and conduct a cup orchestra together.
Pro Tip: Start by having each child simply place a cup over their ear and listen. The way it changes the sounds around them creates instant fascination – and the perfect launching point for asking “why do you think that happens?”
Tips for Making Cup STEM Challenges a Success
Before you dive in, a few quick notes that make all the difference:
Embrace the mess and the “failures.” A falling tower isn’t a failure – it’s data. Help children see every collapse as a clue: “Interesting! Why do you think it fell that time?”
Ask questions, don’t give answers. “What do you think will happen?” and “How could we fix that?” are two of the most powerful phrases in early STEM education. Resist the urge to solve it for them.
Keep it short and sweet. Preschoolers have big curiosity and shorter attention spans. A 15–20 minute focused challenge beats a 45-minute marathon every time.
Supervise around liquids and small objects. For the water-based activities and memory match challenges, keep an eye on younger preschoolers throughout.
Let them take the lead. Once you’ve introduced the challenge, step back. The most amazing STEM moments happen when kids start inventing their own rules.
Bring STEM Home: A Note for Parents
You don’t need a classroom to make these challenges happen. A kitchen table, a bag of plastic cups, and your enthusiastic presence is genuinely all it takes. Try picking one challenge per week, maybe on a rainy afternoon or as a Saturday morning activity, and watch how quickly your preschooler starts thinking like a builder, a scientist, and an engineer.
The best part? Once kids discover how much fun problem-solving can be, they start applying it everywhere. That persistence, creativity, and curiosity they build with a stack of cups? It follows them all the way to kindergarten and beyond.
So go raid that cup cabinet. Your little STEM superstar is ready to build.
More Kid’s Party Ideas to Keep the Fun Rolling:
5 Domino Math Games Kids Actually Want to Play (No Worksheets Required!)
The Coolest Morse Code Activity for Kids (Using Lego!)
The Straw Maze Activity Kids Will Beg to Play Again and Again
7 Fun Hand-Clapping Games Kids and Adults Will Absolutely Love
DIY Robot Hand: The STEM Activity That’ll Make Kids Say ‘Whoa!’
DIY Toilet Roll Knitting for Kids: The Ultimate Beginner Craft That Actually Works
