

Get ready to turn a humble cardboard tube into your kid’s new favorite craft! This genius toilet roll knitting activity (also called French knitting) is about to become your secret weapon for rainy days, classroom activities, and keeping little hands happily busy. And the best part? You probably have everything you need already sitting in your recycling bin.
If you’ve ever watched a child struggle with traditional knitting needles (hello, dropped stitches and frustrated tears), you’re going to love this. Toilet roll knitting makes the basics of knitting so simple that even the youngest crafters can make adorable friendship bracelets, colorful belts, doll scarves, and yarn snakes without any of the usual knitting drama.
Trust me – once they master this, they’ll be cranking out knitted creations faster than you can say “craft supplies.”
Why Toilet Roll Knitting is a Total Game-Changer
Here’s what makes this craft activity absolutely brilliant for parents and teachers:
It’s ridiculously simple. If your child can wrap yarn around a stick and lift it over, they can do this. The cardboard loom does most of the heavy lifting, and the repetitive motion is surprisingly meditative (read: quietly focused children).
Zero fancy supplies required. We’re talking cardboard tubes, craft sticks, yarn, and glue. That’s it. No expensive knitting kits or specialty tools needed.
Instant gratification. Unlike traditional knitting where you’re working on the same scarf for three months, kids can finish a bracelet in 20-30 minutes and actually wear their creation the same day.
Perfect for building fine motor skills. All that wrapping, lifting, and pulling strengthens those little finger muscles while they’re having a blast making something cool.
Endlessly customizable. Rainbow bracelets? Check. Long skinny scarves for dolls? Absolutely. Weird yarn snakes? Why not! The creative possibilities are endless.

What You’ll Need to Get Started
For the Loom:
1 cardboard tube (toilet paper roll, paper towel roll, or any similar tube)
2 craft sticks or popsicle sticks (you’ll cut these in half to make 4 pieces)
Hot glue gun (adult supervision required!)
Colorful duct tape (optional, but it makes the loom look way cooler)
4 small buttons (optional but HIGHLY recommended – this is the secret trick!)
For Knitting:
Yarn (any weight works, but medium weight is easiest for beginners)
Wooden skewer or toothpick (optional, helps hook the stitches)
Child-friendly blunt needle (for finishing)
Scissors

The Secret Button Trick You Need to Know
Here’s the insider tip that makes toilet roll knitting 100% less frustrating: glue small buttons to the top of each craft stick.
Why? Because without them, the yarn constantly slides off the sticks when kids are making their stitches, leading to groans of “It keeps falling off!” The buttons act as stoppers, keeping everything in place. This one tiny modification will save everyone’s sanity. You’re welcome.
How to Make Your Toilet Roll Knitting Loom
Step 1: Cut or break 2 craft sticks in half so you have 4 equal pieces.
Step 2: Position the 4 stick pieces evenly around the top of your cardboard tube – think of it like the four points of a compass: north, south, east, and west.
Step 3: Use a hot glue gun to secure each stick to the tube, making sure about 3/4 inch extends beyond the top edge of the roll. (Adults, this is your job!)
Step 4: Wrap the entire cardboard roll in colorful duct tape. This step is optional, but kids love picking their favorite colors and patterns, plus it makes the loom sturdier.
Step 5: Hot-glue one small button to the top of each craft stick. Make sure it’s close to the top edge so the yarn can’t escape!
Let the glue dry completely, and boom – you’ve got yourself a knitting loom!

How to Knit with Your Cardboard Loom: Step-by-Step
Now for the fun part! Here’s how to actually use this thing.
Casting On Your Stitches
Step 1: Drop the end of your yarn down through the center of the cardboard tube, letting about 4-5 inches of “tail” hang out the bottom. Keep a gentle hold on this tail as you work – it helps keep tension on your stitches.
Step 2: Working with the yarn attached to the ball, wrap it around the first craft stick once in a clockwise direction. The yarn should sit snugly at the base of the stick, right above where it meets the cardboard.
Step 3: Move to the next craft stick (going clockwise around the loom) and wrap the yarn around it once, also in a clockwise direction.
Step 4: Continue to the third and fourth sticks, wrapping each one once in the same clockwise direction.
Step 5: Gently push all the loops down to the bottom of the sticks. You’ve just cast on your first row of stitches!

Knitting Your Stitches (Here’s Where the Magic Happens!)
Step 1: Lay the working yarn (still attached to the ball) across the top of the first craft stick, just above the loop you already made. Don’t wrap it – just lay it across.
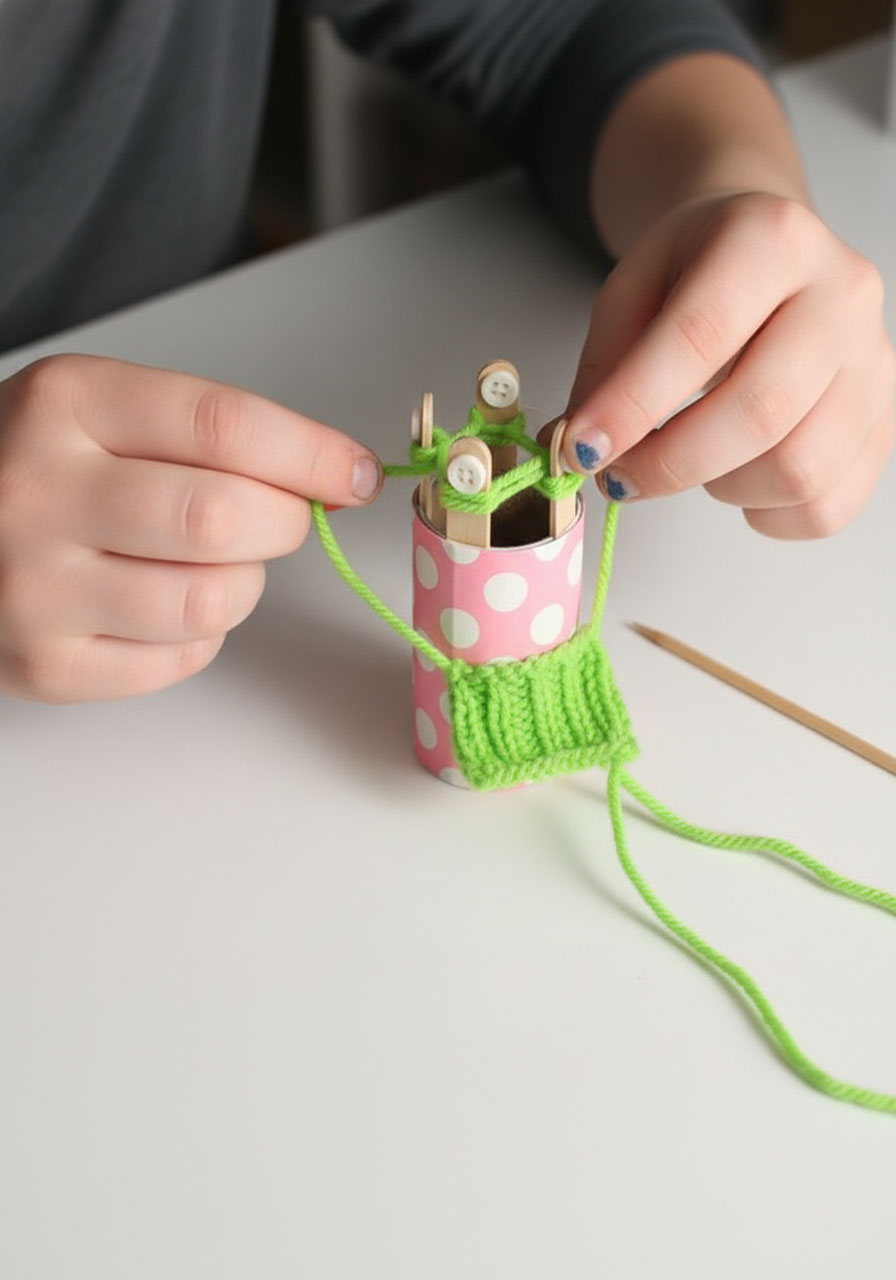
Step 2: With your fingers (or a wooden skewer if that’s easier), hook the lower loop and gently pull it up, over the yarn you just laid across, and completely off the craft stick. Let it drop down the other side of the stick.
Step 3: Give the tail hanging from the bottom of the tube a gentle tug to tighten up that stitch. Not too tight – just snug.
Step 4: Move to the next craft stick and repeat: lay the yarn across the top, hook the bottom loop, pull it up and over the yarn, and off the stick.
Step 5: Keep going around and around your loom, repeating this pattern: lay yarn across → hook bottom loop → pull up and over → off the stick.
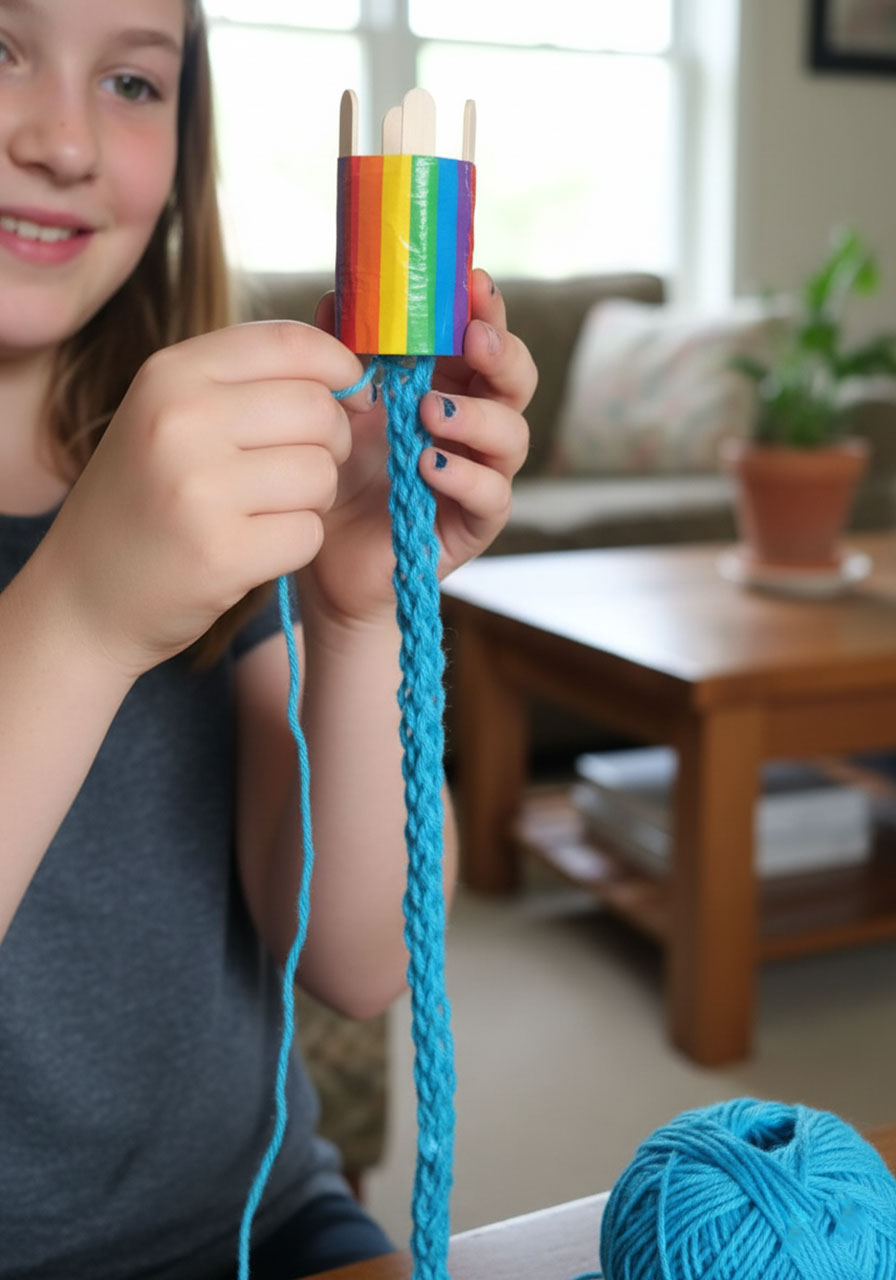
As you work, you’ll see a knitted tube start to form and grow down through the center of your cardboard roll. It’s so satisfying to watch! Remember to give that tail yarn a little tug every few stitches to keep everything neat and tidy.
Pro Tip for Kids: The rhythm is key here. Think “across, hook, over, off” as you work around the loom. Once you’ve got the rhythm down, you’ll be knitting without even thinking about it!
How Long Should You Knit?
Keep knitting until your tube reaches the length you want:
- Bracelet: 5-7 inches (depending on wrist size)
- Headband: 18-20 inches
- Doll scarf: 8-12 inches
- Belt: 25-30 inches
- Skinny scarf: 36+ inches
- Yarn snake: As long as patience allows!
Casting Off (Finishing Your Project)
When you’ve reached your desired length, it’s time to secure those stitches so your beautiful creation doesn’t unravel.
Step 1: Cut the working yarn, leaving a tail at least 6 inches long.
Step 2: Thread this tail through your child-friendly needle.
Step 3: Look at your craft sticks – each one should have just one loop remaining on it. Starting with any stick, slide the needle up under the loop and gently slip the loop off the stick and onto the yarn on your needle.
Step 4: Move around the loom, sliding each remaining loop off its stick and onto your needle. Take your time – you’ve got four loops total to collect.
Step 5: Once all four loops are off the loom and on your yarn, gently pull the tail. Watch as the loops close up tight! Tie a secure knot close to where the loops closed to keep everything in place.
Step 6: Thread the needle through to the opposite end of your knitted tube and tie a similar knot there to finish off the starting tail.
Step 7: Trim any excess yarn, and you’re done!

Creative Ideas: What to Make with Toilet Roll Knitting
The basic knitted tube is just the beginning! Here are some awesome ways kids can use their creations:
Friendship Bracelets: The classic! Knit a tube about 6 inches long, tie the ends together, and you’ve got the perfect gift for a bestie. Make a whole rainbow collection in different colors.
Stacked Bracelet Set: Create multiple bracelets in coordinating colors and stack them for a trendy layered look.
Headband: Knit a longer tube (about 18-20 inches), tie the ends together, and wear it as a cozy headband. Perfect for keeping hair back during sports or just looking stylish.
Doll Accessories: Make scarves, belts, or even jump ropes for dolls and action figures. Kids love creating custom accessories for their toys!
Bookmarks: Knit a 7-8 inch tube, flatten it, and add a button or charm to one end for a one-of-a-kind bookmark.
Yarn Snakes: Knit a really long tube, tie off both ends, and glue or sew on googly eyes and a felt tongue. Instant pet snake!
Gift Wrapping Ribbon: Use knitted tubes as unique, reusable ribbons for wrapping presents. So much cuter than regular ribbon!
Hair Ties: Knit a short 4-5 inch tube and tie the ends together for a soft, stretchy hair tie that won’t damage hair.
Keychains: Make a 3-4 inch tube, attach a key ring to one end, and add beads or charms for personality.
Wall Hanging: Knit tubes in various lengths and colors, then attach them to a stick or dowel for a colorful boho wall decoration.

Tips for Teachers: Using Toilet Roll Knitting in the Classroom
This activity is absolutely perfect for classroom settings! Here’s how to make it work smoothly:
Prep Looms in Advance: Have parent volunteers or older students help make the looms ahead of time. You can make a classroom set of 30 looms in about an hour.
Create a Loom Library: Keep the looms in a designated bin so they’re reusable for multiple classes or throughout the year.
Pair Struggling Students: Have kids who “get it” partner with those who are still learning. Peer teaching is incredibly effective for this activity.
Make it Cross-Curricular: Tie it into math (measuring, patterns, counting stitches), history (traditional crafts), or even science (textiles and fibers).
Set Up Finish Stations: Designate a “casting off” station where you or a classroom helper can assist kids with finishing their projects. This keeps things moving and prevents bottlenecks.
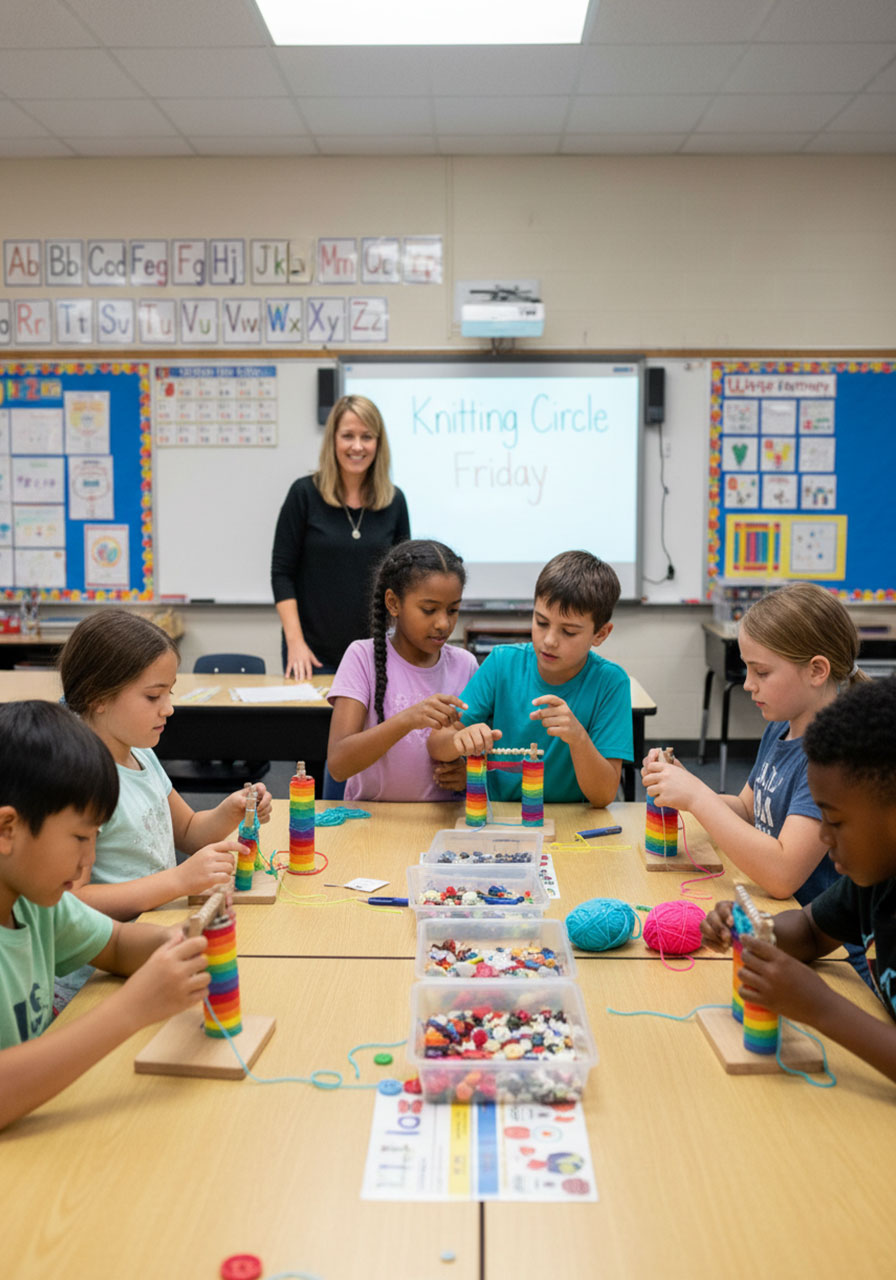
Host a “Knitting Circle”: Make it a regular Friday afternoon activity where kids can work on their projects while you read aloud or play calm music.
Troubleshooting Common Issues
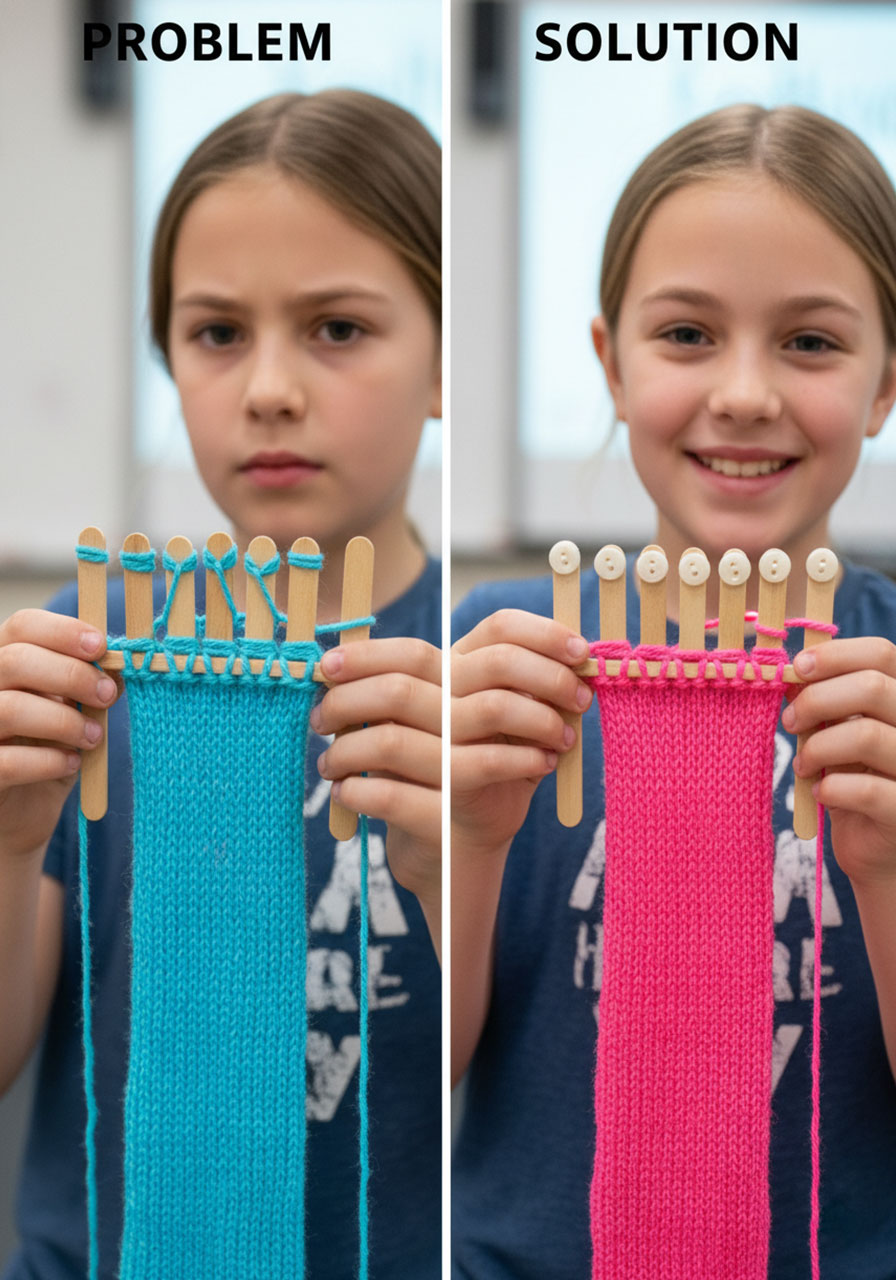
Problem: The yarn keeps sliding off the sticks. Solution: Make sure you’re using the button stoppers! If you are and it’s still happening, the buttons might be too small or placed too far down the stick. Re-glue them closer to the top.
Problem: The stitches are too loose and sloppy. Solution: Remind kids to give the tail yarn a gentle tug after each stitch. Also check that they’re pulling the loops all the way off the sticks, not leaving them hanging halfway.
Problem: The stitches are too tight and hard to work with. Solution: They’re pulling the tail yarn too hard! Encourage a gentler touch – snug but not strangling.
Problem: The knitted tube isn’t coming through the bottom of the cardboard roll. Solution: Give it a gentle tug from the bottom to start the tube feeding through. Sometimes it just needs a little encouragement to get going.
Problem: A loop fell completely off the loom. Solution: Don’t panic! Just pick up the loop with your fingers and slip it back onto the appropriate stick. It’s totally fixable.
Problem: Kid lost track of which stick is next. Solution: Put a small sticker or mark on one stick to designate it as the “start” stick. Always begin there and work clockwise.
Why Kids (and Adults!) Love This Craft
There’s something incredibly satisfying about watching your knitted tube grow longer and longer as you work. It’s meditative, creative, and productive all at once. Plus, kids get the thrill of wearing or gifting something they made entirely by themselves.
Parents love it because it’s a screen-free activity that keeps kids engaged for real chunks of time (we’re talking 30-45 minutes of focused crafting). Teachers love it because it builds fine motor skills, teaches patience and following directions, and results in a tangible finished product that kids are genuinely proud of.
And here’s the best part: once kids master the basic technique, they’ll come up with their own creative ideas for what to make next. We’ve seen kids experiment with multiple colors, try different yarn textures, and even figure out how to make tubes of different sizes by adjusting their technique.
Final Thoughts: Your New Go-To Craft Activity
Toilet roll knitting is one of those rare craft activities that’s genuinely easy, requires minimal supplies, and produces results that kids actually want to keep and use. Whether you’re a parent looking for a rainy day activity, a teacher seeking a hands-on classroom project, or a caregiver trying to keep kids creatively engaged, this one’s a winner.
So grab those cardboard tubes from the recycling bin, raid your craft supplies for some sticks and yarn, and get ready to introduce the kids in your life to the wonderfully addictive world of knitting. Those friendship bracelets aren’t going to make themselves!
Happy knitting!
More Kid’s Party Ideas to Keep the Fun Rolling:
11 Ridiculously Simple Fine Motor Activities That’ll Keep Toddlers Busy for Hours
Sticker Lines: The Ridiculously Simple Activity That Keeps Kids Busy for Hours
101+ Fun Questions To Ask Kids That’ll Get Them Talking (FREE Printable!)
15+ Brilliant Games You Can Play With UNO Cards (Way Beyond the Rules!)
Cup Stacking Tower Challenge: The Epic Building Game That’ll Keep Kids Busy for Hours
Build a LEGO Slingshot Car: The Epic Racing Activity Your Kids Will Beg to Do Again
Muffin Tin Coin Counting Activity: The Sneakily Brilliant Math Game Kids Actually Want to Play
Matching Pairs: The Toddler Activity That’s Equal Parts Learning and Fun
