
There’s something deeply magical about the moment confetti explodes into the air. It doesn’t matter how old you are – that burst of color and sparkle just makes everyone feel alive.
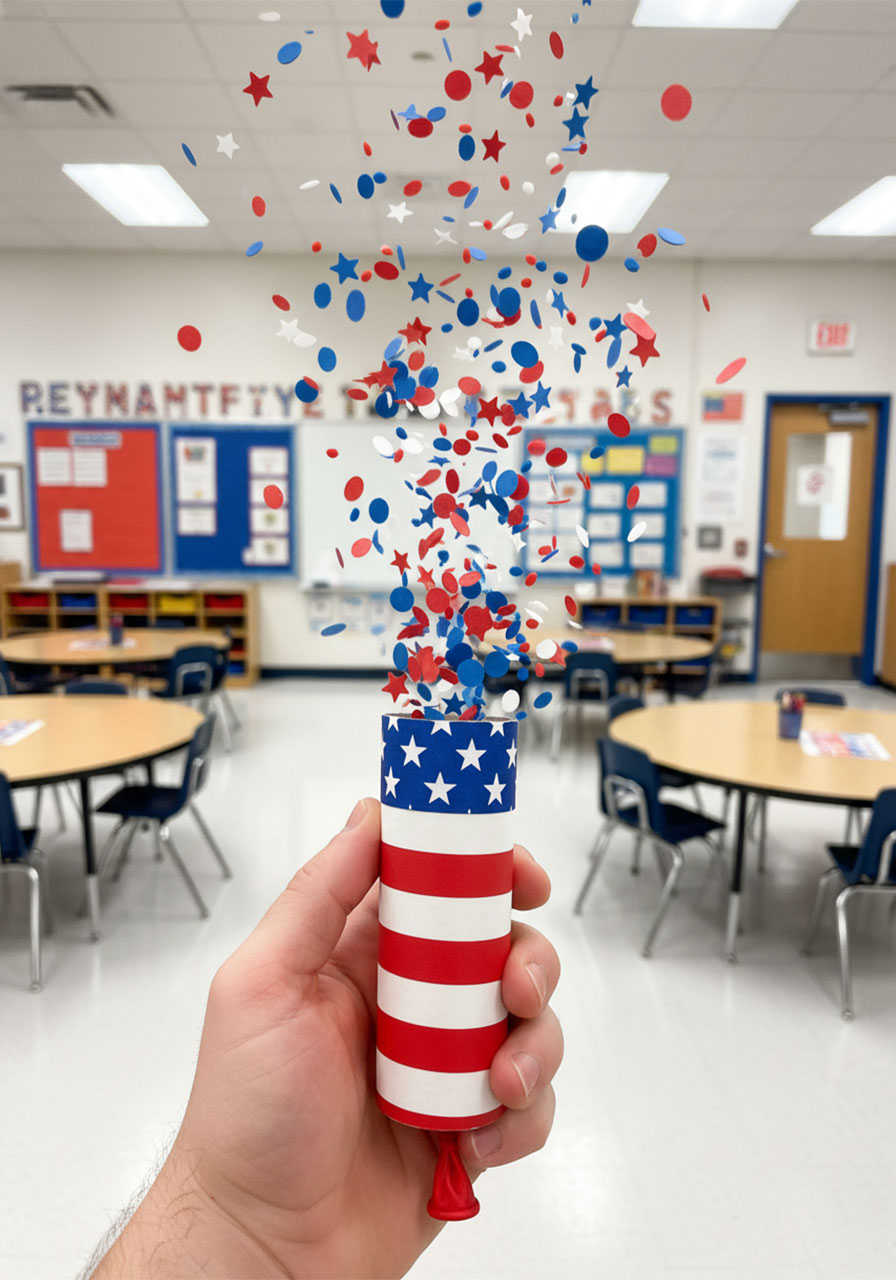
And here’s the best part: you don’t need to buy fancy party supplies to get that feeling. These DIY confetti poppers take less than 30 minutes to make, cost almost nothing, and look absolutely stunning in red, white, and blue for the 4th of July.
Whether you’re hosting a backyard barbecue, a neighborhood block party, or just celebrating with your family, these homemade party poppers are the kind of detail that makes your guests go “Wait – you made these yourself?!”
Spoiler: Yes. Yes, you did. And you’re going to feel great about it.
Why You’ll Love Making These Confetti Poppers
First things first – let’s talk about why this craft is an absolute winner for your 4th of July celebration.
These poppers are made from toilet paper rolls and balloons. That’s right – cardboard tubes you’d normally toss in the recycling bin become the star of your party. It’s the kind of upcycled, budget-friendly craft that feels like a small act of creativity AND self-care rolled into one.
There’s real joy in making something beautiful with your own hands. And if you’re someone who loves projects that combine a calming, focused activity with a wow-worthy result, this one is for you.
They’re also perfect to make with your kids, your girlfriends, or even as a solo afternoon activity with your favorite playlist on in the background. Think of it as your patriotic craft therapy session.

What You’ll Need
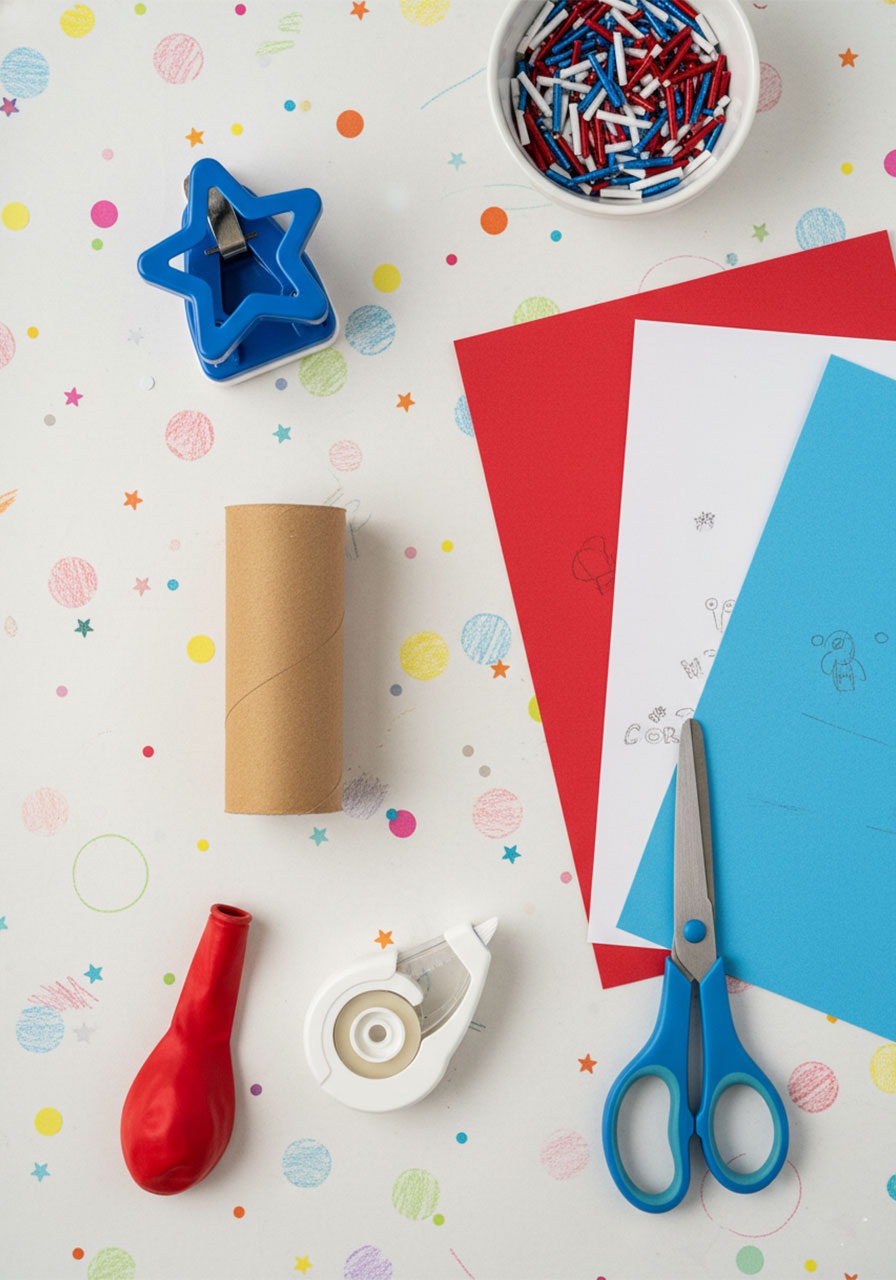
The supply list is short, sweet, and very budget-friendly. Here’s everything you need to gather before you start:
Balloons (red, white, or blue – pick your patriotic palette!)
White paper
Red paper
Blue paper or cardstock
Empty toilet paper rolls (one per popper)
Confetti – store-bought or homemade (more on that below!)
Scissors
Tape
Glue tape (also called a tape runner – trust us, it makes life easier)
Star hole punch, 1-inch size
That’s it! If you have a paper cutter at home, grab that too – it’ll make cutting those thin red stripes a total breeze.
What Confetti Should You Use?
This is where you get to have a little fun with it. You have a few great options depending on how much time and budget you’re working with.
Store-bought confetti is the easiest route. Look for red, white, silver, and blue tube confetti for that classic patriotic look. Star-shaped confetti is especially cute for the 4th of July.
Homemade confetti is surprisingly easy and satisfying to make. Grab a hole punch and punch out circles from red, white, and blue paper. You can also use a star punch to make tiny stars – how adorable is that?
Eco-friendly options: If you’re using these poppers outside (hello, backyard party!), consider biodegradable confetti made from rice paper or seed paper. It’s just as pretty and you won’t be cleaning up glitter for the next three months.
No matter what you choose, aim for about 2 to 3 tablespoons of confetti per popper. That’s the sweet spot for a satisfying launch without making a total mess. (Well – a controlled mess. This is still confetti, after all.)
How to Make DIY Confetti Poppers – Step by Step
Let’s get into it! Follow these steps and you’ll have a gorgeous, fully functional confetti popper in about 20 to 30 minutes.
Step 1: Prep Your Balloon
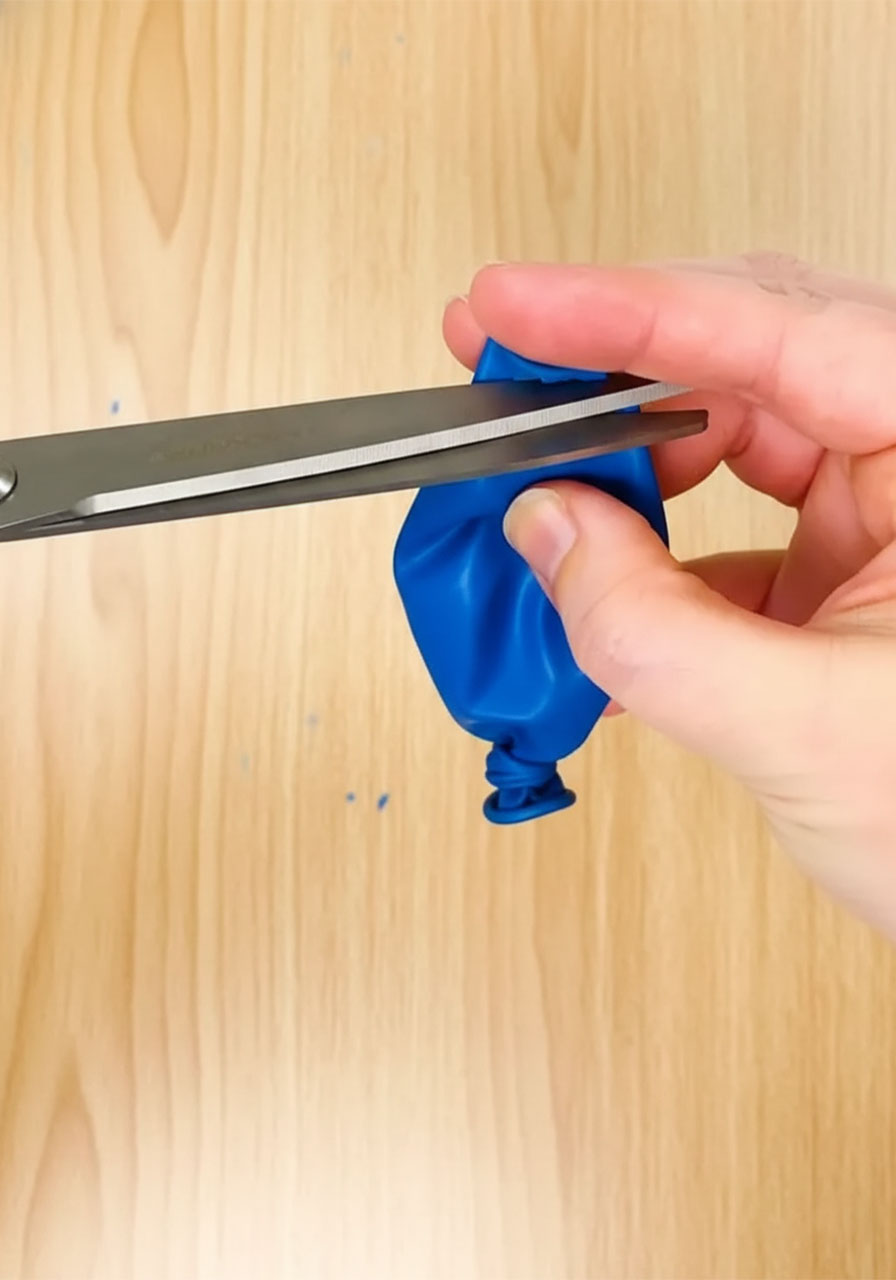
Start with a deflated balloon in red, white, or blue. Tie a knot at the open end of the balloon.

Next, use your scissors to carefully snip off about ½ inch from the very top (the rounded tip) of the balloon. This creates the open end that will stretch over your paper roll.
Don’t cut too much – you just need a small opening. The smaller it is, the more tension it creates, and the bigger your confetti explosion will be!
Step 2: Attach the Balloon to the Toilet Paper Roll
Now take your toilet paper roll and stretch the cut end of the balloon over one end of the roll. You want it to cover the opening completely and sit snugly.
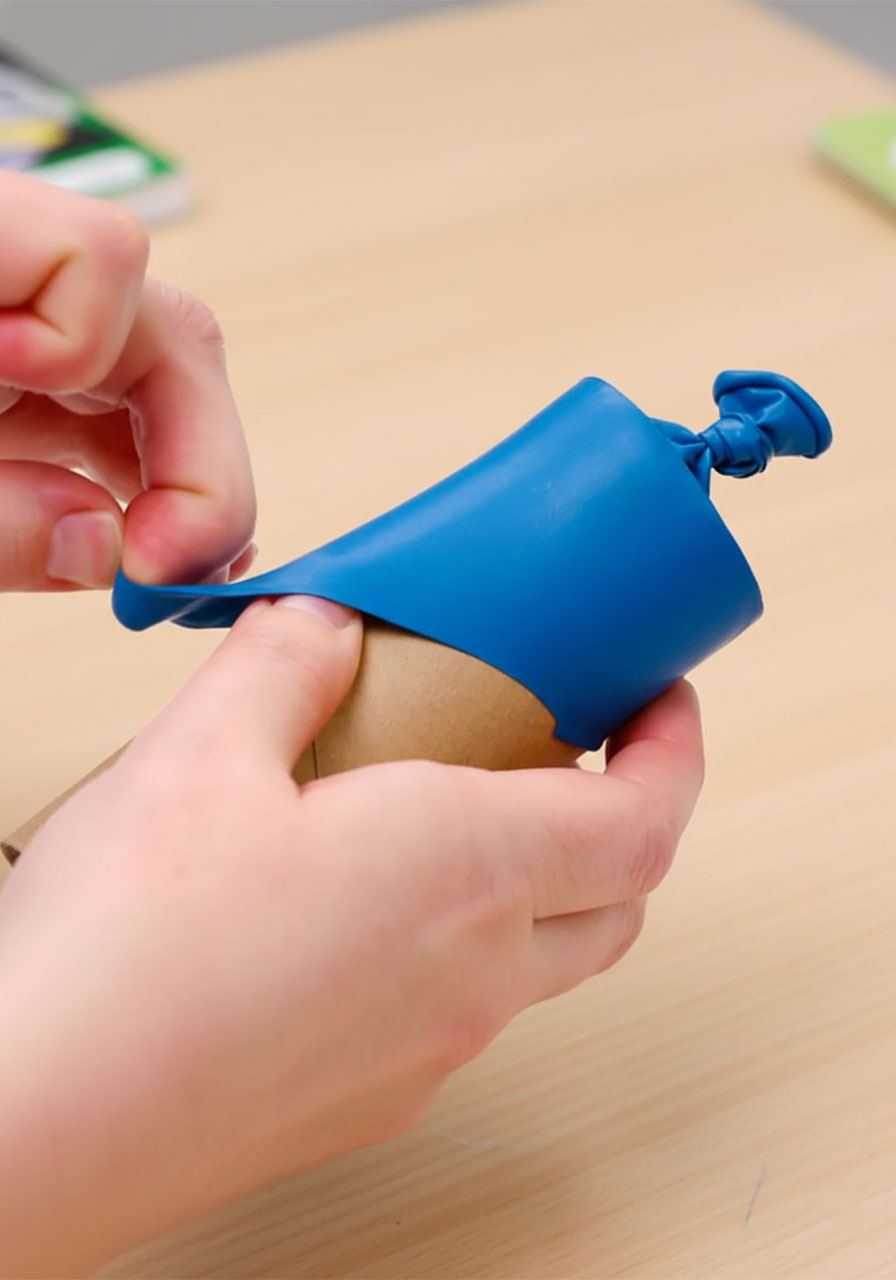
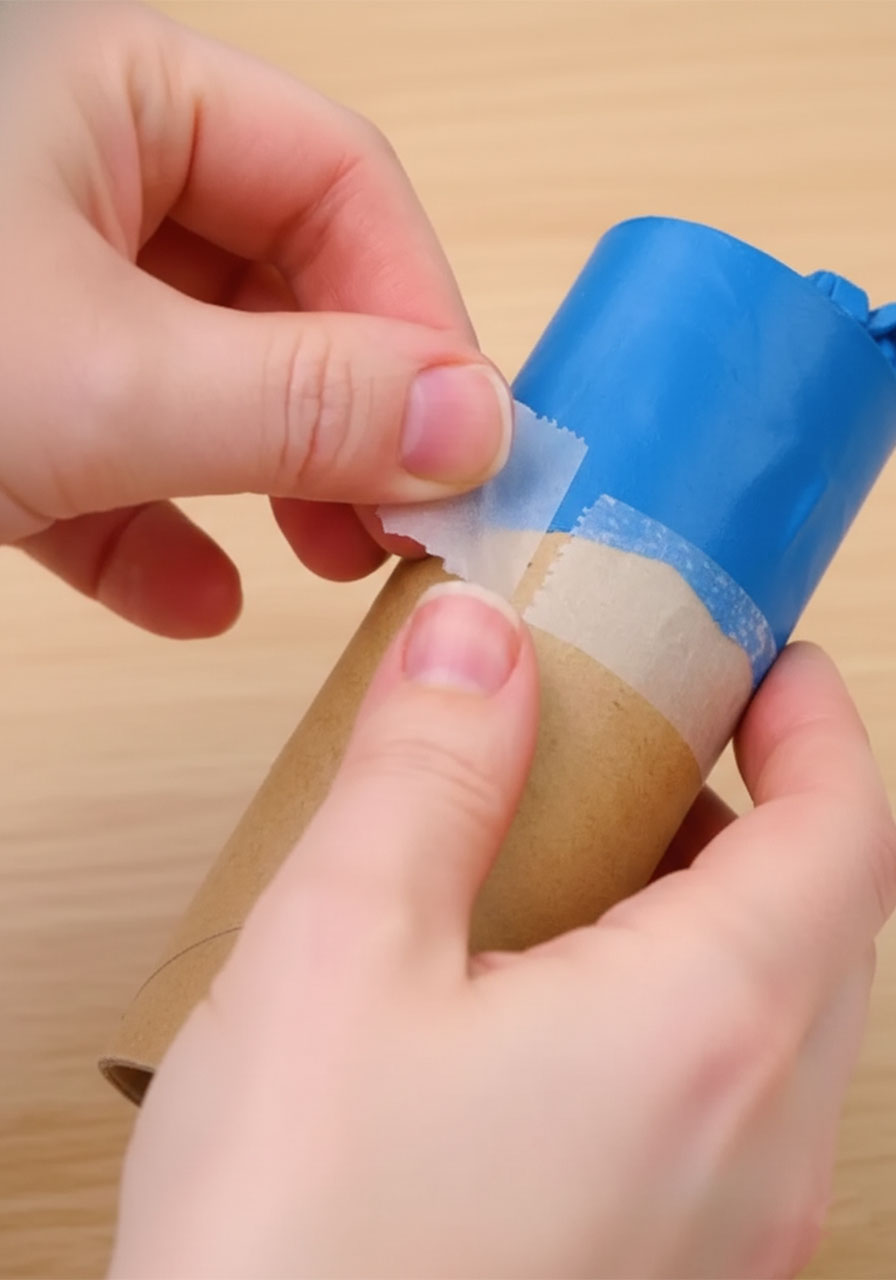
Secure the balloon in place with tape, wrapping it around the edge where the balloon meets the cardboard tube. Press it down firmly so it stays put when you pull and release.
This is the “engine” of your confetti popper. The balloon creates the air pressure that launches the confetti. Pretty genius, right?
Step 3: Cut Your Paper Pieces
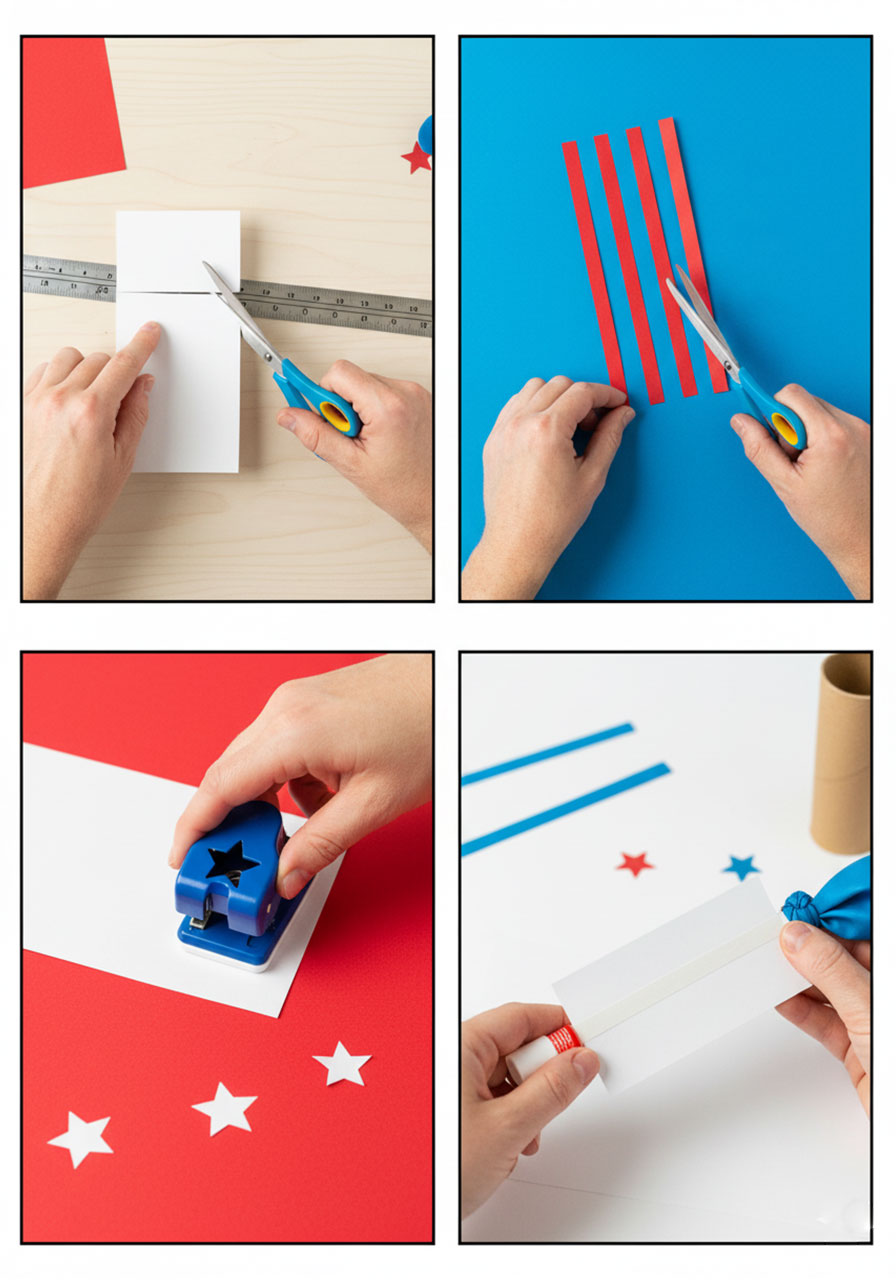
Now it’s time to cut all the decorative paper pieces before you start assembling. Doing all your cutting at once makes the decorating step go much faster.
Here’s exactly what to cut:
White paper: One piece, 6 inches long × 4½ inches tall (or whatever size covers your whole paper roll)
Red paper: Four strips, each 6 inches long × ¼ inch wide
Blue paper: One section, 6 inches long × 1½ inches wide
White stars: Use your star punch to punch out 4 white stars
If your scissors are making those thin red strips tricky to cut straight, this is a great moment to use a paper cutter or ruler as a guide. Straight stripes make a big visual difference in the finished product!
Step 4: Wrap the Base in White Paper
Apply glue tape (or regular tape) to one short end of your white paper. Roll it around the paper roll and press it into place.
The glue tape trick here is a game-changer – it helps you get the paper on perfectly straight without it shifting around as you wrap. If you’ve ever tried to get wrapping paper on perfectly straight, you know the struggle is real. Glue tape solves it.
Now you have a clean white canvas to decorate!
Step 5: Add the Red Stripes
Take your first red strip and use glue tape on one end to attach it about ¼ inch from the bottom of the paper roll. Wrap it all the way around and secure the end with tape.
Repeat with the remaining three red strips, spacing them evenly up the roll. When you’re done, you’ll have that classic red-and-white striped pattern that immediately says “America.”
Even spacing is the key to making these look polished. Eyeballing it works just fine – no ruler required.
Step 6: Add the Blue Band at the Top
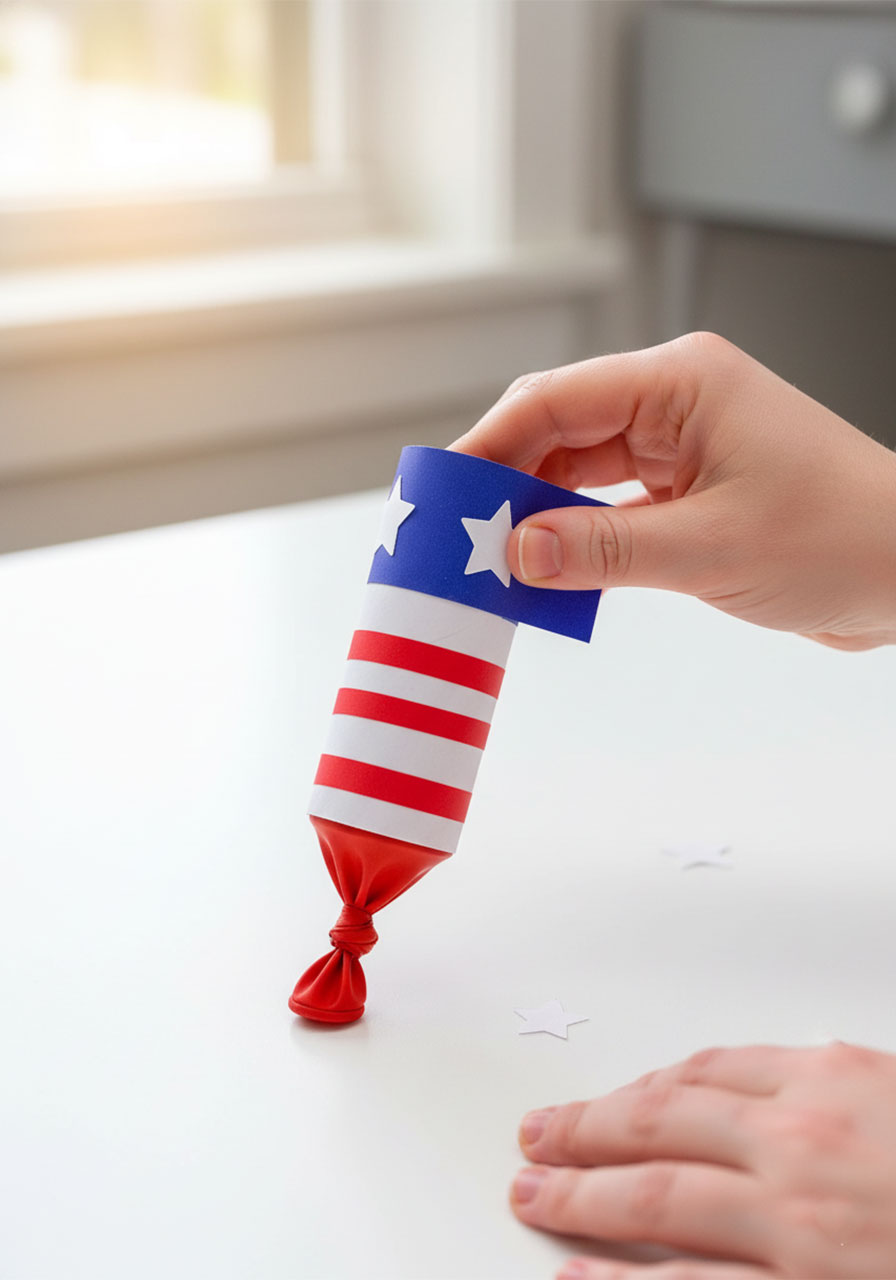
Apply glue tape to one short end of your blue paper strip. Attach it to the top of the paper roll, wrapping it around and securing the other end with tape.
This blue band at the top gives you your “canton” – the place where the stars will go. It anchors the whole patriotic look beautifully.
Step 7: Add the White Stars
This is the step where everything comes together and starts looking really good.
Apply glue tape or a glue stick to the back of each white star. Press them onto the blue band, spacing them evenly around the roll – roughly one on each “side” of the cylinder.
Pro tip: If you used cardstock or thick scrapbook paper to punch out the stars, use tacky glue instead of a glue stick. It holds the edges down much better so you won’t get curling corners.
Step 8: Load It Up With Confetti
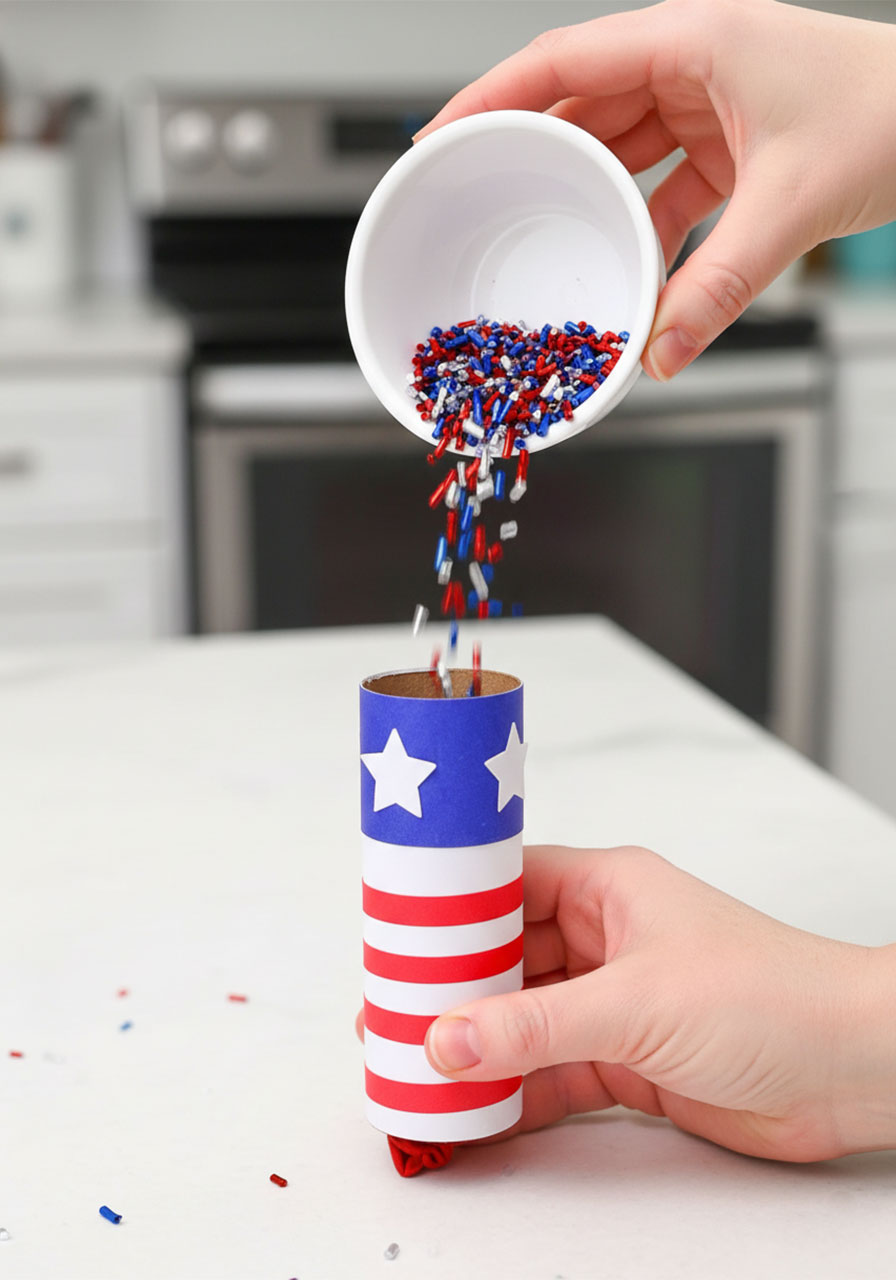
You’re in the home stretch! Drop 2 to 3 tablespoons of confetti into the open top of your paper roll.
Hold the popper with the balloon end pointing down and the open confetti end pointing up while you’re filling it. This keeps everything in place until you’re ready to fire.
Step 9: Pop It!
This is the moment you’ve been building toward. Hold the knot of the balloon firmly, pull it down and slightly outward, then let go.
Watch the confetti EXPLODE into the air in a gorgeous burst of red, white, and blue.
It never gets old. I promise.
Helpful Tips for the Best Results
A few things I’ve learned that make a real difference:
Cut less balloon, not more.
The smaller the opening you cut in the balloon tip, the more tension it has, which means a more powerful launch. Start with ½ inch and don’t go bigger unless the balloon is too hard to stretch over the roll.
Use a paper cutter for the stripes.
Those thin ¼-inch red strips are the trickiest part of this whole craft. A paper cutter makes them perfectly straight and saves a ton of time.
Transporting poppers to a party?
Cover the open top with a small square of saran wrap or tissue paper and secure it with a rubber band. They’ll travel perfectly with the confetti already loaded and ready to go.
Making these with kids?
Let them do the decorating (wrapping paper, adding stars) and you handle the balloon trimming and tape-securing. It’s the perfect collaboration – you handle the finicky bits, they get to feel like the creative genius behind the whole thing.
4 Fun Ways to Personalize Your Confetti Poppers
The red, white, and blue design is a classic, but don’t let that stop your creativity! Here are some ideas to make your poppers even more uniquely you:
Use glitter scrapbook paper as your base instead of plain white. It catches the light beautifully and makes the finished popper look like something you’d find at a boutique party store.
Try pinking shears for zigzag stripes. Instead of straight red strips, cut them with pinking shears for a fun, festive sawtooth edge. Such a small change, such a big visual payoff.
Add stickers. American flag stickers, star stickers, or even “Happy 4th!” stickers from the dollar section are an easy way to add personality in seconds.
Draw fireworks with a gel pen. On a black or white base, use a gold or silver gel pen to draw fireworks bursting upward. It looks incredibly cool and requires zero artistic talent – just a few starburst lines.
Mix up the star sizes. Use a large star punch for one statement star and a small star punch for scattered mini stars around it. The variation in scale looks really dynamic.

How to Make a Confetti Popper Without a Balloon
No balloons on hand? No problem – here’s a clever alternative that works just as well.
Cut two small slits on opposite sides of your paper roll, going about halfway down. Cover the opposite end of the roll with a small piece of tissue paper (this is now the bottom/launch end).
Thread a rubber band through the two slits so it stretches across the inside of the tube. Pull it down over the tissue paper on the outside so it sits snugly against the bottom.
To create a pull tab, slide a thin strip of paper under the rubber band on the outside and glue the ends together to form a little loop you can grab.
Fill the roll with confetti through the top, then pull the tab firmly downward. The snap of the rubber band launches the confetti through the tissue paper at the bottom. It’s a totally satisfying pop!
When Else Can You Use These Poppers?
The 4th of July is the obvious moment for these beauties, but once you get the hang of making them, you’re going to want an excuse to make them for everything.
They’re absolutely perfect for:
Birthdays – customize with the birthday person’s favorite colors
New Year’s Eve – gold and silver confetti for the midnight countdown
Bachelorette parties – white and blush pink with gold stars
Graduations – school colors make these incredibly personal and thoughtful
Baby showers – soft pastels for a gender reveal or welcome celebration
Any random Tuesday when you just need a little burst of joy
That last one is only half a joke. There’s something genuinely mood-lifting about popping one of these, even when there’s no occasion at all. Sometimes you just need to watch confetti fly.

The Bottom Line
These DIY confetti poppers are proof that the most memorable party moments don’t come from expensive decorations – they come from thoughtful touches made with a little time and a lot of heart.
You’ll spend maybe 30 minutes making these, and your guests will be talking about them for the rest of the summer. That’s the best return on investment in party planning.
So grab those toilet paper rolls, pull out the red, white, and blue paper, and get crafting. Your 4th of July celebration just leveled up – and you did it yourself.
Happy crafting, and happy 4th of July! 🎉
More 4th of July Ideas to Keep the Fun Rolling:
Firework Salt Painting: The Easiest 4th of July Craft That’ll Wow Every Kid (and Mom!)
How to Make a Patriotic Paper Plate Wind Catcher (Easy Kids Craft for the 4th of July!)
Memorial Day Star Fingerprint Craft for Kids (Star Template!)
Simple Paper Plate Flag Craft for Kids (Patriotic Activity)
Coffee Filter Watercolor Fireworks Craft: The Most Magical 4th of July Activity for Kids
12 Fun & Creative Memorial Day Crafts for Kids (Patriotic Activities the Whole Family Will Love)
Bald Eagle Craft for Kids: Template + Step-by-Step Guide for Groups of 20!
