You want a festive activity that’s easy to pull off, keeps the kids busy, and ends with something genuinely beautiful hanging on your wall. I have exactly what you need.
This firework salt painting craft has been floating around the internet for years – and for good reason. The finished product looks like you spent hours on it. But here’s the secret: it literally takes 20 minutes of hands-on time, and most of the supplies are probably already sitting in your kitchen cabinet right now.
Yes, really. Salt. Glue. Watercolor paint. That’s it.
Whether you’re hosting a 4th of July party, planning a summer activity for the kids, or just looking for a rainy-day project that produces something gorgeous – this one is a guaranteed winner.
Let’s get into it.

What Is Firework Salt Painting?
If you’ve never tried salt crafting before, prepare to have your mind a little blown.
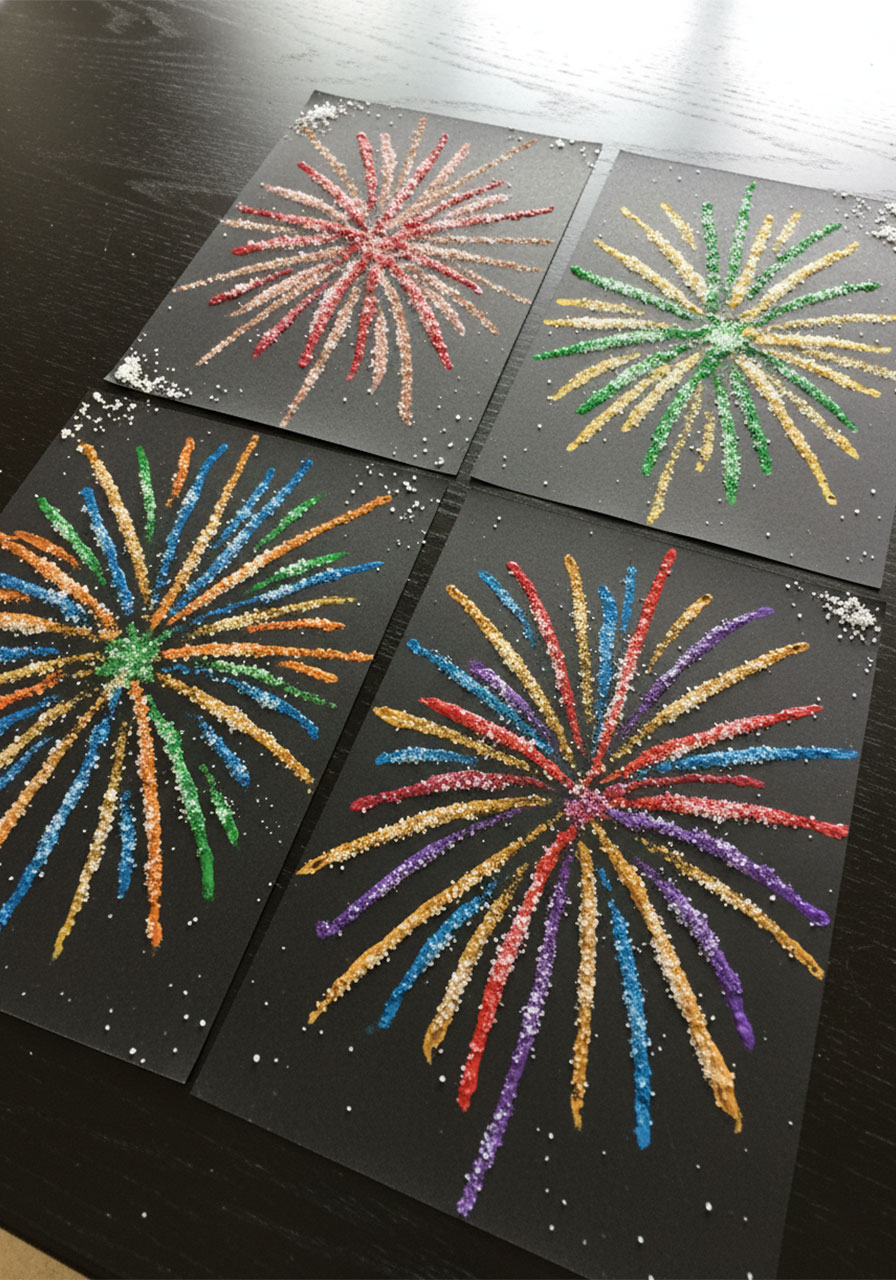
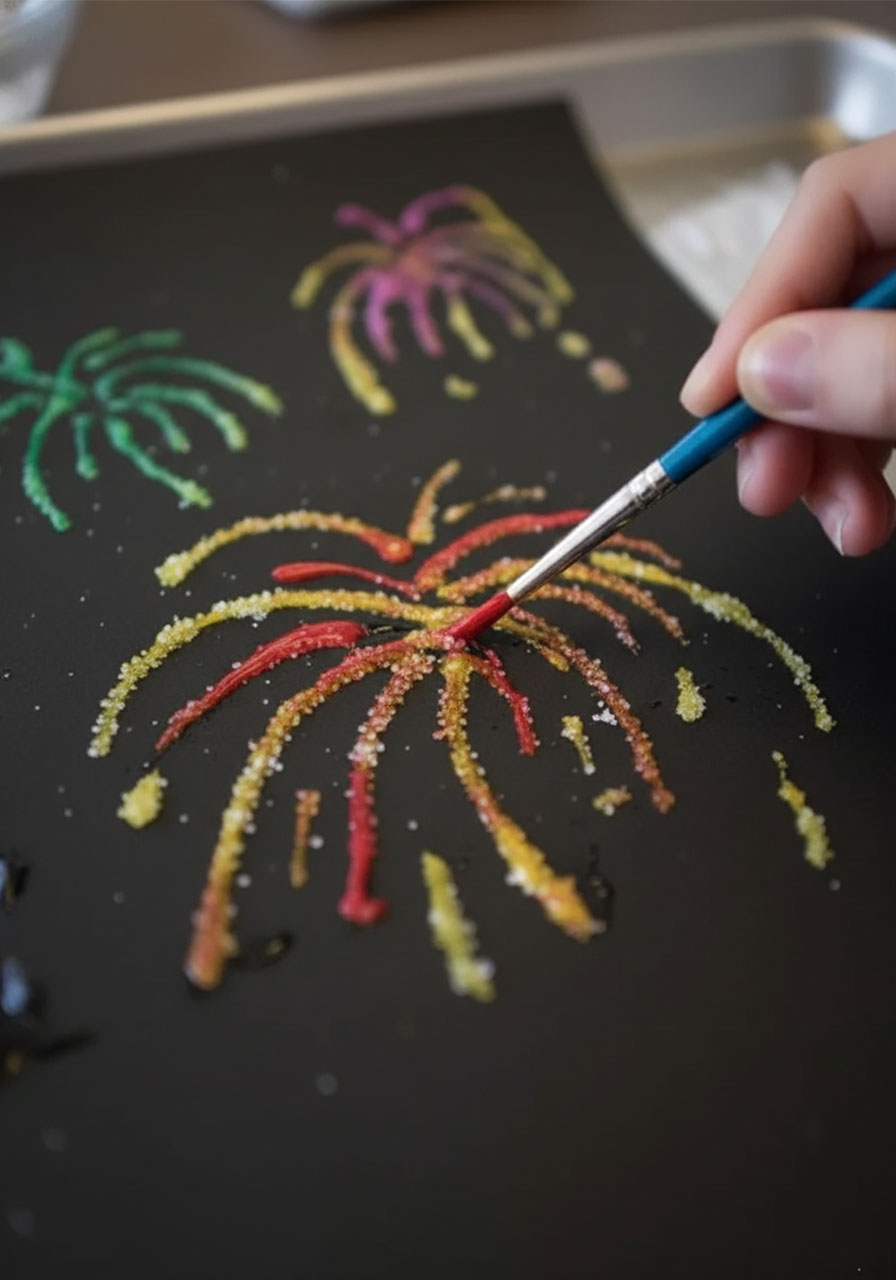
The basic idea is simple: you draw a design with white school glue, coat the wet glue in salt, and then touch watercolor paint to the salted surface. The paint absorbs into the salt and spreads in this dreamy, blended, almost magical way – creating a watercolor effect that looks like real bursting fireworks against a night sky.
It’s part craft, part science experiment, and 100% delightful.
Kids love the sensory experience of pouring the salt and watching the colors bleed and blend together. And honestly? It’s just as satisfying for adults. There’s something deeply therapeutic about watching those colors travel through the salt crystals.
It’s also the kind of activity that naturally builds fine motor skills, creativity, and focus – without feeling like “educational.” It just feels like pure fun.

What You’ll Need
Before you start, gather everything together. The setup takes about 5 minutes, and having it all in one place makes the whole process smooth and stress-free.
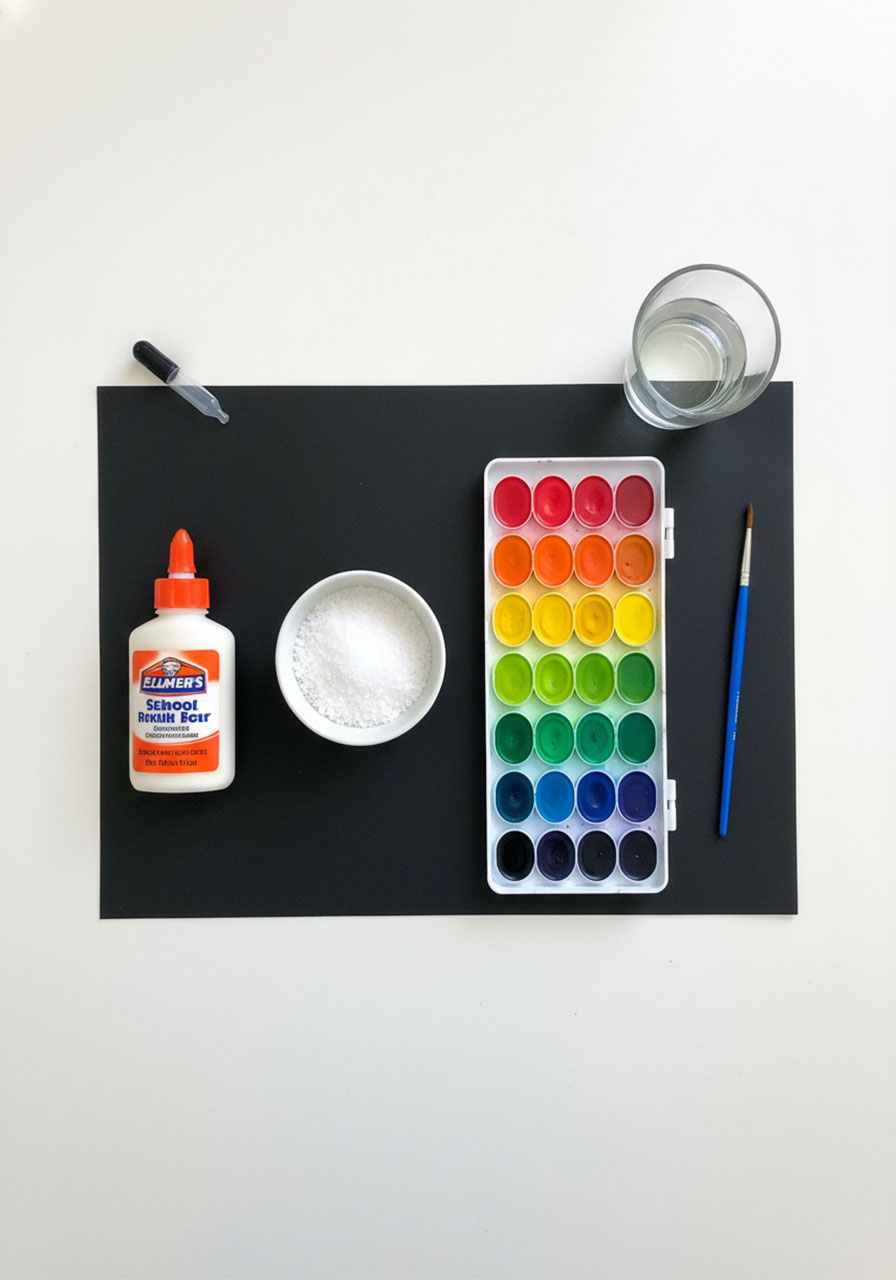
Supplies:
Black cardstock or black poster board (this is key for the firework effect – the dark background makes the colors pop dramatically)
White school glue in a squeeze bottle (Elmer’s works perfectly)
Table salt (fine, regular table salt – not coarse sea salt)
Liquid watercolor paints or watercolor pan set
A thin paintbrush
A small bowl or tray to pour salt over your design
A baking sheet or newspaper to work on (trust me – the salt gets everywhere)
Optional but helpful:
An eyedropper or pipette (great for younger kids – even easier than a brush)
Food coloring mixed with water (budget-friendly alternative to watercolors)
Red, white, and blue glitter (a fun variation for the little ones)
Hairspray (to seal your finished piece)
A quick note on paper: black cardstock is strongly recommended over white. The dark background is what makes your fireworks look like they’re lighting up a real night sky. White paper works technically, but the effect is far less dramatic.
A quick note on salt: Fine table salt is your best friend here. Coarse salt doesn’t stick as well to the glue and tends to fall off, which can be frustrating. Stick with regular table salt and you’ll have a much easier time.
Step-by-Step Tutorial: How to Make Firework Salt Paintings
Step 1: Protect Your Work Surface
This craft is fun, but it is messy. Lay down a sheet of newspaper or place your cardstock on a baking sheet before you start.
The baking sheet is actually ideal because it catches all the excess salt, which you can then reuse for your next piece. Less waste, easier cleanup – win-win.
Step 2: Draw Your Firework Design with Glue
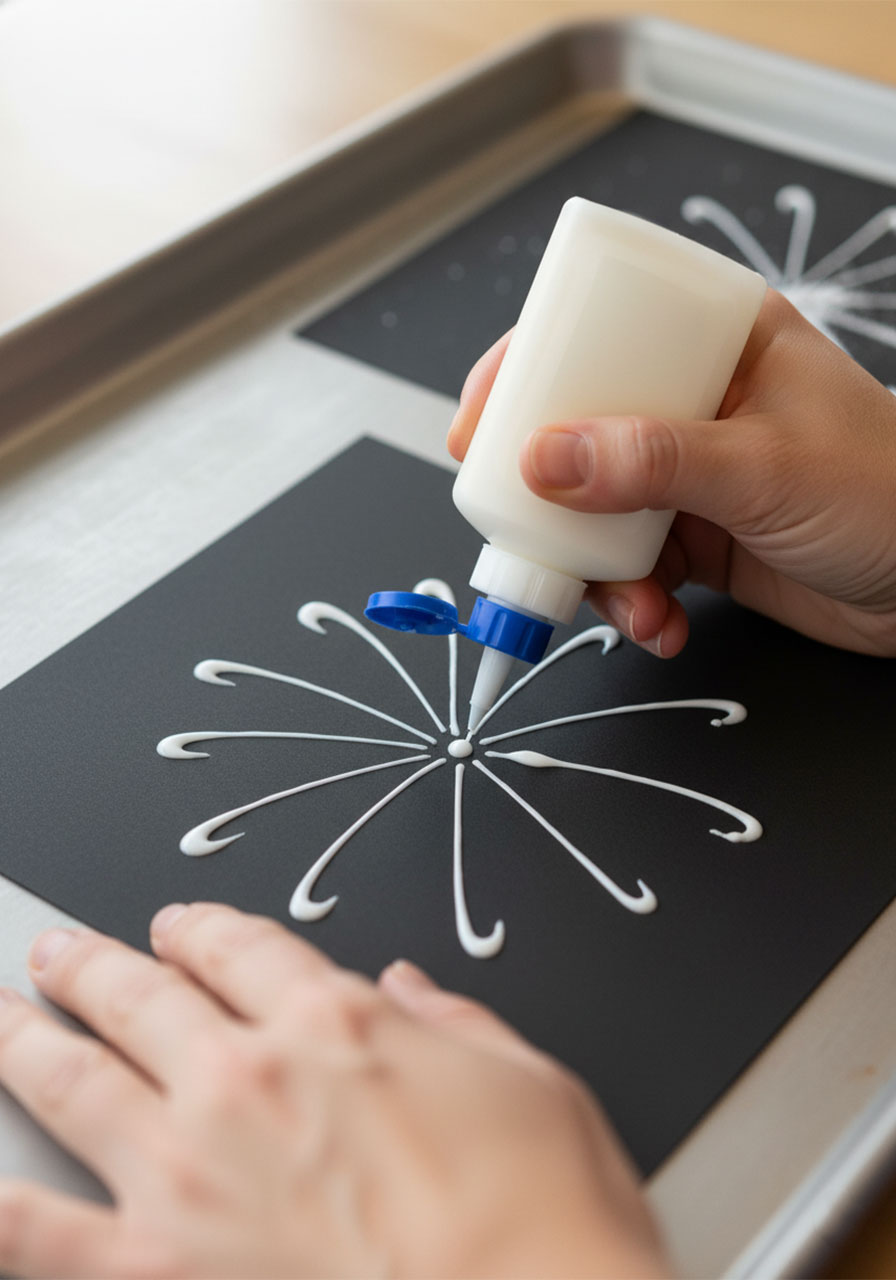
Pick up your squeeze bottle of white school glue and start drawing your firework shapes directly onto the black cardstock.
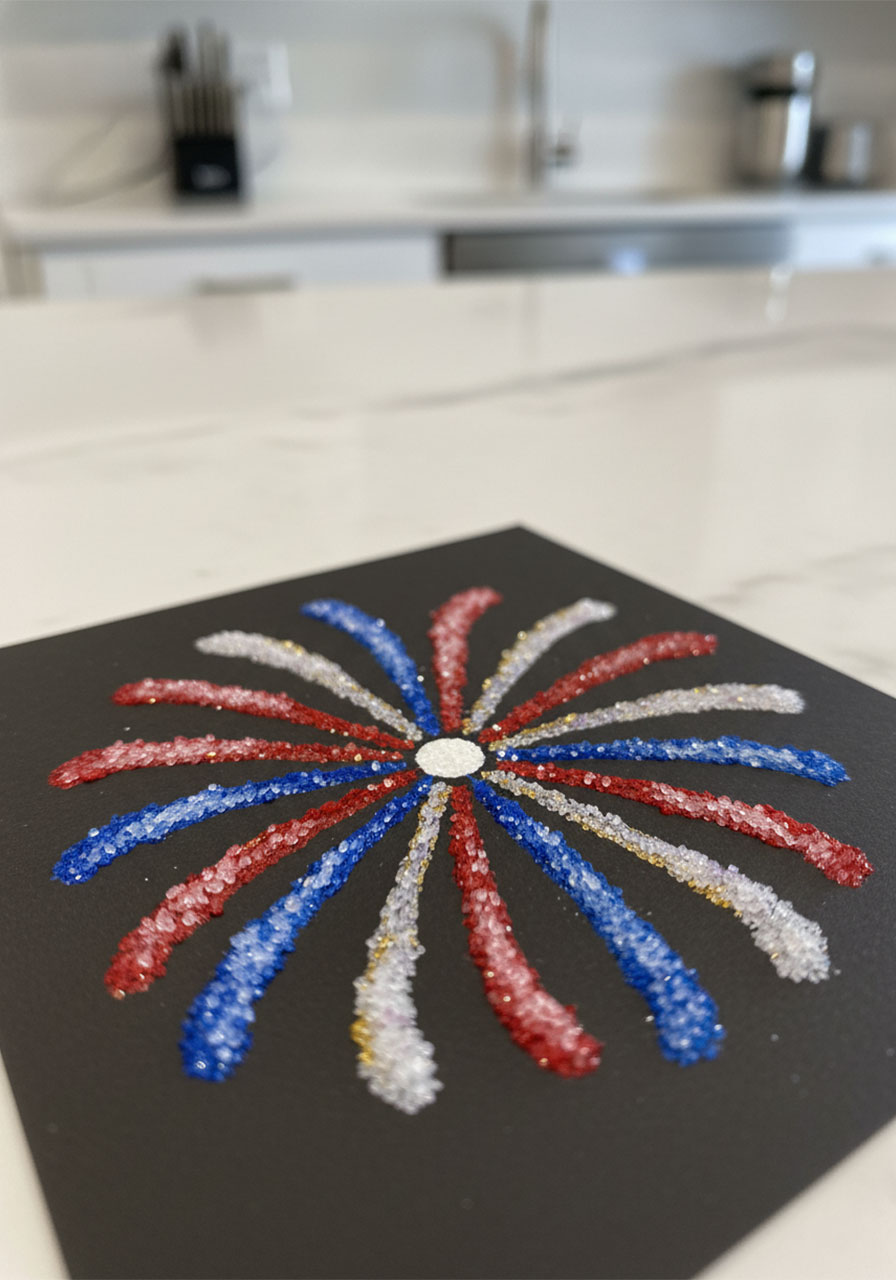
A basic firework shape is simple: draw a center dot, then add 6-10 curved lines radiating outward from it, like an asterisk with a curve. Make the lines droop slightly at the ends for that classic “burst” look.
Pro Tip: Keep your glue lines thin and spaced apart. If lines are too thick or close together, the salt will clump and the colors won’t blend as beautifully. Think delicate, not chunky.
You can draw as many fireworks as you want across your paper. A sky full of bursts looks absolutely stunning when it’s done – and it gives kids plenty of room to experiment with different colors.
Don’t overthink the design. Even simple shapes look incredible once the paint goes on.
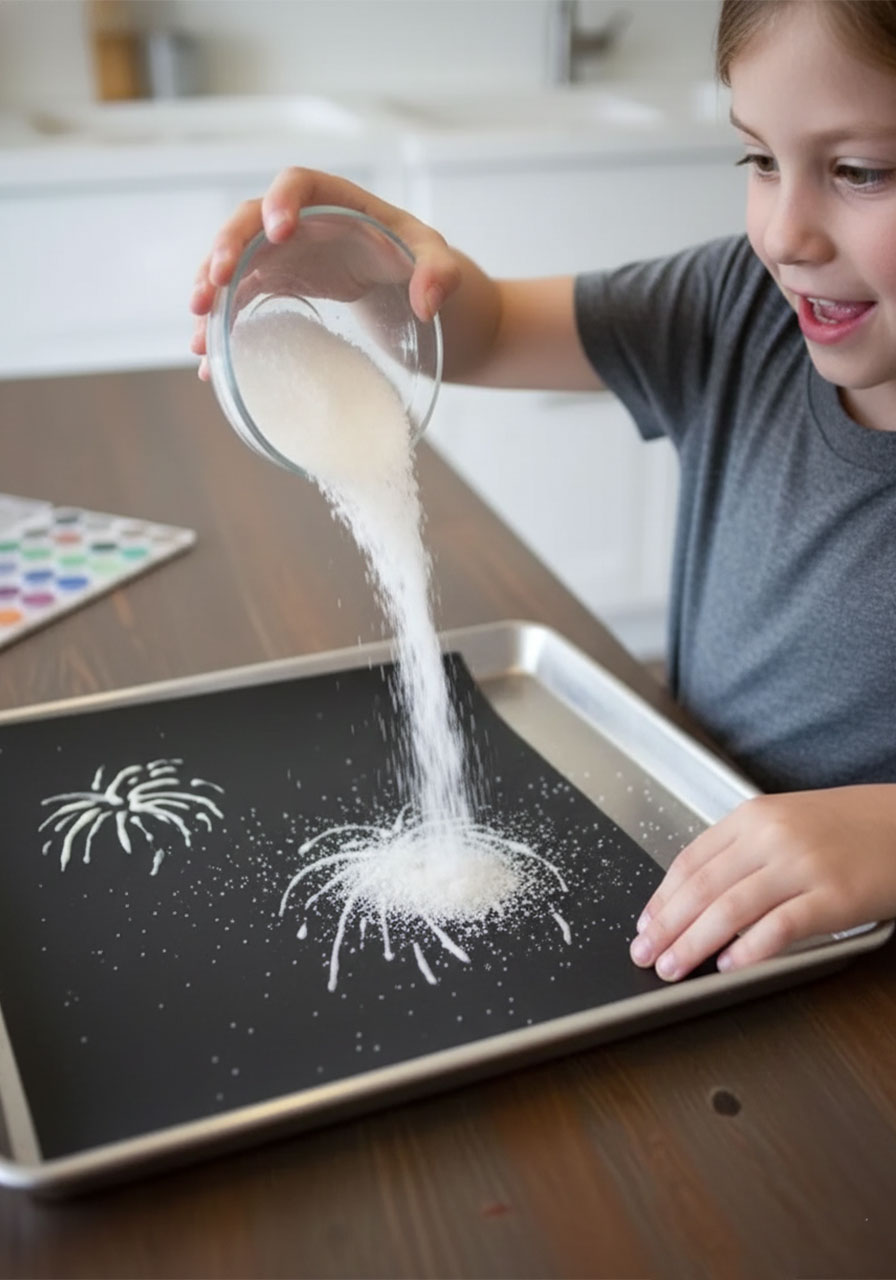
Step 3: Cover the Glue in Salt – Generously
While the glue is still wet, immediately pour salt over your entire design. Be generous. You want every part of the glue to be well-coated with salt crystals.
Use your hand or a small spoon to gently press the salt into the glue lines if needed.
Then, carefully tilt your cardstock or lift it slightly and tap the back to shake off all the excess salt. The salt that’s stuck to the glue will stay. Everything else falls away.
Important: Do this step before the glue starts to dry. If the glue dries first, the salt won’t stick properly. Move from glue to salt quickly!
Step 4: Let the Glue Firm Up Slightly
Give your salted design about 5-10 minutes to firm up before you start painting. You don’t need the glue to be completely dry at this stage – just set enough that your salt lines hold their shape.
This is a great time to set up your paints and get your colors ready. For a classic 4th of July vibe, pull out your reds, blues, whites, and golds. For a more whimsical look, go rainbow – the more colors, the more magical.
Step 5: Paint the Salt with Watercolors
Here’s the most magical step of the whole project.
Dip your paintbrush into your watercolor paint, load it up with color, and then very lightly touch the bristle tips to the salted glue lines. Don’t brush or drag – just touch.
Watch what happens. The color travels through the salt on its own, spreading and blending in the most beautiful way. It looks like the fireworks are actually glowing.
Switch colors as you go. When two colors meet on the salt, they blend together naturally – creating gorgeous gradient effects you couldn’t achieve with a brush even if you tried.
Pro Tip: Less is more with the paint at first. Start with a small amount of color on your brush. You can always add more, but you can’t take it away.
Work slowly and enjoy the process. This is genuinely one of the most satisfying parts – watching the colors move is almost meditative.
Step 6: Let It Dry Completely
Once you’re happy with your fireworks, set your piece flat and leave it to dry completely. This will take 1 to 2 days depending on how thick your glue lines are and how humid your environment is.
This part requires patience – especially from little ones! Resist the urge to touch it or move it before the glue is fully set. If you disturb it while it’s drying, the salt can shift and break your beautiful lines.
Lay it flat on a clean surface away from pets, curious toddlers, and air vents.
Step 7: Optional – Seal with Hairspray
Once fully dry, you can lightly spritz the finished piece with hairspray to lock the salt in place and help it last longer without flaking.
If you choose to do this, take the piece outside or to a well-ventilated area first. A quick, light spray from about 12 inches away is all you need.
This step isn’t required, but it’s a great idea if you want to display the piece long-term or send it home with little guests as a party favor.
Tips for the Best Results
After doing this craft a few times, you pick up tricks that make a big difference. Here are the ones worth knowing before you start:
Use black cardstock, not white. The dark background makes the colors luminous and gives the fireworks that real “night sky” look. White paper makes the colors look washed out by comparison.
Fine table salt over coarse salt – always. Coarse salt doesn’t stick as reliably and makes the painting step uneven. Regular Morton table salt is perfect.
Don’t rush the glue-to-salt step. As soon as you finish drawing with the glue, pour the salt immediately. If you wait even a few minutes, the glue starts to skim over and the salt won’t adhere properly.
Touch, don’t brush. When applying the paint, resist the urge to drag your brush across the salt. Just touch the tip of the brush to the salt and let the capillary action do its thing. The color will spread beautifully on its own.
Lay it flat while drying. If your piece dries at an angle, the wet paint can run and blend in ways you don’t want. Keep it perfectly flat for the best results.
For young kids, try an eyedropper. Loading an eyedropper with paint and letting kids drop color onto the salt is even more exciting for little hands – and gives them even more control over where the color lands.
Fun Variations to Try
Once you’ve got the basic technique down, there are so many directions you can take this craft. Here are a few favorites:
Glitter instead of salt. For the tiniest crafters who might struggle with the painting step, swap the salt for red, white, and blue glitter. Press the glitter into the wet glue, let it dry, and you’ve got a sparkly firework display with zero painting required. Adorable and foolproof.
Snowflake designs for winter. This same technique works beautifully for snowflake shapes on white paper with cool blues, purples, and silvers. Perfect for a holiday craft night.
Other seasonal designs. Stars, hearts, flowers, butterflies – any design with open, flowing lines works wonderfully with salt painting. Let kids sketch their own ideas freehand or print a template to trace over with glue.
Try different paper colors. Dark navy blue and deep purple also create a stunning backdrop for the firework effect. Experiment with different dark backgrounds to see which you love most.
Go rainbow. Don’t limit yourself to red, white, and blue. A full rainbow of colors across a sky full of fireworks looks absolutely magical – and gives each kid total creative freedom.
Perfect Occasions for This Craft
This activity fits beautifully into so many different settings. Here’s when it really shines:
4th of July parties: Set up a craft station alongside the food and games. Kids can make their firework paintings while the adults mingle, and they get a personalized keepsake to take home.
Summer camp or vacation bible school: Easy to set up for large groups, uses inexpensive supplies, and produces a result kids are genuinely proud of. A crowd-pleaser every single time.
Rainy day activities: When the weather isn’t cooperating with your summer plans, this is the kind of activity that keeps kids engaged for a solid stretch of time – and produces something worth framing.
Classroom craft time: Teachers love this one because it’s budget-friendly, teaches color mixing and fine motor skills, and the end results are individual enough that every kid’s piece looks unique.
Party favor activity: Have each child make their own firework painting at the beginning of the party. By the time the party ends and the glue is drying, they have a beautiful homemade party favor to carry home.
Why This Craft Is So Good for Kids (and Moms)
Beyond the obvious fun factor, this activity has some genuinely good things going for it from a developmental standpoint – which is always a nice bonus.
The fine-motor control required to draw with the glue bottle builds the same hand muscles kids use for writing. The sensory experience of pouring and touching the salt is grounding and tactile. Watching the colors blend teaches early lessons in color theory. And completing a full project from start to finish builds patience and a sense of accomplishment.
From a mom’s perspective? It’s a low-effort, high-reward activity. The supplies are cheap, the setup takes minutes, cleanup is manageable (just fold up the newspaper), and the result is something you’ll actually want to display on the refrigerator – or maybe even frame.
That’s a rare combination in the world of kids’ crafts. Enjoy it.

Quick-Reference Supply List
- Black cardstock or poster board
- White school glue (squeeze bottle)
- Fine table salt
- Liquid watercolors or watercolor pan set
- Thin paintbrush
- Baking sheet or newspaper (for mess control)
- Optional: eyedropper, food coloring, glitter, hairspray
Quick-Reference Steps
- Lay black cardstock on a baking sheet or newspaper.
- Draw firework shapes on the cardstock using white school glue.
- Immediately pour fine table salt over all the glue lines.
- Tap off the excess salt gently.
- Let the glue firm up for 5–10 minutes.
- Touch watercolor paint to the salted lines with a brush tip – don’t drag, just touch.
- Let dry flat for 1–2 days.
- Optional: seal with a light spritz of hairspray outdoors.
There you have it – one of the most satisfying, low-stress crafts you can pull out for any summer celebration. Whether you’re hosting a big backyard 4th of July bash or just looking for something fun to do with the kids on a Tuesday afternoon, this firework salt painting delivers every single time.
Give it a try, set up a little craft station, and watch the magic happen. I promise the kids will be talking about it long after the fireworks outside have faded.
Because the best memories aren’t always the big, elaborate ones. Sometimes they’re the quiet ones – a kitchen table, a bottle of glue, a sky full of homemade fireworks, and a kid who can’t stop smiling at what they made.
Happy crafting! 🎆
More 4th of July Ideas to Keep the Fun Rolling:
How to Make a Patriotic Paper Plate Wind Catcher (Easy Kids Craft for the 4th of July!)
Memorial Day Star Fingerprint Craft for Kids (Star Template!)
Simple Paper Plate Flag Craft for Kids (Patriotic Activity)
Coffee Filter Watercolor Fireworks Craft: The Most Magical 4th of July Activity for Kids
12 Fun & Creative Memorial Day Crafts for Kids (Patriotic Activities the Whole Family Will Love)
Bald Eagle Craft for Kids: Template + Step-by-Step Guide for Groups of 20!
Patriotic Star Suncatcher Craft: The Easiest 4th of July Activity That Kids AND Adults Will Love