
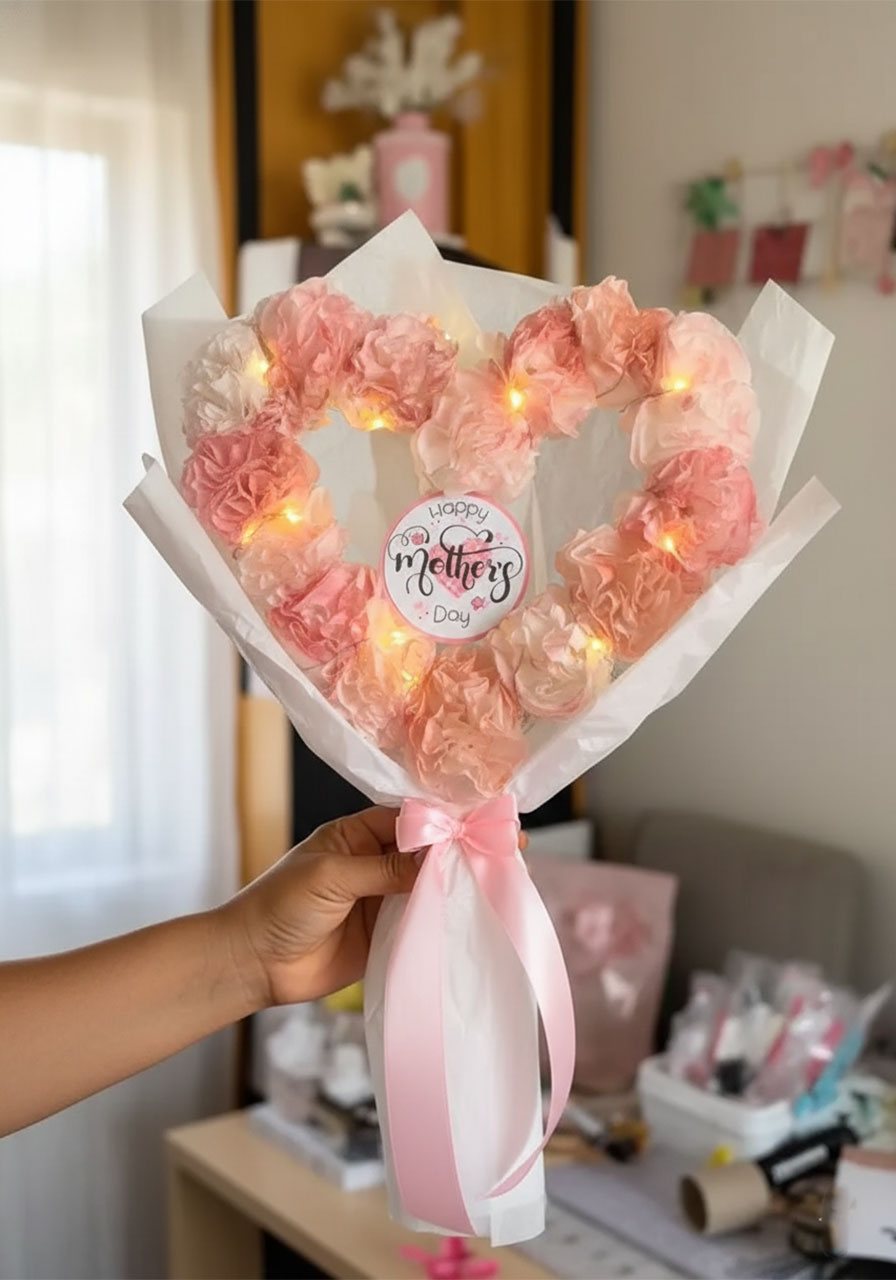
Want to give Mom something that will make her eyes light up – without spending a fortune? This DIY Tissue Paper Heart Flower Bouquet is one of those rare gifts that looks incredibly impressive but is secretly so simple to make. Fluffy pink blooms, a glowing heart-shaped frame, and a beautiful bow – it’s the kind of handmade gift she’ll want to display all year long.
The best part? Kids can help make it too. This is a wonderful weekend project to do together as a family, and the whole thing costs just a few dollars. Let’s dive in!
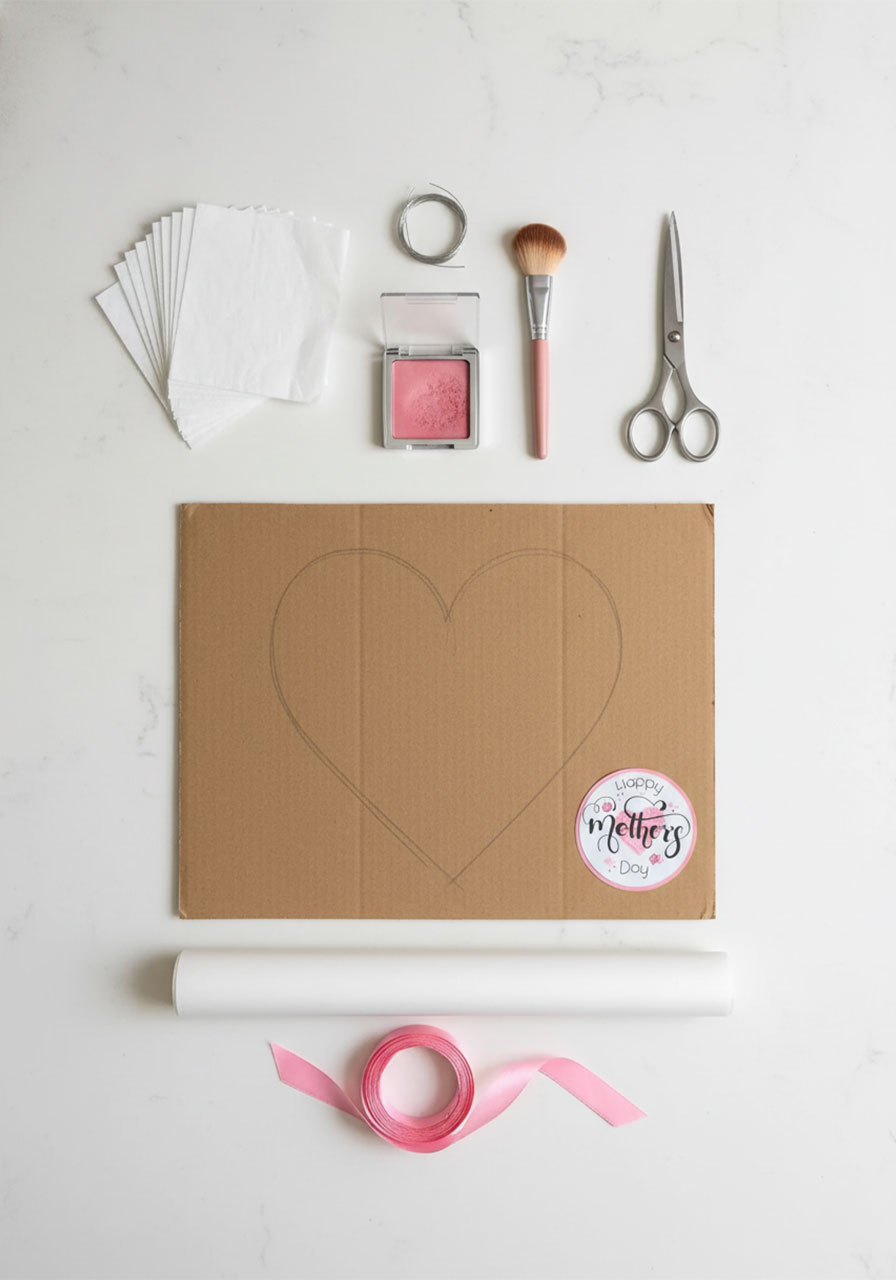
What You’ll Need
White tissue paper (the kind used for gift bags – sold in multi-packs at the dollar store)
Thin floral wire or twist ties
Scissors
Pink or blush eyeshadow or loose powder blush
A makeup brush or soft paintbrush
A piece of cardboard (a cereal box works perfectly)
A pen or marker
A hot glue gun or strong craft glue
Fairy lights (battery-powered string lights – optional but magical!)
White or clear wrapping paper or cellophane
Pink ribbon
A “Happy Mother’s Day” tag or sticker (available at most dollar stores or craft stores)
Pro Tip: Head to your local dollar store first – tissue paper, ribbon, fairy lights, and even blush can often all be found in one trip for under $10 total!

Step 1: Make Your Tissue Paper Flowers
This is where the magic happens! Each flower takes less than 2 minutes once you get the hang of it. You’ll want to make around 15–20 flowers to cover the heart frame generously.
1. Cut your tissue paper into squares.
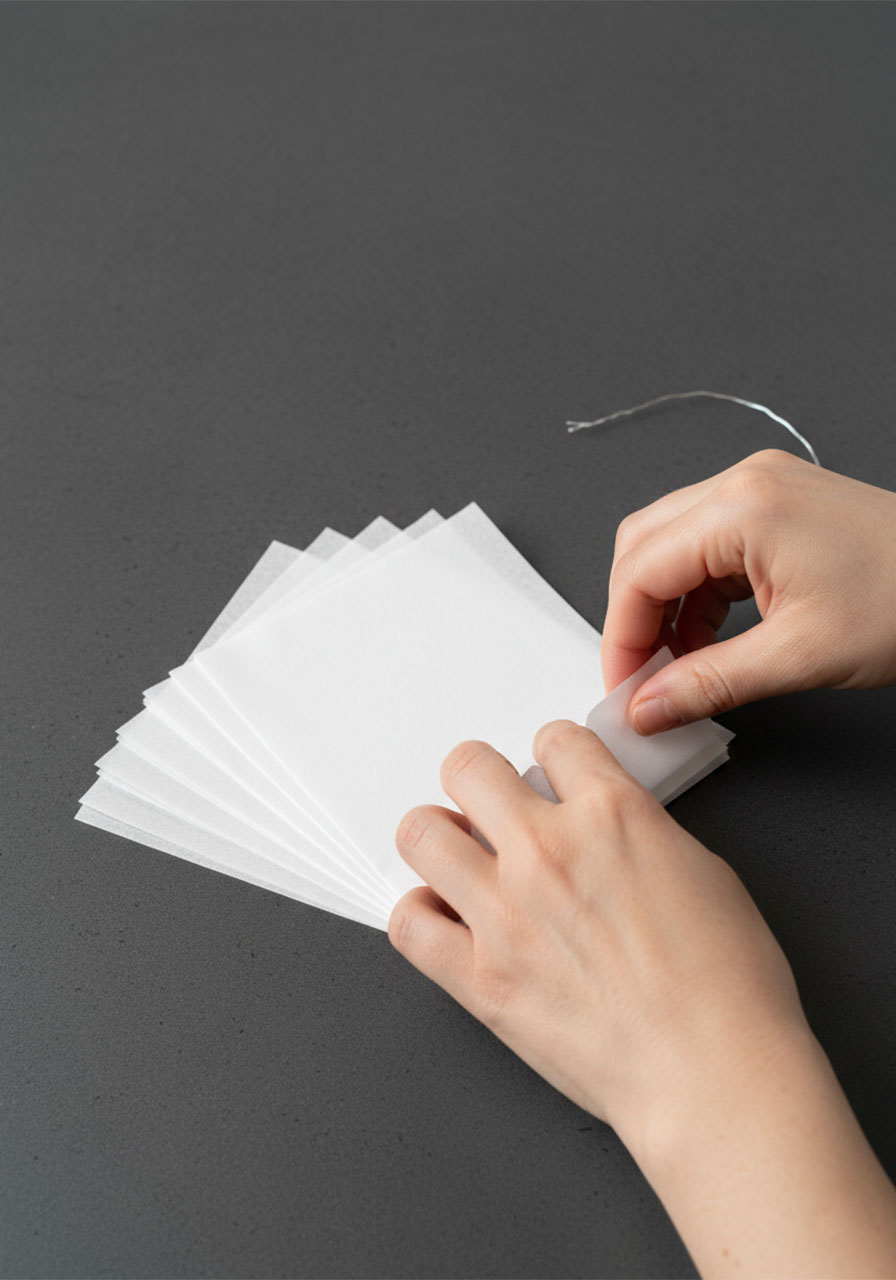
Each square should be roughly 4×4 inches. You don’t need to be perfectly precise – slightly uneven edges actually make the flowers look more organic and realistic. Stack 5–6 squares on top of each other.
2. Accordion-fold the stack.
Starting from one edge, fold the entire stack back and forth in a zigzag (like a paper fan). Each fold should be about half an inch wide.
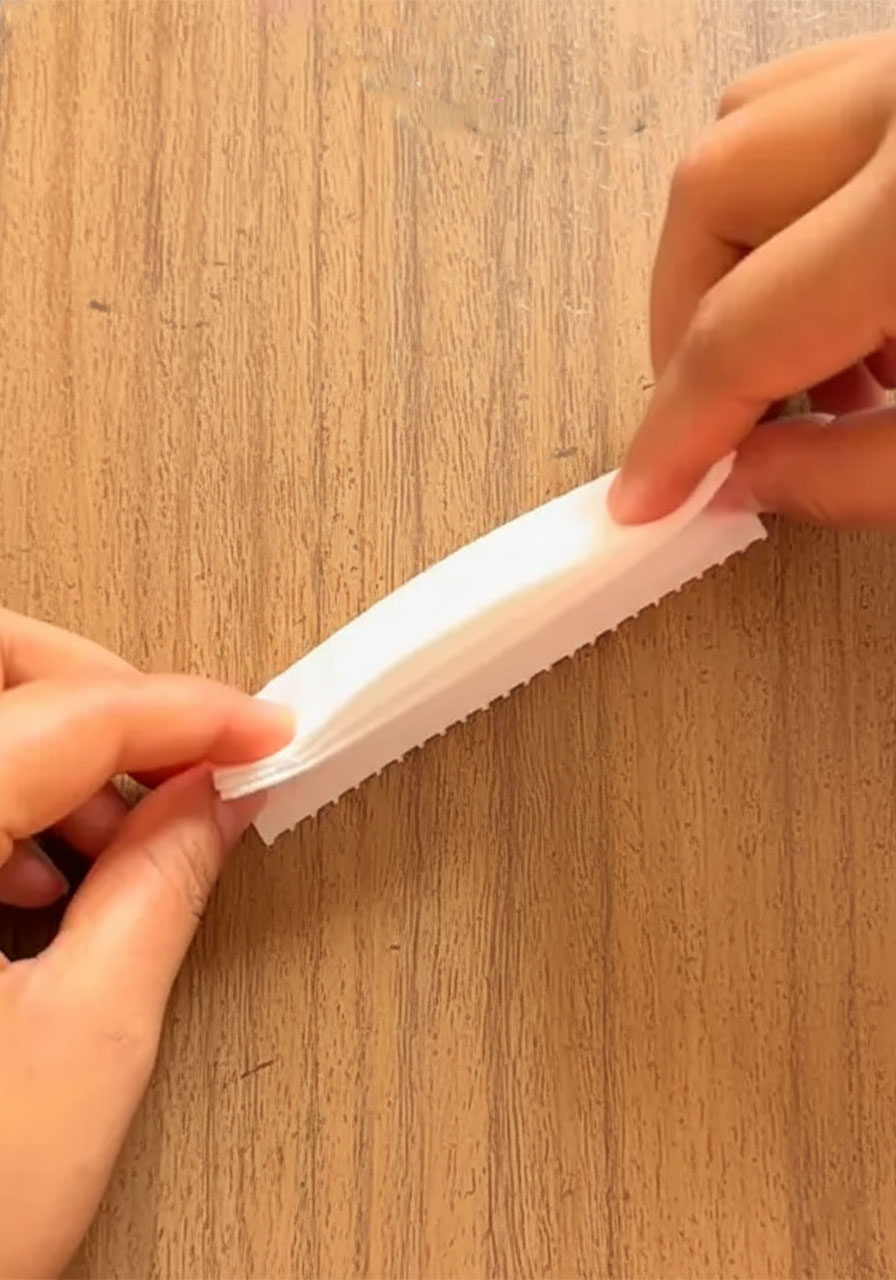
3. Secure the center.
Pinch the folded stack right in the middle and wrap a small piece of thin wire or a twist tie tightly around it. Twist the wire ends together at the back to secure. Leave a 2–3 inch “stem” of wire sticking out – you’ll use this to attach the flower to the heart later.


4. Fluff up the petals.
Here’s the fun part – gently peel each layer of tissue paper away from the center, one at a time, pulling upward and outward. Keep going until you have a full, fluffy pom-pom shape. Don’t worry if a layer tears slightly; it just adds to the texture!

5. Add the pink color.
Dip your makeup brush into the blush or eyeshadow and lightly dust the tips and edges of the petals. This gives each flower a gorgeous blush-pink gradient that looks just like a real carnation. Apply more for a deeper color, or keep it light and airy – both look beautiful!

Pro Tip: Make all your flowers before moving on to the next steps. Put on a favorite playlist and enjoy the process – it’s surprisingly relaxing!
Step 2: Make the Heart Base
1. Draw a large heart on your cardboard.
Aim for about 10–12 inches wide. If you’re not confident freehanding it, fold the cardboard in half and draw half a heart on the fold – when you cut it out and unfold, you’ll have a perfectly symmetrical shape.
2. Draw a second, smaller heart inside the first.
This inner heart should be about 2 inches smaller all the way around, leaving a thick “frame” or “wreath” shape. This is where all your flowers will go.
3. Cut out both hearts.
First cut out the large outer heart shape, then carefully cut out and remove the inner heart. You’re left with a hollow heart frame. Set the inner heart piece aside – you can use it as a backing or write a note on it for Mom!
Pro Tip: If your cardboard feels flimsy, glue two pieces together for a sturdier frame before you start.

Step 3: Attach the Flowers to the Heart Frame
1. Poke small holes along the heart frame.
Use a pencil or scissors tip to poke evenly-spaced holes around the entire cardboard frame. Each hole should be large enough for your wire stem to pass through.
2. Thread each flower through a hole.
Push the wire stem from each flower through one of the holes from the front side. On the back, bend and twist the wire flat against the cardboard to lock the flower in place.
3. Fill in the frame completely.
Keep going until every inch of the heart frame is covered in fluffy flowers. Pack them in close together so no cardboard shows through – the result should look lush and full.
Pro Tip: Alternate deeper-colored flowers (more blush) with lighter ones (less blush) to create a beautiful ombre effect around the heart!

Step 4: Add the Fairy Lights (Optional but So Worth It!)
1. Take your battery-powered fairy light string and gently weave it in and out between the flowers, tucking the wire between the blooms.
2. Tuck the battery pack behind the cardboard frame, securing it with a small piece of tape or wire.
3. Turn them on – seriously, take a moment to admire your work. It’s stunning.
Pro Tip: Warm white fairy lights give the most romantic, glowing effect against the pink flowers. Cool white lights also work but have a slightly crisper feel.

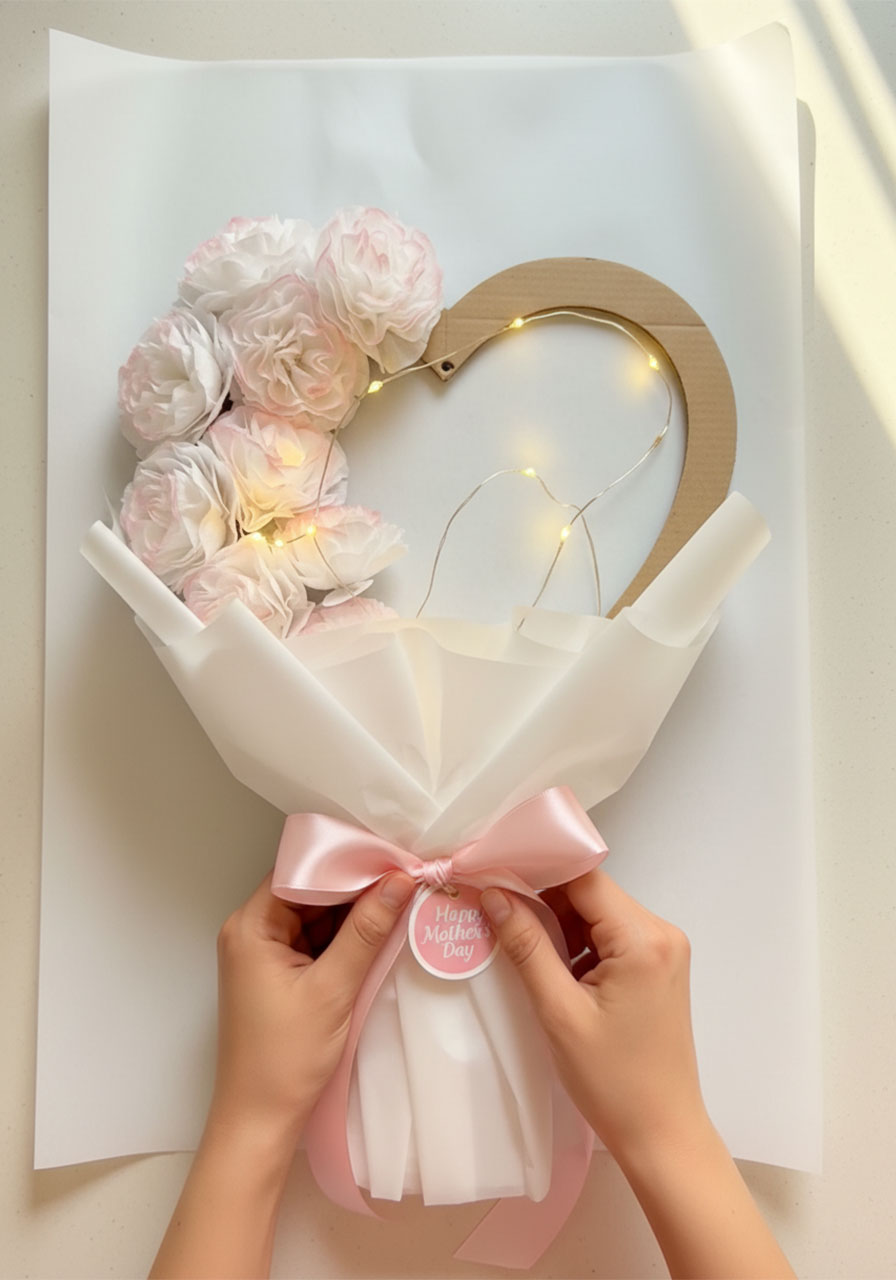
Step 5: Wrap and Personalize the Bouquet
1. Lay your wrapping paper flat.
Place the heart flower arrangement face-up on a large sheet of white or clear wrapping paper.
2. Gather the paper around the base.
Lift the sides of the paper up around the bottom edges of the heart – similar to how a florist wraps a real bouquet. Scrunch and gather the paper into a handle shape at the bottom of the heart and hold it in place.
3. Tie with ribbon.
Wrap a length of pink ribbon around the gathered paper handle and tie it into a full, generous bow. This both secures the wrapping and makes it look beautifully gift-ready.
4. Add your tag.
Attach a “Happy Mother’s Day” sticker or tag to the center of the heart – right in the open middle of the frame – or tuck it into the ribbon bow. Either way, it’s the perfect finishing touch.
Ways to Make It Extra Special
Write a message on the cardboard insert. Remember the inner heart you cut out earlier? Flip it over and write Mom a heartfelt note on the back. Slip it into the center of the bouquet before wrapping so she finds a hidden love letter inside!
Match her favorite colors. Tissue paper comes in every color – try red and white for a classic Valentine’s look, lavender and yellow for a spring vibe, or her absolute favorite colors for a totally personalized touch.
Add a little glam. A light sprinkle of craft glitter on the flower petals before they fully dry catches the light beautifully.
Make it a kid’s project. Younger kids can fluff the flowers, and older kids can handle the folding and wrapping. Even a 4-year-old can “paint” on the blush – and they will absolutely love it.
Frequently Asked Questions
Can I make this the night before?
Absolutely! The flowers hold their shape well. Just store the finished bouquet somewhere it won’t get squished, and it’ll look just as beautiful the next day.
What if I don’t have a hot glue gun?
No problem! The wire method described above holds everything in place without any glue. The glue gun is optional if you prefer to glue flowers directly to the frame instead of threading wire through holes.
How many flowers do I need?
For a 10–12 inch heart frame, plan on 15–20 flowers. Make a few extras just in case – leftover flowers can always be tucked into the wrapping or given separately!
My tissue paper keeps tearing when I fluff it. Help!
Be very gentle and pull slowly! Tissue paper is delicate, but small tears are actually fine – they just add more texture. Also, make sure you’re pulling each layer individually rather than trying to pull multiple layers at once.
There you have it – a heartfelt, handmade gift that Mom will absolutely treasure. Whether you’re making this with your kids on a Saturday afternoon or sneaking in some solo crafting time, this bouquet is one of those projects where the process is just as joyful as the final result.
Happy crafting, and Happy Mother’s Day!
More Mother’s Day Ideas to Keep the Fun Rolling:
30+ Mother’s Day Crafts for Kids of All Ages
“I Love You This Much!” DIY Handprint Card for Mother’s Day
Surprise Mom with This Magic Foldable Heart Flower Card
How to Make a Stunning Quilled Heart Mother’s Day Card (Step-by-Step)
DIY Mother’s Day Flower: The Cutest Toilet Paper Roll Craft Kids Can Actually Make
Handprint Flower Bouquet The Perfect DIY Mother’s Day Craft
The Cutest DIY Pull-Tab Mother’s Day Card Kids Can Actually Make (No Glue, No Scissors!)
DIY Paper Hyacinths: The Perfect “Everlasting” Mother’s Day Craft
