

Here’s the thing about store-bought Mother’s Day gifts: they’re lovely, but they’re forgettable.
This handprint flower bouquet? It’s the kind of gift that gets framed, refrigerator-displayed for a decade, and pulled out every single Mother’s Day for a happy cry. And the best part – your toddler does most of the work.
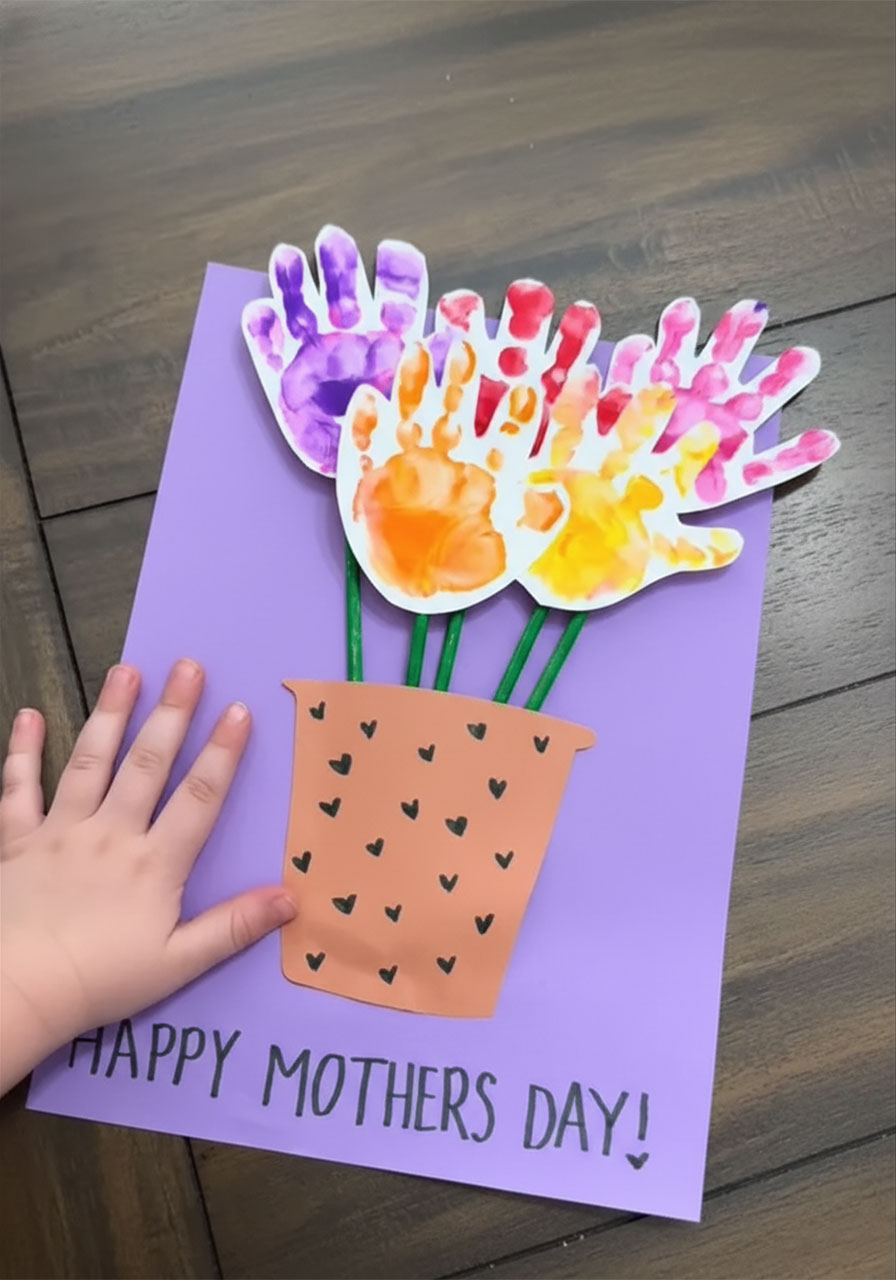
This craft turns your little one’s handprints into a vibrant, colorful bouquet of “flowers” tucked into an adorable paper flower pot. It’s mess-worthy, memory-making, and guaranteed to make Mom’s heart melt. Let’s get into it.
What You’ll Need
Washable paint – pick 4–5 bright colors (think pink, purple, orange, red, and yellow for a full, rainbow-y bouquet)
Foam sponge brush – great for applying paint evenly onto little hands
White cardstock – this is where the handprints go; regular printer paper will work in a pinch, but cardstock holds up better when cut
Purple cardstock or construction paper – for the background (a large sheet, around 9×12″)
Brown or terra-cotta cardstock – for the flower pot
Wooden dowels or straws – these become the flower stems
Green marker – to color the stems (skip this if you already have green straws!)
Hot glue gun + glue sticks – adults only for this part
Scissors
Black marker – for decorating the pot and writing the message
Paper plate – doubles perfectly as a paint palette
Pro Tip: Lay down a plastic tablecloth or some old newspaper before you start. Toddler + five colors of paint = a scene. You’ve been lovingly warned.


How to Make Your Handprint Flower Bouquet
Step 1: Set Up Your Paint Palette
Squeeze small dollops of each paint color onto a paper plate, keeping them separate so the colors stay vibrant. Have your foam sponge brush ready – it applies paint to little hands much more evenly than a regular paintbrush, which means cleaner, more defined handprints.
Step 2: Make the Handprint “Flowers”
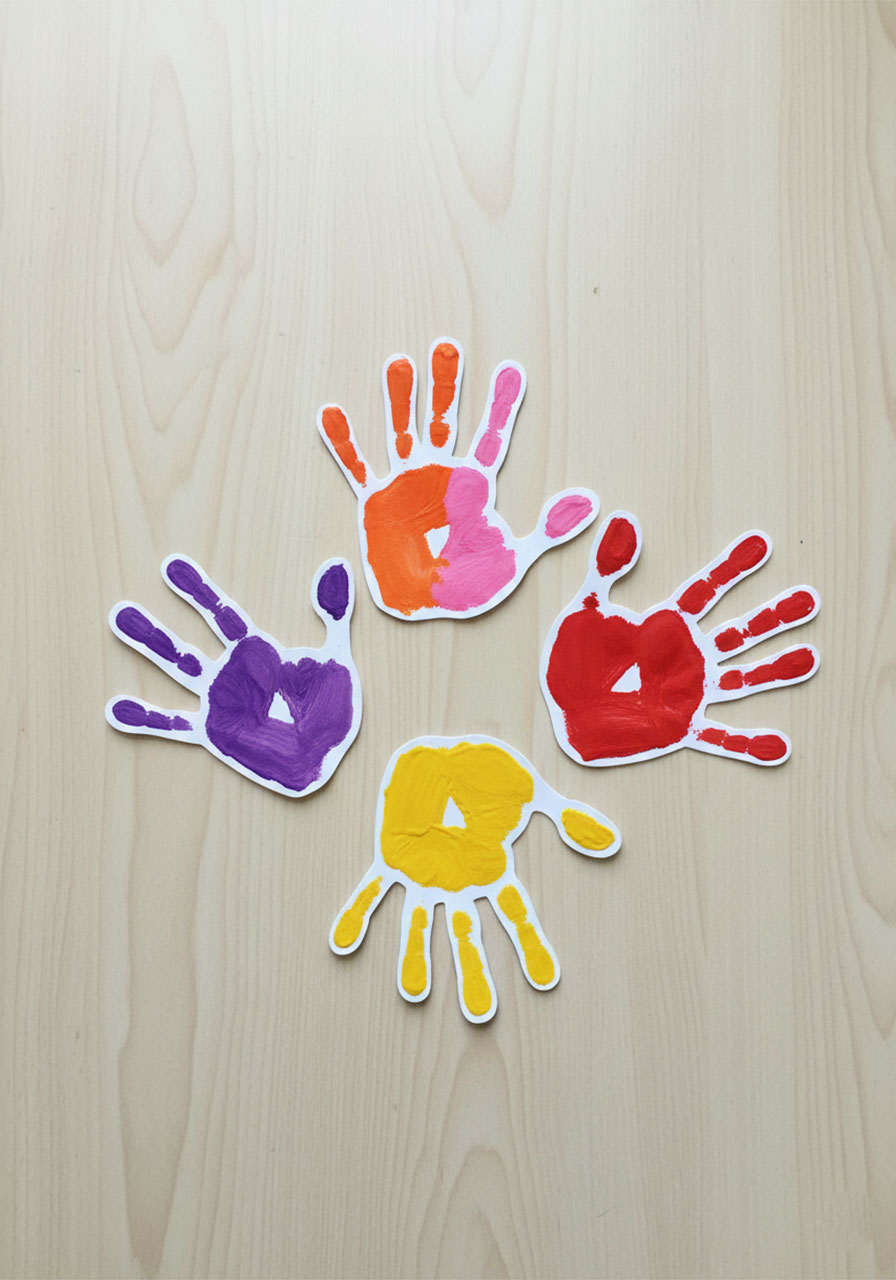
This is the fun (and slightly chaotic) part! Using the sponge brush, coat your child’s hand with one paint color. For an extra gorgeous effect, try loading two colors side-by-side on the same hand – orange and yellow together, or pink and red – so the handprint has a natural ombre look.
Press their painted hand firmly and flatly onto the white cardstock. Lift straight up without wiggling to get a clean print. Repeat with different colors until you have 5–6 handprint flowers. Set them aside to dry completely before moving on.
Pro Tip: Do a quick “practice press” on scrap paper first to get a feel for the right amount of paint. Too much and it smears; too little and the print looks faint.


Step 3: Cut Out the Handprints
Once the paint is fully dry, carefully cut around the outline of each handprint. You don’t need to be perfectly precise – a slightly imperfect cut actually gives it that sweet, handmade charm. These cutouts are now your flower heads!
Step 4: Prep the Stems
Take your wooden dowels (or straws) and color them green from top to bottom with your green marker. Let them dry for a minute. If you already have green straws on hand, you can skip this step entirely – use what you have!
Step 5: Attach the Flowers to the Stems
Adults take over here. Using the hot glue gun, apply a small dab of glue to the back of each handprint cutout – right at the bottom center of the hand. Press the top of a green stem onto the glue and hold for a few seconds until secure. Repeat for each handprint flower.

Step 6: Cut Out the Flower Pot
On your brown or terra-cotta cardstock, draw a simple flower pot shape – a wide trapezoid body with a narrow rectangular rim across the top. It doesn’t have to be perfect! Cut it out. This will sit at the bottom of your background paper and hold all the flower stems.
Step 7: Assemble the Card – This Step Is Key!
Lay your large purple sheet flat. Place the flower pot cutout near the bottom center. Now here’s the important part: only apply glue to the two side edges and the bottom of the pot – NOT the top. This creates a little pocket that the flower stems will slide into. Press the pot firmly onto the purple background and let it set.

Step 8: Arrange Your Bouquet
Slide your handprint flower stems down into the top opening of the pot pocket. Play around with the arrangement – vary the heights and fan them out so they look like a real, full bouquet. Once you’re happy with how it looks, you can add a tiny dot of glue behind each stem where it meets the pot opening to keep everything in place.
Step 9: Add the Finishing Touches
This is where your little one can get involved again! Use a black marker to decorate the flower pot with tiny hearts, dots, or your child’s name. At the bottom of the purple background, write “HAPPY MOTHER’S DAY!” in big, bold letters. That’s it – you’re done!
Why This Craft Is an Absolute Winner
Beyond being genuinely adorable, this project is one of those rare crafts that works on so many levels. It’s a sensory activity toddlers love (squishing paint = endlessly satisfying). It builds fine motor skills as little ones press and lift their hands. And it creates a keepsake that captures exactly how tiny those hands were at this moment in time.
I’ve seen moms tear up when they receive this. Not because it’s fancy – but because it’s real. Those little painted handprints are a timestamp. Years from now, Mom will hold this up next to her kid’s actual hand and just marvel at how much they’ve grown.
That’s the kind of gift no store can sell.
Quick Tips for Teachers
Making this as a class project? It scales beautifully! Set up a painting station with one or two colors per table to keep things moving. Have wet wipes and paper towels at every station for speedy hand-cleaning between colors. Assign parent volunteers to handle the hot glue assembly after school hours so you can focus on the fun painting part during class time.
Whether you’re a parent doing this at the kitchen table or a teacher running a whole-class Mother’s Day project, this handprint flower bouquet is one of those crafts you’ll be proud to send home. It’s simple, it’s meaningful, and it will absolutely make someone’s Mother’s Day.
Happy crafting – and Happy Mother’s Day!
More Mother’s Day Ideas to Keep the Fun Rolling:
30+ Mother’s Day Crafts for Kids of All Ages
“I Love You This Much!” DIY Handprint Card for Mother’s Day
Surprise Mom with This Magic Foldable Heart Flower Card
How to Make a DIY Tissue Paper Heart Flower Bouquet for Mother’s Day
How to Make a Stunning Quilled Heart Mother’s Day Card (Step-by-Step)
DIY Mother’s Day Flower: The Cutest Toilet Paper Roll Craft Kids Can Actually Make
The Cutest DIY Pull-Tab Mother’s Day Card Kids Can Actually Make (No Glue, No Scissors!)
DIY Paper Hyacinths: The Perfect “Everlasting” Mother’s Day Craft
