

Store-bought cards are sweet – but a handmade one? That’s the kind of gift moms actually keep. This DIY quilled heart Mother’s Day card looks like it came straight from a boutique gift shop, but it’s made entirely from paper strips, a little patience, and a whole lot of love. And the best part? Kids and adults can make it together, which makes it even more special.
The finished card features a gorgeous 3D heart filled with tiny rolled paper spirals – it’s textured, beautiful, and 100% one-of-a-kind. Whether you’re a teacher looking for a classroom craft or a parent making something memorable with your child, this one’s a keeper.
What You’ll Need
1 sheet of white or cream cardstock (or a blank greeting card)
Thin strips of pink and/or red paper (pre-cut quilling strips work great, or cut your own – about ¼ inch wide)
Scissors
A pencil
Clear-drying craft glue (like Elmer’s or a glue pen)
A black marker or calligraphy pen for your message
Optional: a quilling tool, toothpick, or skewer to help roll the strips
Optional: colorful markers or stickers for extra decorating
Pro Tip: If you’re doing this as a classroom activity, pre-cut the paper strips ahead of time and fold the cardstock bases in advance. It saves a ton of time and lets kids jump straight to the fun part – rolling those spirals!


How to Make It: Step-by-Step
Step 1: Fold Your Card Base
Take your cardstock and fold it in half to create the card. Run your finger along the fold to get a nice, clean crease. This folded piece is your card base – the front panel is where all the magic happens.
Step 2: Draw and Cut Out the Heart
On the front panel of your folded card, lightly draw a heart shape in pencil. Make it big enough to fill most of the front – the bigger the heart, the more dramatic the final look. Then, carefully cut out the heart shape. You’ll now have a heart-shaped “window” cut into the front of the card.
Important: Only cut through the front layer of the card, not both layers. The back panel stays intact – it’s what holds your quilled spirals in place.

Step 3: Roll Your Paper Spirals
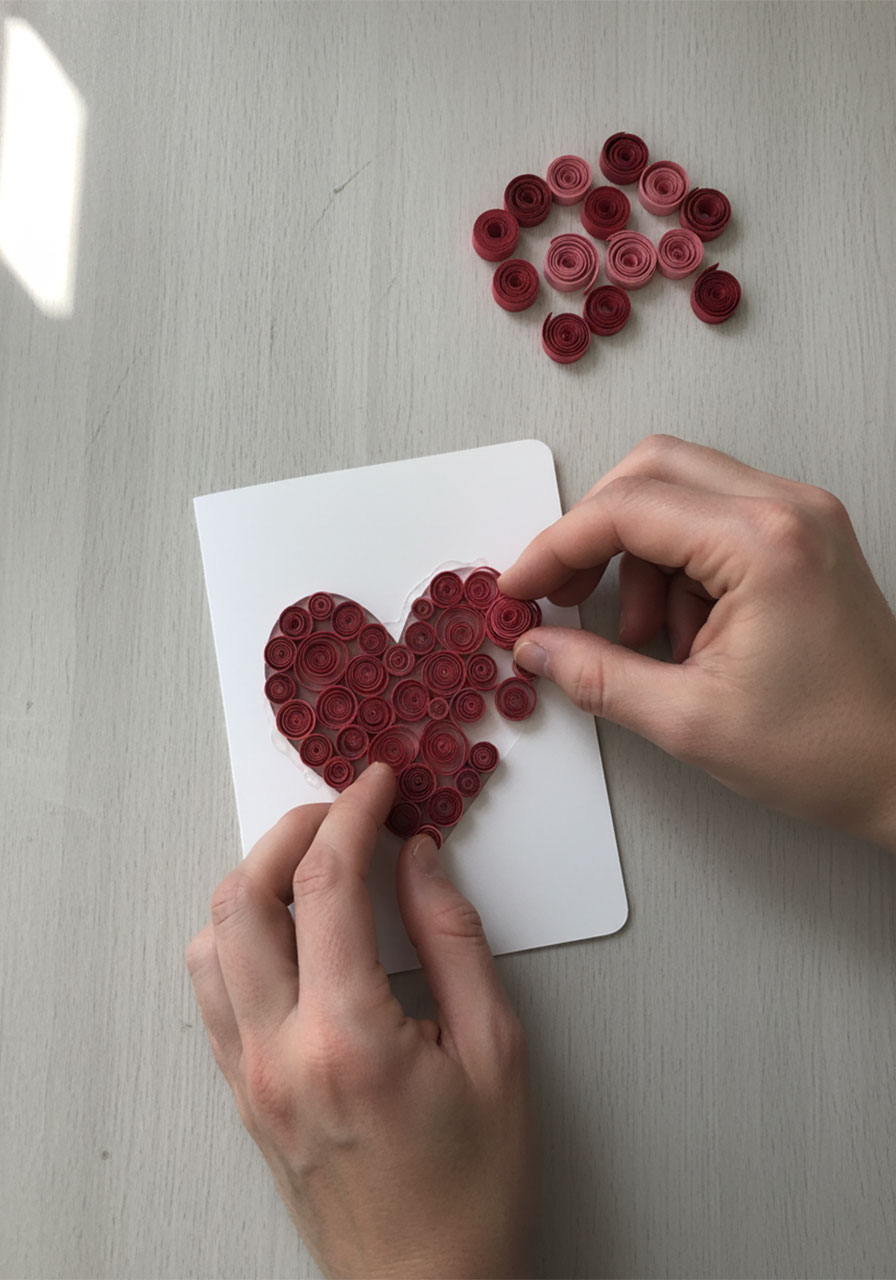
This is the most meditative (and satisfying!) part. Take a strip of paper and roll it tightly from one end – using a quilling tool, toothpick, or just your fingers. Once you’ve rolled the whole strip, let it loosen just slightly so it springs open a little. Then dab a tiny bit of glue on the loose end and press it down to secure the spiral.
You’ll need to make a lot of these – anywhere from 20 to 40 spirals depending on how big your heart is. Mix pink and red strips for a beautiful two-toned effect, or vary the tightness of your rolls for different sizes. Put on a podcast or some music and roll away!
Pro Tip: Rolling tighter spirals and letting them open slightly before gluing gives you a fuller, rounder shape – which looks absolutely stunning when they’re all packed together in the heart.


Step 4: Glue the Spirals Into the Heart Window
Flip your card open and look at the back of the heart window from the inside. Apply a thin line of glue along the inside edge of the heart cutout. Now start placing your spirals one by one into the heart window, packing them in snugly so they fill the entire space.
Work from the edges inward, and don’t worry about making them perfectly uniform – the organic, varied look is part of what makes it so beautiful. Press each spiral gently as you go. Once the heart is full, let the glue dry completely (about 15–20 minutes).
Pro Tip: Place a small piece of wax paper under your work while gluing to prevent the card from sticking to your table.
Step 5: Write Your Message
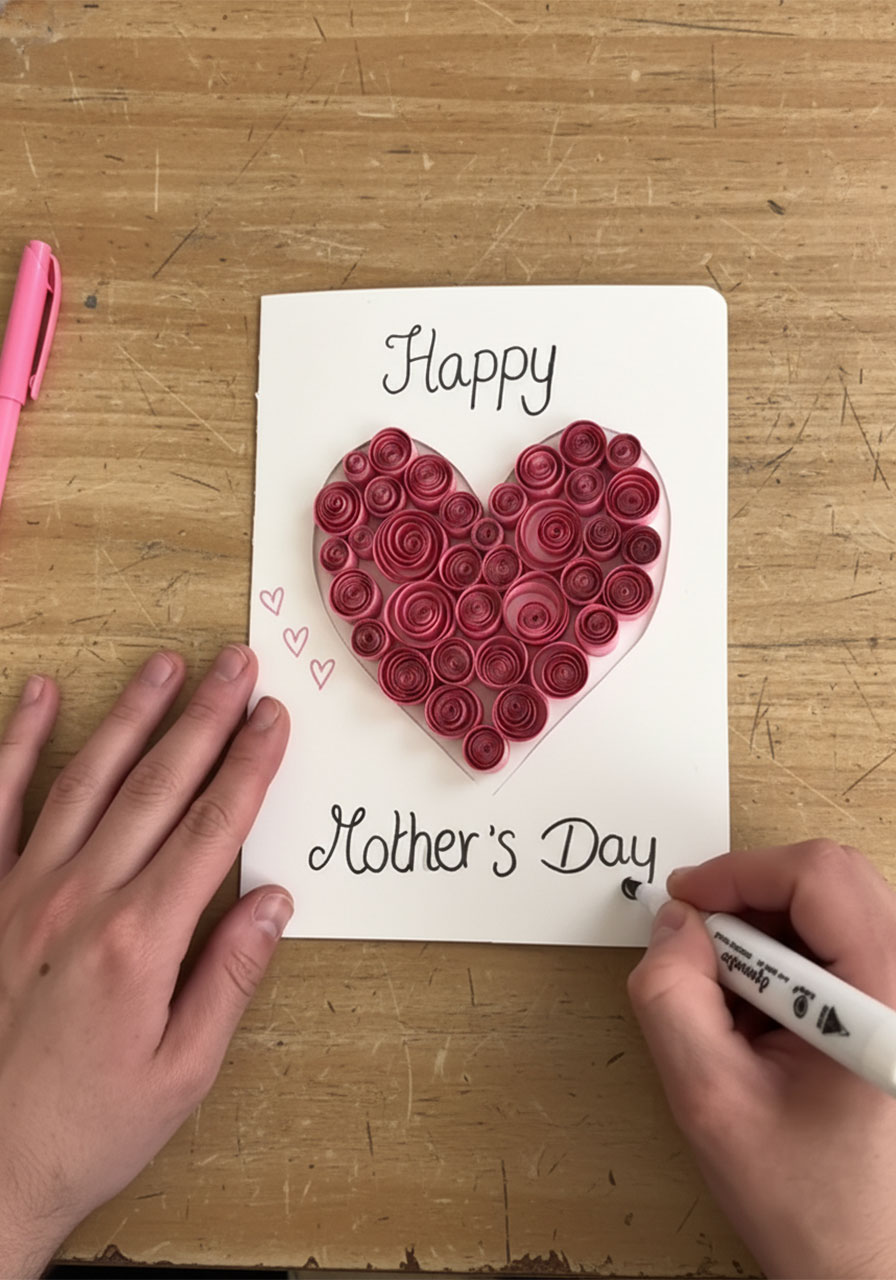
Once everything is dry, it’s time for the words. Write “Happy Mother’s Day” on the front of the card – above and below the quilled heart looks stunning. Then open the card and write your personal message inside, like “To the best mom in the world!”
Use a black marker for a clean look, or get fancy with a calligraphy pen. You can also add small hand-drawn hearts, dots, or colorful doodles around the edges for extra flair.
Tips to Make It Even Better
Use less glue, not more. A little goes a long way with quilling. Too much glue makes the spirals look flattened and messy.
Make spirals in batches. Roll 10–15 at a time before you start gluing – it makes the assembly step much smoother.
Try different sizes. Mixing large and small spirals fills the heart more naturally and adds visual depth.
For a classroom setting: Have each child make their own spirals and assemble their own card. It’s a wonderful fine motor skill activity for kids ages 7 and up.
Embrace the imperfections. Handmade gifts have character. A spiral that’s a little loose or a message that’s slightly crooked just makes it more personal – and more precious.
Why Moms Will Absolutely Love This
This isn’t a card that gets recycled in a week. The 3D quilled heart makes it feel more like a piece of art than a greeting card – something worth framing or keeping on a shelf. Every time she looks at it, she’ll know someone took the time to hand-roll each and every spiral just for her. That’s the kind of thoughtfulness no store-bought card can replicate.
Whether you’re making this solo, with your kids, or as a whole classroom full of little crafters – this Mother’s Day card is guaranteed to make someone feel deeply, truly loved. And isn’t that exactly the point?

Looking for more creative ideas to make your next celebration unforgettable? You’re in the right place – we’ve got you covered.
More Mother’s Day Ideas to Keep the Fun Rolling:
30+ Mother’s Day Crafts for Kids of All Ages
“I Love You This Much!” DIY Handprint Card for Mother’s Day
Surprise Mom with This Magic Foldable Heart Flower Card
How to Make a DIY Tissue Paper Heart Flower Bouquet for Mother’s Day
DIY Mother’s Day Flower: The Cutest Toilet Paper Roll Craft Kids Can Actually Make
Handprint Flower Bouquet The Perfect DIY Mother’s Day Craft
The Cutest DIY Pull-Tab Mother’s Day Card Kids Can Actually Make (No Glue, No Scissors!)
DIY Paper Hyacinths: The Perfect “Everlasting” Mother’s Day Craft
