
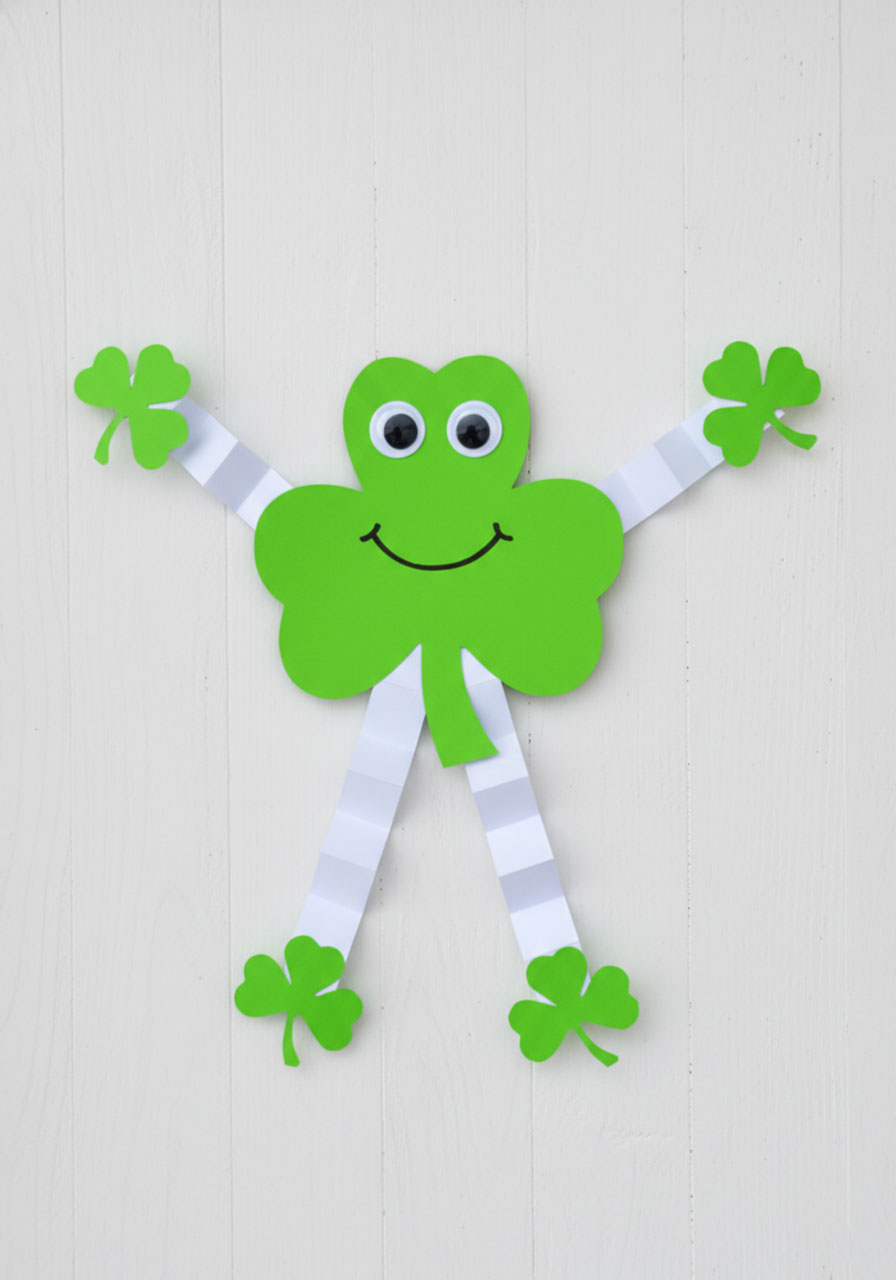
Looking for a St. Patrick’s Day craft that won’t drain your budget or your sanity? This adorable Shamrock Man is about to become your new favorite go-to project. Trust me – if you’ve got paper, scissors, and glue, you’re already 90% of the way there.
This cheerful little guy is perfect for preschoolers (with a helping hand) all the way up to elementary kids who want to add their own creative flair. Plus, with a total cost under $5, you can make an entire classroom’s worth without breaking the bank. Let’s dive in!
Why You’ll Love This Shamrock Man Craft
Here’s the thing: not every craft needs to be elaborate to be memorable. This project hits that sweet spot between “simple enough for busy parents and teachers” and “cute enough that kids will actually be proud of what they made.” The accordion-fold arms and legs give him personality and movement, and decorating his face is where kids really get to make him their own.
I’ve seen kids turn their Shamrock Men into whole families, complete with different expressions and poses. Some even name them! It’s one of those crafts that looks impressive but is secretly super forgiving – which is exactly what we need during the hectic holiday season.
Best for: Preschoolers (with help) through elementary age
Time to Complete: 20-30 minutes
Mess Level: Low (just paper scraps!)

What You’ll Need
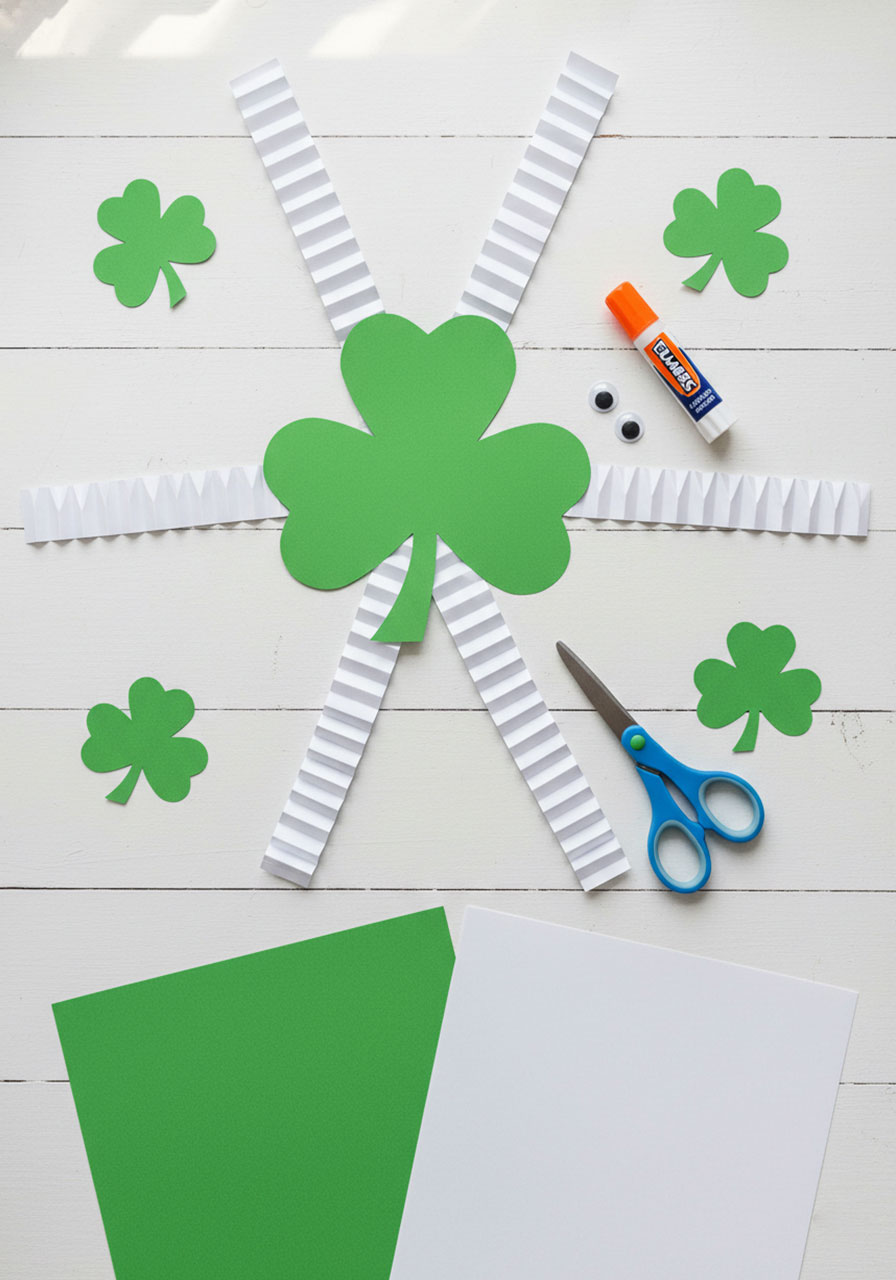
The beauty of this craft is that you probably already have everything on hand. Here’s your simple supply list:
White paper (regular printer paper works great)
Green paper or cardstock (brighter is better!)
Black marker or crayon
Scissors (kid-safe scissors for the little ones)
Glue stick or white glue
Googly eyes (optional, but they add extra personality!)
Shamrock template (trace around a cookie cutter or draw your own!)
Pro Tip: If you don’t have green paper, let kids color white paper green with crayons or markers before cutting. It adds an extra layer of creativity and extends the activity time – perfect for keeping a classroom engaged!
How to Make Your Shamrock Man (Step-by-Step!)
Let’s bring this lucky little fellow to life. The process is simple, but I’ll walk you through each step so there’s zero confusion.
Step 1: Cut Out Your Shamrocks
Print or trace one large shamrock onto your green paper. This will be the body, so make it nice and big – about 5-6 inches wide works well. Cut off the stem so you have a clean, round shamrock shape.
Next, cut out four small shamrocks (about 2 inches wide). These will be the hands and feet.
For younger kids: Pre-cut the small shamrocks since they can be tricky. Let them practice their scissor skills on the larger body shamrock with your guidance.
Step 2: Create the Accordion Arms and Legs
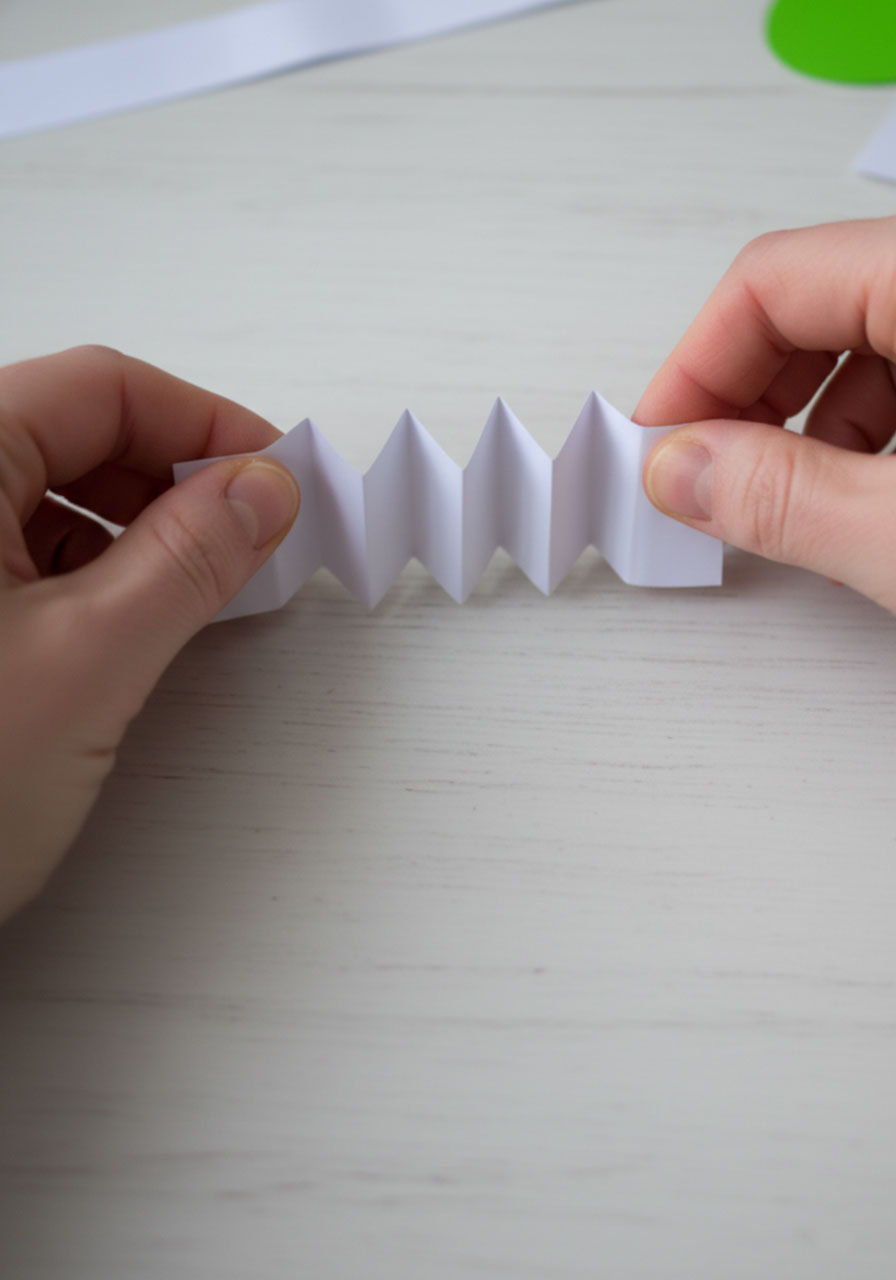
Cut four strips of white paper, each about 1 inch wide and 6-8 inches long. Now here comes the fun part – fold each strip accordion-style (back and forth, back and forth) to create that classic zigzag pattern.
Make the arm strips slightly shorter than the leg strips to give your Shamrock Man proper proportions. Kids love this step because they get to see the arms and legs “spring” to life!
Pro Tip: Show younger children how to make crisp folds by running their finger along each crease. It’s great fine motor practice, and the cleaner the folds, the better the arms and legs will move.
Step 3: Attach the Arms and Legs
Time to assemble! Put a dab of glue on one end of each accordion strip and attach them to the back of the large shamrock. Position two strips on the upper sides for arms and two on the bottom for legs.
Let the glue dry for a minute before moving on – this helps everything stay in place.

Step 4: Add the Hands and Feet
Glue one small shamrock to the end of each arm and leg. Now your Shamrock Man can wave hello and do a little jig!
Step 5: Give Him a Face
Here’s where your Shamrock Man gets his personality. Use a black marker to draw a big, friendly smile. For the eyes, you have options:
Googly eyes: The easiest route and always a hit with kids
Paper circles: Cut two white circles and two smaller black circles, then layer and glue them together for classic cartoon eyes
Hand-drawn eyes: Let kids draw whatever expression they want – silly, surprised, sleepy, you name it!
Fun Variation: Challenge kids to give their Shamrock Man different emotions. Make a happy one, a surprised one, a sleepy one – then line them up and talk about feelings. It’s a sneaky way to incorporate social-emotional learning into craft time!
Tips for Teachers and Group Settings
Planning to make these with a full classroom? Here are some time-savers:
Pre-cut the small shamrocks for preschool and kindergarten groups. They’ll still get plenty of cutting practice with the large shamrock body.
Set up an assembly line where kids rotate through stations: cutting, folding, assembling, and decorating. It keeps the flow moving and prevents bottlenecks at the glue station.
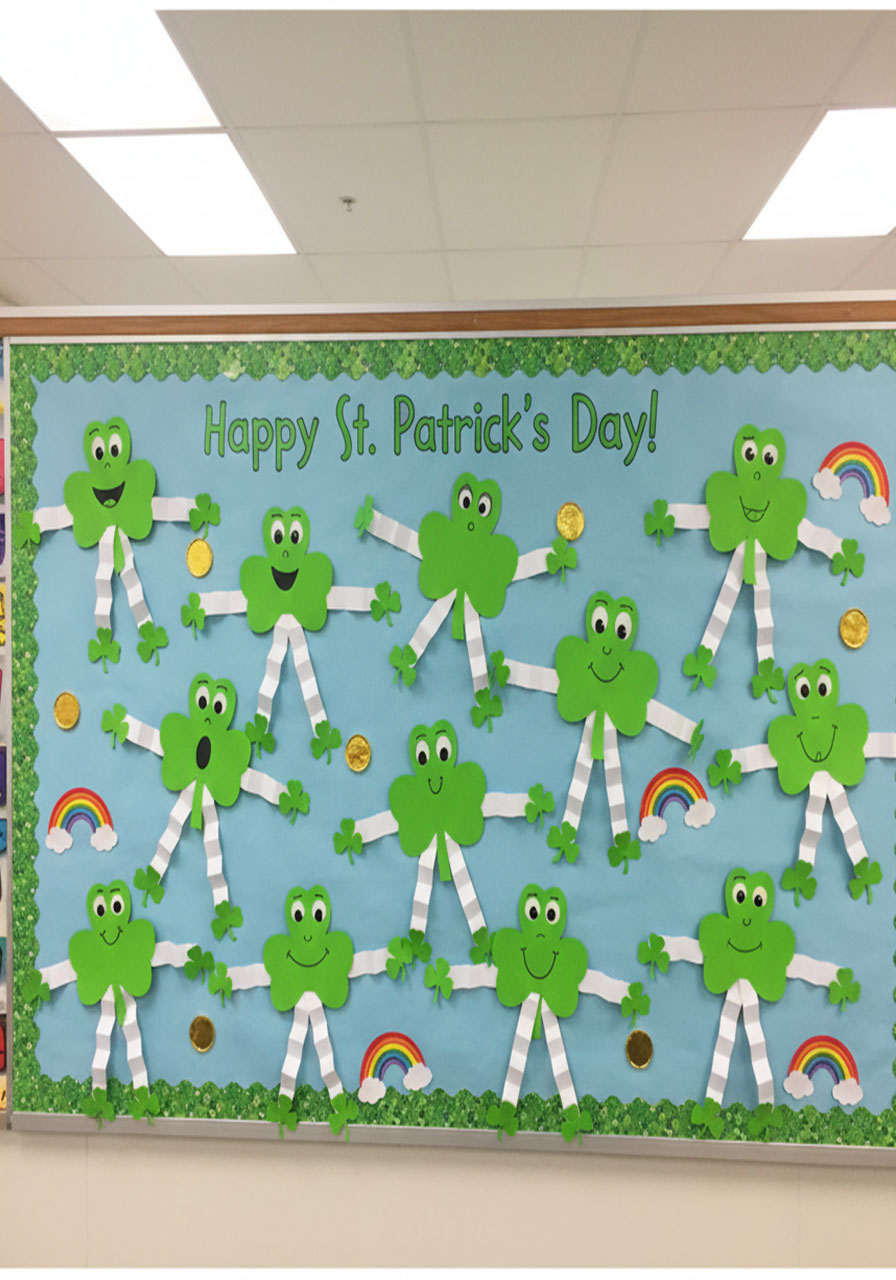
Make it a bulletin board display by adding “Happy St. Patrick’s Day!” in fun lettering and surrounding it with your students’ Shamrock Men. Parents love seeing their kids’ work showcased, and the 3D arms and legs create an eye-catching display.
Why This Craft Works for Busy Parents Too
Let’s be real – between work, homework, dinner, and everything else, you need crafts that don’t require a trip to three different stores or a Pinterest-level skill set. This Shamrock Man checks all the boxes:
✓ Minimal supplies (most of which you already have)
✓ Quick setup and cleanup (no paint or glitter explosion!)
✓ Age-flexible (adjust the help you give based on your child’s age)
✓ Actually looks cute when finished (not just “cute for a kid craft”)
Plus, the accordion-fold technique is one kids can use for other projects year-round. You’re not just making a St. Patrick’s Day decoration – you’re teaching a skill they’ll use again and again.

Taking It Further: Creative Variations
Once you’ve mastered the basic Shamrock Man, try these fun twists:
Add texture: Use green tissue paper crumpled up and glued to the body shamrock for a fluffy, dimensional look.
Make it sparkle: Add a touch of green glitter to the shamrocks before the glue dries (if you’re brave enough to deal with glitter!).
Create a whole scene: Make a Shamrock family with different sizes, or add a rainbow and pot of gold background.
Turn it into a card: Glue your finished Shamrock Man to the front of folded cardstock and write a St. Patrick’s Day message inside. Grandparents absolutely love receiving handmade cards like this!

The Bottom Line
This St. Patrick’s Day Shamrock Man craft proves that the best projects don’t have to be complicated. With just a few basic supplies and about 30 minutes, you’ll have a cheerful decoration that kids are genuinely proud to display. The combination of cutting practice, folding skills, and creative decorating makes it both educational and entertaining – which is the holy grail of kids’ activities.
So grab your green paper and get ready for some crafting fun. Your little leprechauns are going to love bringing their Shamrock Man to life, and you’re going to love how easy the whole process is. Happy crafting, and may the luck of the Irish be with you!
More St. Patrick’s Day Party Ideas to Keep the Fun Rolling:
5 Adorable St. Patrick’s Day Projects You Can Make This Weekend
5 Easy St. Patrick’s Day Crafts That’ll Make You Look Like a Creative Genius (Zero Luck Required!)
Easy Ideas to Host an Epic St. Patrick’s Day Breakfast for Kids
18 Easy and Fun St. Patrick’s Day Activities for Toddlers (No Prep Required!)
15 Easy St. Patrick’s Day Crafts for Kids That Are Actually Fun
Easy Shamrock Suncatcher Craft – A Magical St. Patrick’s Day Activity for Kids
How to Make a DIY St. Patrick’s Day Garland in 7 Easy Steps
Rainbow Pot of Gold Craft: The Ultimate 3D St. Patrick’s Day Project Kids Will Love
