

Get ready to create the most adorable (and delicious) St. Patrick’s Day gifts with just a few supplies and a little paint!
Remember believing you’d actually find a pot of gold at the end of a rainbow? Yeah, me too. Well, here’s the next best thing – and it’s way better because it’s filled with chocolate.
These DIY lucky pots of gold are about to become your new favorite go-to gift for St. Patrick’s Day. They’re perfect for teachers, neighbors, classroom parties, or anyone who deserves a little extra luck (and let’s be honest, who doesn’t?). Plus, they’re so simple that you’ll want to make a whole batch at once.
The best part? Your kids can totally help with this one, which means you get quality craft time AND adorable handmade gifts. Win-win!
What You’ll Need
Here’s your shopping list – most of these you probably already have hiding in your craft stash:
Essential Supplies:
Small terracotta pots (3.5 inches work perfectly – find them at Dollar Tree, Walmart, or your local hardware store)
Acrylic craft paint in black and green
Foam paint brushes
Gold-wrapped candy (see our epic list below!)
Optional But Awesome:
Metallic gold paint or gold glitter paint
Small detail paint brushes
Stencil vinyl and a Cricut machine (if you want to get fancy)
Shamrock stickers or felt embellishments
Green ribbon, sequins, or gems for extra pizzazz
Acrylic paint sealer (if you want these pots to last forever)
Paper shred or gold filler (trust us, this saves you from needing a mountain of candy)
Pro Tip: Can’t find terracotta pots at your local stores? Amazon has tons of options, including pre-colored pots if you want to skip the painting step entirely. Sometimes the lazy route is the genius route!


How to Make Your Pot of Gold
Step 1: Prep Your Pot (Optional But Smart)
If you think the gift recipient might want to use this as an actual planter later, seal the pot first with acrylic sealer – inside, outside, and bottom. This keeps the paint from peeling when it gets wet.
If this is purely a gift vessel? Skip the before-sealing and jump straight to painting. We won’t judge.
Quick Note: Once painted or sealed, terracotta loses its natural porousness, so if it does become a planter, it’ll need less frequent watering.
Step 2: Paint Your Pot
Grab that foam brush and apply 1-2 coats of your base color. The terracotta will soak up that first coat like it’s been wandering the desert, so don’t be surprised if you need a second layer.
Here’s where you choose your adventure:
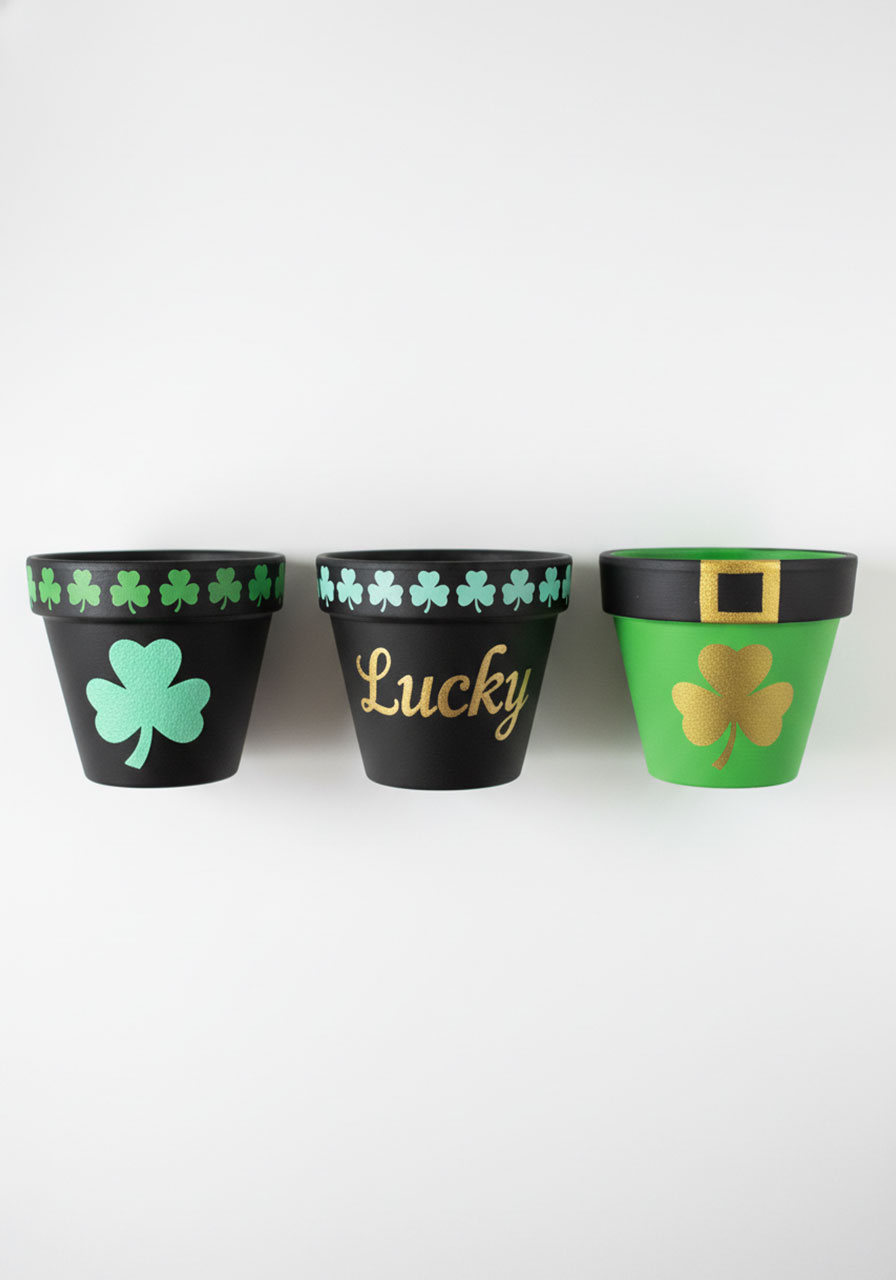
Option A: The Classic Black “Lucky” Pot
Paint the entire pot black (including the bottom and a few inches inside)
Keep your brush strokes going in the same up-and-down direction for a smooth finish
Option B: The Leprechaun Hat Pot
Paint the body of the pot green
Paint the rim (the flat part at the top) black
Use a small detail brush to get a clean line where the colors meet, or cheat with painter’s tape if you’re not feeling confident
Let it dry completely before moving on. Go grab a snack – you’ve earned it.

Step 3: Add Your Designs
This is where the magic happens! You’ve got options depending on your skill level and supplies:
The Stencil Method (Easiest):
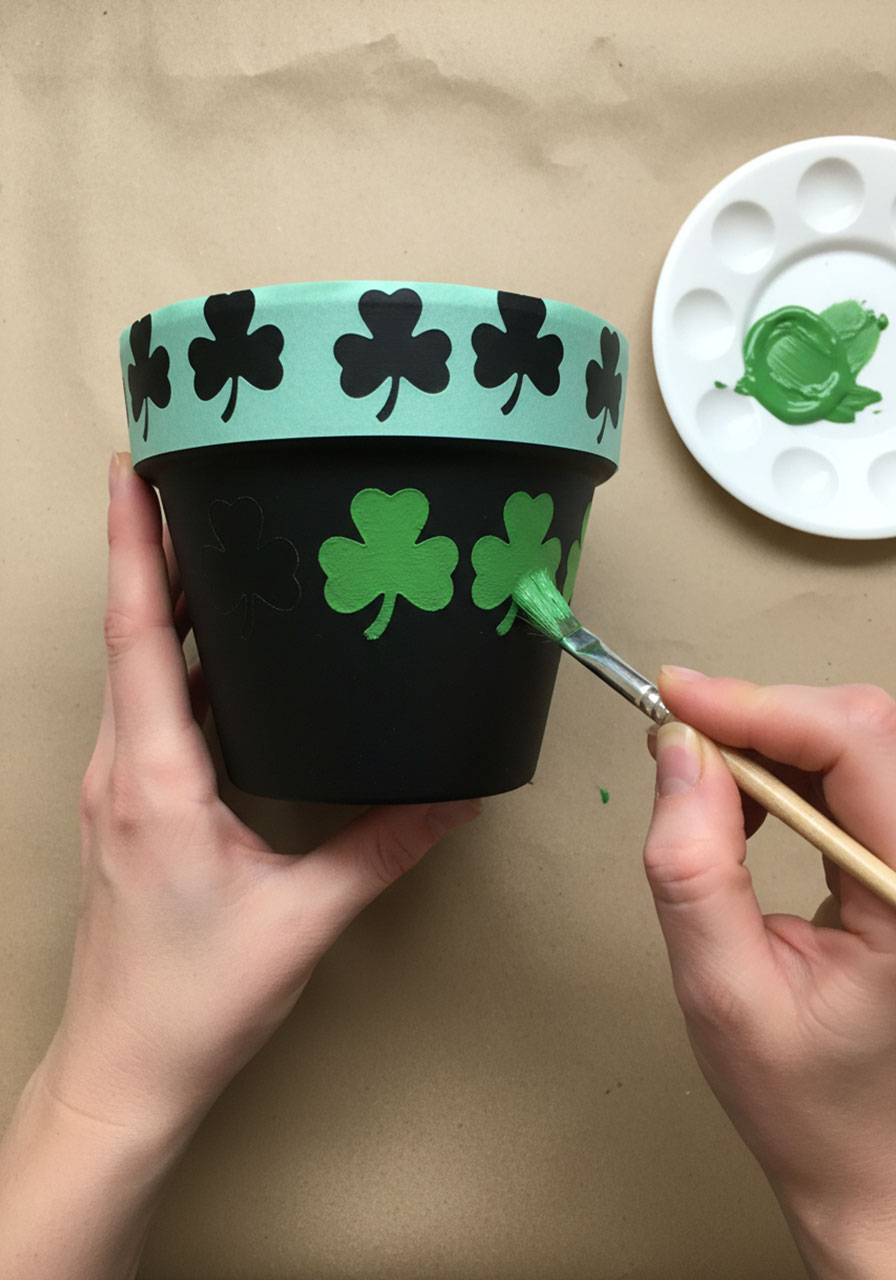
If you have a Cricut, cutting stencils from stencil vinyl is a game-changer. The stencil sticks right to the curved pot surface and gives you crisp, professional-looking designs.
1. Cut your shamrock border, “Lucky” lettering, or shamrock design from stencil vinyl
2. Stick the stencil onto your painted (and dry!) pot – press down firmly on all edges
3. Don’t forget those little “island” pieces (like the middle of the letters L, U, C, K, and Y) – use tweezers to place them
4. Apply light coats of paint with a stencil brush or regular small brush, pulling paint from the vinyl edge toward the center
5. Let each coat dry before adding the next (shamrock green needs about 3 coats to pop on black)
6. Carefully peel off the stencil while the final coat is still slightly tacky – this prevents paint from lifting
The Freehand Method (For the Brave):
No Cricut? No problem! You can paint designs by hand:
1. Lightly sketch your design with pencil first
2. Use metallic gold paint for shamrocks, buckles, or the word “Lucky”
3. Add a final coat of gold glitter paint on top for extra sparkle (but fair warning: glitter paint takes forever to build up, so use regular gold as your base)
4. Touch up any wobbly edges with your base color and a tiny brush
Design Ideas That Work Great:
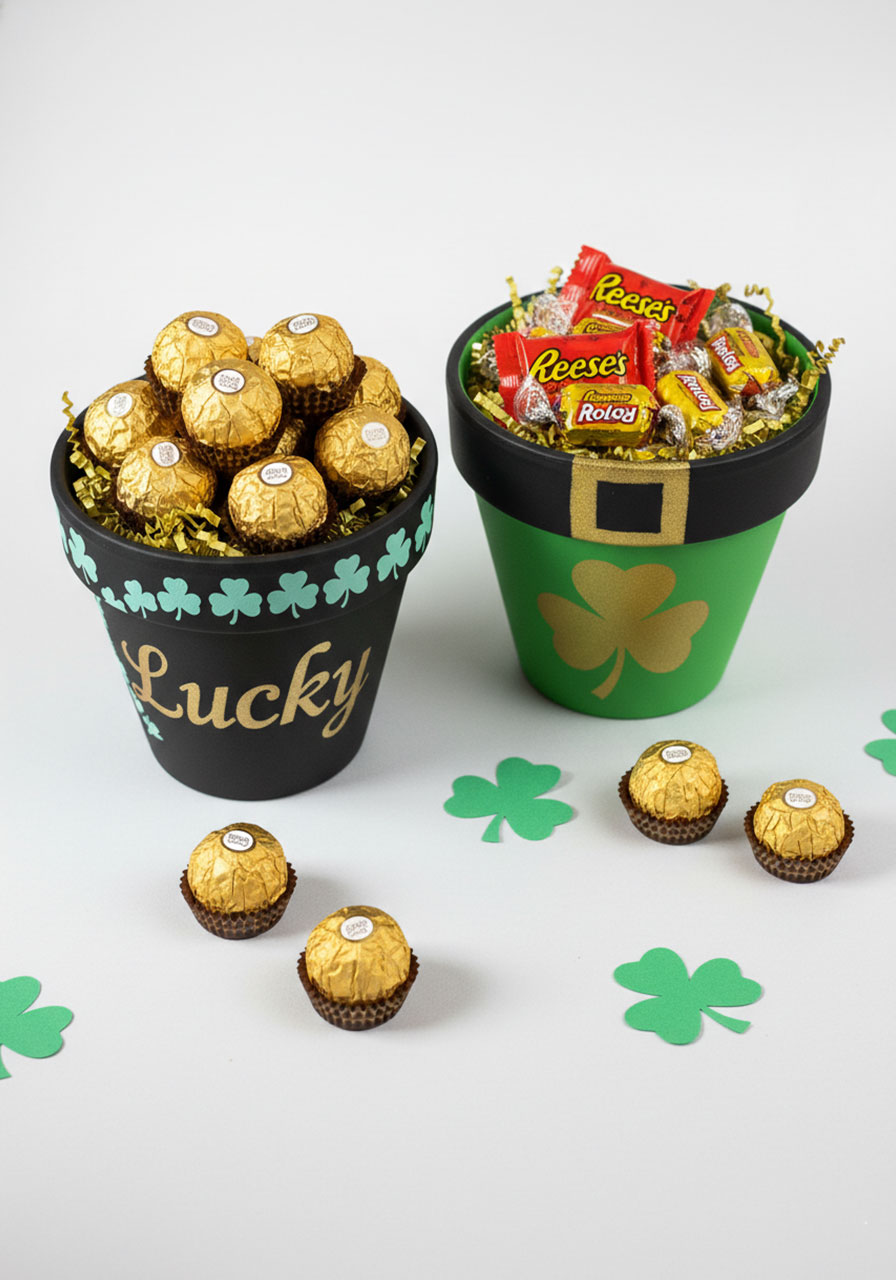
- Green shamrock border around the rim
- Gold “Lucky” written across the front
- Large gold shamrock on one side
- Gold belt buckle (for the leprechaun hat version)
Pro Tip: For the shamrock border stencil, cut between each shamrock instead of one long strip. This makes it WAY easier to position on the curved surface without wrinkles.



Step 4: Seal the Deal (Optional)
If you want to protect your masterpiece from scuffs and chips, spray it with a matte acrylic sealer once everything’s bone dry. You won’t notice a huge visual difference, but your paint will stay pristine.
Step 5: Add the Finishing Touches
This is where you make it YOURS:
Hot glue felt shamrock stickers to the pot
Tie a green ribbon bow around the rim
Add adhesive gems or sequins for sparkle
Get creative – there are no rules here!
Step 6: Fill It Up!
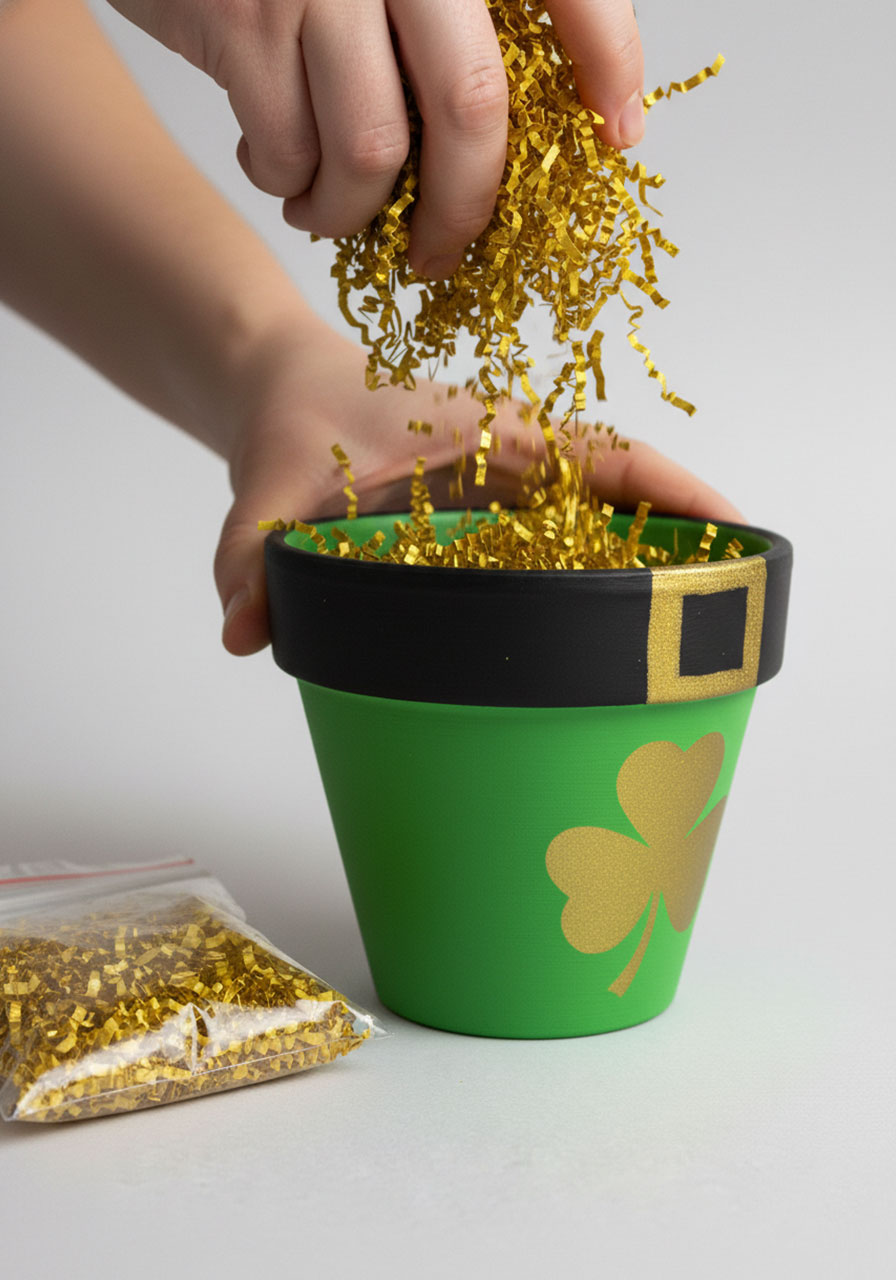
Start with a layer of gold paper shred or filler on the bottom (especially for the 3.5-inch pots – otherwise you’ll need an entire bag of candy per pot, which is fine if you’re going for “Best Teacher Ever” status).
Then pile on the gold-wrapped candy until it’s overflowing with deliciousness.
The Ultimate Gold Candy Guide
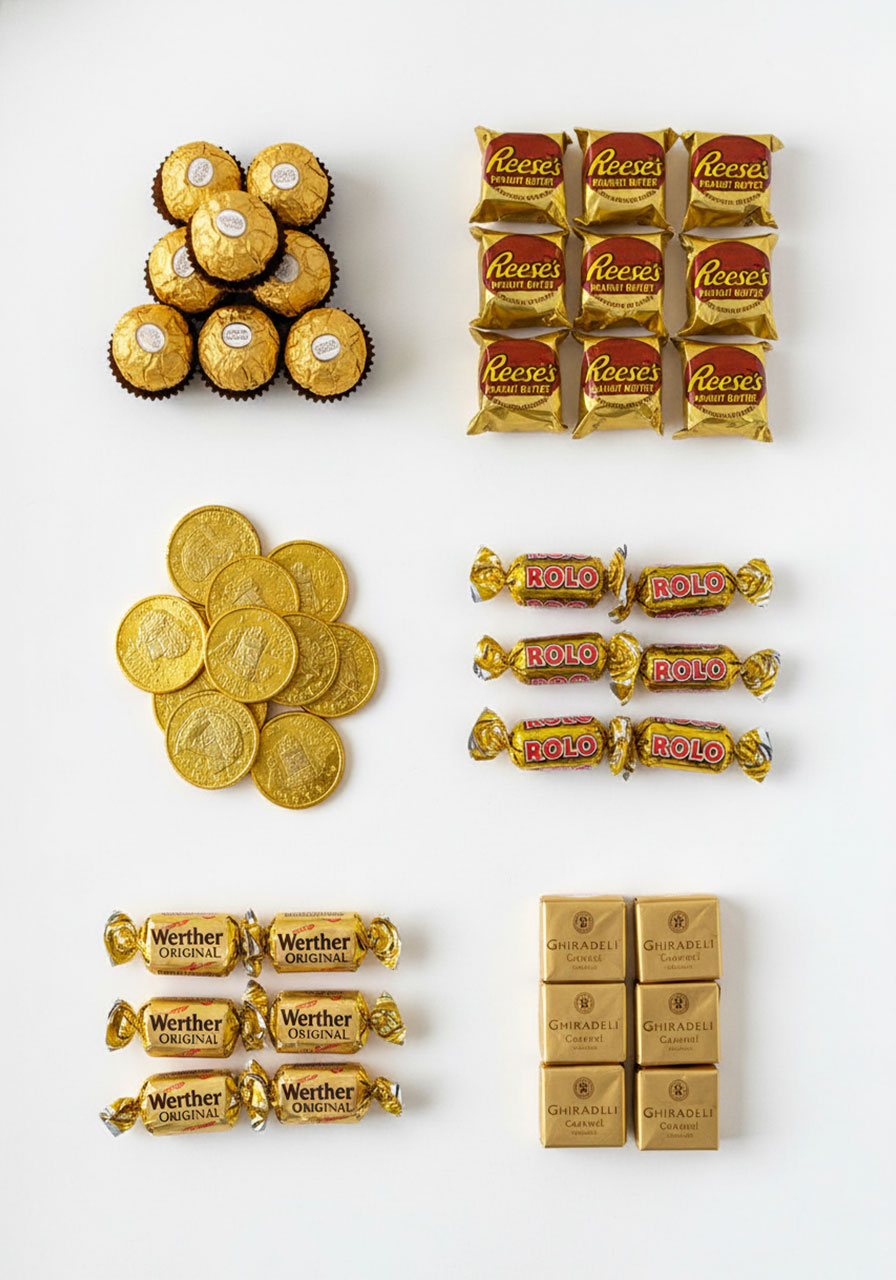
Here’s every gold-wrapped candy we could think of to fill your pot:
Rolos (a classic for a reason)
Miniature Reese’s (peanut butter and chocolate = perfection)
Chocolate coins (the most literal pot of gold option)
Ferrero Rocher (fancy!)
Werther’s Original (multiple flavors available)
Hershey’s Nuggets
Hershey’s Kisses (the milk chocolate with almonds are gold-wrapped)
Lindor caramel milk chocolate truffles
Dove Gifts caramel & milk chocolate
Ghirardelli squares (milk chocolate caramel)
Twix minis
Bonus Idea: Yellow-wrapped candies work too! Try miniature Butterfingers for variety.
The Healthy Rebellion: Want to be that person who gives something healthy? Go for it! Try popcorn or clementines. Your gift, your rules.
Why This Craft Is a Total Winner
Let’s be real – these pots check every box:
✓ Kid-friendly: Little ones can help paint (even if it gets messy)
✓ Budget-friendly: All supplies are inexpensive and reusable
✓ Quick to make: You can knock out several in one afternoon
✓ Universally loved: Teachers, neighbors, friends – everyone appreciates chocolate
✓ Classroom party perfect: Make mini versions for the whole class
✓ Doubles as décor: Keep one for yourself on a tiered tray or mantel
Quick Troubleshooting
Paint not sticking well? The terracotta is too porous – add another coat and consider sealing next time.
Stencil bleeding under the edges? Press down firmer on the vinyl edges and use less paint per coat.
Gold glitter paint looking orange? Stick with just the metallic gold paint – it looks better anyway.
Ran out of candy because you ate half of it while crafting? We’ve all been there. No judgment. Just buy more Reese’s.
Make It Your Own
The beauty of this craft is that there’s no wrong way to do it. Want to make mini pots for a classroom exchange? Perfect. Want to create one giant pot filled with full-size candy bars? Also perfect. Want to skip the stencils and just use stickers? You do you!
The point is to create something fun, festive, and filled with a little luck (and a lot of chocolate).
Your friends, teachers, and neighbors are going to LOVE these – and you’ll love how easy they are to pull together. So grab those pots, break out the paint, and get ready to spread some St. Patrick’s Day cheer!
And hey, if a few Reese’s become “casualties of crafting” along the way? That’s just quality control. You’re welcome.
More St. Patrick’s Day Party Ideas to Keep the Fun Rolling:
St. Patrick’s Day Shamrock Man Craft: The Easiest (and Cutest!) Holiday Project for Kids
5 Adorable St. Patrick’s Day Projects You Can Make This Weekend
5 Easy St. Patrick’s Day Crafts That’ll Make You Look Like a Creative Genius (Zero Luck Required!)
Easy Ideas to Host an Epic St. Patrick’s Day Breakfast for Kids
18 Easy and Fun St. Patrick’s Day Activities for Toddlers (No Prep Required!)
15 Easy St. Patrick’s Day Crafts for Kids That Are Actually Fun
Easy Shamrock Suncatcher Craft – A Magical St. Patrick’s Day Activity for Kids
