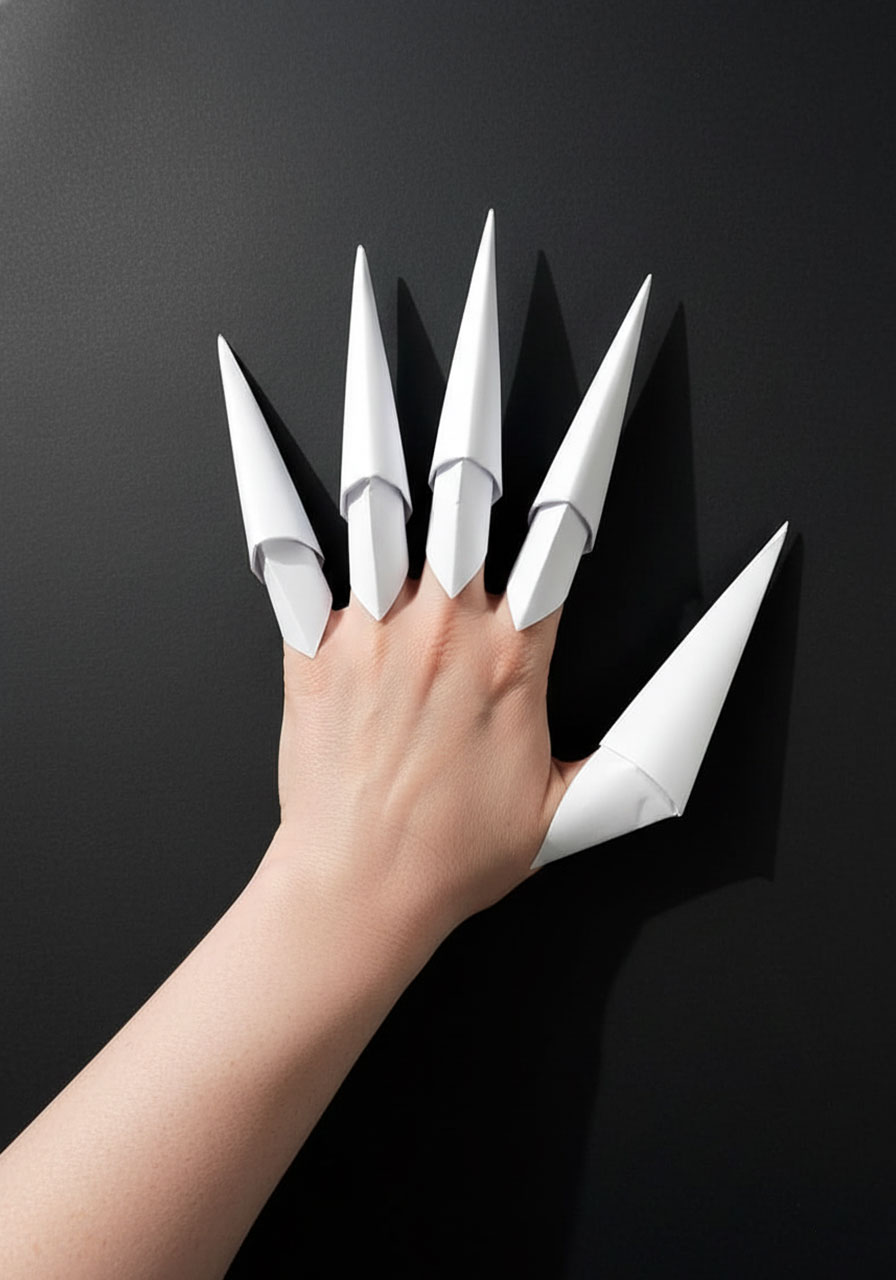
Ready to unleash your inner beast? These DIY paper claws are about to transform you from regular human to fearsome creature with nothing more than a sheet of printer paper and some clever folding. Whether you’re completing a Halloween costume, adding drama to game night, or just looking for a wickedly fun craft, these origami claws are your ticket to instant cool.
The best part? You’ll have a full set of menacing claws faster than you can say “trick or treat.” Let’s dive in!
What Makes Paper Claws So Awesome?
Here’s why we love this craft: it’s insanely simple, requires zero special supplies, and the end result looks legitimately intimidating. I still remember the first time I showed up to a party with a full set of paper claws – the reaction was priceless. People couldn’t believe they were just folded paper!
These claws work perfectly for costume parties, cosplay events, pretend play with kids, or even as props for a spooky photoshoot. Plus, once you’ve mastered the technique, you can whip up a claw in under a minute. That’s faster than most people can find their car keys.
Best for: Halloween costumes, pretend play, quick craft projects, parties
Time to Make: 3-5 minutes per claw (15-20 minutes for a full set)
Skill Level: Beginner-friendly


What You’ll Need:
Printer paper (regular letter-size, 8.5 x 11 inches) – one sheet per claw
Your hands (and a bit of patience for the first attempt)
Pro Tip: Thinner paper (20 lb weight) is easiest to fold and gives you the sharpest points. You can use colored paper for variety, but avoid anything thicker than 24 lb or you’ll be wrestling with your folds instead of mastering them.
How to Fold Your Paper Claws: Step-by-Step
Here’s where the magic happens. Follow these steps carefully, and you’ll have a perfectly pointed claw ready to slip onto your finger. Don’t worry if it feels tricky at first – by your second or third claw, you’ll be folding like a pro.
Getting Started: Creating the Foundation
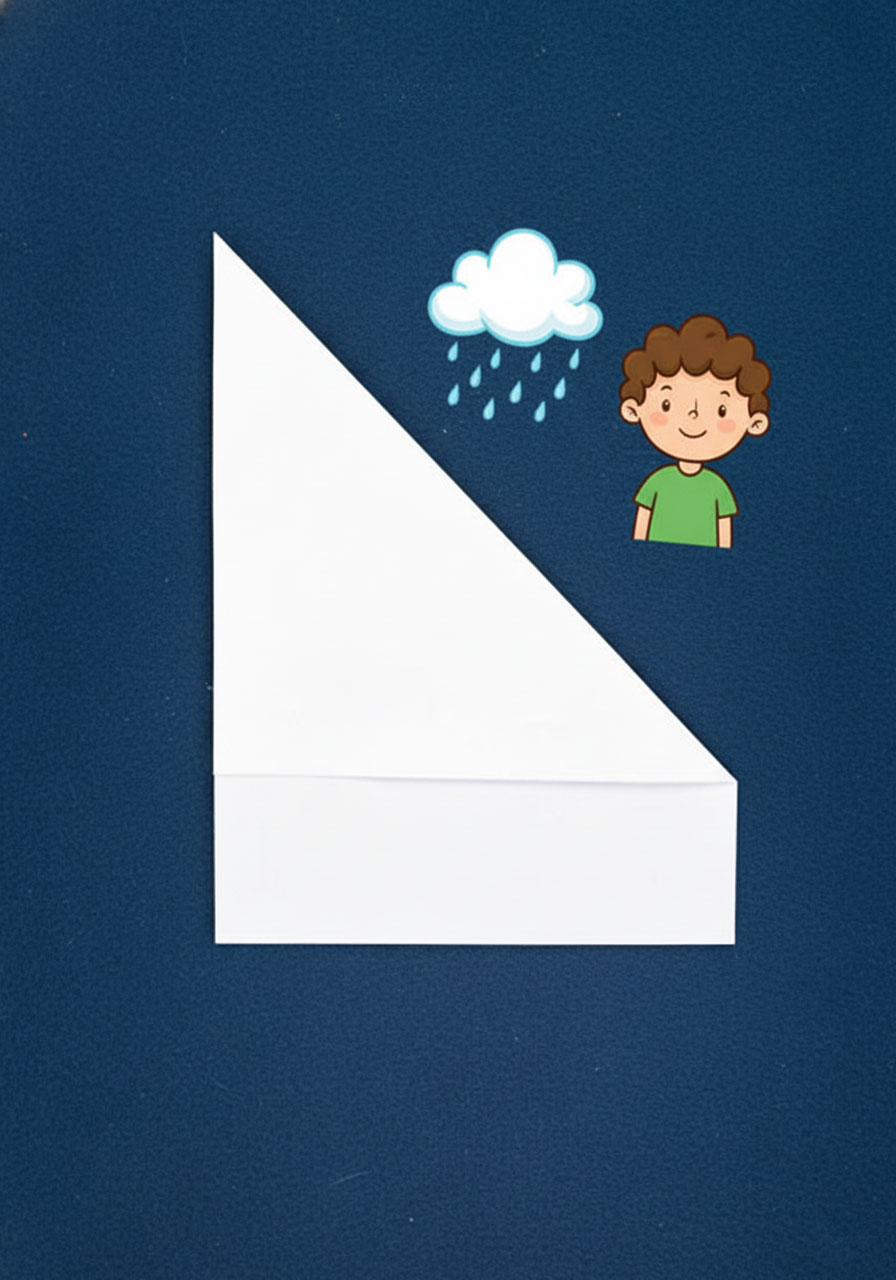
1. Make your first diagonal fold.
Grab the top right corner of your paper and fold it down so the top edge lines up perfectly with the left edge. You should end up with a triangular flap on top and a rectangular strip of paper at the bottom. Press that fold down nice and crisp!
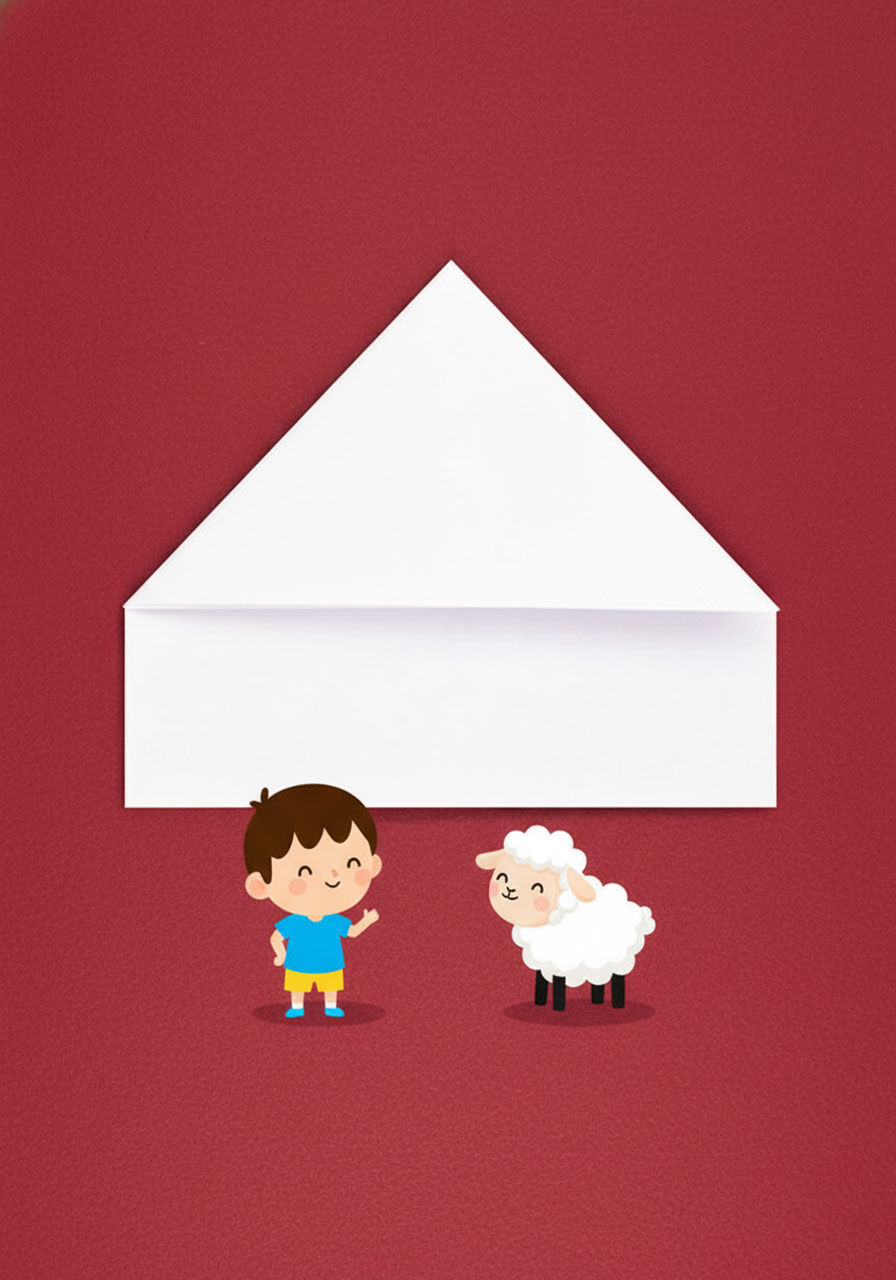
2. Create a center point.
Take the top left corner and fold it down to meet the top right point. Now you’ve got a pointed triangle at the top center of your paper. This point is the beginning of your fearsome claw tip.
3. Build up the left side.
Fold the bottom left corner upward so the left edge aligns with the horizontal edge of your folded paper. You’re starting to create that claw shape now – can you see it taking form?
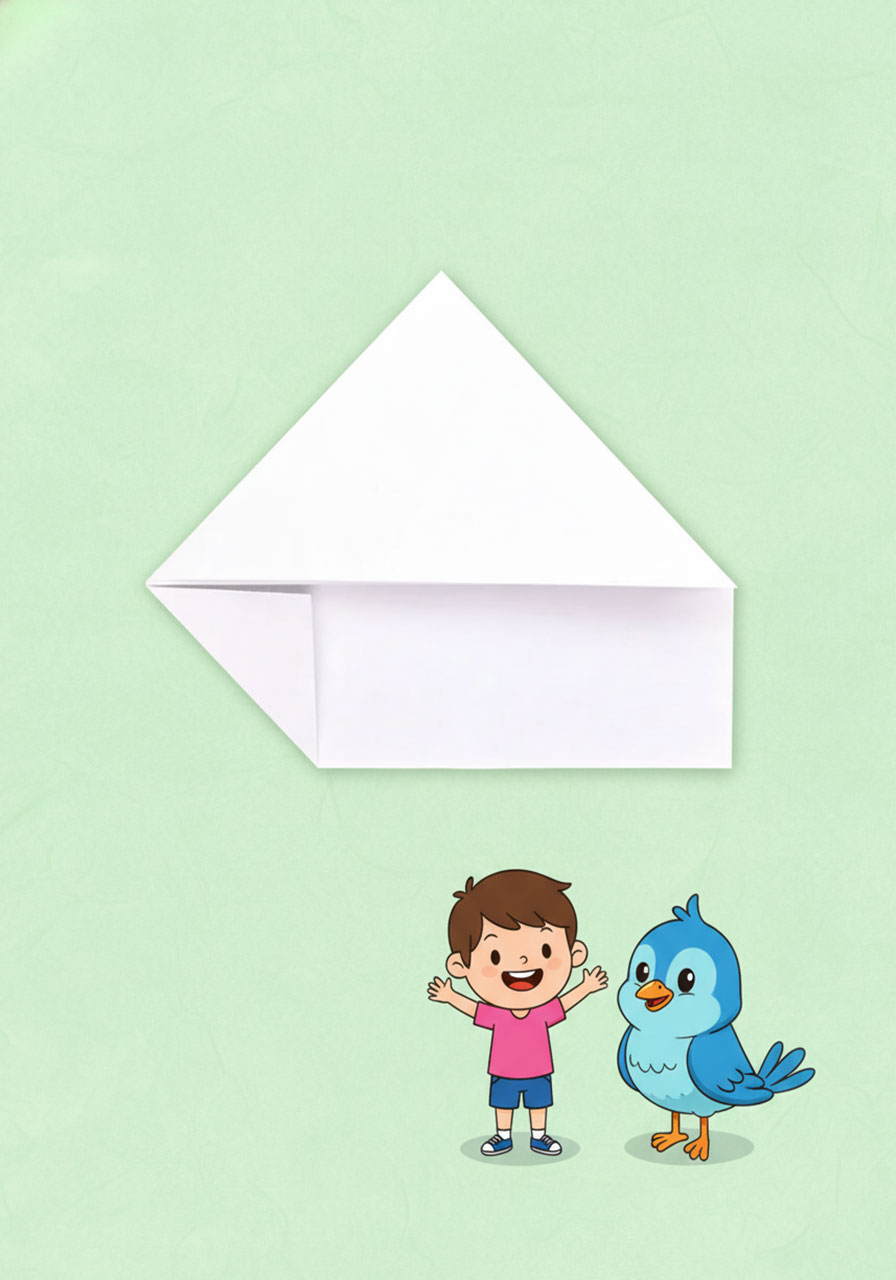
4. Mirror it on the right side.
Do the exact same thing with the bottom right corner, folding it up to match the horizontal edge. Your paper should be looking more symmetrical now, like a house with a pointed roof.
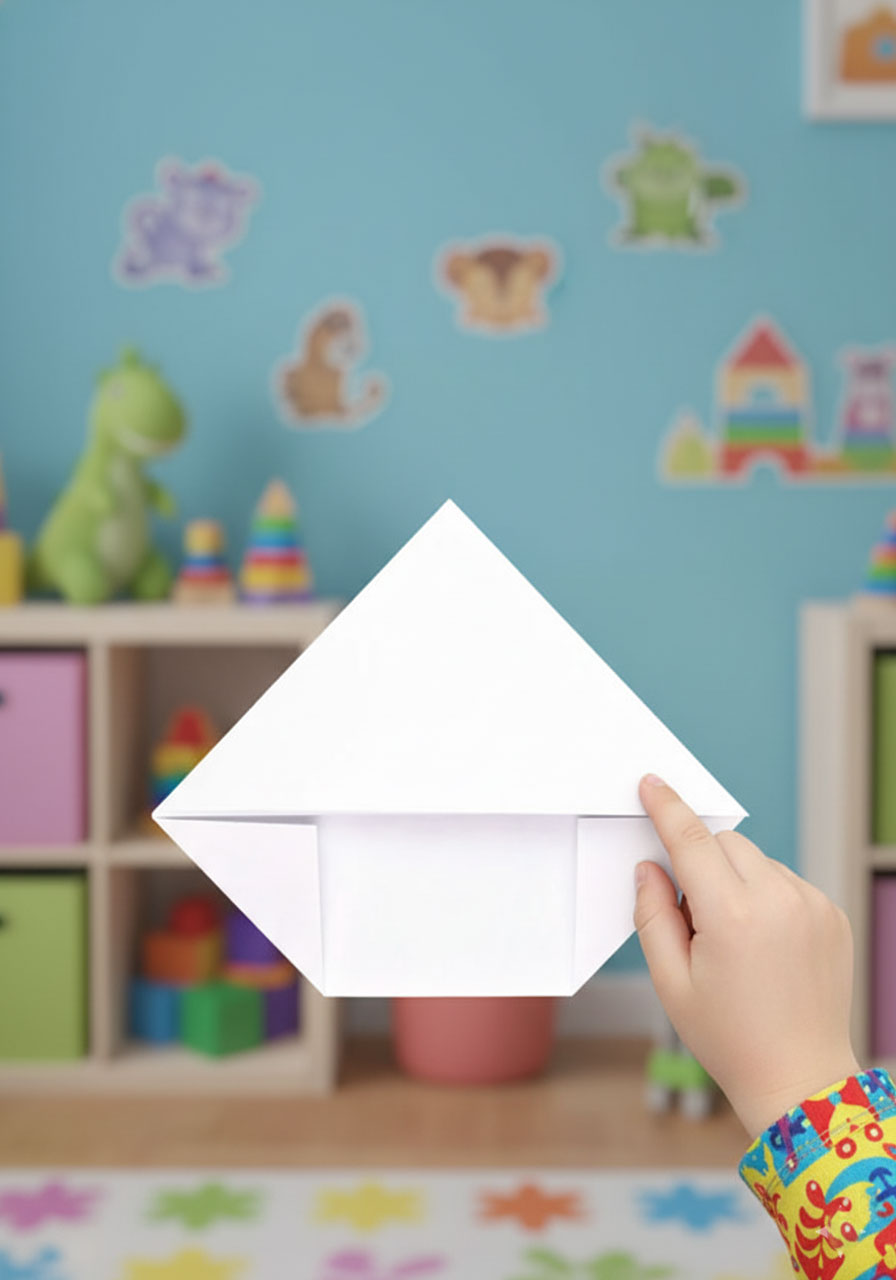
5. Fold up the bottom.
Take that remaining bottom section and fold it upward so you’ve got a clean triangle shape. We’re getting close!
Creating the Claw Structure
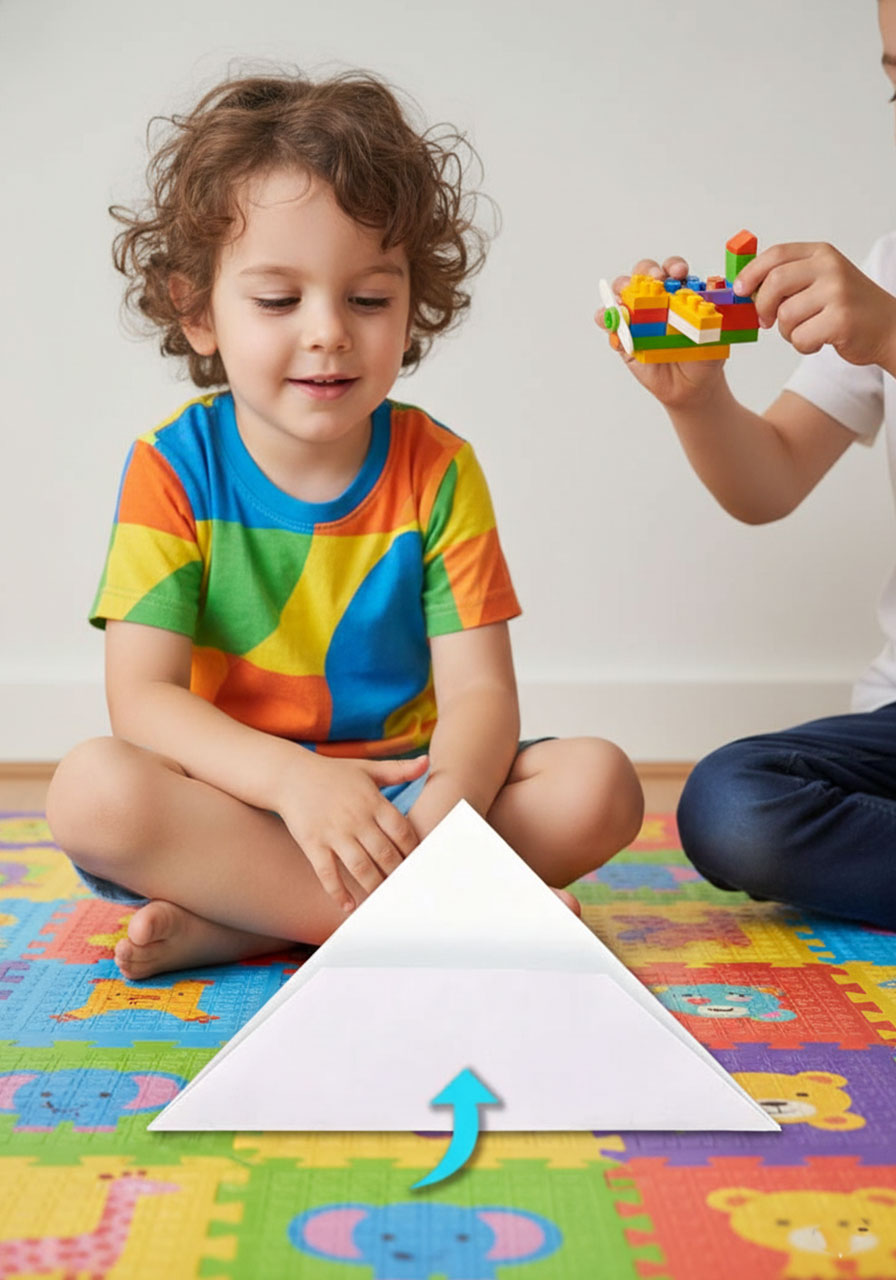
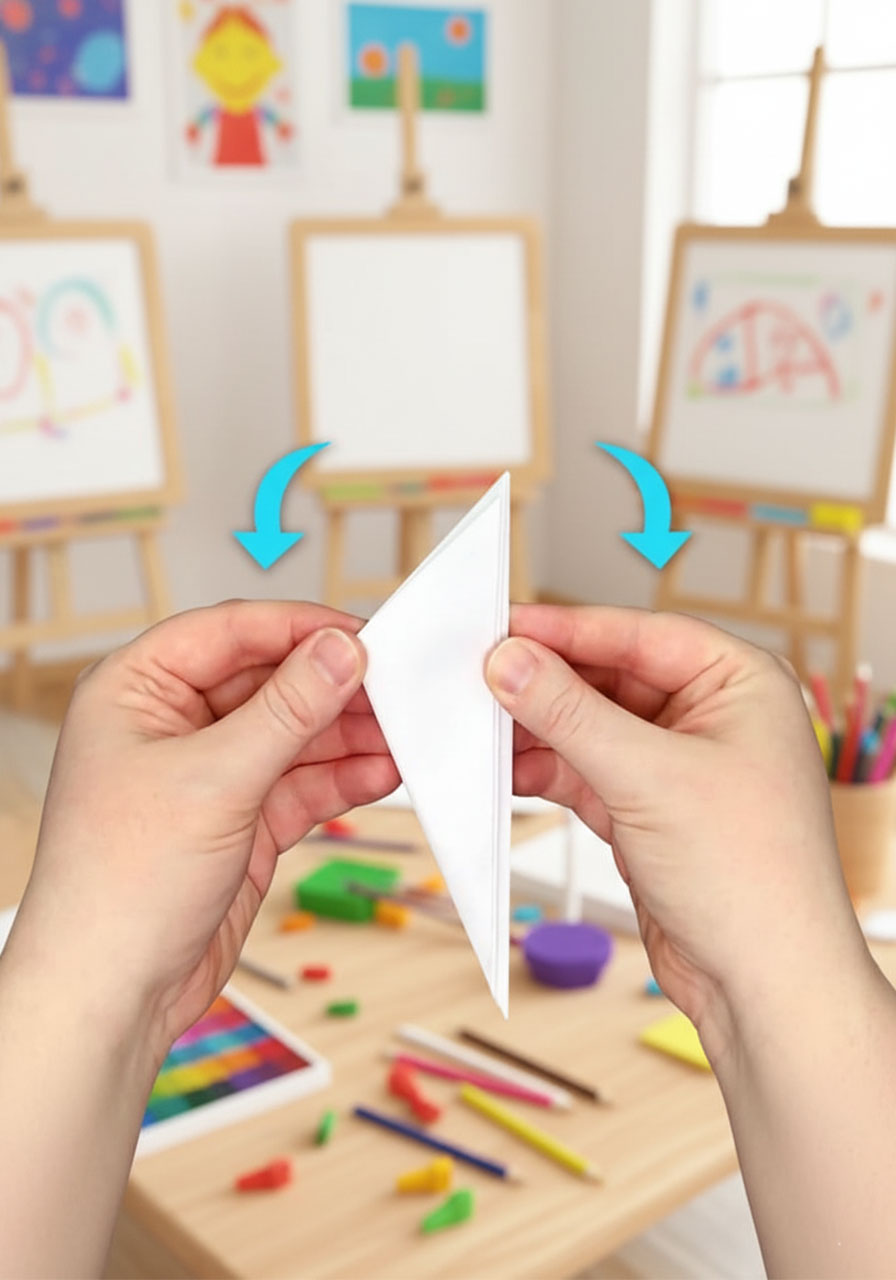
6. Fold your triangle in half.
Fold the entire triangle in half from left to right (or right to left – totally your call). This creates a center crease that you’ll need for the next steps.
7. Unfold and find your guide.
Open that last fold back up so you’ve got your triangle again, but now with a helpful center line running down the middle.

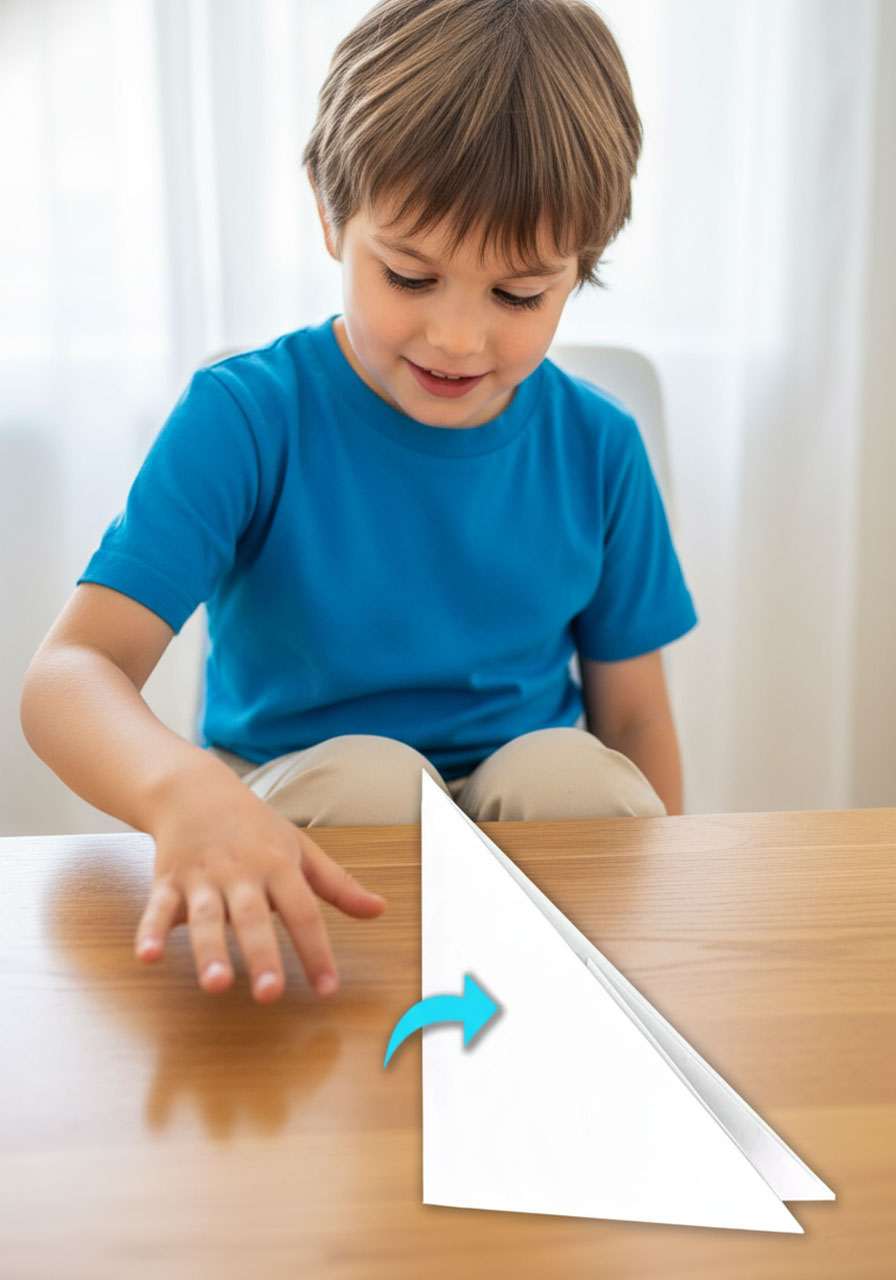
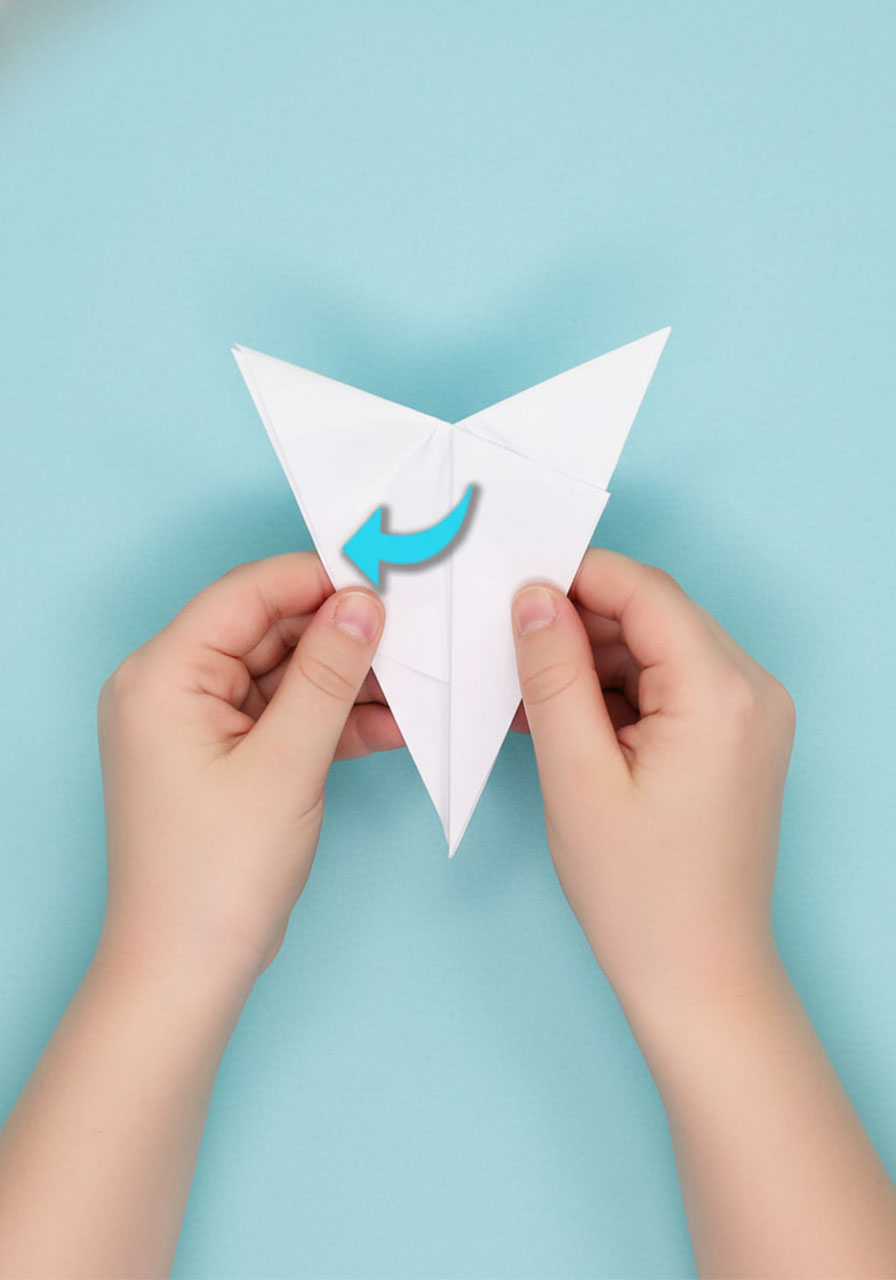
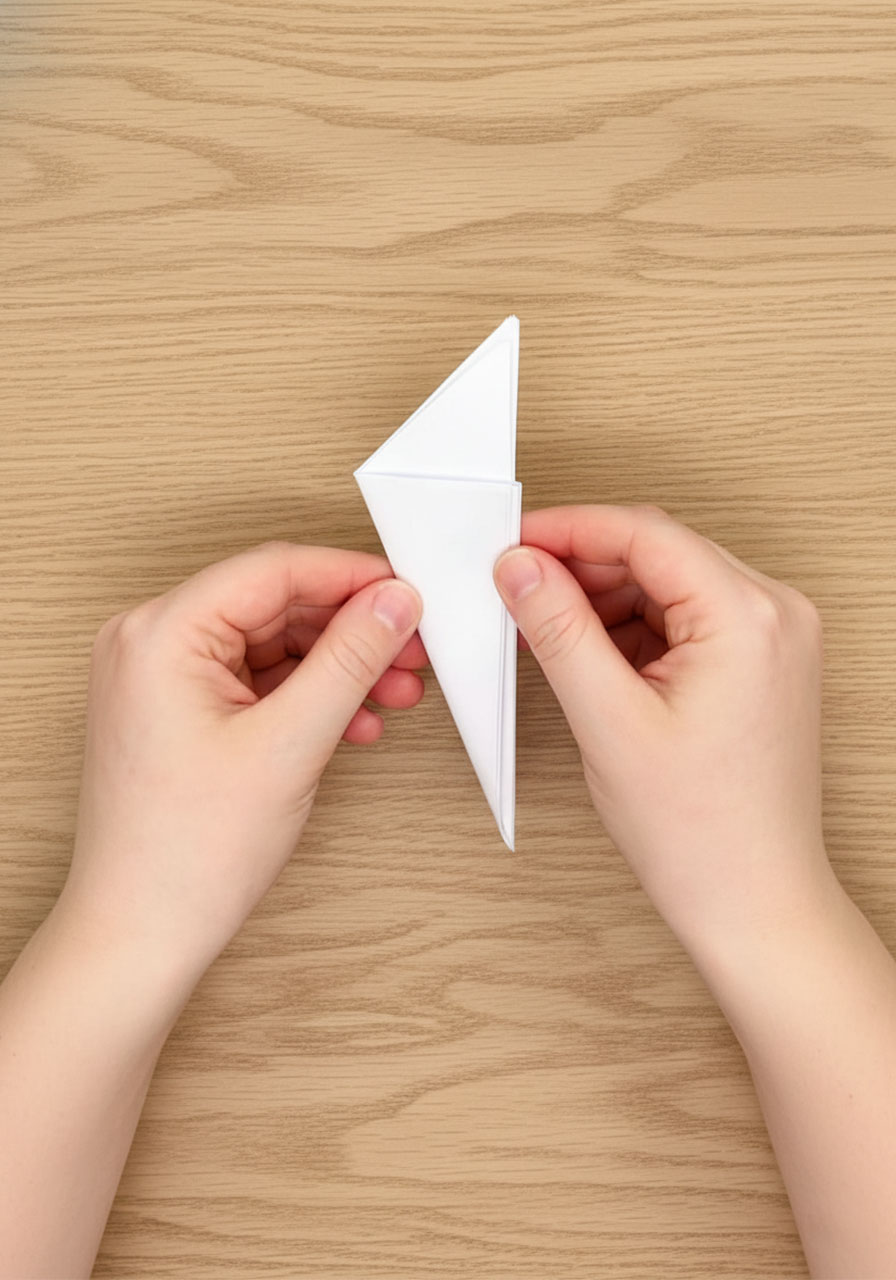
8. Start the rolling process.
Here’s where it gets interesting! Take the left edge and fold it inward so it lines up with that center crease you just made. You’re starting to form the cone shape that makes the claw work.
9. Roll it over again.
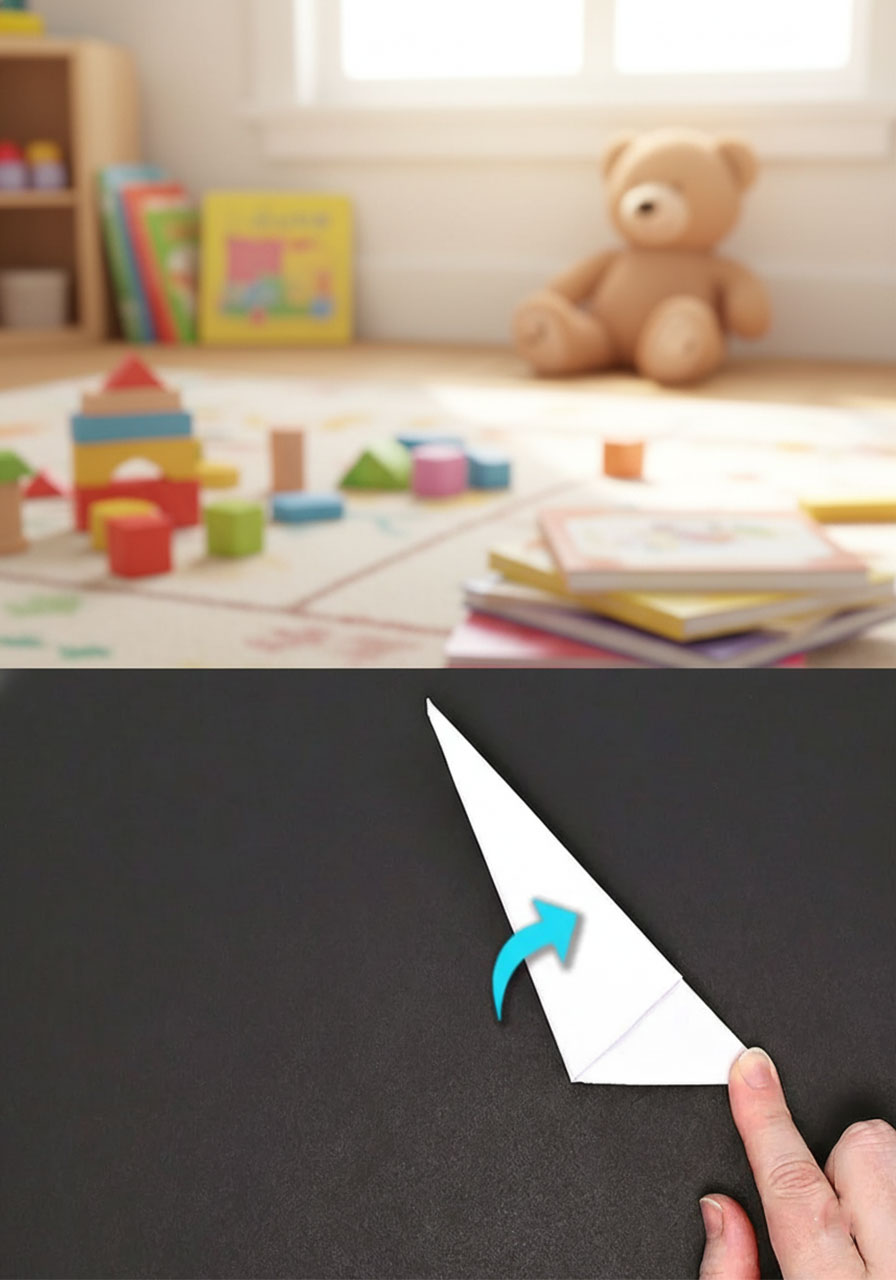
Fold the paper to the right again along that center line, almost like you’re rolling the paper around itself. The point should stay nice and sharp up top while you’re doing this.

10. One final roll.
Roll the paper over to the right one last time. Your claw should now look like a long, pointed cone. Make sure that tip stays neat and pointy – that’s what gives your claw its menacing look!
Locking It All Together
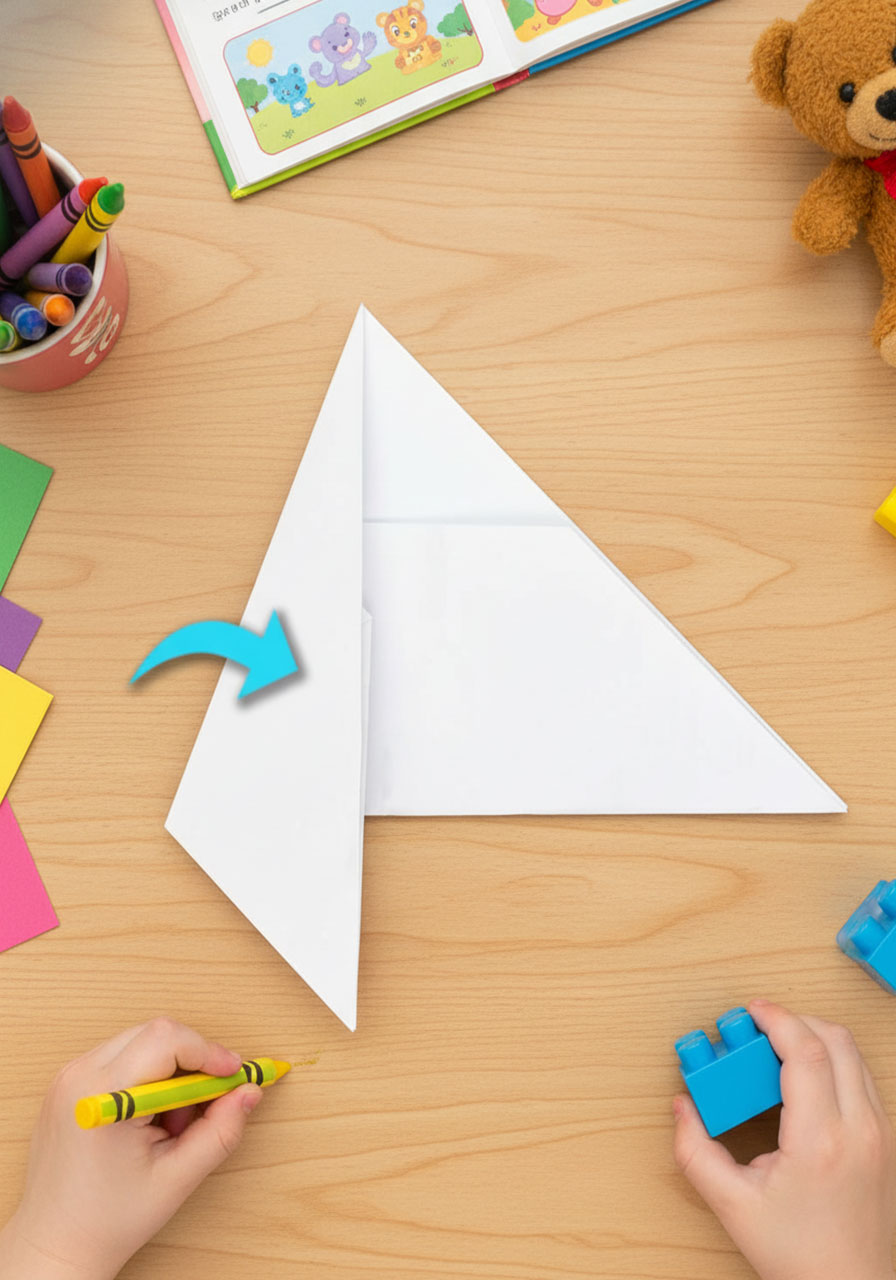
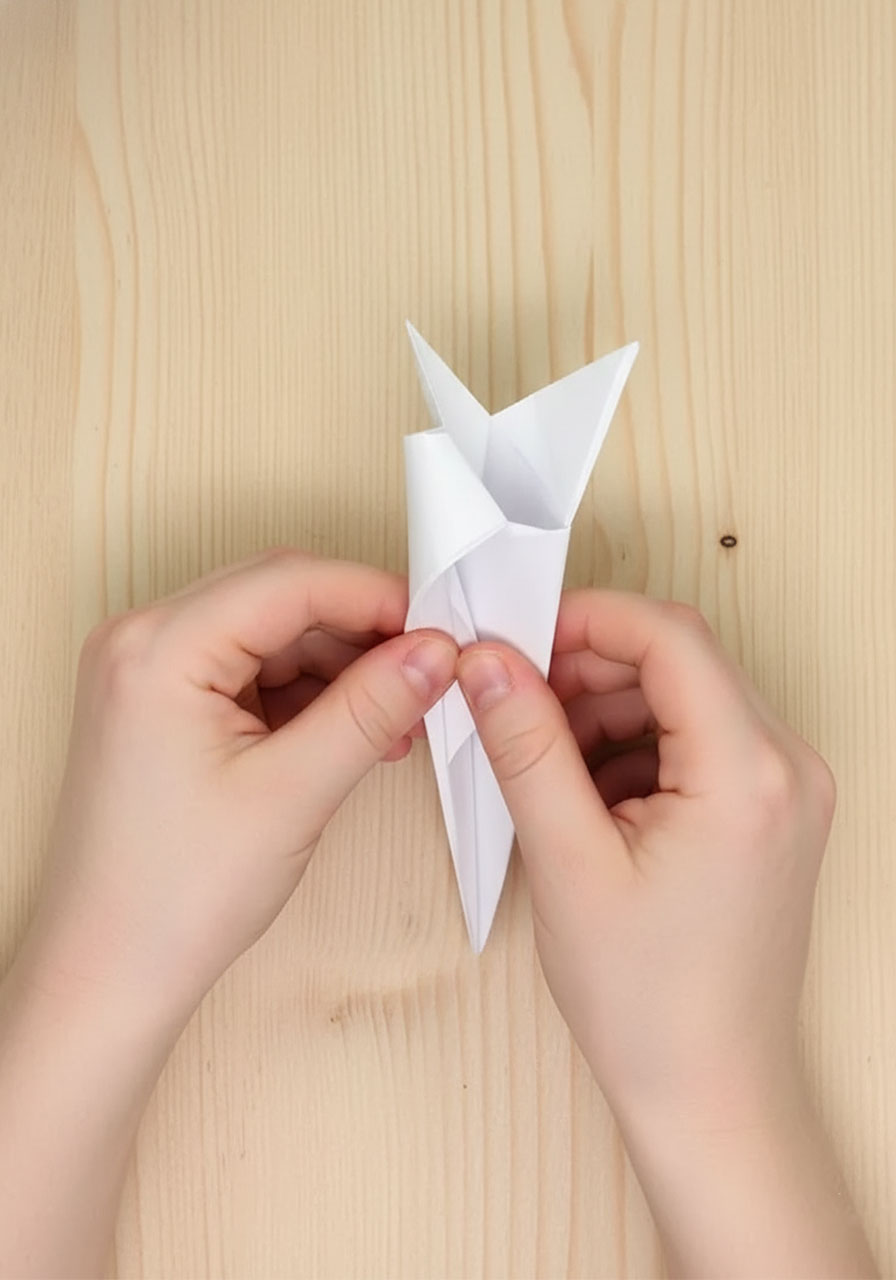
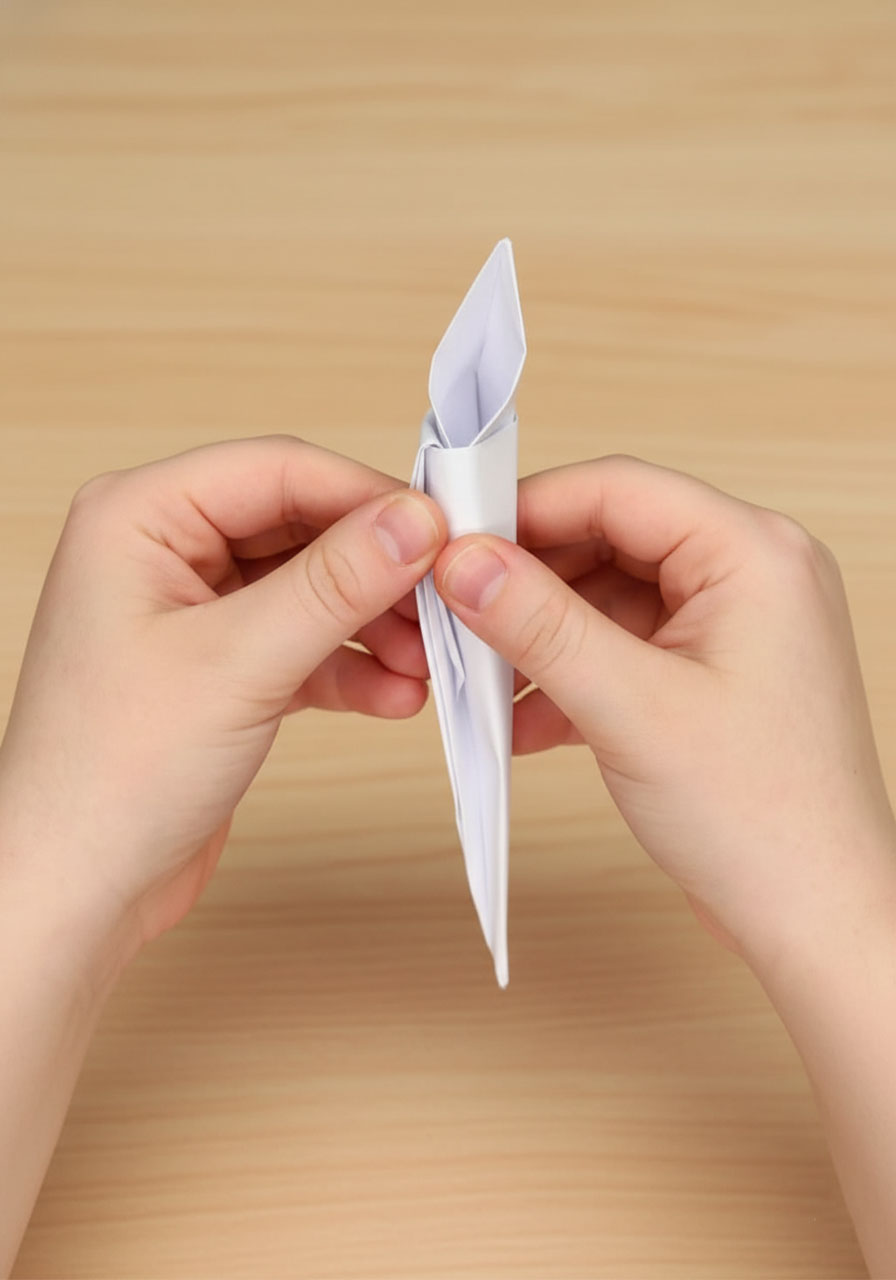
11. Flip and prepare to lock.
Flip your almost-finished claw over so the long point faces toward you. You should see the folded layers on top.
12. Find the secret pocket.
Open up the top fold slightly. You’ll notice two sections: a plain surface on the left and a folded part with a little pocket opening on the right. This pocket is your claw’s secret locking mechanism!
13. Tuck and secure.
Grab that top left point and tuck it firmly into the pocket on the right side. Push it all the way down inside until the fold is completely flat and secure.
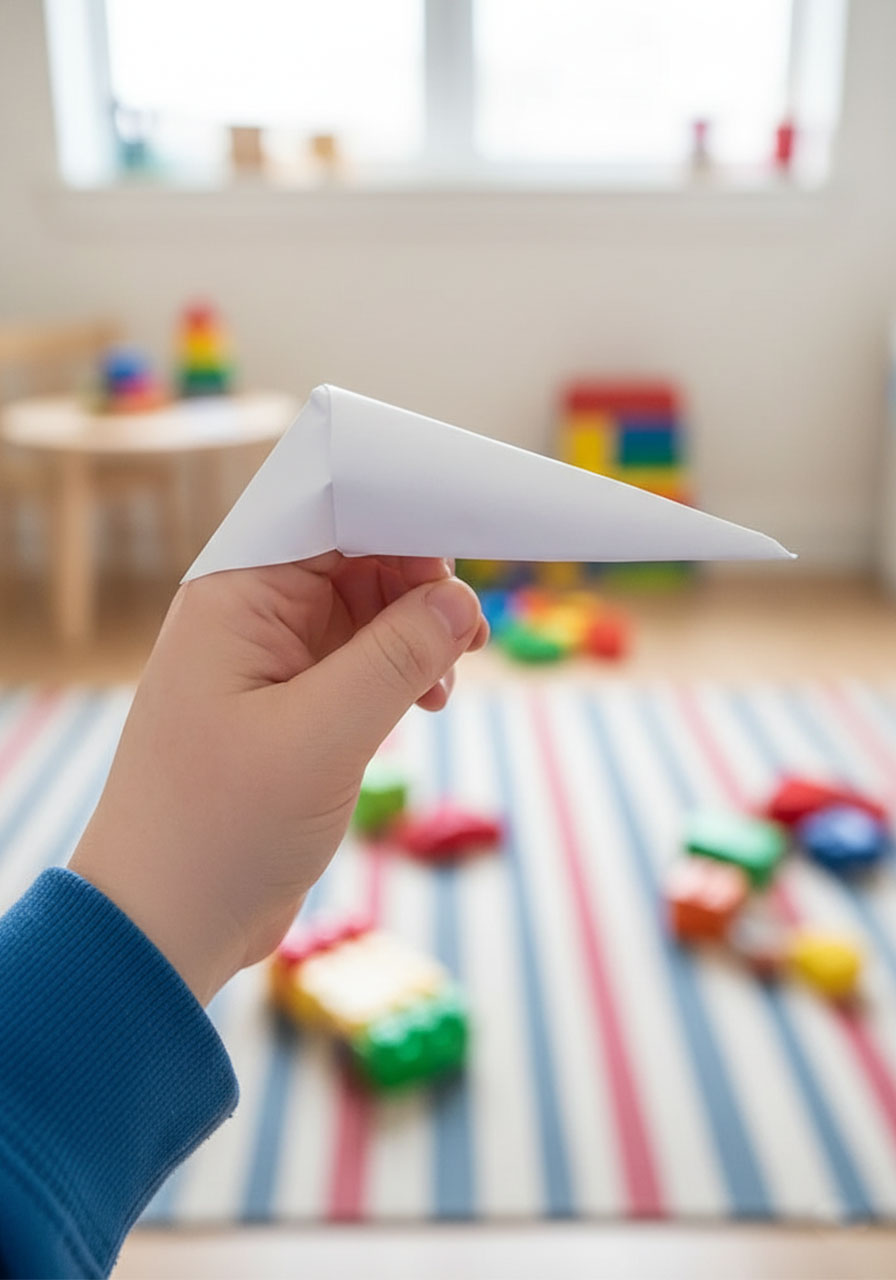
14. Create the finger opening.
Turn the claw about 90 degrees to the left (not completely upside down – just a quarter turn). You’ll see a fold at the top that naturally wants to open up.
15. Make room for your finger.
Stick your finger inside that opening and press gently on both sides of the claw to widen the gap. The claw should fit snugly on your finger – tight enough to stay on but not so tight it cuts off circulation!
16. Slide it on and admire your work.
Push the claw all the way up onto your finger. It should sit securely at the tip, transforming your regular finger into a menacing talon. One down, nine to go!
Pro Tips for Paper Claw Perfection
Make crisp folds. The sharper your creases, the better your claw will look and hold its shape. Run your fingernail along each fold to really set it.
Watch out for those points! These paper claws end up surprisingly sharp. Seriously – I’ve accidentally scratched myself more than once while making these. Be careful not to poke yourself or others, especially if kids are involved.
Can’t figure out the final steps? The tucking-and-locking part can be the trickiest. If you’re getting stuck, double-check that the long point is facing toward you when you flip the claw over, and look for that pocket on the right side where the layers overlap.
Putting on all 10 claws solo? Start with the pinky finger on your non-dominant hand and work your way across. Push each claw up as far as it’ll go to keep them from falling off. When you get to your dominant hand, use your already-clawed fingers to help position the last few. For that final thumb claw, use your clawed fingers to scoop it up and slide it on – it feels ridiculous but totally works!
Want colorful claws? Colored printer paper makes for eye-catching variations. Try black for a classic scary look, red for a dragon vibe, or white for an ice creature aesthetic.
Common Questions About Paper Claws
How long do they last? These claws are surprisingly durable for paper crafts! As long as you don’t crush them or get them wet, they’ll last through an entire party or event. I’ve kept sets for weeks just by storing them carefully in a box.
What if my claw won’t stay on my finger? Your claw might be too loose. Try refolding with tighter, more precise folds, or use slightly thicker paper. You can also make a tiny adjustment by opening the finger pocket slightly less.
Can kids make these? Absolutely! Kids around 8 years old and up usually have the dexterity to master these folds. Younger kids might need help with the tucking step, but they’ll love wearing the finished product.
What else can I make with paper? Once you’ve conquered paper claws, try your hand at paper airplanes, ninja stars, or paper boats. Origami is addictively fun once you get the hang of it!
Your Turn to Get Clawing!
There you have it – everything you need to know to create a full set of legitimately awesome paper claws. These simple folded creations pack serious visual punch, and the fact that you can make them in minutes with supplies you already have makes them an absolute party-planning win.
So grab some paper and get folding. Whether you’re prepping for Halloween, adding flair to a costume, or just want to dramatically gesture during your next story, these paper claws have got you covered. Your fingers will thank you for the upgrade!
More Kid’s Party Ideas to Keep the Fun Rolling:
How to Play Help Your Neighbor: The Card Game That’ll Have Your Family Actually Wanting Game Night
28 Super Fun Dollar Store Crafts for Kids That Won’t Break the Bank
3 Easy Heart Painting Ideas That’ll Make You Look Like a Creative Genius
10 Easy Elementary School Indoor Party Games Kids and Room Moms Will Love
How to Make a Cardboard Loom Bracelet: Easy DIY Friendship Bracelets
15 Minions Party Ideas For The Ultimate Despicable Me Birthday Bash
How to Make Magic Unpoppable Bubbles That’ll Blow Your Kids’ Minds