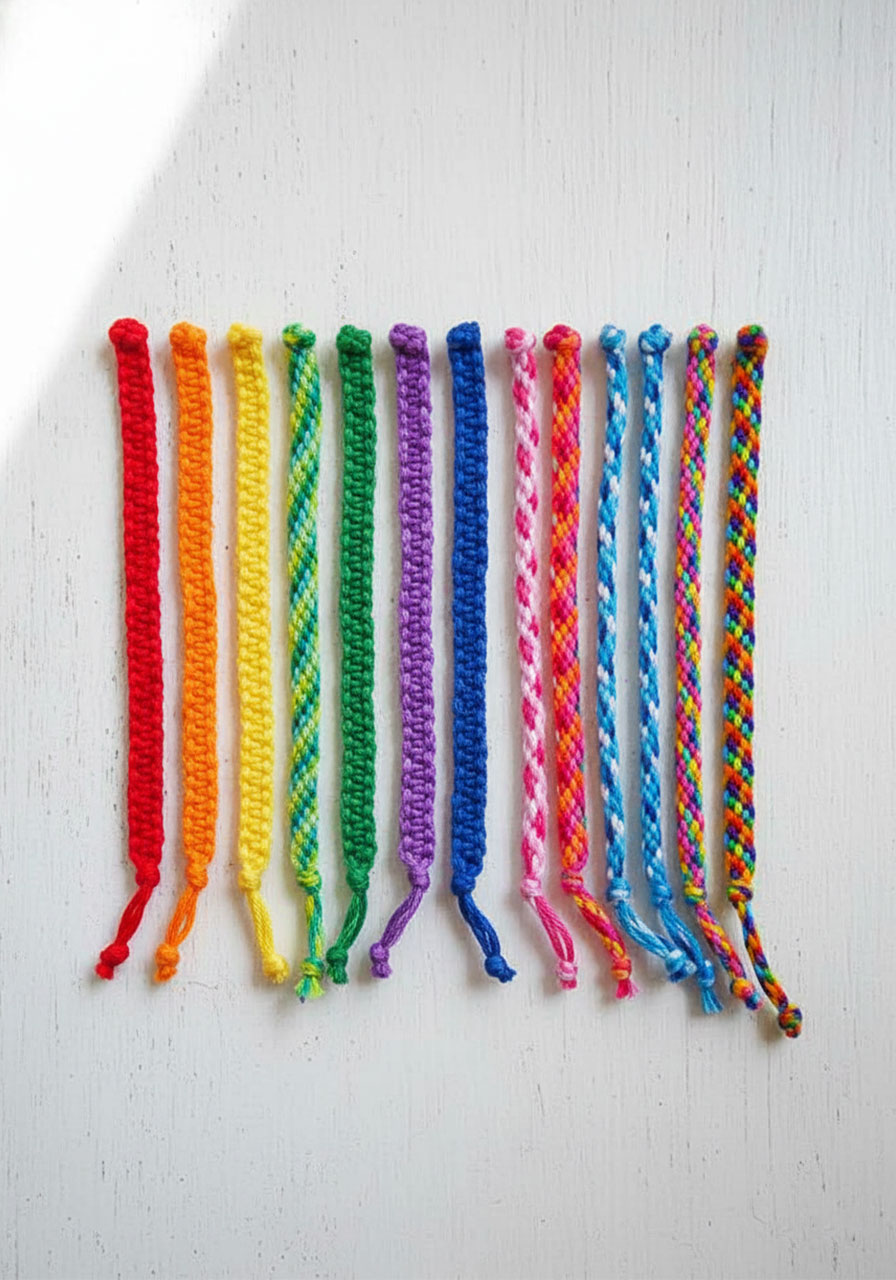
Get ready to create the coolest friendship bracelets you’ve ever seen – using nothing but cardboard and embroidery floss! This cardboard loom bracelet is about to become your new favorite craft, and trust us, once you make one, you’ll want to make a whole rainbow stack of them.
The best part? This technique is so ridiculously simple that you’ll have the pattern down after just a couple of knots. No complicated instructions to remember, no losing your place in a tricky pattern – just pure, colorful bracelet-making fun that’s perfect for sleepovers, rainy afternoons, or whenever you need to keep your hands busy.
Why You’ll Love This Cardboard Loom Bracelet
This isn’t your average friendship bracelet. The round loom creates a stunning spiral pattern that looks way more impressive than the effort required. Here’s what makes this craft a total winner:
It’s beginner-friendly. If you can count to three and tie a knot, you can make this bracelet. Seriously.
Zero fancy supplies needed. Raid your recycling bin for cardboard, grab some embroidery floss, and you’re in business.
It’s actually adjustable. Unlike traditional friendship bracelets that you tie on and leave forever, this one has a sliding closure that adjusts to fit any wrist.
The repetitive pattern is surprisingly relaxing. Once you get into the rhythm, it’s almost meditative – perfect for unwinding after a long day.


What You’ll Need
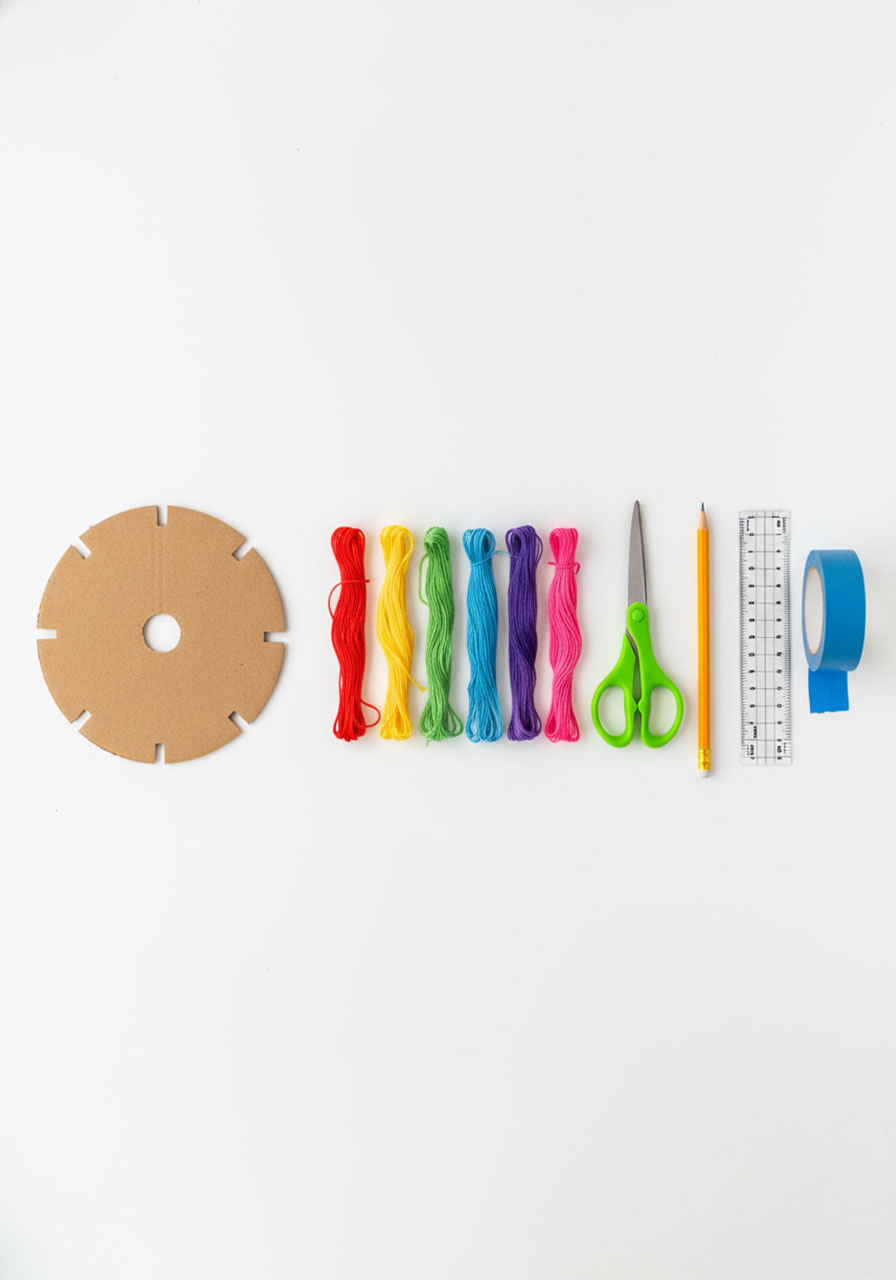
Here’s your shopping list (spoiler alert: you probably already have everything):
Materials:
Embroidery floss in 7 colors (pick your favorites – rainbows, ombres, or stick to a color scheme)
Cardboard (an old delivery box works perfectly)
Tools:
Scissors
Pencil
Ruler (optional, but helpful)
Painter’s tape or any tape (optional, for the finishing step)
Pro Tip: Choose embroidery floss for that sleek, polished look, but you can totally experiment with yarn, macrame cord, or any non-stretchy string you’ve got lying around.
Step-by-Step: Let’s Make Your Cardboard Loom Bracelet!
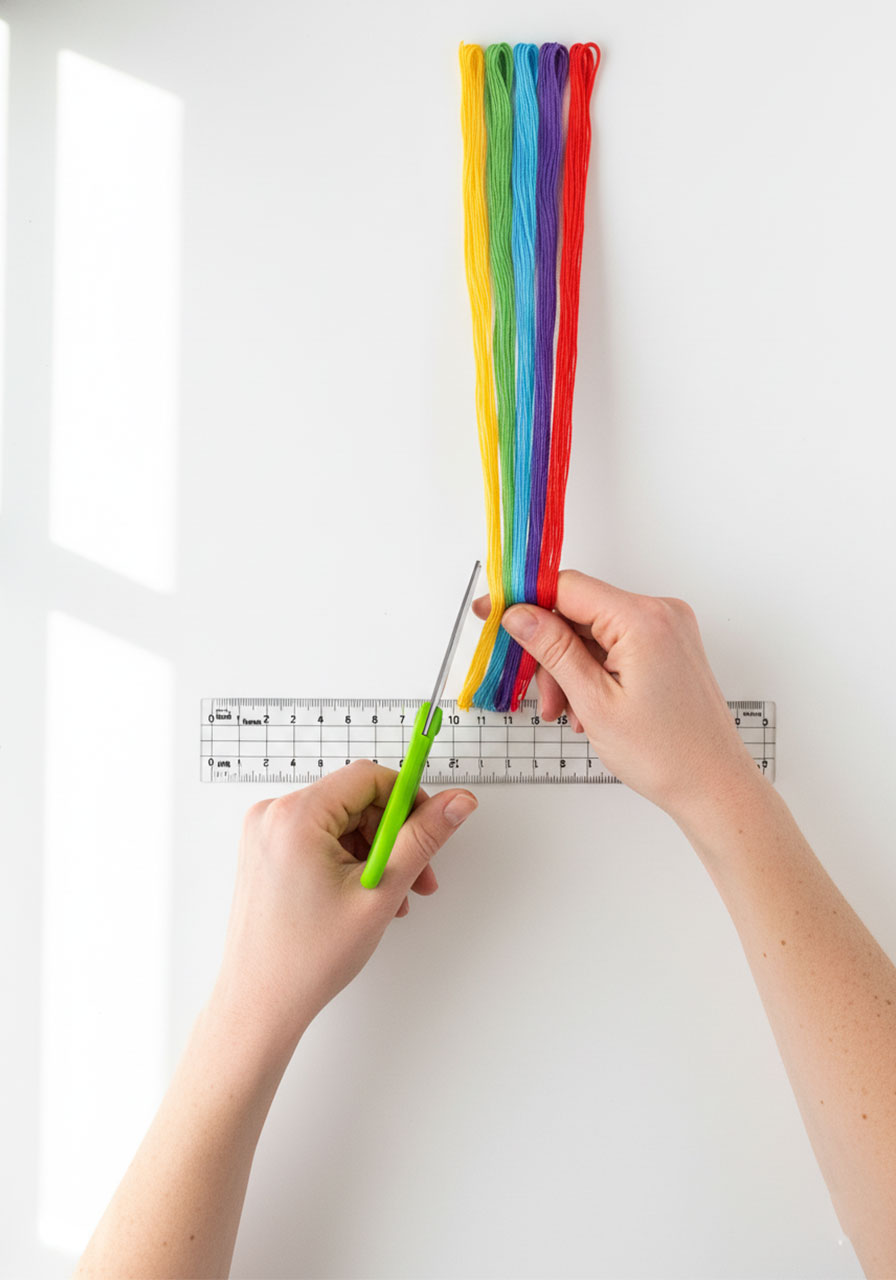
Step 1: Prep Your Embroidery Floss
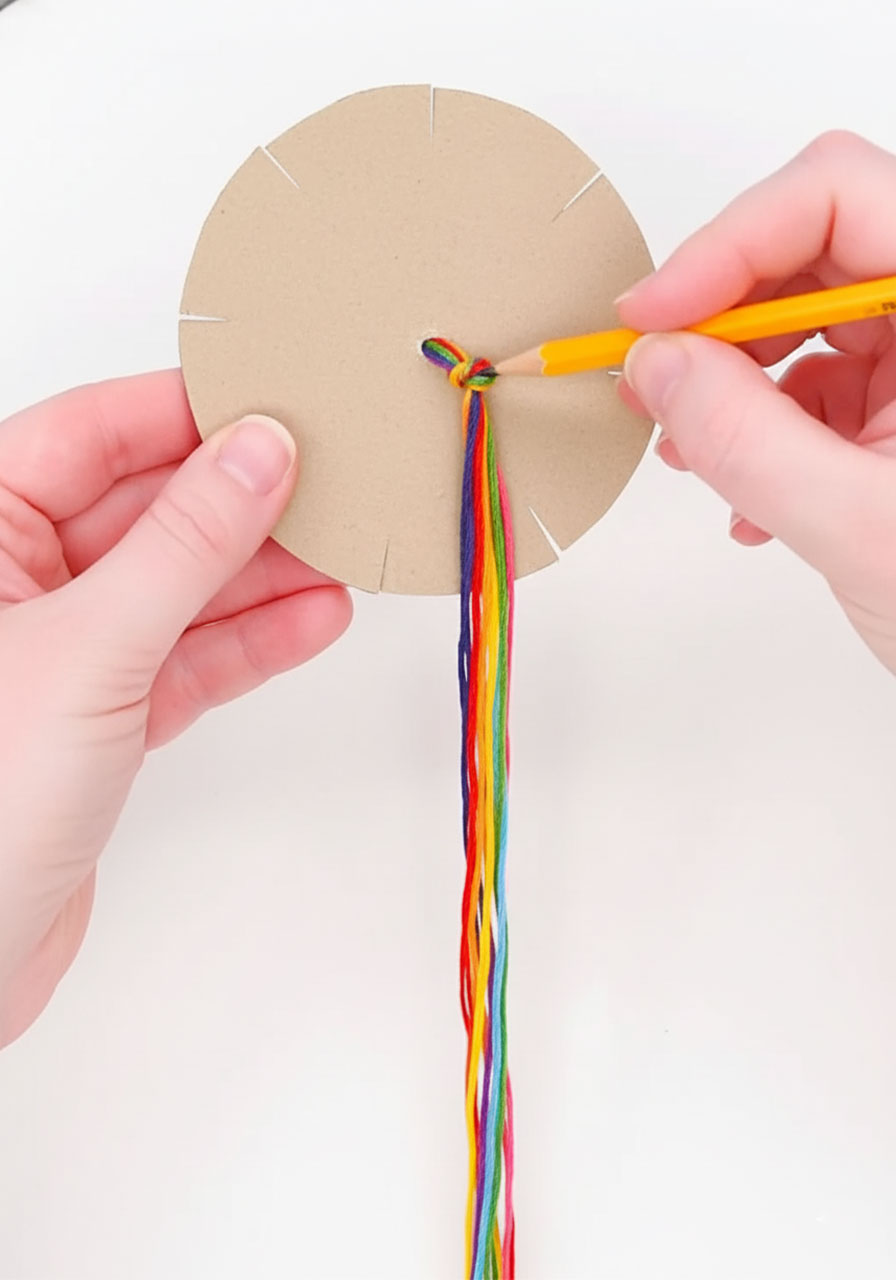
Cut 7 pieces of embroidery floss, each 20 inches long. Line them all up and tie them together in a knot about 2.5 inches from one end. This knot is super important – it’s going to anchor your bracelet to the loom, so make it tight and secure.

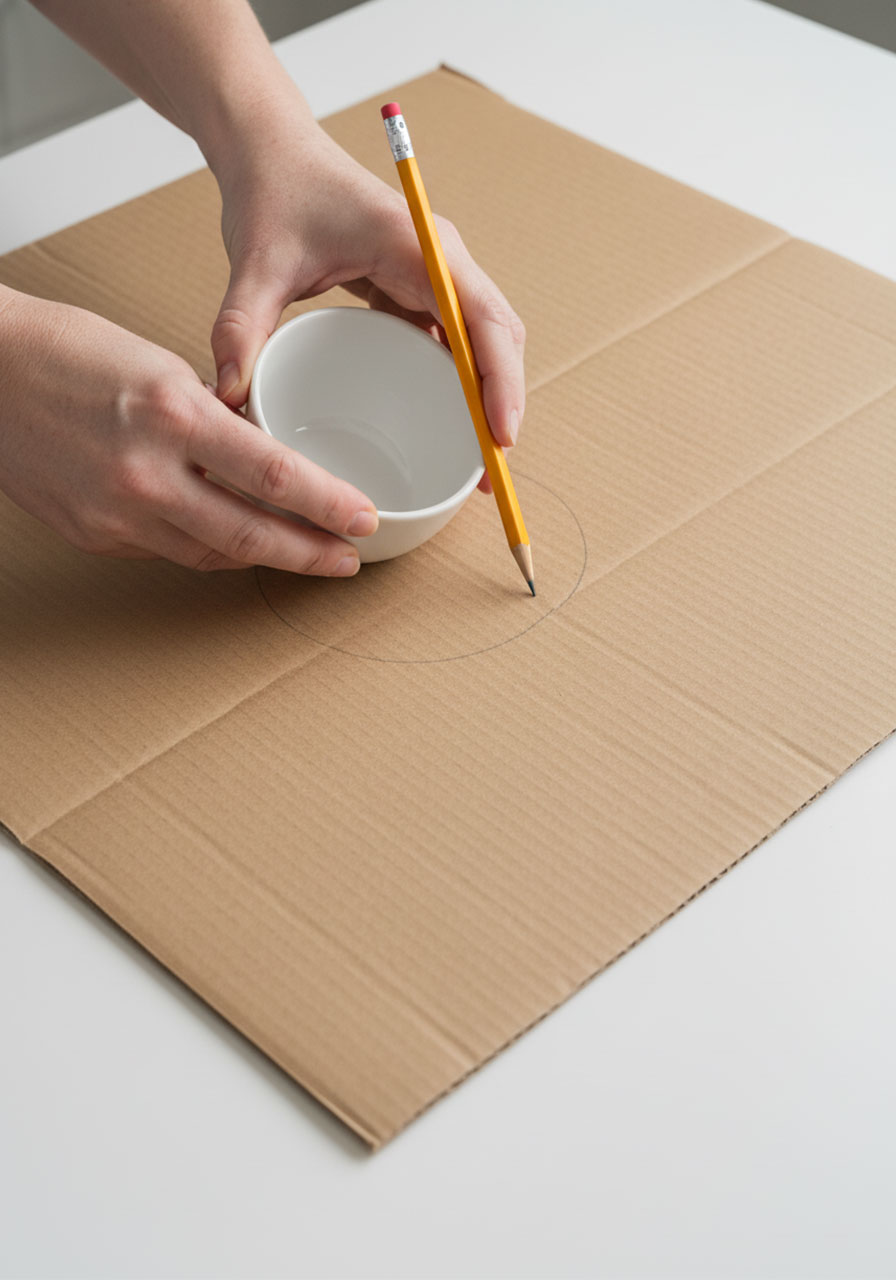
Step 2: Create Your Cardboard Loom
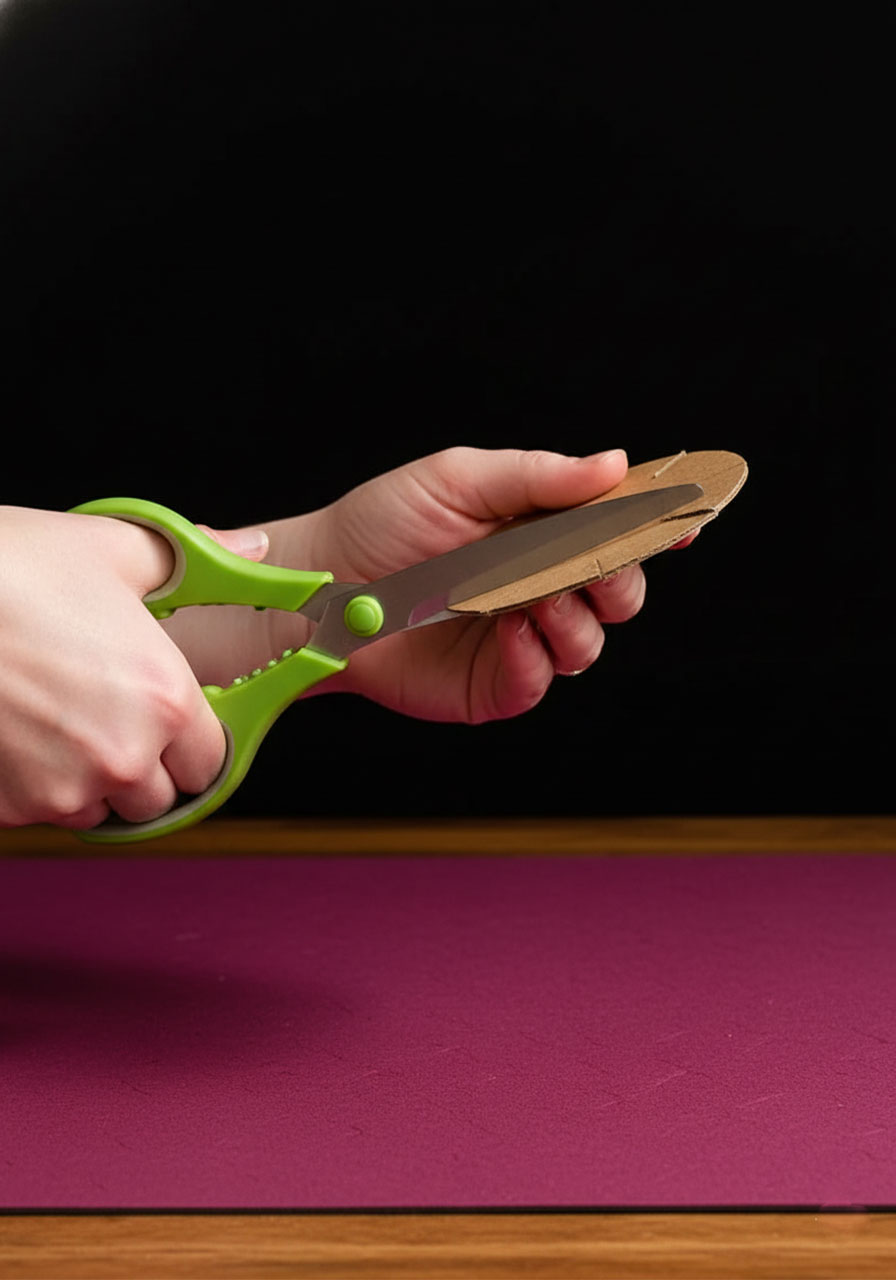
Time to make your magic circle! Trace a circle onto your cardboard (a small bowl about 3.5 inches across works great, or use a compass if you’re feeling fancy). Cut out your circle.
Now for the important part: Draw 8 evenly spaced lines around the edge of your circle, each going about 1/3 of the way toward the center. Here’s the easiest way to get them evenly spaced:
1. Start with lines at 3 o’clock and 9 o’clock
2. Add lines at 12 o’clock and 6 o’clock
3. Fill in the remaining 4 lines between these marks
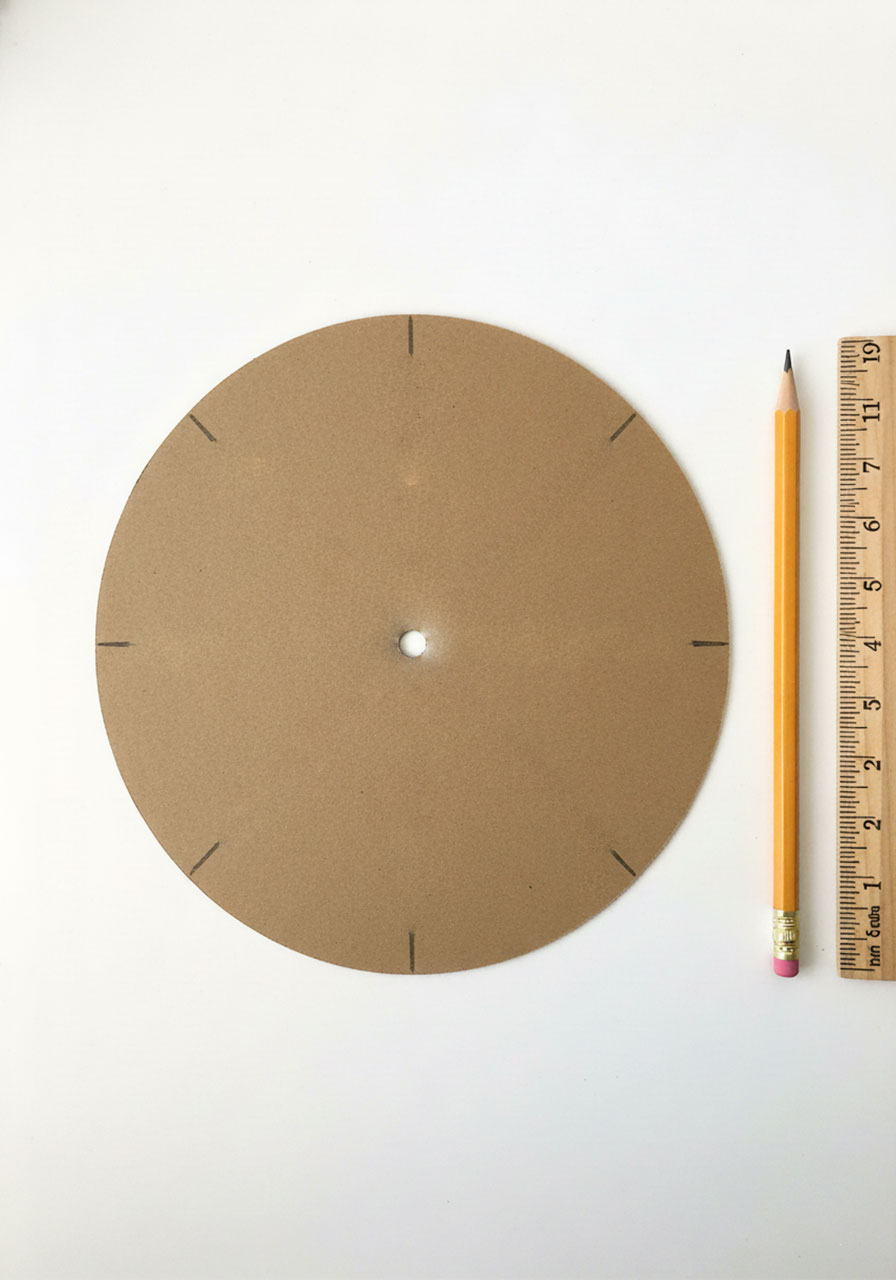
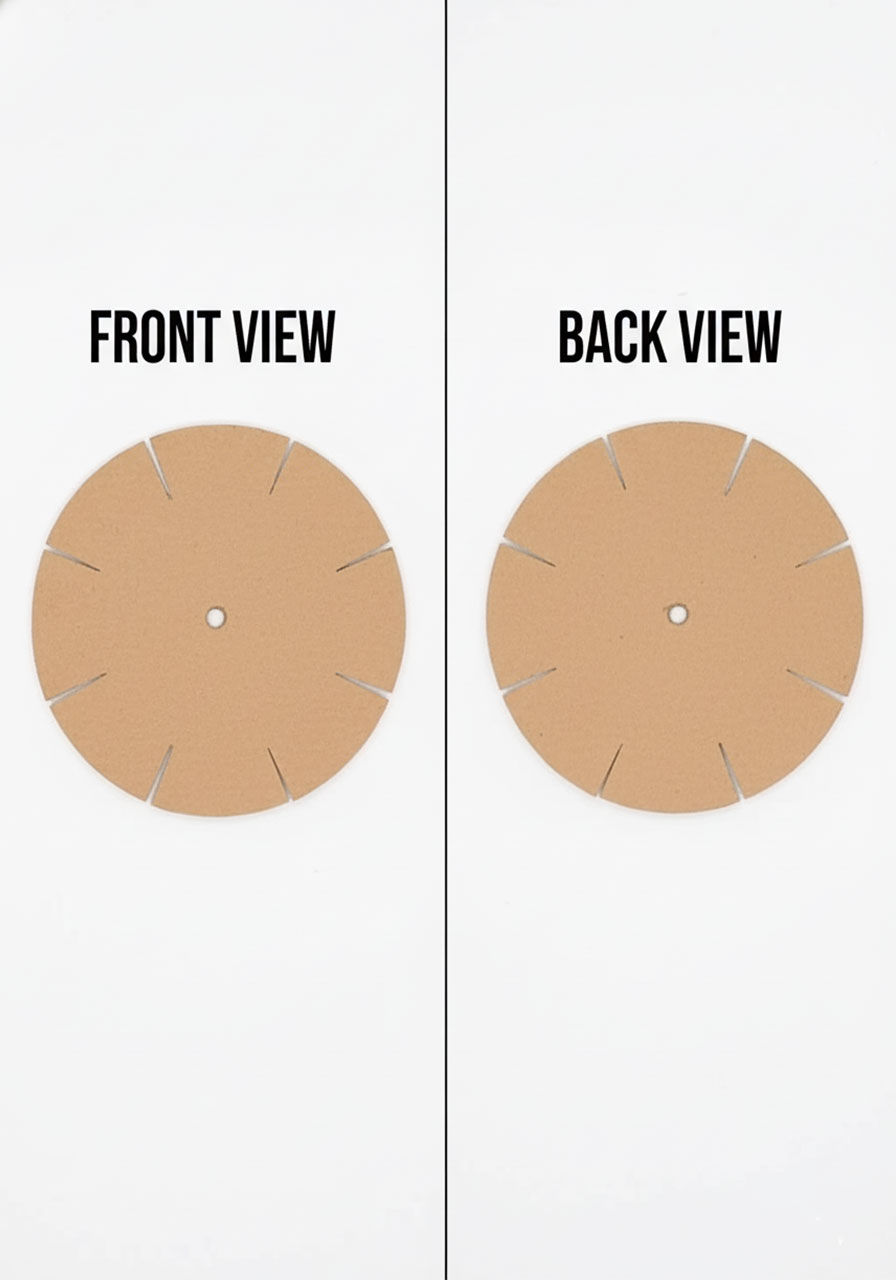
Poke a hole in the center of your cardboard circle (use a pencil tip or small scissors – just make it big enough for your knot to push through). Then cut along each of those 8 lines to create notches around the edge.
Quick note: Any cardboard works, but thicker cardboard from a delivery box is easier to handle. If you only have thin cardboard (like from a cereal box), glue two pieces together for extra stability.
Step 3: Set Up Your Bracelet on the Loom
Push your knotted embroidery floss through the center hole so the knot sits on the back of the loom. Separate your 7 strands and place one strand in each notch around the circle, leaving one notch empty. Hold your loom with the empty notch facing you – this is your starting position.

Step 4: Master the Magic Move
Here comes the fun part – the move you’ll repeat over and over to create your bracelet:
1. Count 3 notches to the left of the empty space
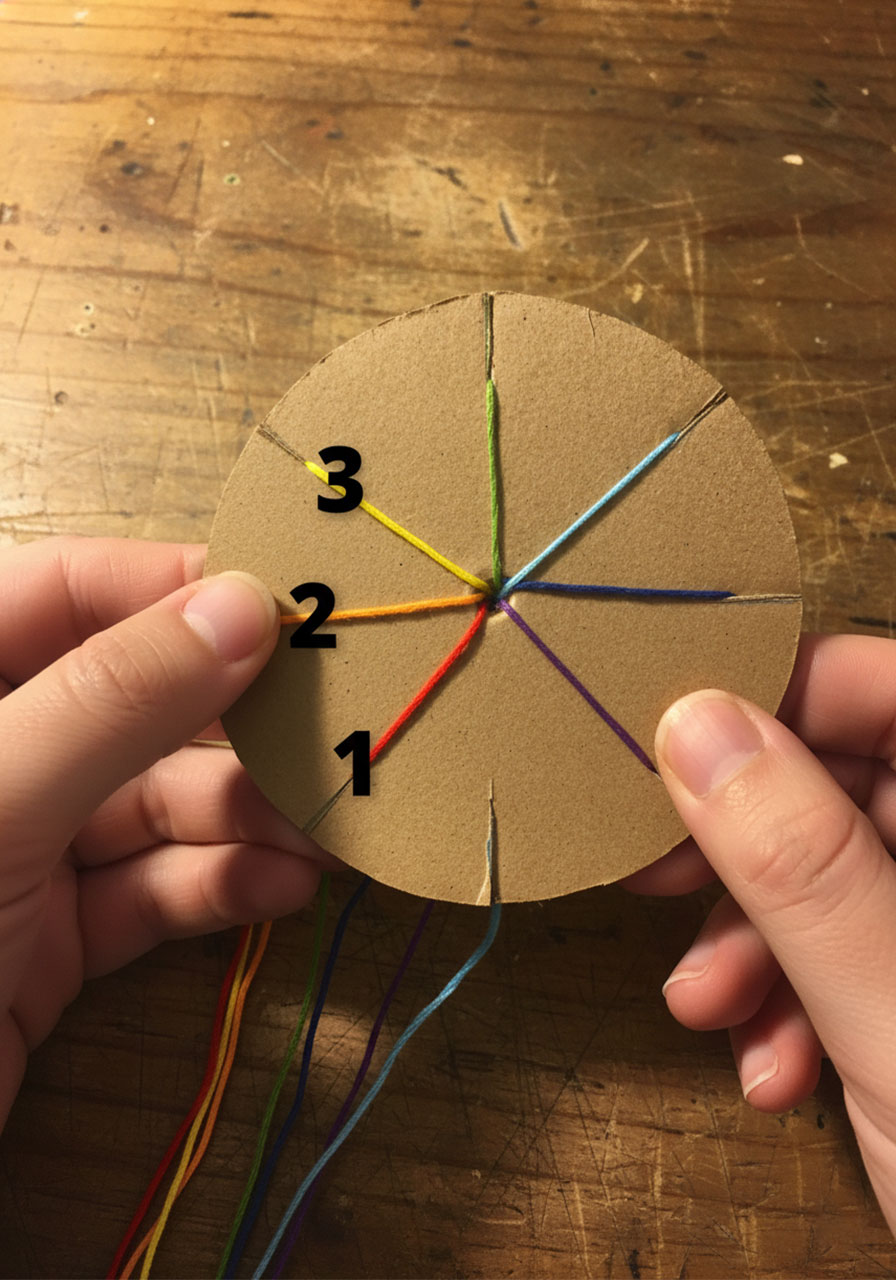
2. Lift that strand out of its notch
3. Bring it down into the empty notch in front of you
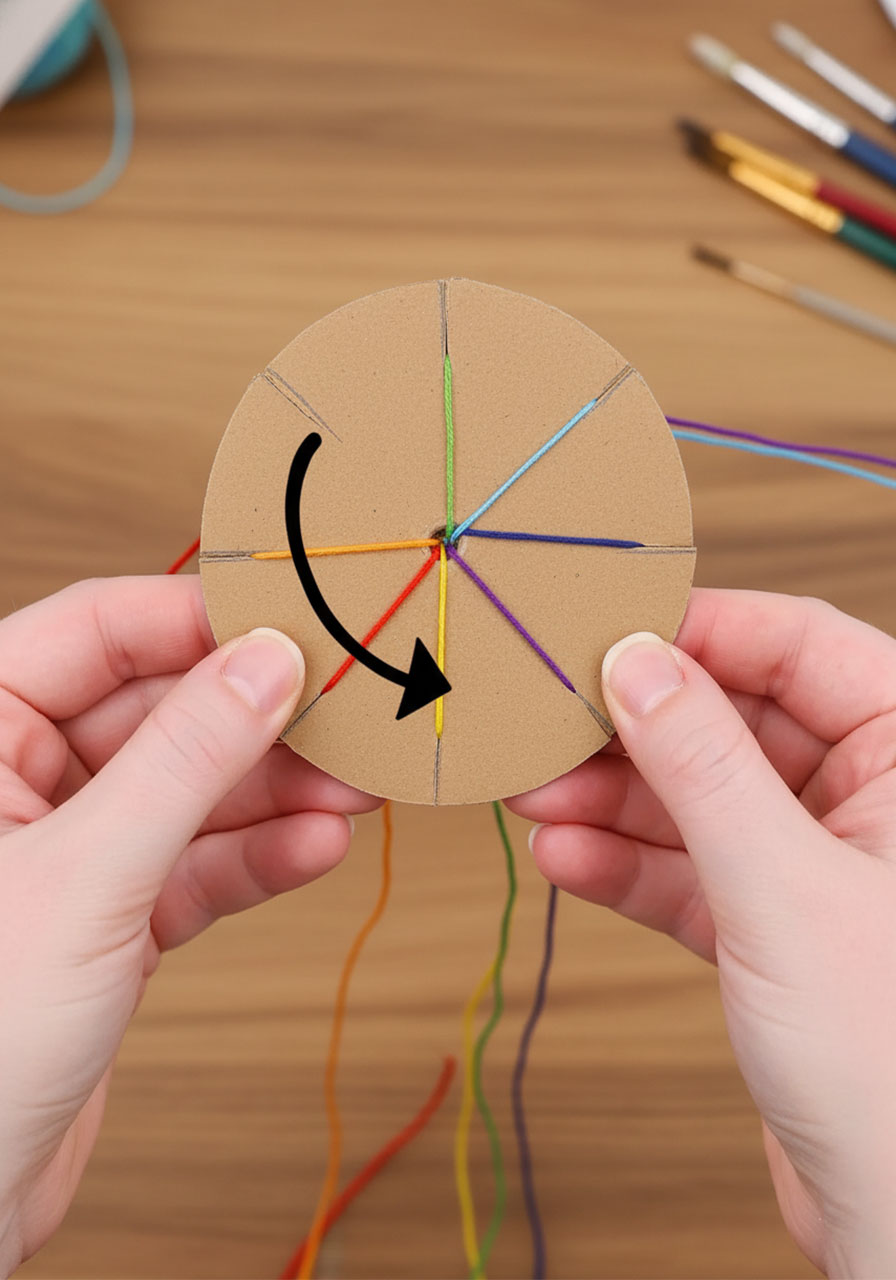
4. Rotate the loom counter-clockwise so the empty notch is facing you again
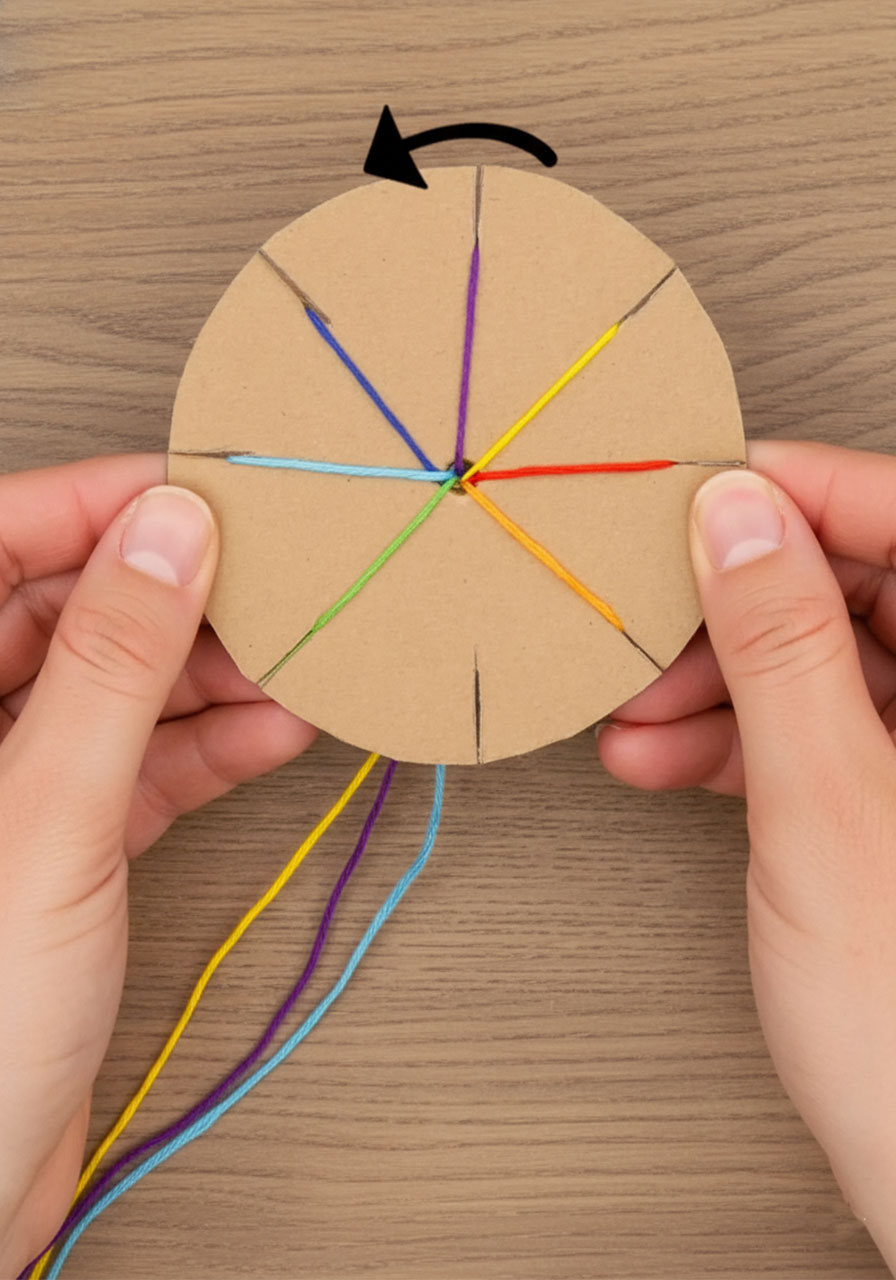
That’s it. That’s the whole technique. Repeat this exact sequence – count 3 left, lift, move down, rotate – and watch your bracelet magically appear on the back of the loom!
Pro Tip: Run your fingers through the strands every few rotations to keep them from tangling. And if you want to see your bracelet forming more clearly, hold it between two fingers and gently pull down as you work- this creates just enough tension to help the pattern emerge.
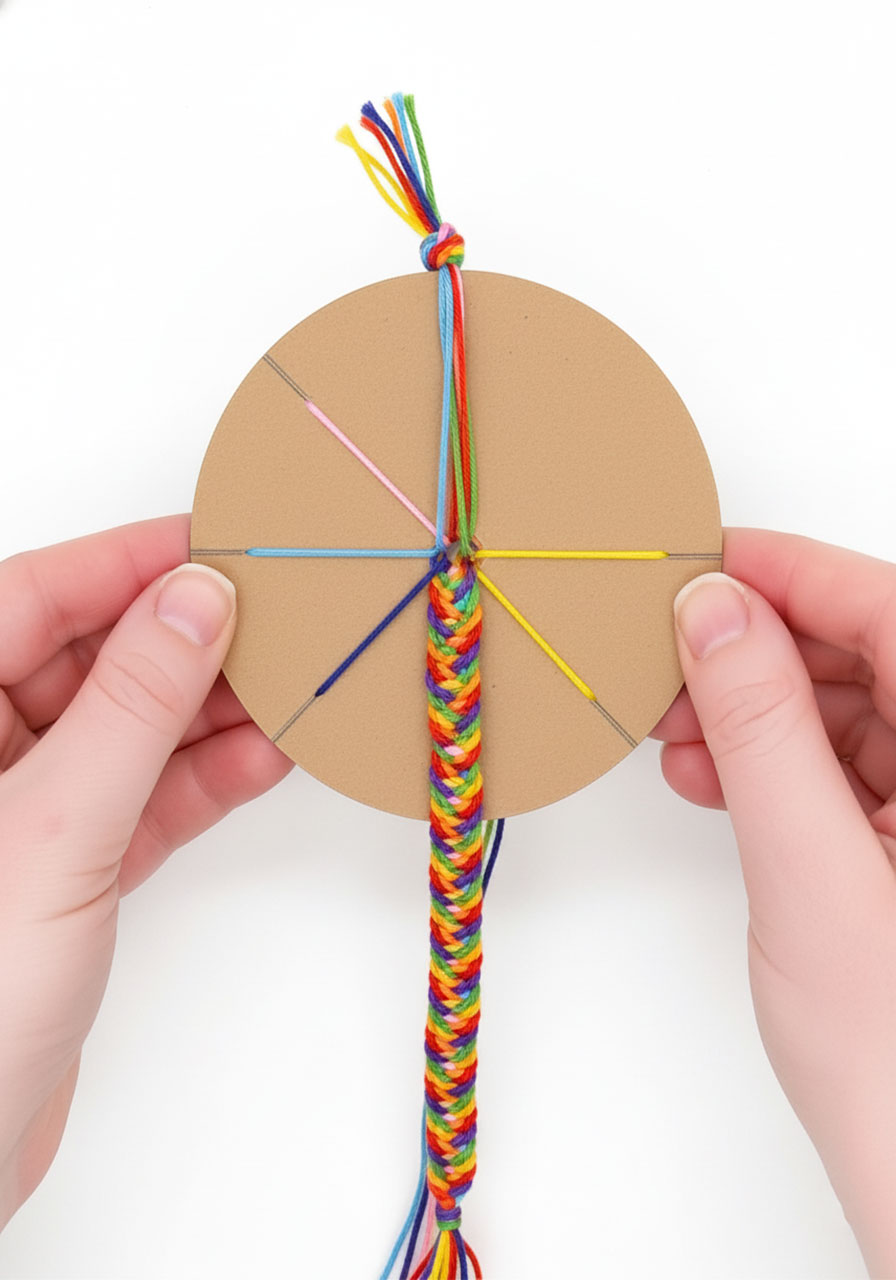
Step 5: Keep Going Until It’s Long Enough
Continue the same pattern until your bracelet is long enough to wrap comfortably around your wrist. Test it against your wrist occasionally – you want it to fit at its longest length before you make the adjustable closure.
Once you’ve reached your desired length, remove each strand from the notches and pull the entire bracelet out from the back of the loom. Tie a knot right at the end of your woven section to secure all those beautiful knots you just made.
Step 6: Create the Adjustable Closure
This is where your bracelet gets its super-cool sliding feature:
Tape one end down. Tape the knotted end of your bracelet to your work surface to keep it steady.
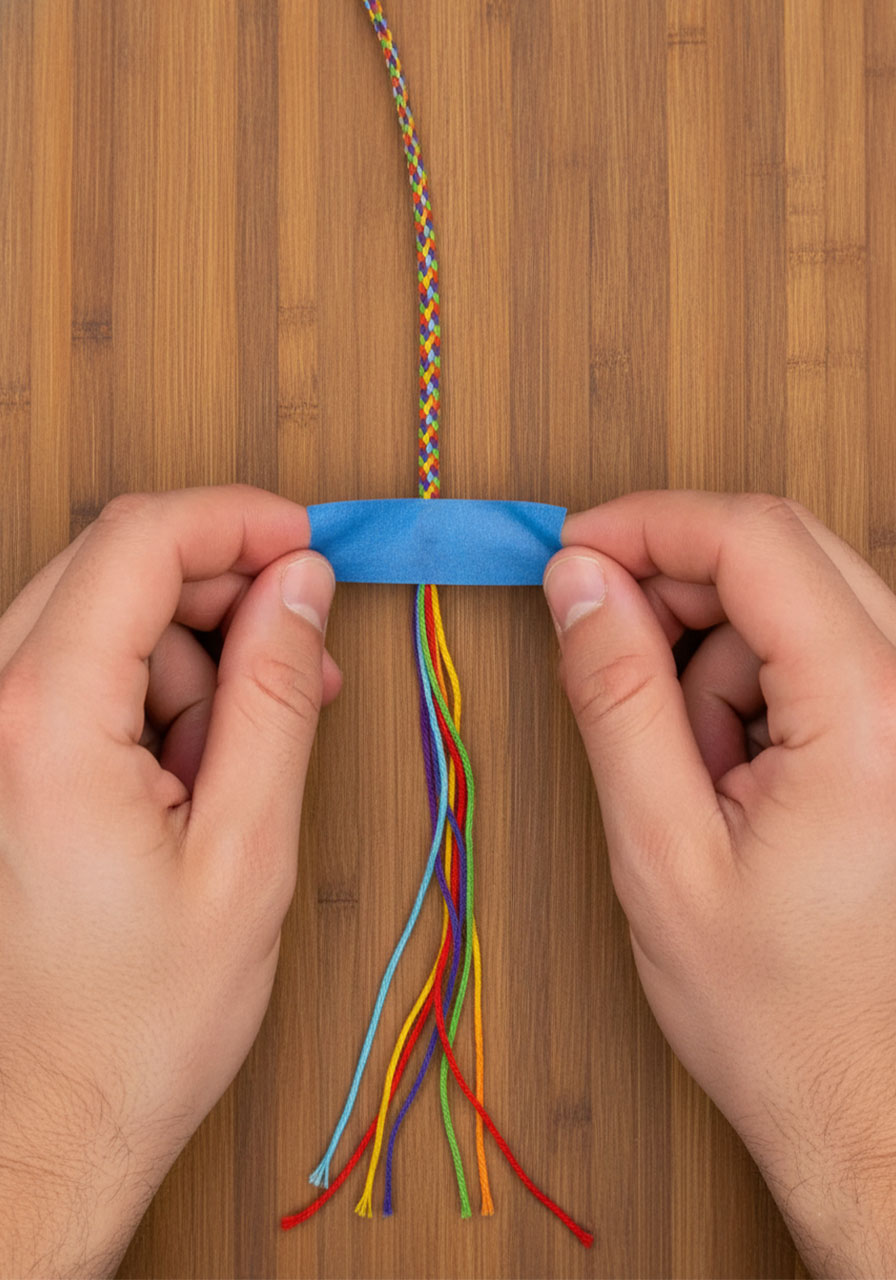
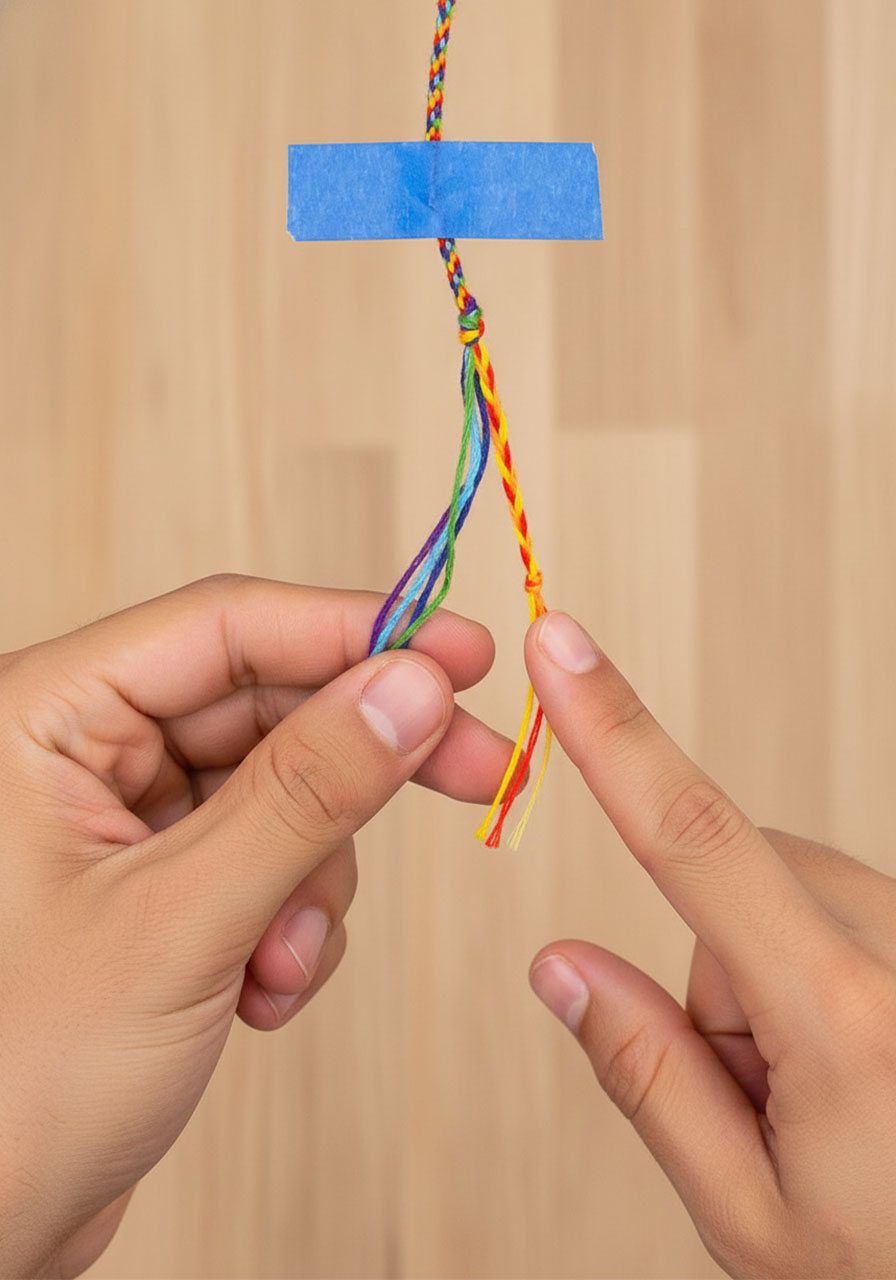
Split and braid. Separate your 7 loose strands into two sections – 3 strands on one side, 4 on the other. Braid the 3-strand section normally and tie a knot at the end. For the 4-strand section, keep 2 strands together and braid with the other two individual strands, then knot the end. Trim any excess thread near those knots.
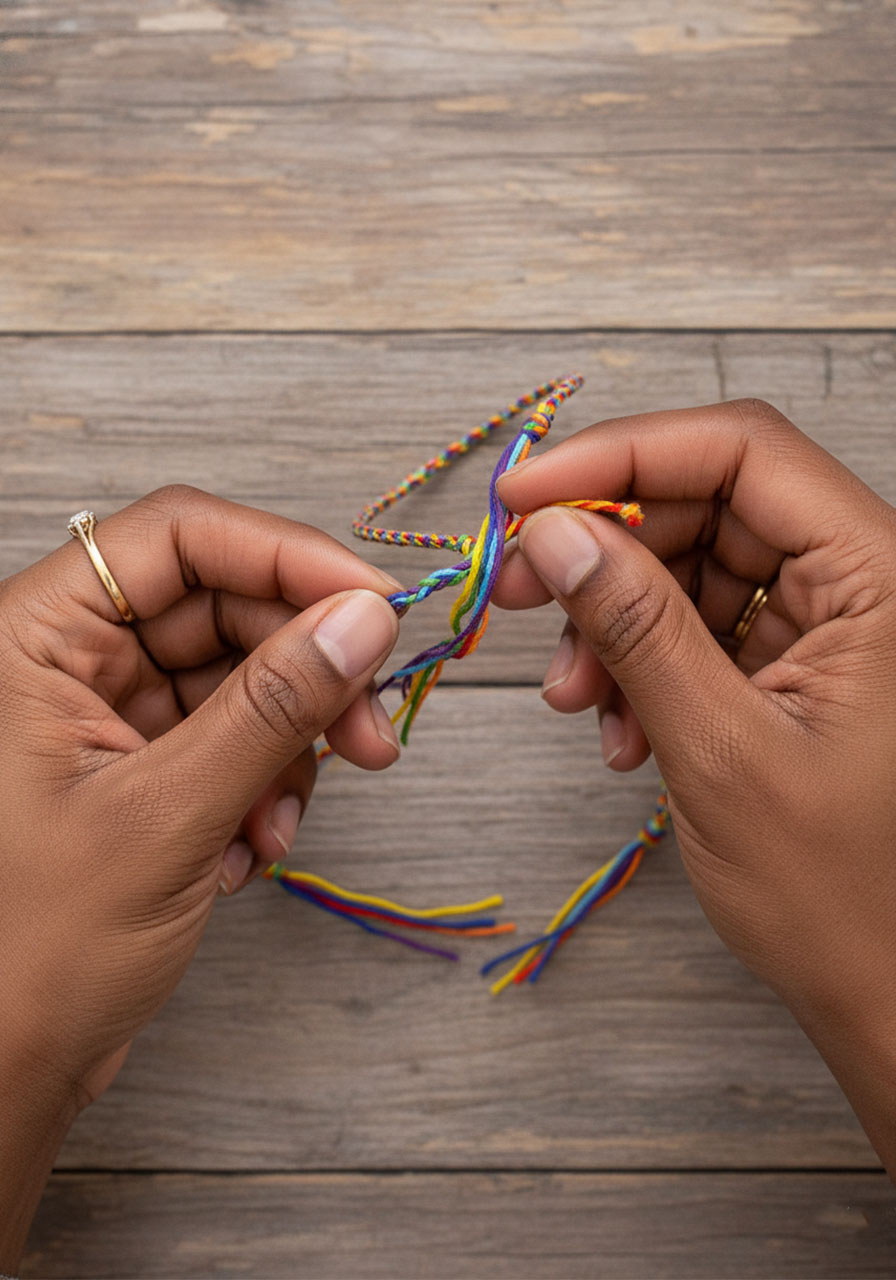
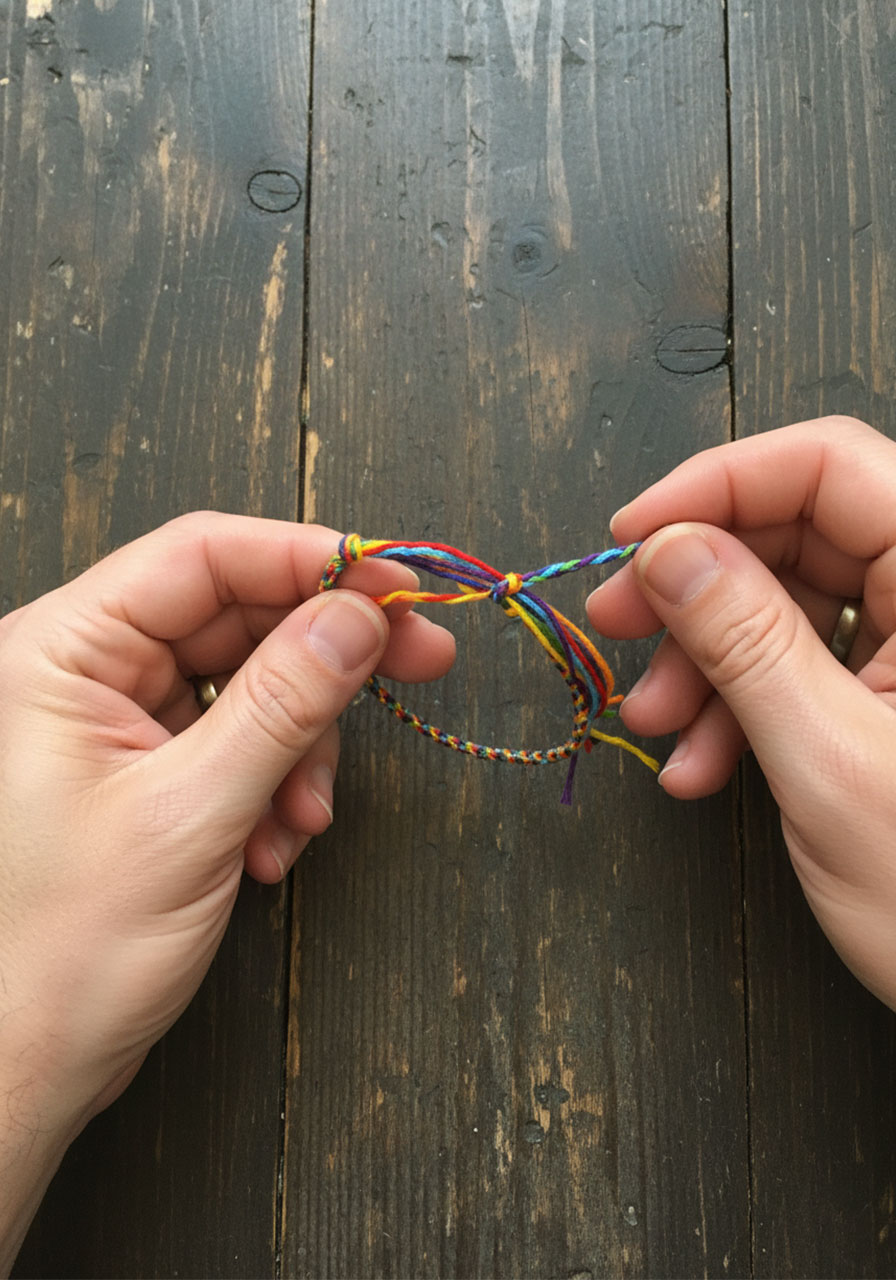
Make the magic happen. Remove the tape and pick up your bracelet. Arrange the loose cords from the starting knot neatly together. Place these loose cords between your two finished braids, then tie the braids in a knot around the loose cords. This creates your sliding closure!
Test and trim. Try on your bracelet and make sure it slides to the largest size you need. While it’s at that largest length, tie a knot in the loose cords to create a stopper. Trim off any excess cord beyond that knot.
Done! You’ve just made an adjustable friendship bracelet that you (or your lucky friend) can wear forever.
Pro Tips for Next-Level Bracelets
Play with color combinations. A rainbow is classic, but try an ombre effect by using different shades of the same color, or go bold with complementary colors like purple and yellow.
Control your tension. How tightly you pull as you work affects the final look. Gentle, consistent tension creates a tight, polished bracelet, while pulling down more firmly after each knot makes a looser, slightly different pattern.
The size doesn’t really matter. Your loom can be anywhere from 3.5 to 4.5 inches across – smaller looms are easier to hold, but both sizes work great.
Want a different closure? You can also make a loop at the start (by folding your floss in half before knotting) and thread the loose ends through it, or just tie the bracelet directly onto your wrist for a permanent wear situation.
Why This Craft Is Perfect for Party Planning
Looking for an activity that’ll keep everyone entertained at your next gathering? Cardboard loom bracelets are the answer! Set up a bracelet-making station at your party with pre-cut cardboard looms, baskets of colorful embroidery floss, and scissors. It’s the perfect low-key activity for:
Slumber parties where everyone can make matching friendship bracelets
Birthday parties as both an activity and a take-home favor
Summer gatherings when you need something to do between swimming sessions
Rainy day get-togethers that need a creative indoor activity
Guests can work on their bracelets while chatting, and everyone leaves with a handmade treasure. Plus, it’s that perfect combination of easy to learn but engaging enough to keep people busy for a while.
Ready to Get Looping?
This cardboard loom bracelet is proof that the best crafts are often the simplest ones. With just cardboard and embroidery floss, you’re about to create friendship bracelets that look like they took way more skill than they actually did. Once you nail that basic “count 3, lift, move, rotate” pattern, you’ll be cranking out bracelets in every color combination you can dream up.
So grab that cardboard from your recycling bin, raid your craft drawer for embroidery floss, and get ready to become the friendship bracelet hero your friends didn’t know they needed. Your wrist is about to get a seriously colorful upgrade!
More Kid’s Party Ideas to Keep the Fun Rolling:
How to Play Help Your Neighbor: The Card Game That’ll Have Your Family Actually Wanting Game Night
28 Super Fun Dollar Store Crafts for Kids That Won’t Break the Bank
3 Easy Heart Painting Ideas That’ll Make You Look Like a Creative Genius
10 Easy Elementary School Indoor Party Games Kids and Room Moms Will Love
How to Make a DIY Kaleidoscope: A Mind-Blowing Science Craft for Kids
15 Minions Party Ideas For The Ultimate Despicable Me Birthday Bash
How to Make Magic Unpoppable Bubbles That’ll Blow Your Kids’ Minds