
Father’s Day is coming up fast – and if you haven’t figured out the card yet, we’ve got you covered with something way better than anything you’ll find at the store.
This DIY tuxedo card is everything a handmade gift should be: adorable, interactive, and genuinely impressive-looking without being hard to make.
The secret? A hidden pull-out message tucked inside the “jacket.” When Dad (or whoever you’re celebrating) pulls the bow tie, a heartfelt note slides out. It’s one of those small touches that turns a card into a keepsake.
Whether you’re making this solo, crafting it with the kids on a rainy afternoon, or honoring a mom or grandma who does double duty this Father’s Day – this guide walks you through every single step.
Ready to get crafting? Let’s dress this card up.

Why You’ll Love This Card
Before we dive in, here’s why this one is worth your time.
It looks like you spent hours on it. You didn’t.
The tuxedo shape is clever enough to make people do a double-take – but the steps are beginner-friendly, even if scissors and glue are about as crafty as you usually get.
It’s also interactive, which means it goes beyond just being read and tossed aside.
The recipient actually gets to “reveal” the message by pulling out the inner card. That little moment of discovery? That’s the part they’ll remember.

What You’ll Need
Gather these supplies before you start so you’re not scrambling mid-craft:
Black cardstock – This is your suit jacket and bow tie. One or two sheets will do.
White cardstock – For the inner “shirt” card where your message goes.
2–3 small black buttons – Real buttons give it the best look, but drawn-on circles work in a pinch.
Scissors – Sharp ones make cleaner folds.
Glue stick or double-sided tape – Either works. Double-sided tape gives a neater finish.
Black marker – For drawing the dashed “stitching” lines along the shirt edge.
Red marker or red pen – For the tiny heart on the pocket square detail.
That’s genuinely it. No special tools, no craft store membership required.

Step-by-Step Instructions
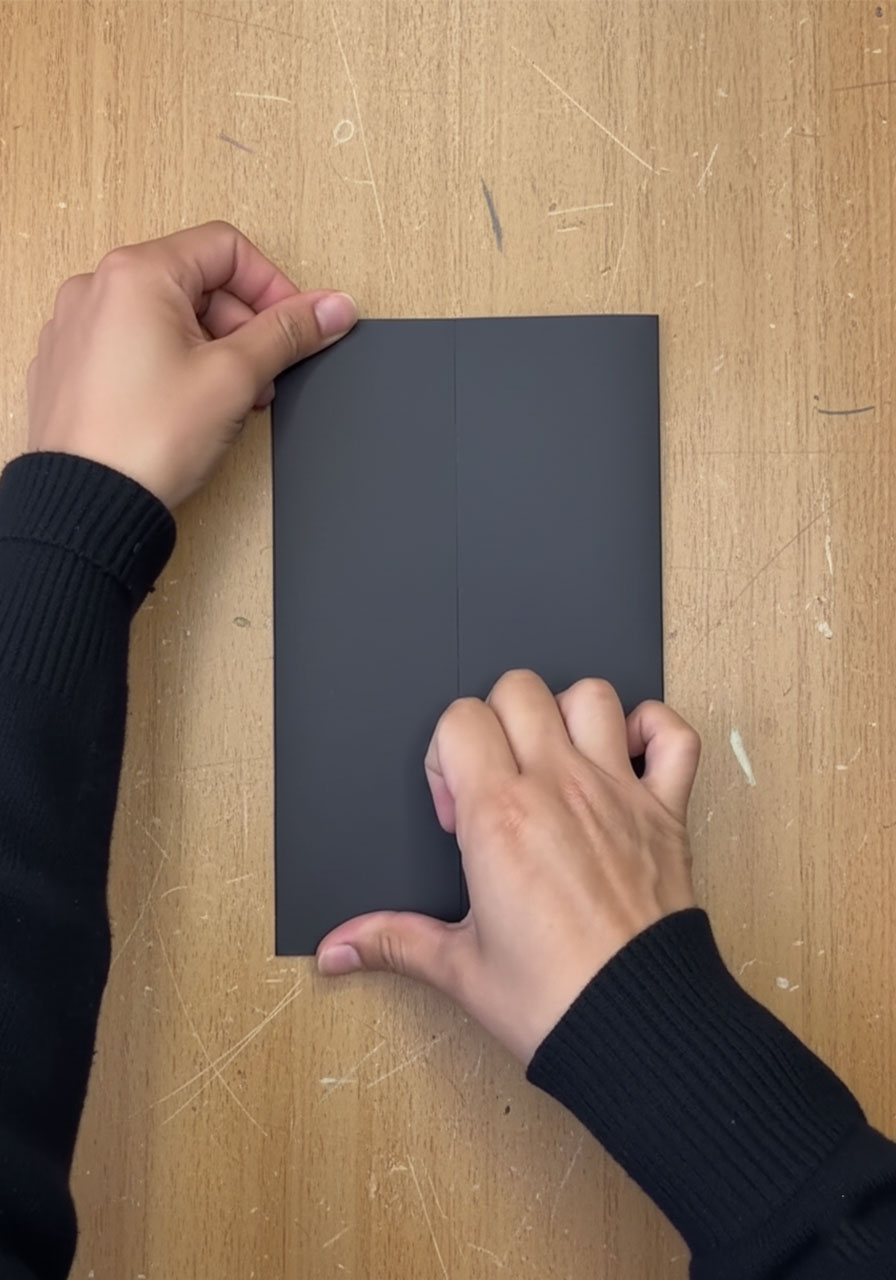
Step 1: Create the Jacket Base
Start with your black cardstock lying flat in front of you.
Fold the left side inward toward the center. Then fold the right side inward so both sides meet exactly in the middle.
This is called a gatefold – and it’s the foundation of the whole design. When it opens, it should look like a jacket spreading apart. Press the folds down firmly so they hold their shape.
Step 2: Shape the Lapels
Now here’s where the magic starts.
At the top of each folded flap, find the inside top corner – the corner that faces the center. Fold that corner outward and downward at an angle, like you’re peeling it back.
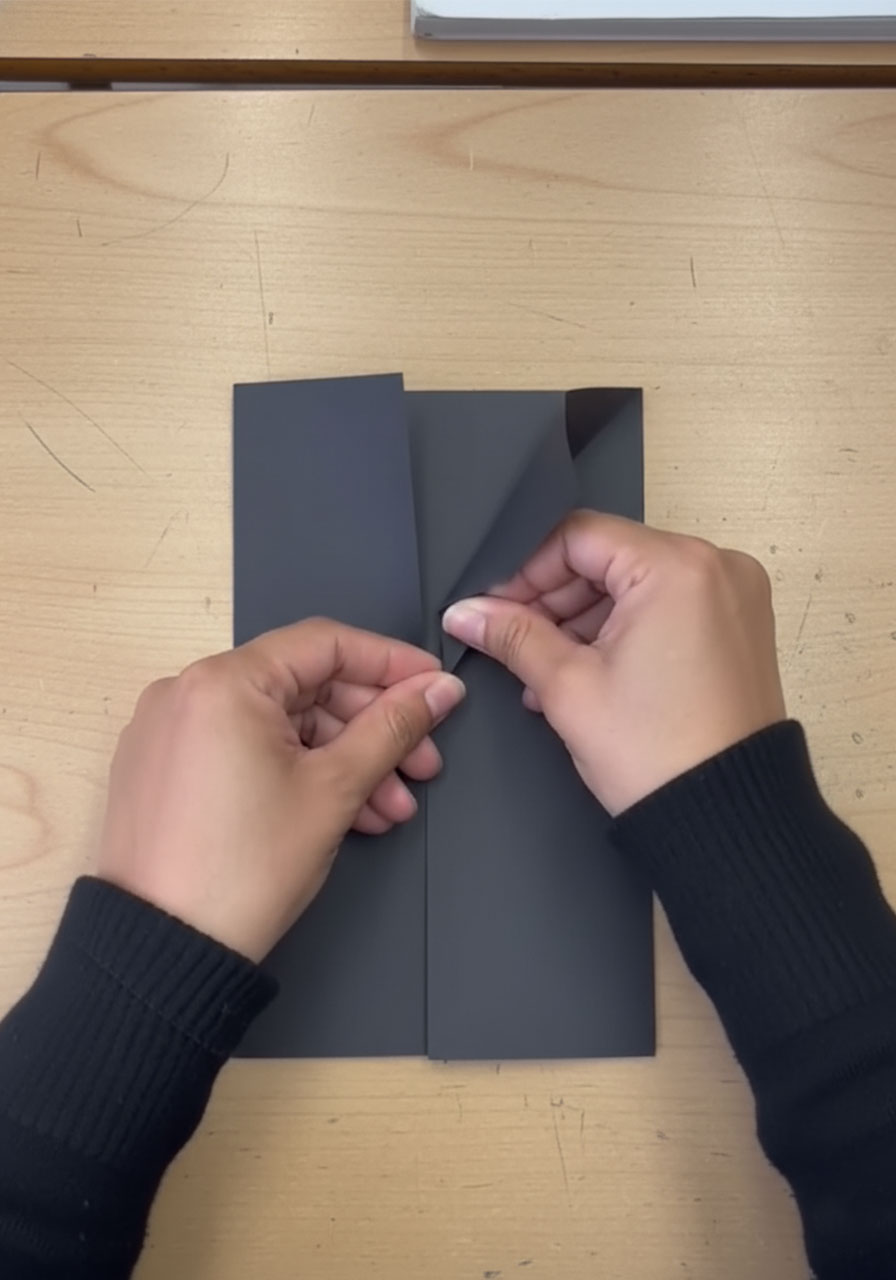
Do this on both sides. Those angled flaps are your lapels – and when they’re done, you’ll see a clear “V” shape forming at the neckline of the jacket. It instantly looks like a suit.
Press those folds down firmly so they stay put.

Step 3: Cut the Inner “Shirt” Card
Take your white cardstock and cut it so it’s slightly narrower than the width of your folded jacket.
The fit matters here – it should slide in and out smoothly without falling out on its own or jamming up. Think of it like a letter sliding in and out of an envelope. Trim it down if needed until it glides easily.


Step 4: Make the Bow Tie
Cut a small bow tie shape from your leftover black cardstock.
If freehand isn’t your thing, sketch a basic bow tie outline on the back first: two small triangles meeting at a narrow center point. Cut it out, then glue it to the very top center of your white shirt card.
This is the “pull tab” – the bow tie is what the recipient grabs to slide out the message. So make sure it’s glued securely but positioned at the top edge where it’ll be easy to pinch and pull.


Step 5: Add the Stitching Detail
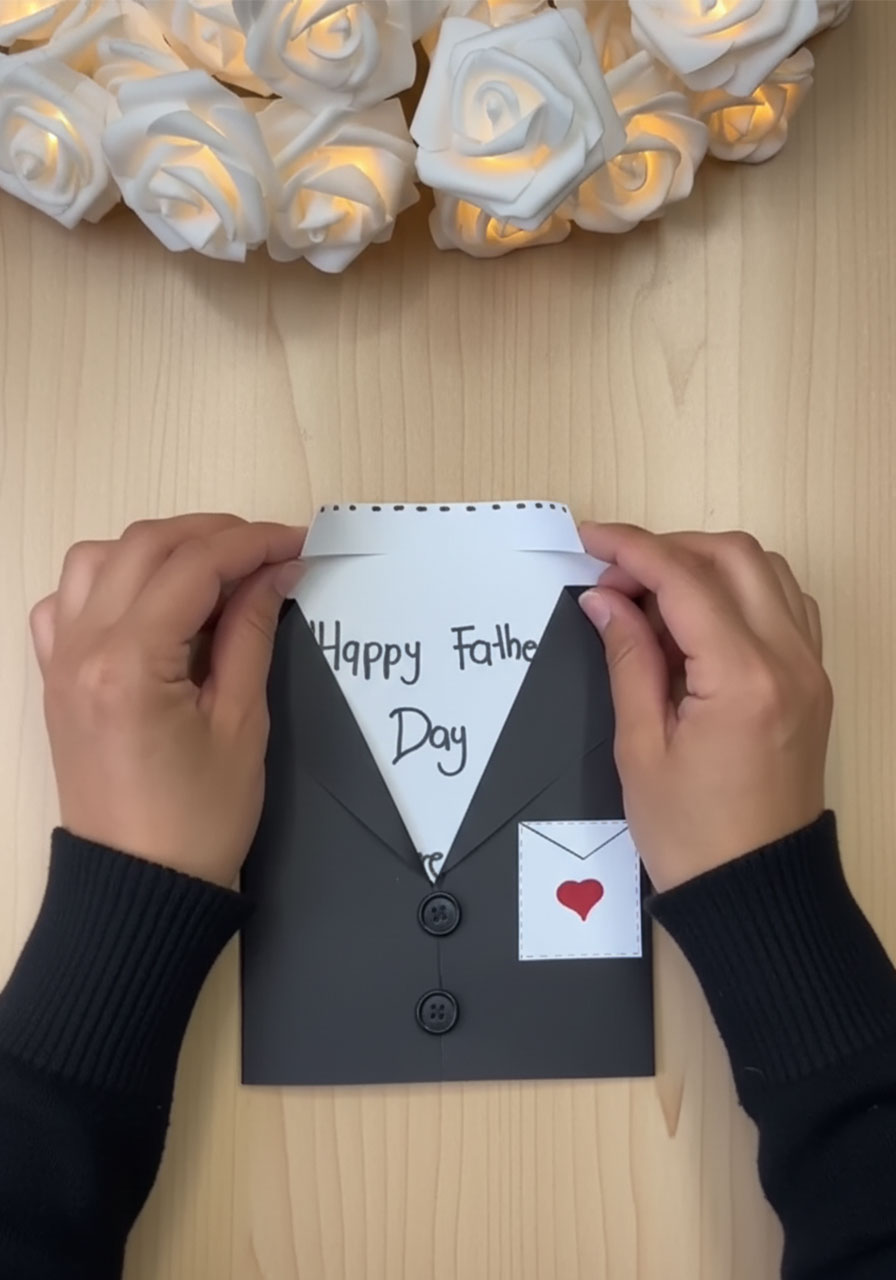
Using your black marker, draw a dashed line along the top edge of the white card.
Keep the dashes small and even – it mimics the look of tailored stitching and gives the card that extra polished, boutique-card feel.
This step takes about thirty seconds and makes a surprisingly big difference in how finished the whole thing looks.
Step 6: Write Your Message
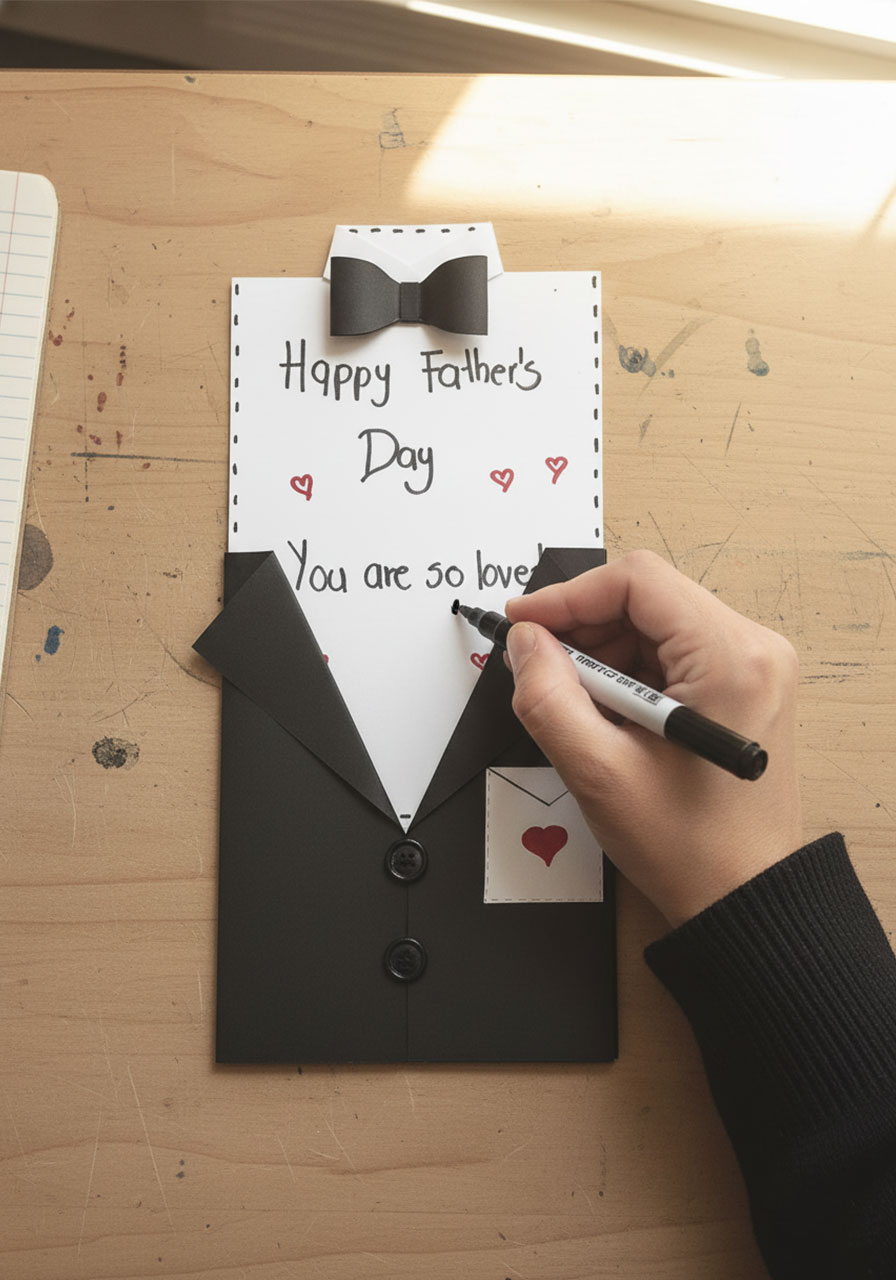
Below the bow tie, write your heartfelt note on the white cardstock.
Keep it simple and sincere. A few lines land harder than a whole paragraph here. Something like:
“Happy Father’s Day! You are so loved.”
You can also add small red hearts around the message – just like in the photos – to give it a warm, personal touch without overthinking it.
If you’re making this with kids, this is the perfect step to hand off to them. Their handwriting makes it that much more special.
Step 7: Add the Buttons
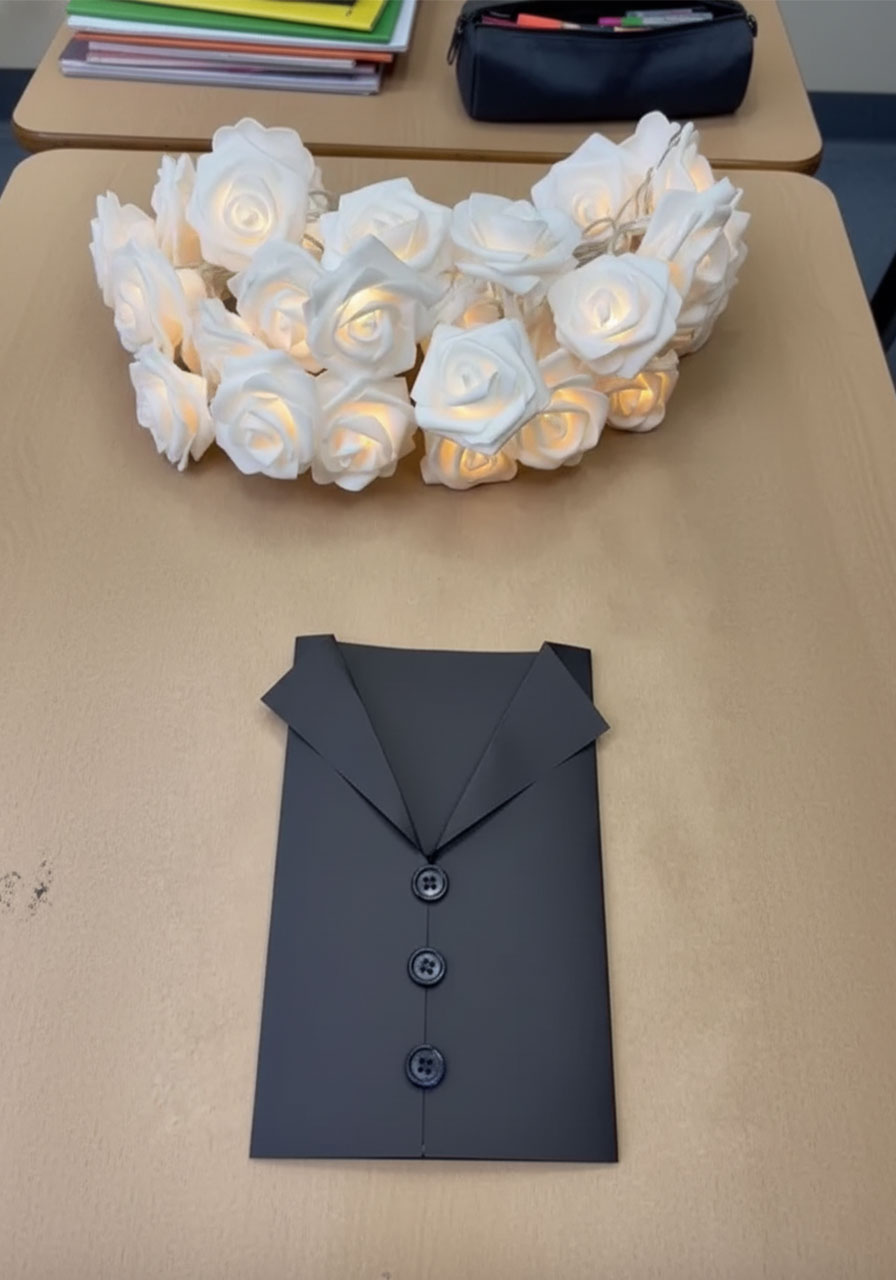
Glue your buttons down the center of the right-hand flap of the black jacket.
Two or three buttons spaced evenly down the front works best. Real buttons are ideal – the slight texture and dimension they add makes the card feel tactile and intentional.
No buttons on hand? Use a black marker to draw small filled circles. Totally fine, and it still reads clearly as a jacket.

Step 8: Add the Pocket Square
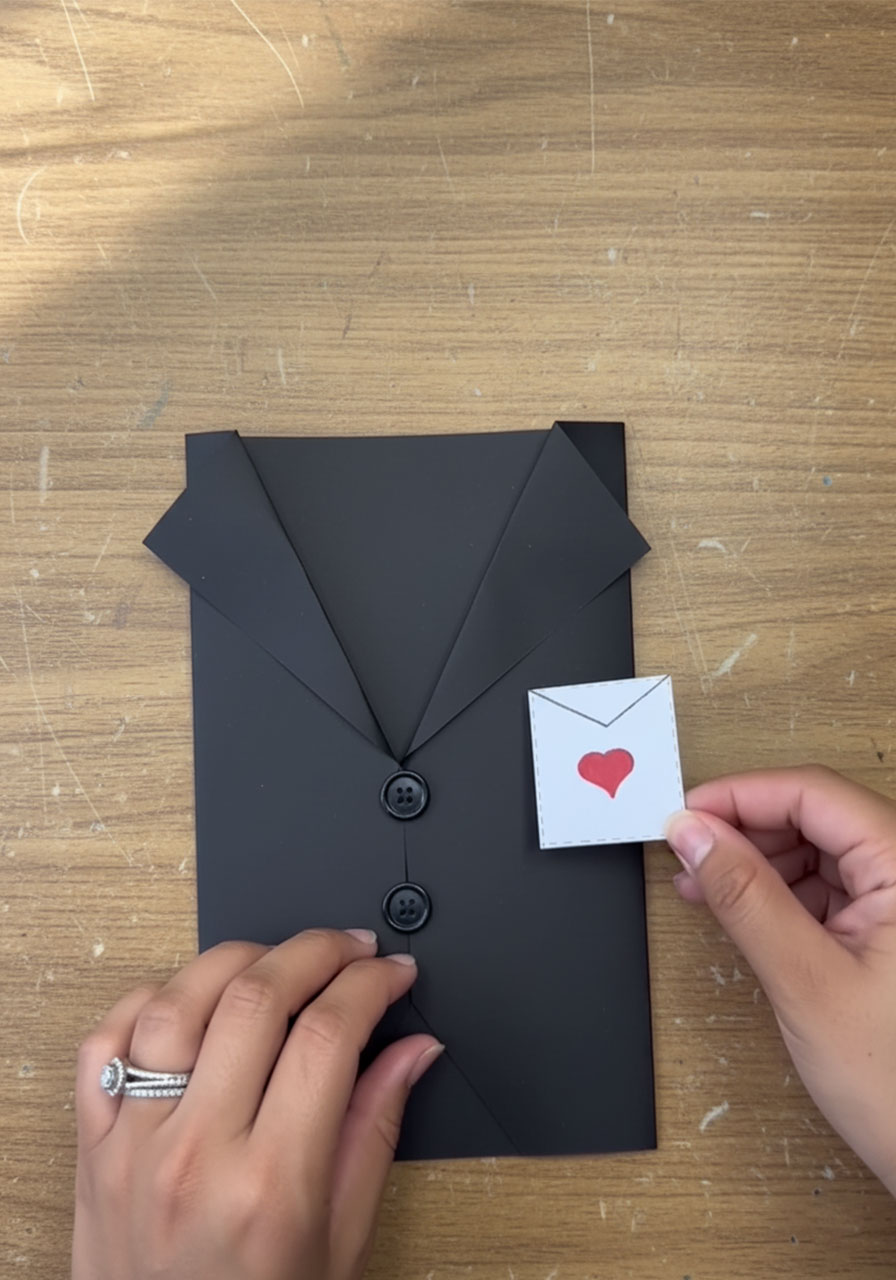
Cut a tiny square from your white cardstock – about the size of a postage stamp.
Draw a small red heart on it. Then glue it to the upper left chest area of the jacket, as if it’s peeking out of a breast pocket.
It’s a tiny detail. But it’s also the kind of tiny detail that makes people say “oh, that’s so cute” when they look closely.
Putting It All Together
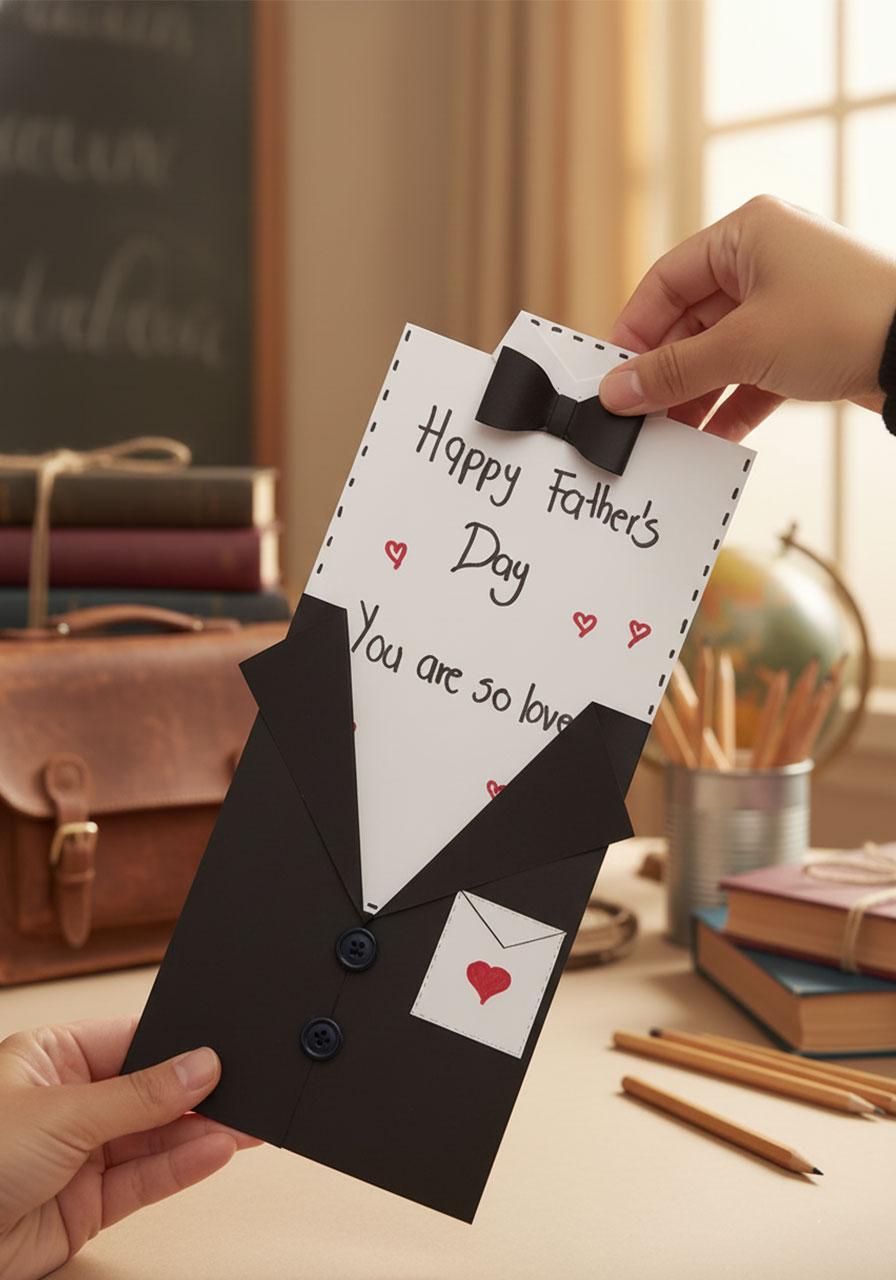
Once everything is dry, slide the white shirt card into the black jacket from the top.
The bow tie should peek out above the collar of the jacket. The message stays hidden inside.
When your recipient pulls the bow tie, the inner card slides out to reveal your note. That reveal moment – that’s the whole point, and it never gets old.
The finished card stands up on its own and looks beautiful displayed on a shelf or mantelpiece long after Father’s Day is over.
Pro Tips to Make It Even Better
Personalize the color. Black is classic, but this card works just as well in navy, charcoal, deep burgundy, or forest green. Swap the cardstock color to match the recipient’s personality or favorite color.
Make it for Mom, too. If you’re honoring a mom who plays both roles – or a grandma who’s been a steadfast force in the family – this card is just as meaningful with a color swap and a message that celebrates her.
Let the kids write the message. If you’re making this as a family craft, have the children write or draw something on the inner card in their own handwriting. That personal touch is worth more than any perfectly printed font.
Seal it with a sticker. Before gifting, you can tuck the inner card in and hold it closed with a small sticker on the front – like a wax seal sticker, or even a simple gold star. It adds a nice “gift” feel before the reveal.
Make it into a gift card holder. The inner card slot is wide enough to slip a folded gift card alongside the note. So if Dad’s getting dinner out or a new tool, this card doubles as the delivery method.

Who This Card Is Perfect For
This isn’t just for dads – though it’s absolutely perfect for them.
It works beautifully for grandfathers, uncles, stepdads, and father figures of all kinds. It also makes a touching tribute for a mom or grandma who has filled that role.
And if you’re a teacher or party planner looking for a meaningful craft activity for kids in the days leading up to Father’s Day – this one is low-mess, low-cost, and high-impact. Kids as young as six can participate with a little help on the folding steps.

Frequently Asked Questions
What size cardstock should I use?
Standard 8.5″ x 11″ cardstock works perfectly. If you want a larger card, go up to 12″ x 12″ scrapbook cardstock – just adjust your white insert to match.
Can I use regular printer paper instead of cardstock?
You can, but cardstock holds the folds better and gives the card more structure. If regular paper is all you have, use two layers glued together to add some stiffness.
How long does this take to make?
From start to finish, expect about 20 to 30 minutes. Most of that is drying time for the glue. The actual cutting and folding is quick once you get going.
Can I print the message instead of handwriting it?
Absolutely. Type your message in a script or handwriting-style font, print it on white cardstock, then cut to size. It gives you a clean, polished look if handwriting isn’t your thing.
What if my lapels won’t stay folded?
A tiny dot of glue on the underside of each lapel fold will hold it in place. Let it dry fully before sliding in the inner card.
There you have it – a handmade Father’s Day card that’s as dapper as the person you’re making it for, without being complicated to pull off.
The best gifts aren’t always the most expensive ones. Sometimes it’s a folded piece of cardstock, three buttons, and a handwritten note that says exactly what you mean.
Happy crafting – and happy Father’s Day to every dad, granddad, and dad-at-heart out there.
More Father’s Day Ideas to Keep the Fun Rolling:
Super Dad Father’s Day Gift: The Sweetest Superhero Craft Kids Can Make in Minutes
“You Mean the World to Me”: How to Make the Cutest 3D Father’s Day Card for Dad or Grandpa
Going the Extra Mile: A Sweet DIY Handprint Semi-Truck Craft for Father’s Day
Unmask the Hero: DIY “Secret Superhero” Dress Shirt Card for Father’s Day
“Best Dad in the Universe”: The Cutest DIY Father’s Day Card Kids Can Make in an Afternoon
Hands Down the Best! 4 Easy DIY Handprint Crafts for Father’s Day
“High-Five for Dad!” – The Cutest Father’s Day Handprint Card Kids Can Make
