
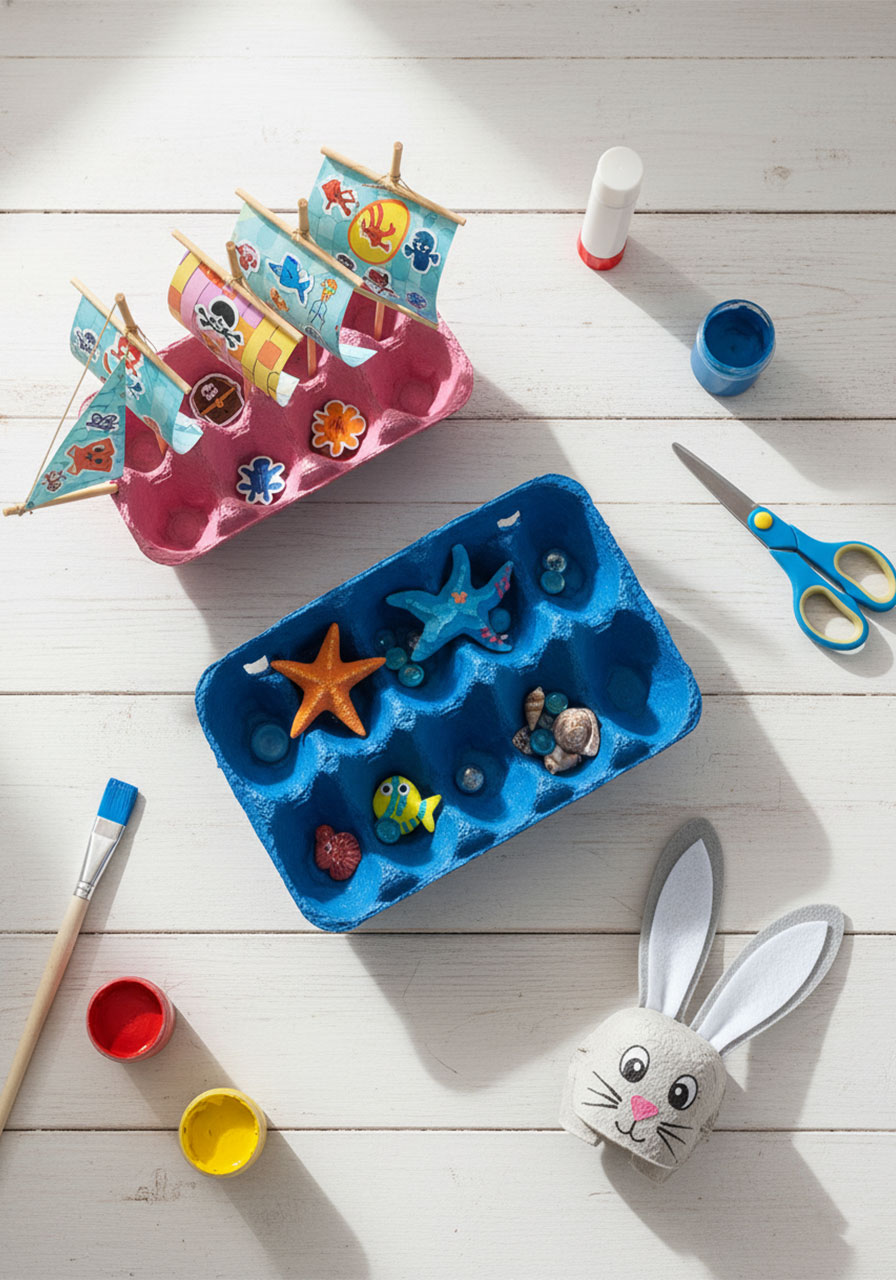
You know that moment when the kids are bored, it’s a rainy afternoon, and you’d love an activity that’s actually fun – not just busy work? This is it. These egg carton crafts for kids check every box: they’re creative, easy to pull together with stuff you already have at home, and the end results are genuinely impressive. Oh, and did we mention they’re eco-friendly too? Those empty egg cartons collecting space in your recycling bin are about to become a pirate ship, an ocean world, and an adorable Easter bunny.
Whether you’re a parent looking for a weekend project or a teacher planning a classroom craft session, these three ideas are foolproof, low-mess (well, mostly!), and completely screen-free. Let’s dive in.
1. Egg Carton Pirate Ship
This one is an absolute showstopper – and kids go wild for it. There’s something about turning a humble egg carton into a full-on pirate ship with sails that sparks pure creative joy. Once it’s done, don’t be surprised if it becomes a fixture on their bedroom shelf for weeks.
Best for: Ages 4 and up (with adult help for cutting and sticking)
Time to Make: 30–45 minutes
Great for: Rainy day activity, classroom craft, imaginative play
What You’ll Need:
1 empty egg carton (12-egg size works best)
2 long, thin sticks (skewers or craft sticks work perfectly)
Chart paper or cardstock in two different colors
Paint and a paintbrush
Pirate-themed stickers (anchor, skull and crossbones – the works!)
Safety scissors
Glue or tape
Small pirate toy figures (optional, but highly recommended for extra fun!)
How to Make It:
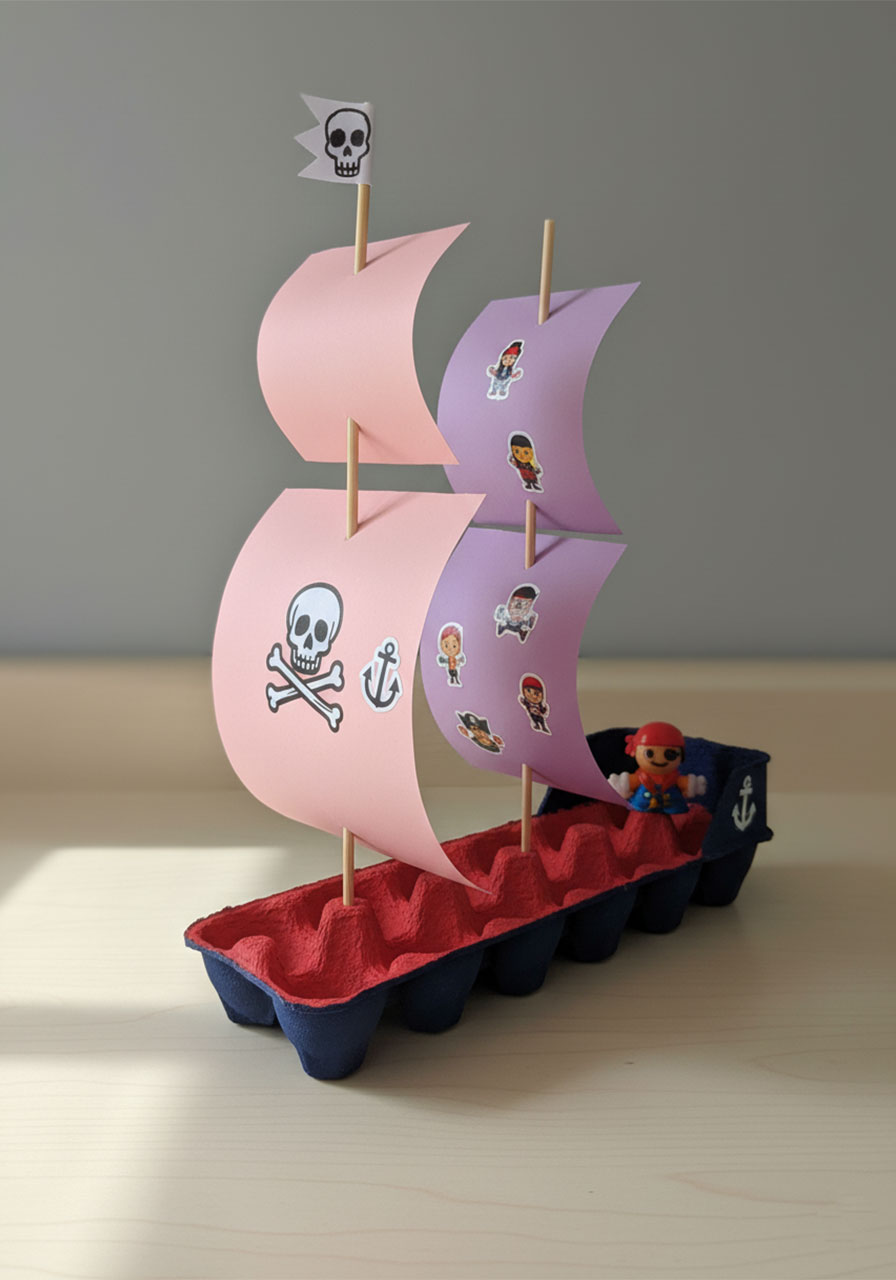
1. Prep the base. Start by cutting off the lid of the egg carton – you only need the bottom half. This bumpy, ridged base becomes the hull of your ship. Pretty convincing, right?
2. Paint the ship. Let your child go to town painting the outside of the carton in their chosen ship color – classic black, deep navy, or even a bold red all look amazing. Don’t forget to paint the inside too!
3. Make the sails. Cut two large squares from your two different colored chart papers. These are your sails. Have your child decorate them with pirate stickers on one side – this is where their personality really shines!
4. Set up the masts. Once the paint is dry, push the two sticks upright into the base of the carton (aim for the center rows). Space them out to give the ship a balanced look.
5. Attach the sails. Tape or glue each decorated chart paper sail onto a stick. Curve the paper slightly for a billowing sail effect – it makes a huge difference!
6. Load the crew! If you have any small pirate toy figures, place them inside the ship. Your child’s pirate adventure is ready to set sail.
Pro Tip: Add a small skull-and-crossbones flag to the top of one mast using a toothpick and a tiny square of paper. Kids absolutely love this finishing touch – it makes the whole ship look 10x more official.

2. Egg Carton Ocean Box
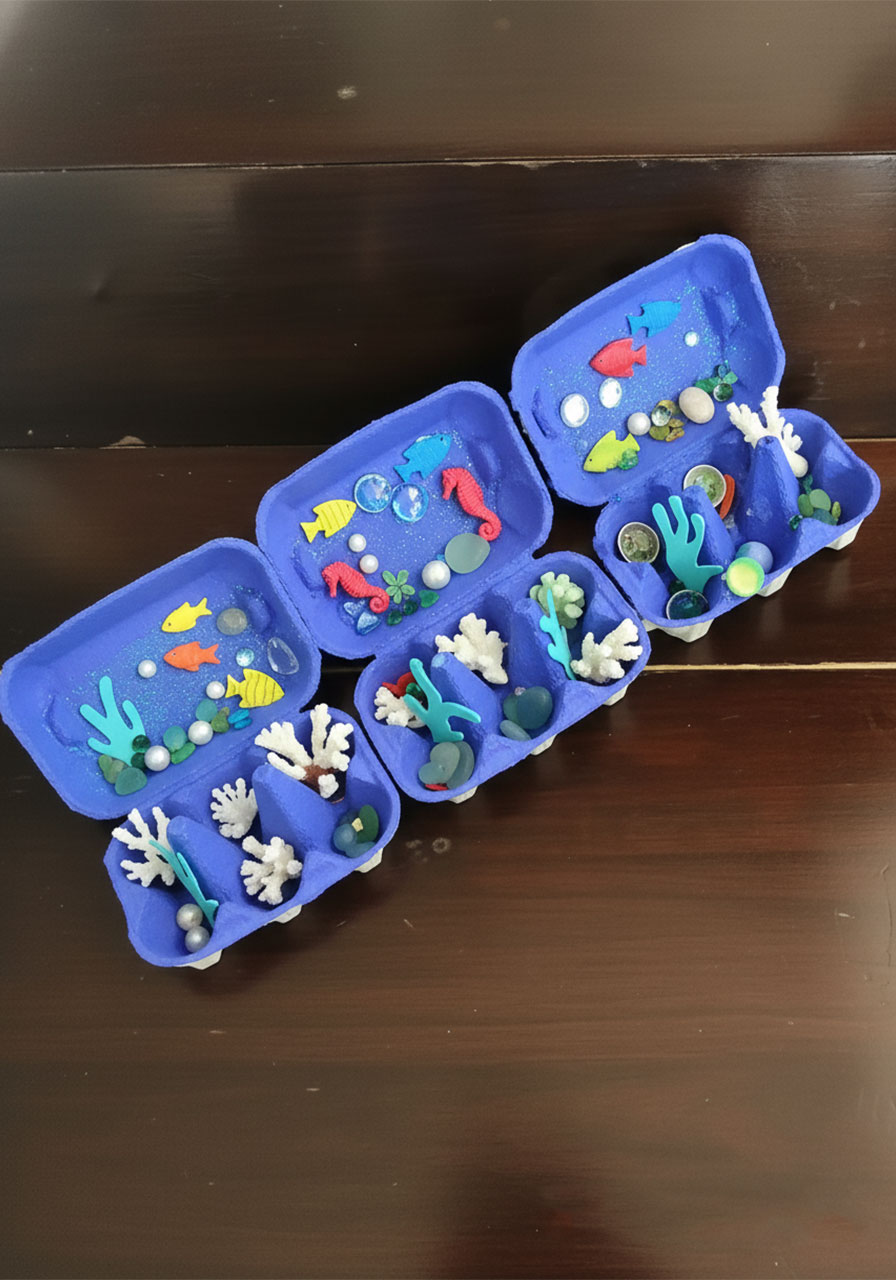
If your child is obsessed with the ocean, sea creatures, or anything under-the-sea themed, this craft is going to be their new favorite thing. The egg carton’s natural compartments become little underwater scenes – each one filled with sea creatures, shells, and shimmer. It’s also a sneaky way to teach kids about marine life while they’re having a blast creating.
Best for: Ages 3 and up
Time to Make: 30–40 minutes (plus drying time)
Great for: Classroom nature projects, ocean-themed parties, sensory play
What You’ll Need:
1 empty egg carton (opened flat, both halves work great)
Blue paint and a paintbrush
Foam sheets or thick chart paper (for cutting sea creatures)
Seashells (real ones if you have them, or foam craft shells)
Glass marbles or blue/clear jewel stickers
Glitter glue (optional, but makes it extra magical)
Safety scissors
Glue
How to Make It:
1. Paint the ocean. Have your child paint the entire inside of the egg carton with blue paint. Make sure every corner and bump gets covered – this is the ocean floor! Set aside to dry completely before moving on.
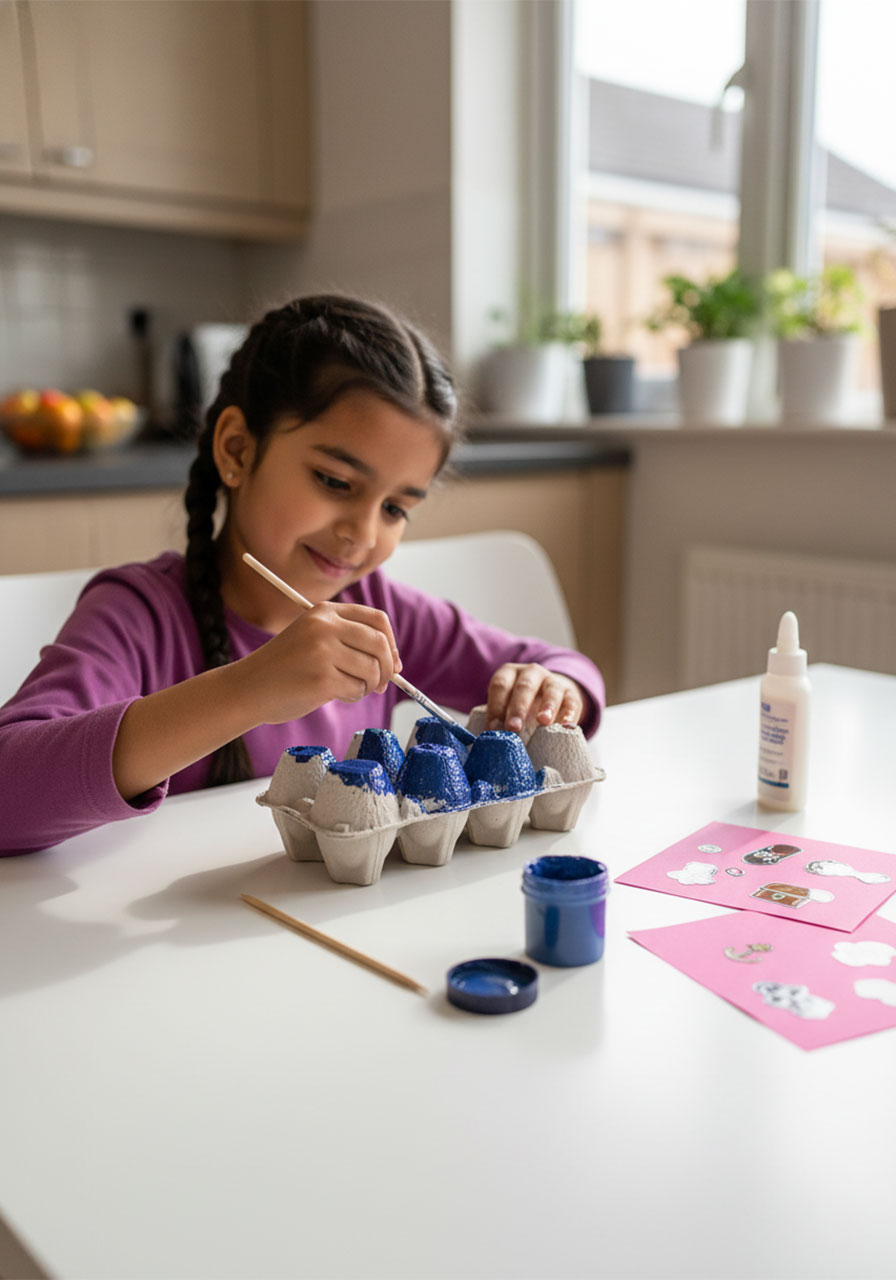
2. Cut out the sea creatures. While the paint dries, help your child cut out simple sea shapes from the foam or chart paper – a starfish, a fish, an octopus, even a crab. They don’t need to be perfect; chunky and cute is totally the vibe here!
3. Build the scene. Once the base is dry, start arranging and gluing down the sea creatures inside the carton’s cups. Place the octopus in one section, a fish in another – each little compartment can tell its own mini underwater story.
4. Add the treasures. Glue jewel stickers or place glass marbles in the cups around the creatures. These look like little pebbles and gems on the ocean floor – so pretty!
5. Add the shells. Glue real or craft seashells throughout the box for extra texture and authenticity. Kids who’ve collected shells at the beach will love using their own treasures here.
6. Final sparkle. Add a thin line of glitter glue along the base for a shimmery, light-through-water effect. This step is optional, but honestly? It makes the whole thing look stunning.
Pro Tip: Turn this into a learning moment! Before the craft, look up pictures of real sea creatures together and challenge your child to recreate their favorites. Ask them: “Where does a starfish live? What does a clownfish eat?” You’ll be amazed at what sparks.
3. Egg Carton Easter Bunny
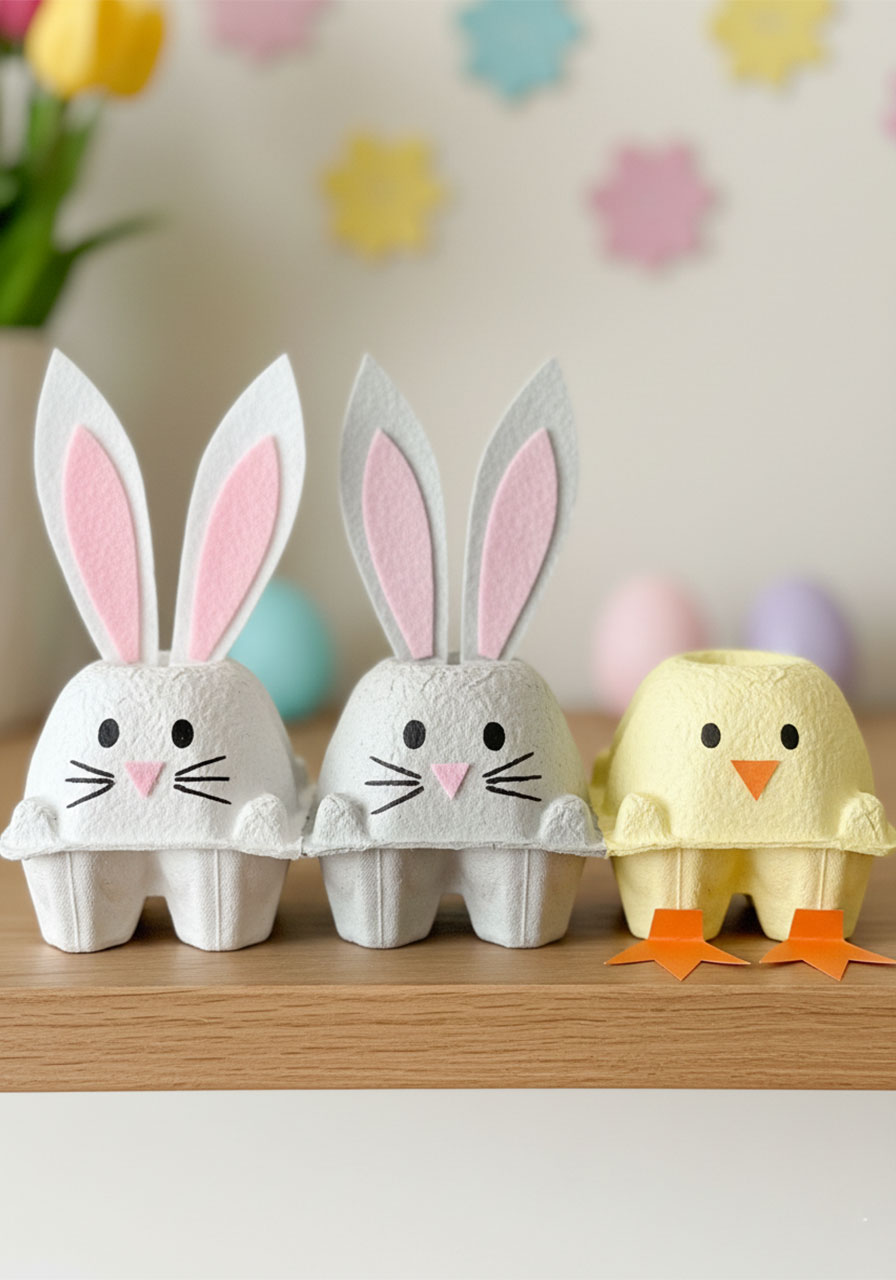
Cutest. Thing. Ever. These little egg carton bunnies are perfect for Easter season – but honestly, they’re so adorable that your kids will want to make them year-round. The best part? You only need half an egg carton per bunny, which means one carton gives you two bunnies. Double the fun!
Best for: Ages 4 and up
Time to Make: 20–30 minutes (plus drying time)
Great for: Easter crafts, spring classroom activities, gift-making for grandparents
What You’ll Need:
Half of an empty egg carton (the 6-cup side)
Grey paint (or white – your child’s choice!)
White paint
A black marker or sketch pen
A pink marker or sketch pen
Grey felt or thick cardstock (for the ears)
Glue
Safety scissors
How to Make It:
1. Prep the face. Cut the egg carton in half so you have just the 6-cup section. Flip it upside down – the rounded bumps now become the bunny’s adorable textured face!
2. Paint it up. Have your child paint the whole piece grey (or white for a classic Easter bunny look). Make sure they get all the sides and bumps. Set aside to dry fully.
3. Draw the face. Using the black marker, draw two small round eyes and outline the nose and mouth on the front of the bunny. Keep it simple – two dots for eyes and a little curved mouth is all it takes!
4. Add the whiskers. Dip a thin brush in white paint (or use a white marker) to draw whiskers on either side of the nose. Three lines on each side looks perfect.
5. Color the mouth. Fill in the nose or color the inside of the mouth with the pink marker for a sweet, rosy touch.
6. Make the ears. Cut two tall, narrow oval shapes from grey felt or cardstock. These are the bunny’s ears! Add a smaller pink oval shape inside each ear for detail – this makes them look so realistic.
7. Attach the ears. Glue the ears to the back of the bunny head, so they stick up tall. Hold them in place for a minute while the glue sets.
Fun Variation: Make a whole family of characters using the same technique! Use different paint colors to make a yellow chick, a blue monster, or a purple alien. Let your child’s imagination run wild – each one ends up totally unique.
Why These Egg Carton Crafts Are Worth Your Time
These three projects do so much more than just keep kids busy (though that’s definitely a win). They build fine motor skills through cutting, painting, and gluing. They encourage imaginative play – that pirate ship and ocean box will be played with long after the craft session is over. And they teach kids the satisfying lesson that something destined for the recycling bin can become something truly special.
Keep a stash of empty egg cartons in your craft drawer. You’ll thank yourself the next time you need a rainy-day rescue.
Which one will you try first? We’d love to know – drop a comment below and share what your kids created!
More Kid’s Party Ideas to Keep the Fun Rolling:
Construction Truck Sensory Bin: The Ultimate Hands-On Activity for Little Builders
3 Easy Paw Print Art Crafts Your Kids (and Pets!) Will Absolutely Love
The Gratitude Game: A Pick-Up Sticks Twist Your Kids Will Actually Love
The Hammering Activity Toddlers Absolutely Love (And All You Need Is a Cardboard Box!)
12 Fun Pen and Paper Games to Cure Boredom (No Screens Required!)
Paper Bag Fairy House: The Cutest Kids’ Craft You Can Make in Under an Hour
Frozen Dinosaur Eggs: The Coolest Summer Activity Kids Will Beg to Do Every Year
Floating Ball Activity: The Easy DIY Science Game Kids Can’t Stop Playing
