
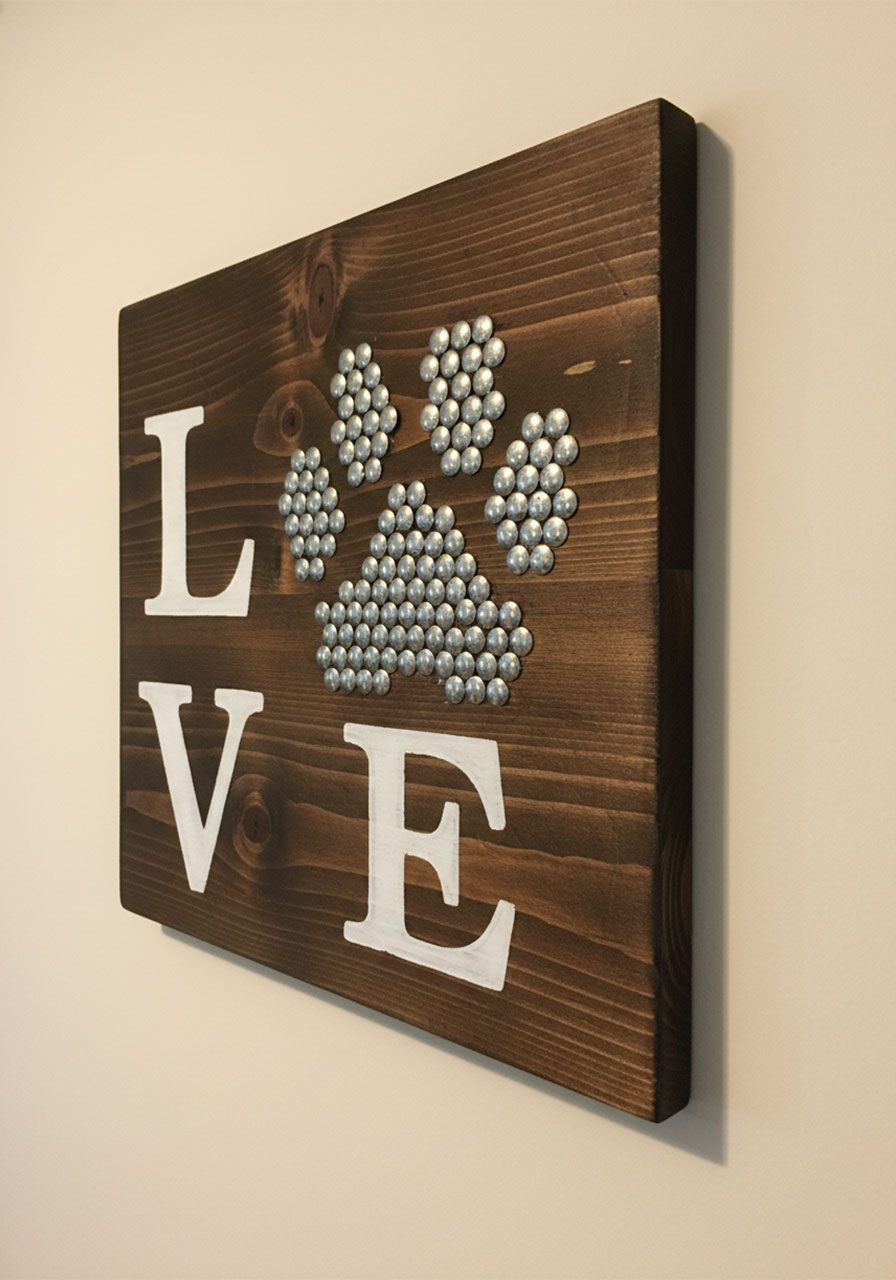
Got a blank wall staring back at you? Same. But instead of buying generic wall art, why not make something that actually means something – and have a blast doing it with your kids? These paw print art projects are simple, budget-friendly, and seriously adorable. All you need is a little scrap wood, some thumbtacks, and about an hour of your time.
Whether you’re a parent looking for a rainy-day activity or a teacher planning a fun classroom craft, these ideas are exactly the kind of low-prep, high-reward projects everyone loves. Let’s get into it!
Why Paw Print Art Is Such a Winner
Here’s what makes this craft a go-to for parents and teachers alike: it’s forgiving, flexible, and totally customizable. There’s no “wrong” way to make it, kids feel proud of the finished product, and the end result genuinely looks like something you’d find in a home décor store – not a school art project. Win-win-win.

Project 1: Thumbtack Paw Print Sign (The “LOVE” Sign)
This is the crowd-pleaser. A stained wood board, painted letters, and a paw print made entirely from thumbtacks. It sounds simple because it is simple – and it looks incredible on any wall.
Best for: Parents and kids ages 8+, classroom art projects, DIY home décor
Time to Complete: About 60–90 minutes (plus drying time)
Difficulty: Easy
What You’ll Need:
1 piece of scrap wood (any size – even a leftover board works perfectly)
Espresso wood stain (1 coat is all you need – available at Lowe’s or any hardware store)
White chalk paint (pro tip: check the mistint section at Lowe’s – you can snag a can for as little as $3!)
Thumbtacks (Dollar Tree or Dollar Star works great – grab 2 packs to be safe)
A pencil or chalk for outlining
Command strips (for hanging – no nails needed!)
Paintbrush
A printed or hand-drawn paw print template as your guide
How to Make It:
1. Prep your wood. Sand down any rough edges so you’ve got a smooth surface to work on. Wipe away any dust with a dry cloth.
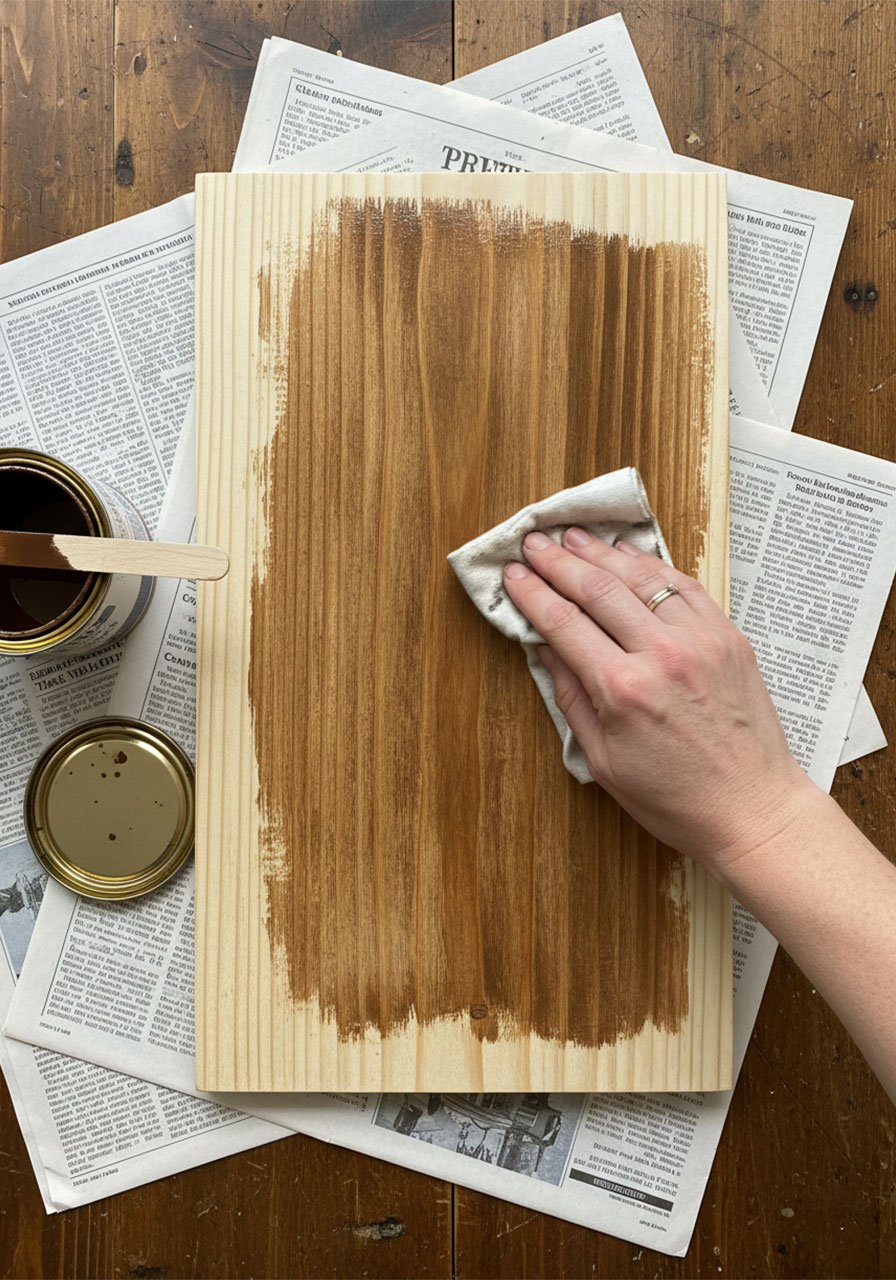
2. Stain the wood. Apply one coat of espresso stain with a brush or a rag, working in the direction of the grain. Let it dry completely – at least 30–45 minutes. This is what gives it that rich, finished look.
3. Plan your layout. Lightly sketch in pencil where your letters and paw print will go. For the classic “LOVE” sign, the “O” in LOVE gets replaced by the paw print – that’s the magic touch!
4. Paint your letters. Using white chalk paint, carefully paint your letters (L, V, E – skipping the O spot). Chalk paint gives a lovely matte, rustic finish. Let it dry fully before moving to the next step.
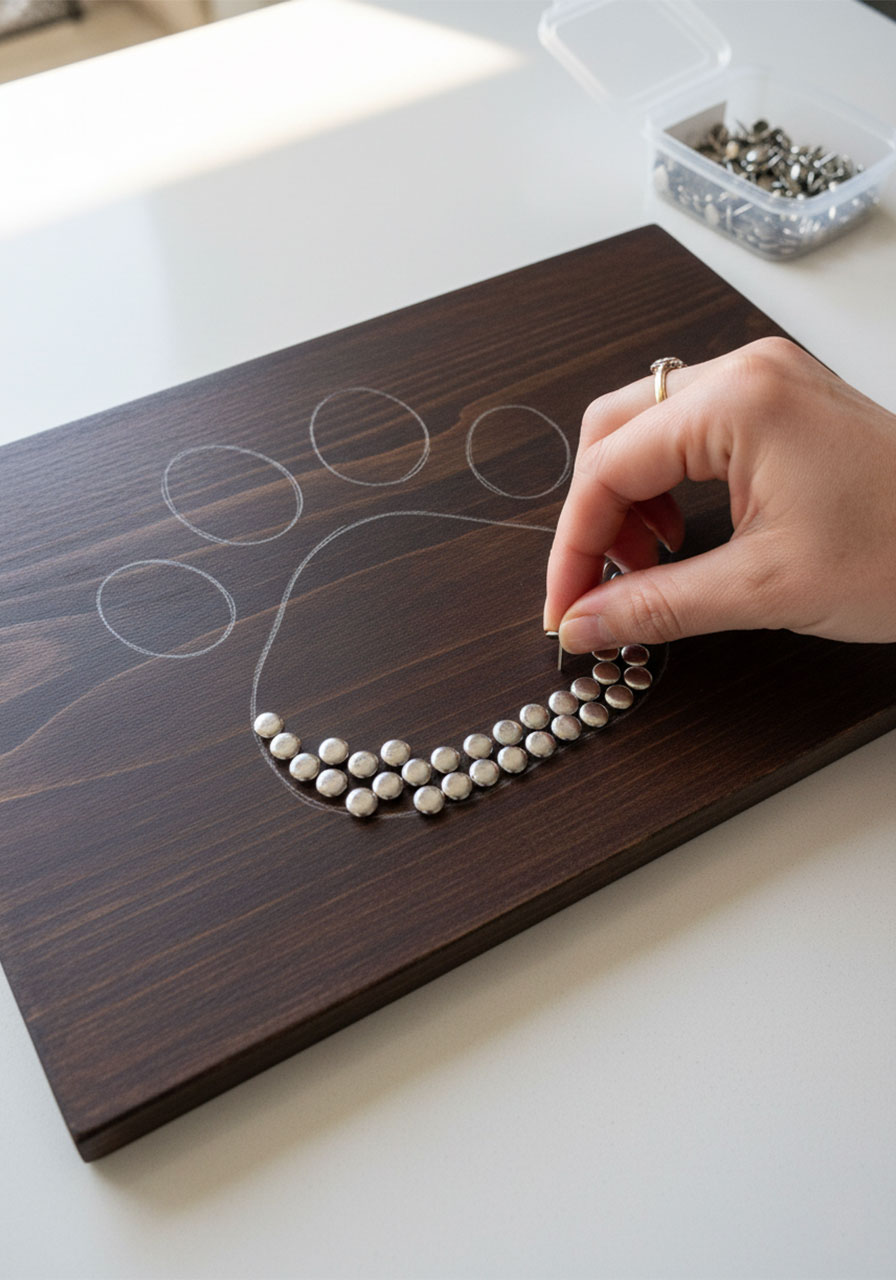
5. Outline your paw print. In the space where the “O” would go, lightly draw a paw print shape in pencil – one large central pad and four smaller toe pads above it.
6. Fill it in with thumbtacks. This is the fun part! Start pressing thumbtacks into the wood along your outline, then fill in the shape tightly. The more tacks you pack in, the bolder and more textured your paw print looks. Kids will love this step – it’s super satisfying!
7. Hang it up. Stick Command strips to the back of the board and press it firmly onto your wall. No drilling, no mess – just instant wall art.
Pro Tip: If your thumbtacks are slipping on the stained surface, try pressing them in at a very slight angle – they’ll grip the wood much better. Also, gold or silver thumbtacks both look stunning against a dark espresso stain!
Project 2: Full Paw Print Nail Art Board
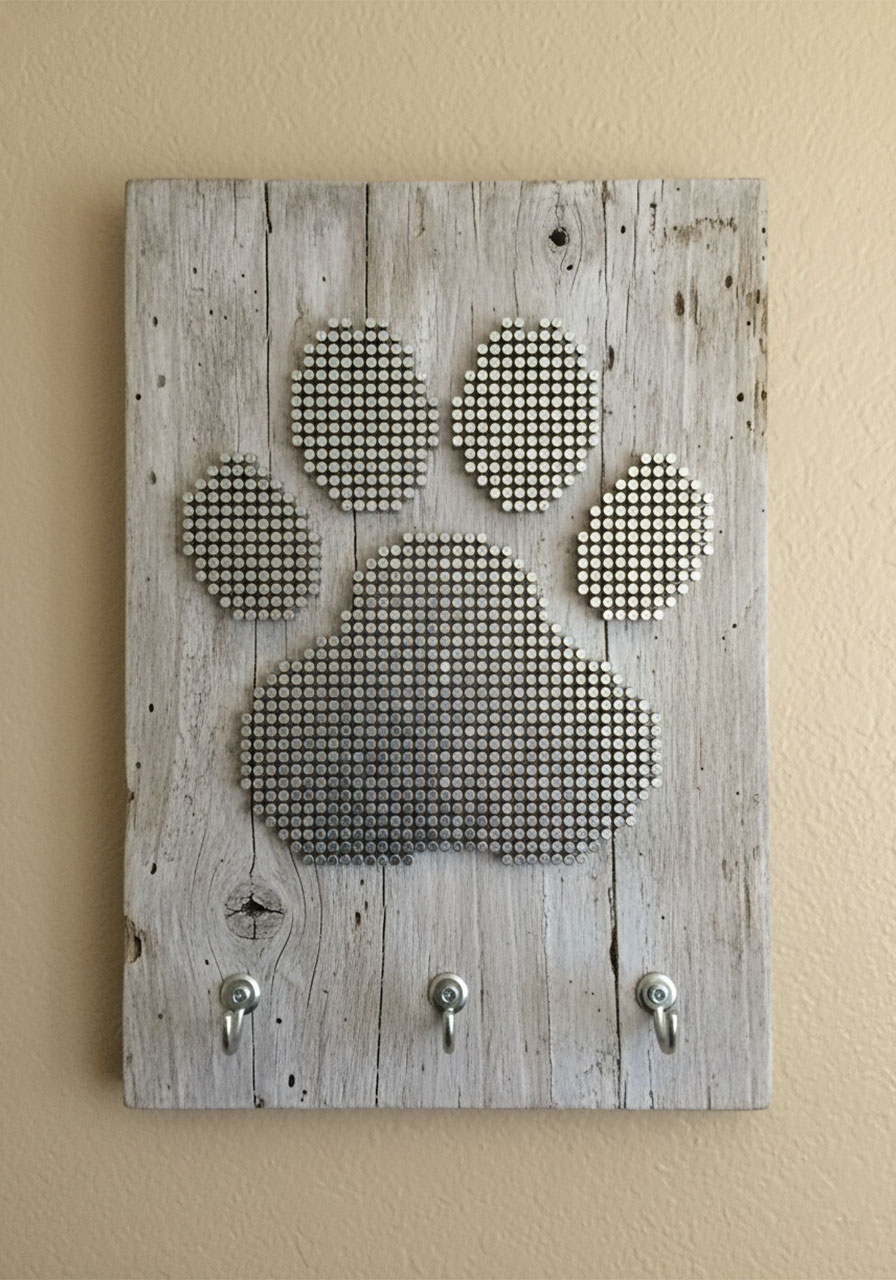
Want to go bigger and bolder? This version uses nails hammered flush into the wood to create a large, textured paw print that becomes the entire focal point of the piece. It’s rustic, eye-catching, and looks like something straight out of a boutique gift shop.
Best for: Older kids (10+) with adult supervision, teen crafters, DIY enthusiasts
Time to Complete: 90 minutes – 2 hours
Difficulty: Medium (adult help required for hammering)
What You’ll Need:
1 piece of scrap wood or reclaimed board (roughly 8″ x 10″ or larger)
Small finishing nails (the short, flat-headed kind – available in any hardware store)
A hammer
Pencil for outlining
Gray or whitewash wood stain (optional, for a weathered look)
A paw print outline drawn or traced onto paper as your guide
Tape (to temporarily hold your paper template on the wood)
How to Make It:
1. Stain your board (optional but recommended). A light gray or whitewash stain gives this project a beautiful, aged look. Apply it and let it dry completely.
2. Create your paw print template. Draw a simple paw print on a piece of paper – one large oval pad and four smaller toe pads. Make it as big or small as you want for your board.
3. Tape the template onto your board. Position it where you want the paw print to appear and tape it securely so it doesn’t shift.
4. Hammer your nails through the paper. Begin hammering small nails through the paper template and into the wood, spacing them about ¼ inch apart. Work your way around the outline first, then fill in the center of each pad.
5. Remove the paper. Once all your nails are in, carefully tear away the paper template. You’re left with a perfectly shaped paw print made entirely of nails!
6. Add hooks (optional but super cute!). For a functional twist, screw 2–3 small metal hooks along the bottom of the board. Now it doubles as a leash holder or key rack!
Pro Tip: Work in sections – outline the large center pad first, then move to each toe pad. It keeps the shape clean and stops things from getting muddled. And let the kids hammer under close supervision – they’ll feel SO proud of the end result!
Project 3: Quick Classroom Version (No Nails, No Stain!)
Teaching a class or doing a group craft with younger kids? Here’s a simplified, no-tools version that still looks adorable and takes less than 30 minutes.
Best for: Classrooms, younger kids (ages 5–8), group craft sessions
Time to Complete: 20–30 minutes
Difficulty: Very Easy
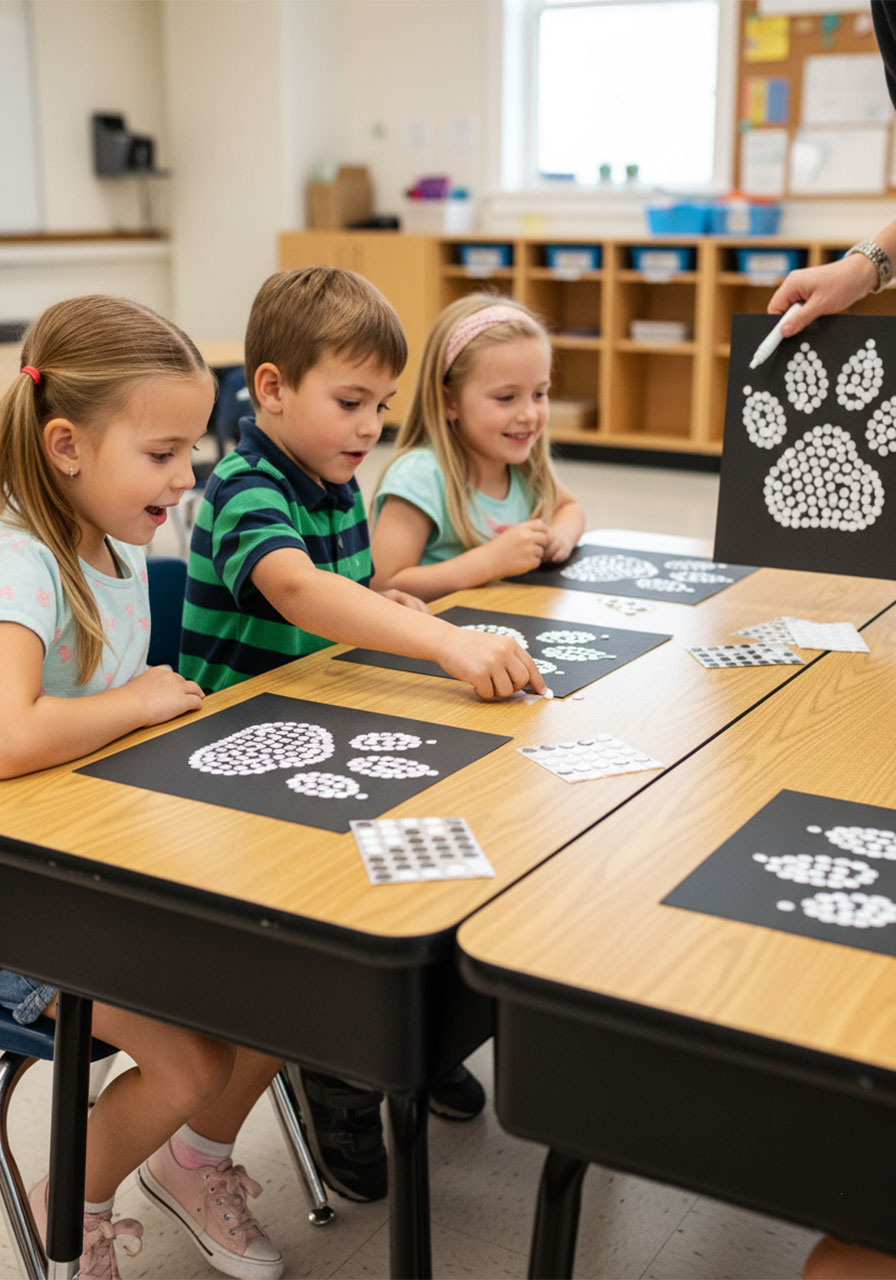
What You’ll Need:
Cardstock or thick cardboard (cut to your preferred size)
Brown or black paint (for the background)
White or silver paint pen or chalk marker
Regular push pins or map tacks (for older kids) OR foam stickers in circular shapes (for younger kids)
A pencil
How to Make It:
1. Paint your background. Paint your cardstock or cardboard a dark color – brown, black, or navy all look great. Let it dry.
2. Draw your paw print outline. Using a white chalk marker or paint pen, lightly draw a paw print shape on your dried background.
3. Fill it in. Older kids can press push pins along the outline and fill it in. Younger kids can press circular foam stickers inside the paw print shape to fill it in. Both look amazing!
4. Add a word or name. Use the chalk marker to write “LOVE,” a pet’s name, or a classroom message around the paw print. It makes each piece totally personal.
5. Display it! Hang with tape, a clip, or a simple string for an adorable classroom gallery display.
Pro Tip: For a classroom, turn this into a collaborative piece – have each student fill in one toe pad, and the teacher fills in the center pad. One big paw print, made by the whole class!
Materials Round-Up
Here’s everything you might need across all three projects, most of which you can find at Lowe’s, Dollar Tree, or already lying around at home:
Scrap wood or reclaimed board
Espresso wood stain (Lowe’s)
White chalk paint (check the mistint rack – score it for ~$3!)
Thumbtacks or push pins (Dollar Tree)
Small finishing nails + hammer (for the nail art version)
Command strips (for hanging)
Pencil or chalk for outlining
Paintbrush
Make It Your Own!
The best part about these paw print art projects? There’s zero pressure to follow the instructions exactly. Use whatever wood you have on hand. Swap thumbtacks for sequins or buttons if that’s what you’ve got. Paint a rainbow paw print instead of a classic one. Use your child’s actual handprint as the “paw.” The whole point is to make something that feels like YOU – and to have a genuinely great time doing it.
These crafts are proof that the best home décor doesn’t come from a store – it comes from an afternoon well spent with people (and pets!) you love.
Happy crafting! 🐾
Suggested materials: Espresso Stain (Lowe’s) · Thumbtacks (Dollar Tree) · Chalk Paint (Lowe’s mistint rack) · Scrap Wood
More Kid’s Party Ideas to Keep the Fun Rolling:
The Gratitude Game: A Pick-Up Sticks Twist Your Kids Will Actually Love
The Hammering Activity Toddlers Absolutely Love (And All You Need Is a Cardboard Box!)
12 Fun Pen and Paper Games to Cure Boredom (No Screens Required!)
Paper Bag Fairy House: The Cutest Kids’ Craft You Can Make in Under an Hour
Frozen Dinosaur Eggs: The Coolest Summer Activity Kids Will Beg to Do Every Year
Floating Ball Activity: The Easy DIY Science Game Kids Can’t Stop Playing
Floating City STEM Challenge: Can Your Kid Build a City That Survives the Waves?
Dot Sticker Addition: The Hands-On Math Activity Kids Actually Want to Do Again and Again
