

Get ready for some serious “ooohs” and “ahhhs” because this walking water experiment is about to become your kids’ new favorite science activity. I’m talking jaw-dropping, can’t-look-away, “Mom, can we do it again?!” kind of fun. And the best part? You probably already have everything you need sitting in your kitchen right now.
This rainbow science experiment is pure magic – except it’s real science, and it’s so easy that even your preschooler can help set it up. Within minutes, you’ll watch colored water literally walk up paper towels, defy gravity, and create a stunning rainbow right before your eyes. Trust me, the adults will be just as mesmerized as the kids!
Perfect for: Preschool through elementary kids, spring science activities, rainy day fun, homeschool lessons
Time Needed: 5 minutes to set up, 2 hours of colorful magic
Mess Level: Low (just some food coloring on hands – totally worth it!)
Why You’ll Love This Walking Water Experiment
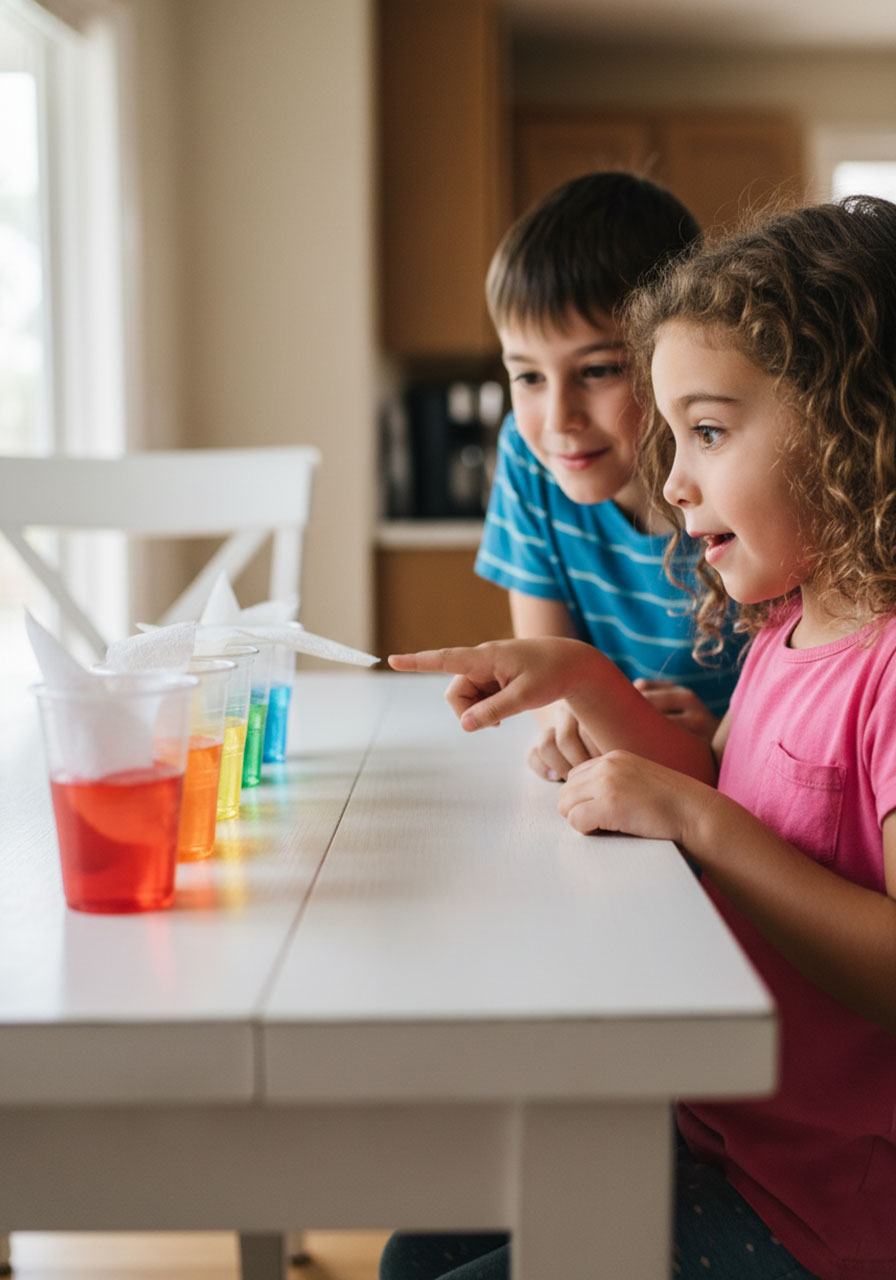
Here’s the thing: kids don’t just watch this experiment – they experience it. They’ll make predictions, observe real-time changes, and witness the awesome power of capillary action (fancy science term for “water climbing up paper towels”). Plus, they get a bonus lesson in color mixing as red + yellow creates orange, yellow + blue makes green, and blue + red transforms into purple.
It’s hands-on science that delivers the “wow factor” without requiring a PhD or a trip to the specialty store. Just grab some cups, paper towels, and food coloring, and you’re ready to blow some young minds!

What You’ll Need:
7 small plastic cups or clear glasses (clear is best so kids can see the action!)
Paper towels (pick-a-size work great – just use half sheets)
Red, yellow, and blue food coloring
Water
A tray or placemat to catch any drips
Optional: Paper and pencil for recording observations
Pro Tip: More absorbent paper towels will make the water walk faster, but honestly? Even the cheap store-brand ones work like a charm. We’ve tried both, and kids are thrilled either way!
How to Set Up Your Rainbow Walking Water Experiment:
Getting Your Cups Ready
Step 1: Line up your 7 cups in a row on a flat surface. Pour water into cups 1, 3, 5, and 7 until they’re about 3/4 full. (Leave cups 2, 4, and 6 empty – this is where the magic happens!)
Pro Tip: The fuller your cups, the faster the water will travel and the more dramatic your final rainbow will be. Don’t be shy with that water!
Step 2: Add 5 drops of red food coloring to cup 1 and cup 7.
Step 3: Add 5 drops of yellow food coloring to cup 3.
Step 4: Add 5 drops of blue food coloring to cup 5.
Now you should have: red water, empty cup, yellow water, empty cup, blue water, empty cup, red water. Looking good!
Pro Tip: Try to keep the number of food coloring drops consistent in each cup. If your little ones accidentally add an extra drop or two (it happens!), just even out the others so all the colors have similar intensity.
Creating Your Paper Towel Bridges
Step 5: Take a half sheet of paper towel and fold it in half lengthwise, then fold it in half again lengthwise. You want a long, narrow strip that looks like a little paper bridge.
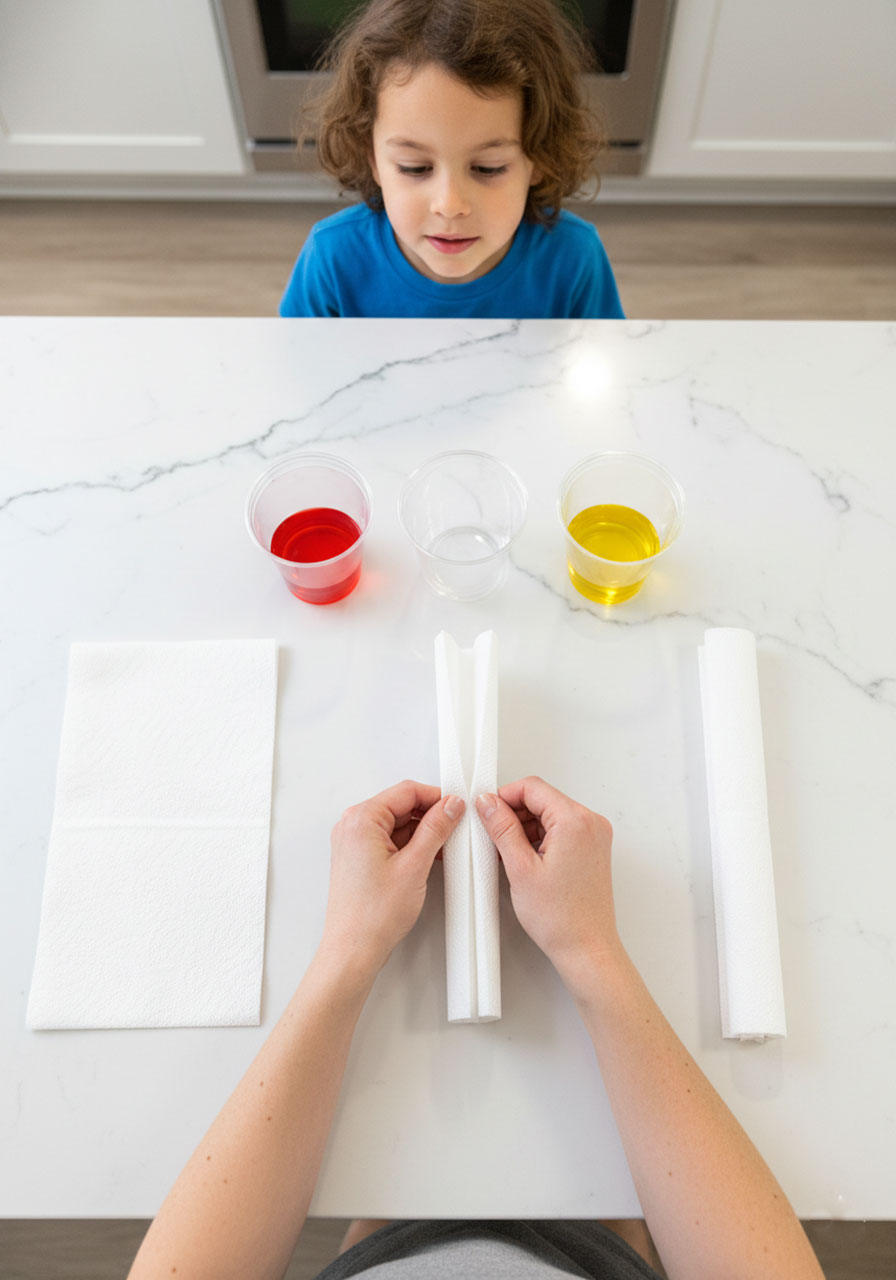
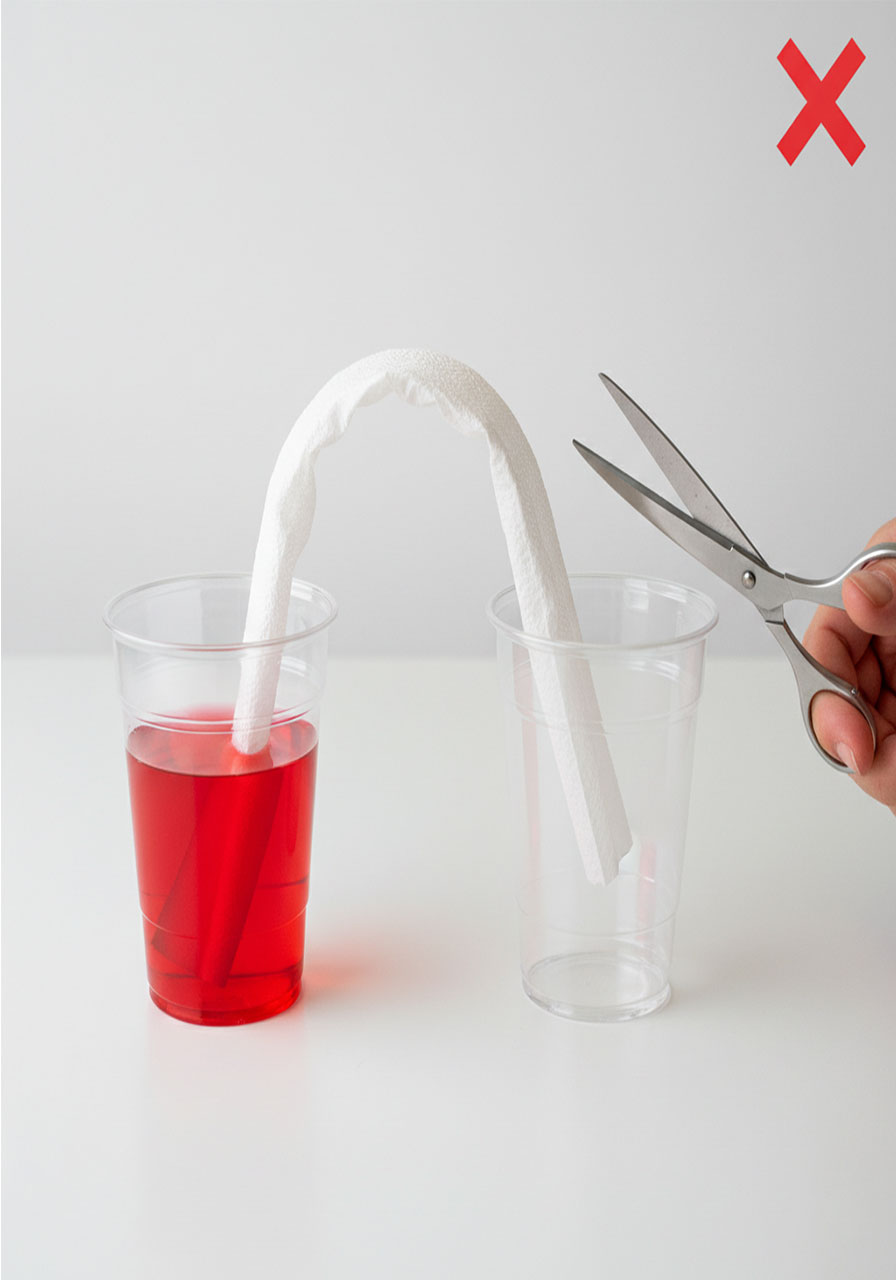
Step 6: Trim the length a bit so there isn’t too much excess paper towel sticking up between cups. The flatter your “bridges,” the faster the water will travel! Aim for just a slight arc between cups – not a big hump.
Step 7: Place one end of your folded paper towel into cup 1 and the other end into cup 2. Make sure both ends are submerged in the water (or touching the bottom of the empty cup).

Step 8: Repeat this process – paper towel from cup 2 to cup 3, cup 3 to cup 4, and so on – until you have six paper towel bridges connecting all seven cups.
Step 9: Now comes the best part – just watch! You should see colored water start climbing up the paper towels almost immediately.
Let the Color-Mixing Magic Begin!
Within minutes, you’ll notice the water creeping up the paper towels. It’s like the water is going on a little adventure, defying gravity as it climbs higher and higher. Soon, it’ll reach the top and start walking back down into the empty cups.
Here’s where it gets really cool: since each empty cup has two colored neighbors, you’ll watch those colors meet in the middle and mix! Cup 2 will fill with a gorgeous orange (from the red and yellow meeting), cup 4 will turn a vibrant green (hello, yellow and blue!), and cup 6 will become a beautiful purple (red and blue joining forces).
Check back every few minutes to see the progress. Your kids won’t be able to resist peeking! The transformation usually takes about 1-2 hours to complete, but you’ll see action happening right from the start.
What to Look For:
First 5 minutes: Water climbing up the paper towels
After 15-20 minutes: Water starting to drip into empty cups

After 45-60 minutes: Colors clearly mixing, new colors forming

After 2 hours: All cups containing roughly equal amounts of water, complete rainbow formed!
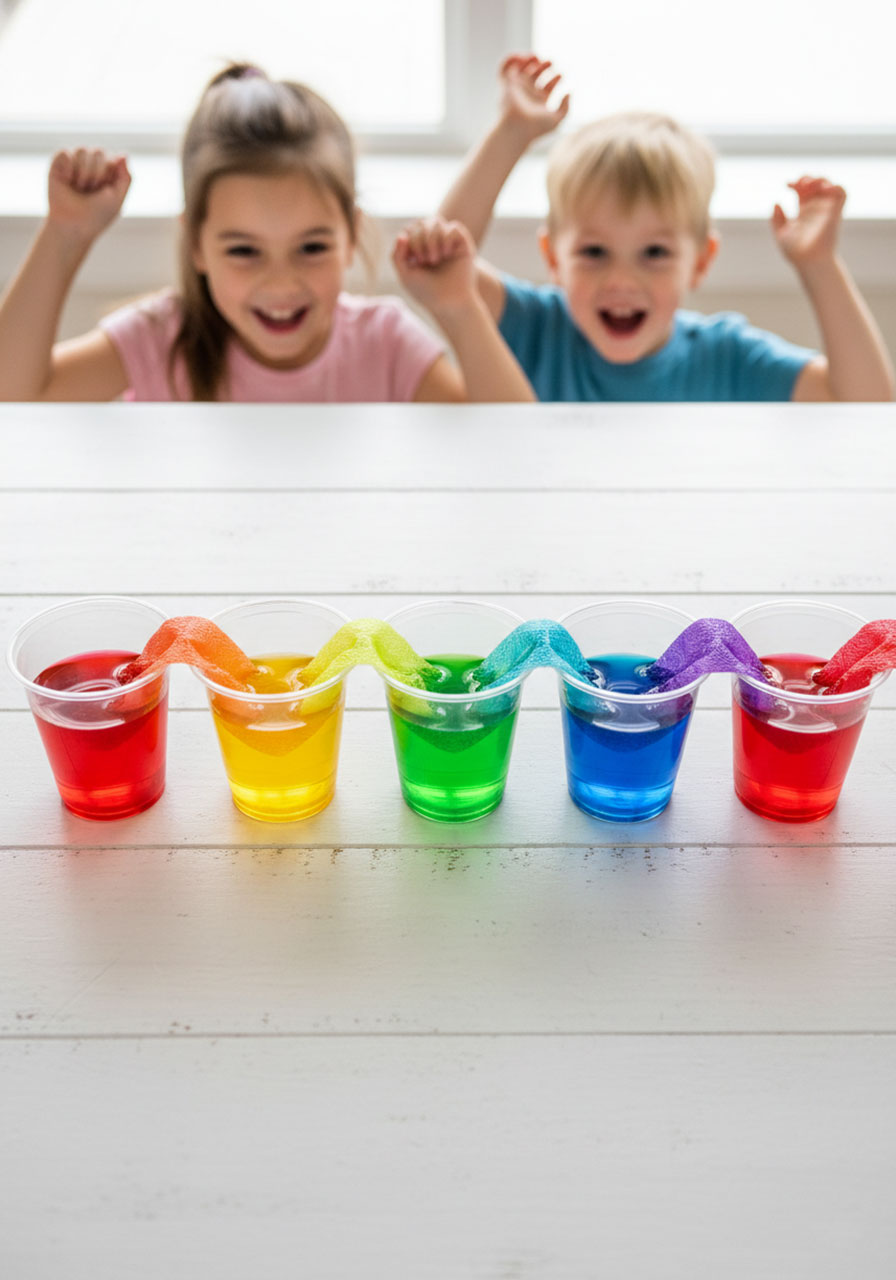
Fun Variation: Want to take it up a notch? Remove one of the red cups and arrange six cups in a circle to create a color wheel! It’s a sneaky-awesome way to introduce your kids to how colors work together.

Questions to Spark Curiosity
Get your kids thinking like real scientists with these conversation starters:
What do you think will happen to the water in the empty cups?
Why do you think the water is moving up the paper towel instead of just sitting in the cup?
What colors do you predict we’ll see in the empty cups?
How is the water able to move against gravity like that?
What’s happening inside the paper towel that we can’t see?
Which cup do you think will fill up first? Why?
What would happen if we used only two colors instead of three?
Create Your Own Science Recording Sheet
Turn this into a full-blown science lesson by having your kids document their observations! Here’s how to create a simple recording sheet that even preschoolers can use:
What to Include on Your Recording Sheet:
1. Title Section:
- Write “Rainbow Walking Water Experiment” at the top
- Add the date and your child’s name
2. Prediction Box:
- Draw a simple row of 7 circles (representing the cups)
- Ask: “What colors do you think will be in each cup when the experiment is done?”
- Let kids color in their predictions with crayons or colored pencils
3. Observation Boxes (Make 3-4 of these):
- Create boxes labeled “After 15 minutes,” “After 30 minutes,” “After 1 hour,” “Final Results”
- In each box, draw 7 circles for kids to color in what they actually see
- Add a line underneath for them to write notes about what’s happening
4. Question Section:
- “What surprised you most?”
- “Which color appeared first in the empty cups?”
- “What do you think made the water move up the paper towels?”
5. Drawing Space:
- Include a large blank box labeled “Draw what you observed”
- Kids can sketch the setup, the paper towel bridges, or their favorite part of the experiment
Pro Tip for Younger Kids: For preschoolers who can’t write yet, just focus on the prediction and observation boxes with circles to color. You can write down their verbal observations for them!
Pro Tip for Older Kids: Challenge elementary-aged kids to measure and record the water levels in each cup at different time intervals, or have them write a hypothesis about why capillary action works.
The Science Behind the Magic
This experiment works because of something called capillary action. The paper towel is made up of tiny fibers with even tinier gaps between them. These gaps act like super-skinny tubes (capillaries) that actually pull the water upward. It’s the same process that helps plants drink water from their roots all the way up to their leaves – even on trees that are hundreds of feet tall!
The water can travel upward against gravity because of the attractive forces between the water molecules and the paper towel fibers. Those forces are strong enough to overcome gravity and carry the colored water on its rainbow journey!
Real-World Connections to Share with Kids:
Plants and trees use capillary action to transport water from their roots to their leaves
Paper towels absorb spills because of capillary action pulling liquid into the fibers
Your body uses capillary action in tiny blood vessels to move blood throughout your system
Candle wicks draw melted wax upward through capillary action to keep the flame burning
Why This Experiment Is a Total Winner
It’s beginner-friendly. Even if you’ve never done a science experiment before, you’ve got this. The setup is foolproof, and the results are guaranteed.
It keeps kids engaged. This isn’t a “set it and forget it” experiment. Kids will keep coming back to check on the progress, which means they’re actively observing and learning the whole time.
It teaches real science concepts. Capillary action, color theory, observation skills, making predictions – this one activity packs a serious educational punch!
It’s screen-free fun. In a world of tablets and TV, this is the kind of hands-on activity that pulls kids in and keeps them captivated without any screens required.
It works for multiple ages. Preschoolers love watching the colors mix, while elementary kids can dive deeper into the scientific explanations and documentation.
Tips for Success
Make it a science party! Set up multiple experiments side by side and let kids compare results. Does one set of paper towels work faster than another brand?
Try different variables: What happens if you use more or less water? What if you use wider or narrower paper towel strips? What if you try warm water versus cold water? Each variation becomes a new learning opportunity!
Capture the process: Take photos at 15-minute intervals so kids can create a time-lapse sequence showing the progression. It’s perfect for science fair projects or digital portfolios!
Extend the learning: After the rainbow forms, challenge older kids to reverse-engineer the process. Can they figure out which original cups the water came from based on the final color?
Ready, Set, Science!
With just a few household items and five minutes of prep, you’re about to create a science experience your kids will remember for years. The walking water experiment proves that the best learning happens when kids are having so much fun they don’t even realize they’re learning.
So grab those cups, squeeze in that food coloring, and get ready to hear “That’s SO cool!” about a hundred times. Because when science looks this good, there’s no stopping the excitement!
The best part? You’re not just teaching kids about capillary action—you’re showing them that science is accessible, beautiful, and absolutely magical. And that’s a lesson that’ll stick with them long after the rainbow fades.
Now go make some colorful memories!
More Kid’s Party Ideas to Keep the Fun Rolling:
How to Make a Paper Plate Kite: The Ultimate Summer Craft for Kids
How to Make a Straw Airplane That Actually Flies (Better Than Paper!)
How to Make Mini Lid Banjos: The Cutest 10-Minute DIY Musical Instrument
Make a Paper Plate Maze STEM Challenge That’ll Blow Your Kids’ Minds
DIY Car Ramp: The 5-Minute STEM Activity That’ll Keep Your Kids Racing for Hours
45 Rainbow Craft Ideas for Kids That’ll Spark Epic Creativity!
How to Make Paper Claws: Turn Your Fingers Into Weapons in 5 Minutes
How to Play Help Your Neighbor: The Card Game That’ll Have Your Family Actually Wanting Game Night
