

Here’s a little secret that every parent and teacher needs to know: LEGOs aren’t just for building towers and spaceships. Press them into a flat slab of playdough and – boom – instant art activity that kids absolutely cannot get enough of. The bumpy dots, rectangular edges, and flat bases of LEGOs create the most satisfying textures and patterns in playdough, and kids can combine those prints to make anything from abstract designs to full-on scenes with houses, suns, and animals.
The best part? Zero mess prep. You probably already have everything you need sitting in a toy bin right now.
Whether you’re looking for a rainy-day activity, a creative quiet-time setup, or a fun sensory station for your classroom, this one delivers every time. Let’s dive in.
What You’ll Need
Playdough – homemade or store-bought, any colors work great
LEGOs or Duplos – a mix of shapes and sizes is ideal
Rolling pin
Butter knife (optional, for cutting playdough into shapes)
Plastic placemat or shallow tray to keep things contained
Pro Tip: Gather a variety of LEGO pieces before you start – flat plates, tall bricks, long bars, and even LEGO figures all make different kinds of impressions. The more variety, the more creative the pictures!

How to Make LEGO Pictures in Playdough: Step-by-Step
Step 1: Roll Out Your Playdough Canvas
Start by rolling a chunk of playdough out flat – aim for about ¼ to ½ inch thick. Think of this as your blank canvas. The flatter and smoother you get it, the cleaner and more detailed your LEGO prints will look.
Pro Tip: Roll it out on a plastic placemat or a rimmed tray. It keeps everything in one place and makes clean-up a breeze.

Step 2: Cut Out a Shape (Optional but Fun!)
This step is totally optional, but it takes the activity up a notch. Using a butter knife, cut your rolled-out playdough into a shape before you start pressing – a circle for a sun scene, a rectangle for a building, a blob for a face, or any silhouette that sparks an idea.
Working within a shape gives kids a fun creative challenge and makes the finished artwork feel even more intentional. That said, free-form is just as awesome – skip the cutting and go straight to pressing if the kids are eager to start!
Step 3: Press LEGOs In to Create Your Picture
Here’s where the magic happens. Take a LEGO brick and press it firmly into the playdough, then lift it straight up. You’ll see a perfect imprint of the dots, edges, and shape of that piece. Now do it again – and again – building up a design one stamp at a time.
A few things to try:
Both sides of the brick. The dotted top creates circular patterns; the smooth or tube-filled underside creates a totally different look.
Different sizes. A 2×4 brick leaves a big bold rectangle; a 1×1 piece makes a tiny precise dot cluster. Mix them for variety.
LEGO bars and flat plates make great lines, borders, and windows.
LEGO figures – press a mini figure’s hand or torso into the dough for fun irregular shapes.
Kids can create anything: a city skyline, an underwater scene, a flower garden, a face, an abstract mandala – the LEGO prints become the building blocks of the picture, just like pixels on a screen.
Pro Tip for teachers: This is a great opportunity to sneak in some shape recognition and pattern talk. “What shape did that brick make? Can you make a row of the same shape?”


Step 4: Collage With Multi-Colored Playdough (Level-Up Move!)
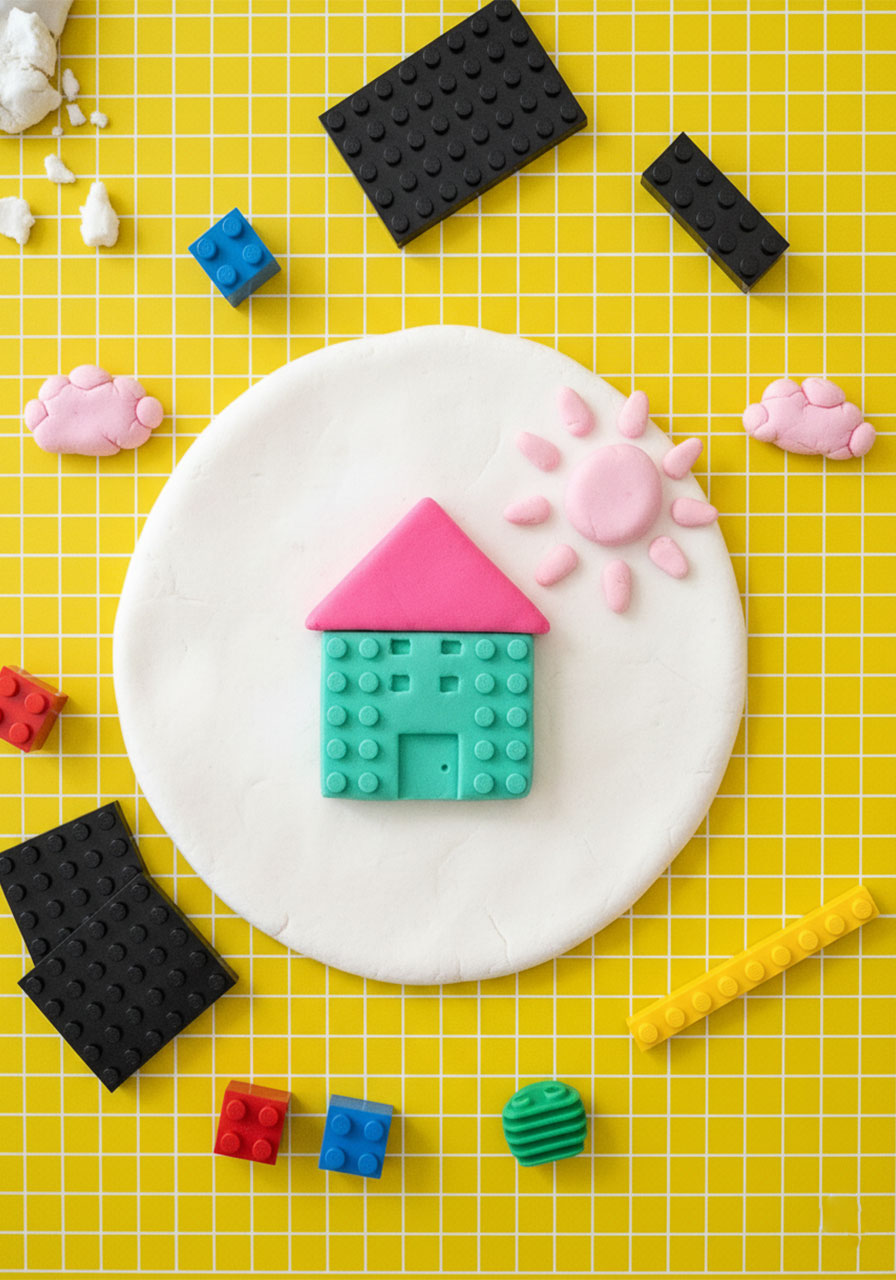
Want to take it even further? Cut out small shapes from differently colored playdough using the butter knife, then layer and collage those pieces onto your base canvas. Add a pink triangle roof on top of a blue square to make a house. Roll tiny snakes of yellow into sun rays. Flatten a piece of green for a grassy yard.
Now your picture has color, texture, AND dimension. It’s basically playdough mixed media art – and it looks incredible.
How to Save Your Playdough Artwork
Playdough pictures are temporary by nature, but if your kid creates something they’re especially proud of, here are a few ways to preserve it:
Take a photo. The simplest and most effective option – snap a picture and save it to your phone or print it out for the fridge.
Cover it with plastic wrap. If you want to keep the artwork intact for a day or two, drape a piece of plastic wrap gently over the top to slow down drying.
Switch to air-dry clay. If the goal is a permanent keepsake, use air-dry clay instead of playdough. The LEGO pressing technique works exactly the same way, and once dry, the artwork is solid and lasting.
Why Kids (and Adults) Love This Activity
Beyond the obvious fun factor, this activity is doing a lot of good work under the hood. The pressing, rolling, and cutting motions are excellent for fine motor development. The open-ended nature of it – there’s truly no wrong way to make a playdough picture – makes it a low-pressure creative win for kids who sometimes feel intimidated by “art.” And for kids who love LEGOs, it’s a totally fresh way to interact with pieces they already know and love.
For classroom settings, it works beautifully as a sensory station, an early finisher activity, or a theme-based art project. Building a unit on community helpers? Have kids press LEGO bricks into playdough to create buildings and vehicles. Studying the ocean? Roll out blue playdough and press in shapes to make an underwater world.
The possibilities are genuinely endless – and the setup takes about 30 seconds.
Quick-Start Tips at a Glance
Roll playdough ¼–½ inch thick for the clearest prints
Try both the top and bottom of each LEGO brick for different textures
Mix brick sizes for more detailed, interesting pictures
Add multi-colored playdough collage pieces to bring scenes to life
Snap a photo to save the finished artwork before it gets squished
Give this one a try the next time you need an activity that’s easy to set up, genuinely engaging, and actually creative. Whether your kids spend 10 minutes or two hours at the playdough table, we’re pretty confident they’ll walk away proud of what they made – and asking to do it again tomorrow.
More Kid’s Party Ideas to Keep the Fun Rolling:
LEGO Charades, Pictionary & Creationary: The Ultimate Hands-On Game for Kids & Families
DIY LEGO Pom Pom Maze: The Ultimate Rainy Day Activity Kids Will Beg to Do Again
16 Genius Colour Sorting Activities for Toddlers & Preschoolers
22 Pinterest Ideas Every Parent (and Teacher!) Will Actually Want to Try
The Easiest Math Activity for Preschoolers (All You Need Is a Cardboard Box!)
15 Cup Stacking STEM Challenges That Will Keep Preschoolers Busy for Hours
5 Domino Math Games Kids Actually Want to Play (No Worksheets Required!)
