
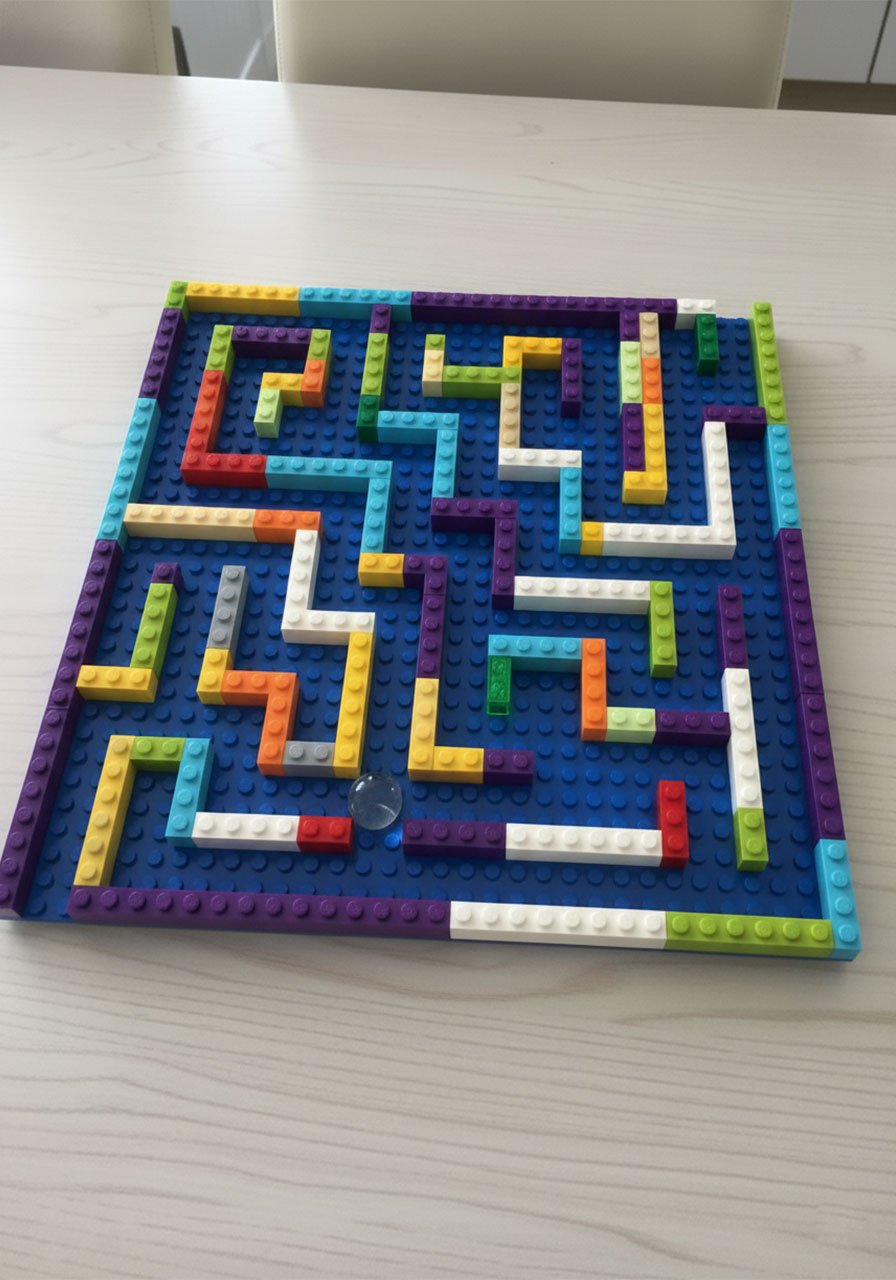
If you’re looking for a screen-free activity that keeps kids genuinely busy for hours – not “I’m bored again in 20 minutes” busy – a LEGO marble maze is about to become your new best friend.
All you need are LEGO bricks you already own, a baseplate, and a marble. That’s it. No kits. No instructions to follow. No pieces to lose. Just pure, creative, open-ended building that sneaks in real engineering skills while your kid thinks they’re just playing.
I built my first LEGO marble maze with my kids after a rainy Saturday afternoon of desperation, and we ended up at the kitchen table for three hours. Three. Hours. The testing, the fixing, the “wait, I want to try something” moments – it just kept going. Now it’s a regular activity in our house, and I’m excited to walk you through exactly how to build one.
Whether your child is 4 or 14, this guide has everything you need: a simple step-by-step build, age-specific maze ideas, 9 creative challenges to keep things fresh, and troubleshooting tips for the inevitable “why won’t this marble cooperate” moments.
Let’s build!
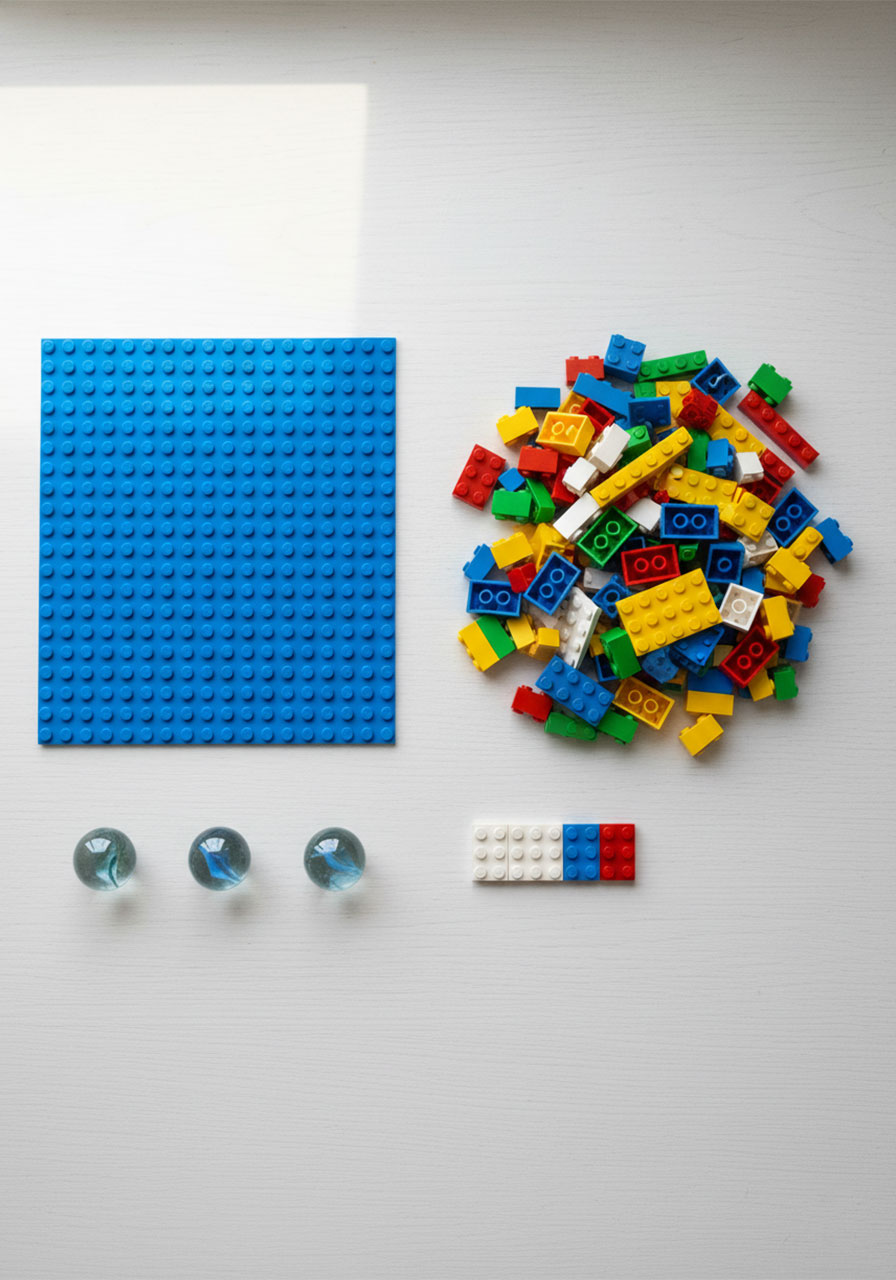
What You Need to Build a LEGO Marble Maze
The beauty of this activity? You probably already have everything you need.
A LEGO baseplate – A 16×16 is perfect for beginners and small hands. A 32×32 gives older kids more room to get creative and complex.
LEGO bricks – Mostly 1×2, 1×4, 2×4, and 1×6 bricks for building walls and paths. Grab whatever you’ve got – there’s no wrong mix.
Marbles – Standard glass marbles work great. Just test yours on the baseplate first (more on that in a second).
LEGO tiles (optional) – Flat tiles make the marble glide more smoothly across the surface. Totally optional – regular studded bricks work just fine.
Before you start building: Roll your marble across the bare baseplate. Make sure it moves freely without getting stuck on the studs. Some larger marbles are just a hair too wide for standard 2-stud-wide paths, and it’s much easier to swap marbles now than after you’ve built an entire maze.

How to Build a LEGO Marble Maze: Step by Step
Step 1: Build the Border
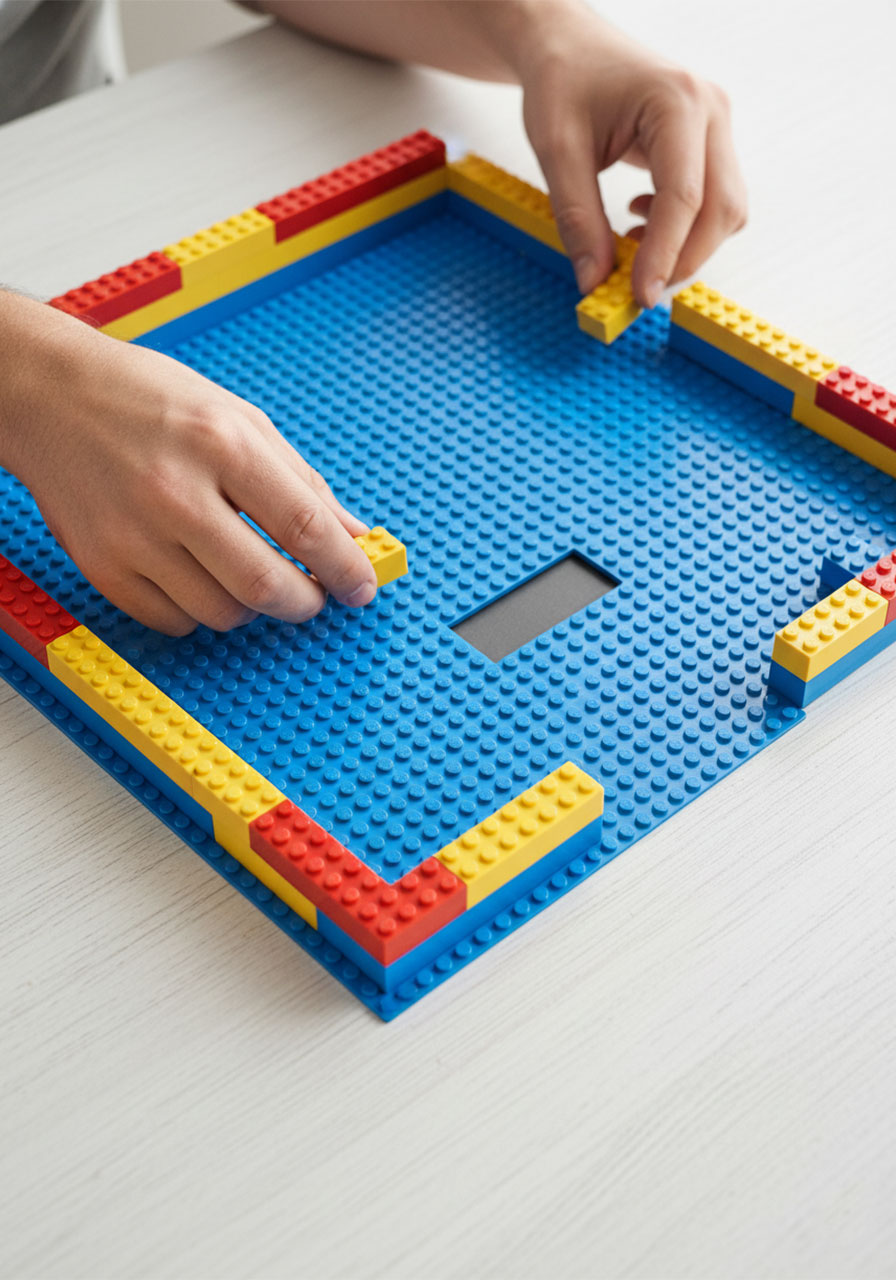
Start by building a wall of bricks around the entire edge of your baseplate – this becomes the outer boundary of your maze.
Leave two gaps: one for the entrance and one for the exit. Place them on opposite sides of the board so the marble has to travel all the way through to get out. Before you move on, test that your marble actually fits through the gaps. Marble sizes vary, and trust me, you do not want to discover a sizing problem after you’ve spent 30 minutes building the interior.
Pro Tip: Build the border two bricks high from the start. It keeps the marble from flying off the edge when kids get enthusiastic with the tilting.
Step 2: Plan Your Path
Here’s where kids really start having fun.
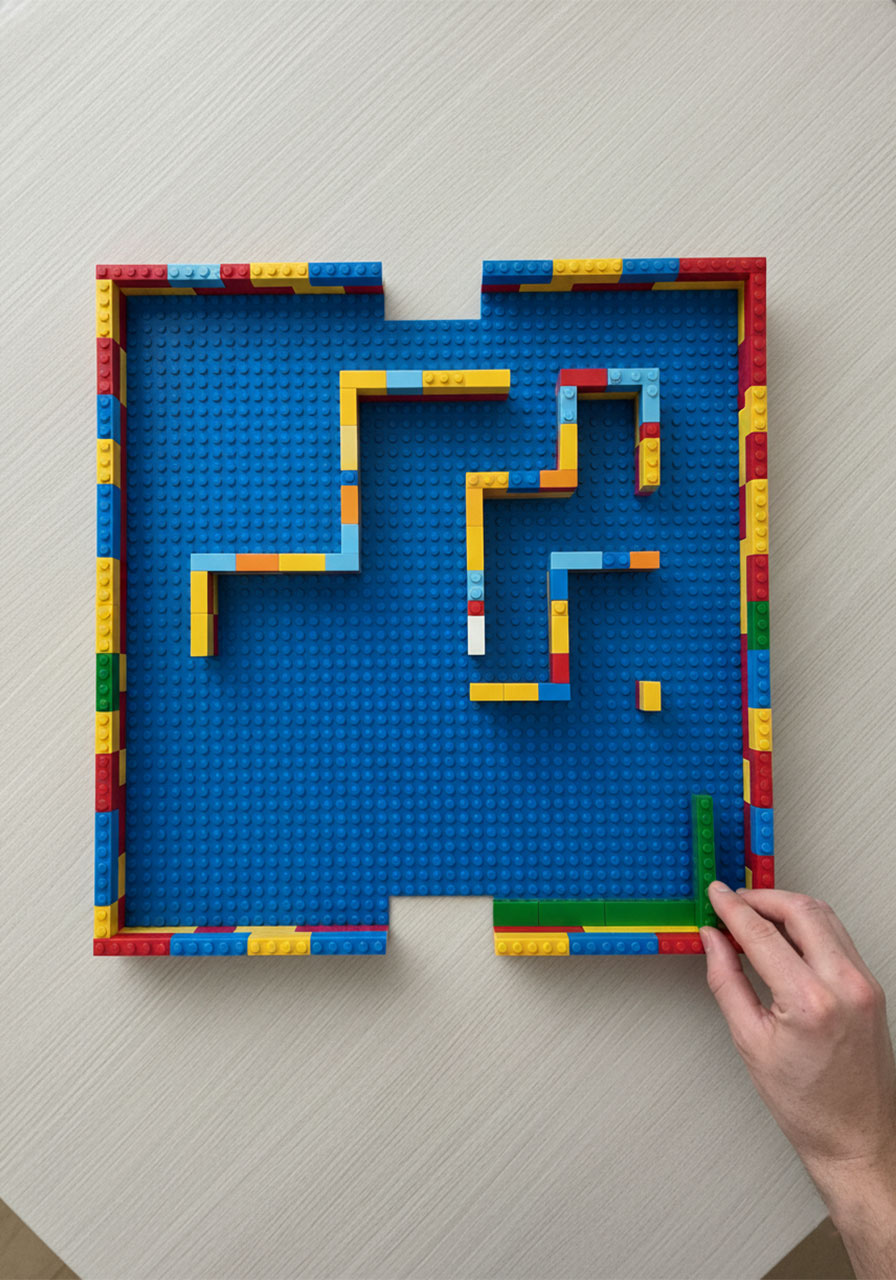
Before placing any interior walls, think about the main route you want the marble to travel. You can sketch it on paper first, or just dive in and wing it – both approaches work. Younger kids might need a gentle nudge to start; older kids will usually just go for it.
The key is to map out one clear path from the entrance to the exit first. Get that working, then go back and add the tricky stuff: dead ends, false paths, tight corners. Build your success before you build your challenge.
Tip for kids who feel stuck: Do a quick online search for “maze generator” – there are free websites that create random maze designs your child can use as inspiration and recreate with their bricks.
Step 3: Build the Walls
Now fill in the maze with interior walls and barriers. Here’s what to keep in mind as you build:
Path width matters. Most standard marbles need paths that are at least 2 studs wide. Use your actual marble as a measuring tool as you place bricks – if it barely squeezes through, that path will cause headaches later.
Stagger your bricks. Just like real brickwork, overlap the seams between bricks on each layer. Bricks stacked directly on top of each other (seam on seam) are weak and will pop apart the moment your kid tilts the board. Staggering them locks everything together.
Mix your brick sizes. Use longer bricks (1×6, 1×8) for straight walls and shorter ones (1×2, 1×3) for corners and tight turns.
Don’t stress about symmetry or perfection. As long as the marble can roll through, it works. That’s the whole engineering point.
Step 4: Add Dead Ends and False Paths
This is the step that turns a simple rolling path into an actual maze.
Go back through your layout and add extra walls that create convincing-looking paths leading absolutely nowhere. These dead ends are what make solving the maze genuinely satisfying – especially for a sibling or friend who didn’t build it and doesn’t know the secret route.
Aim for at least 3–4 dead ends for a standard-sized maze. Older kids who want a real challenge? Stack them in. The more convincing the false paths look, the better.
Step 5: Test, Adjust, and Improve
This is where the real learning happens – and it’s the step kids love most once they get into it.
Place your marble at the entrance, tilt the baseplate, and see what happens. Does it get stuck? Fly off an edge? Refuse to make a tight corner? Every single one of those problems is a design challenge waiting to be solved.
This is exactly what engineers do: build something, test it, find what went wrong, fix it, test again. Most kids go through 3 or 4 rounds of testing before they’re satisfied – and that iterative process is where all the real problem-solving and learning happens.
Pro Tip: Encourage kids to test the maze in sections while they’re building, not just at the very end. Catching a narrow path or a wobbly wall early saves a lot of rebuilding time later.
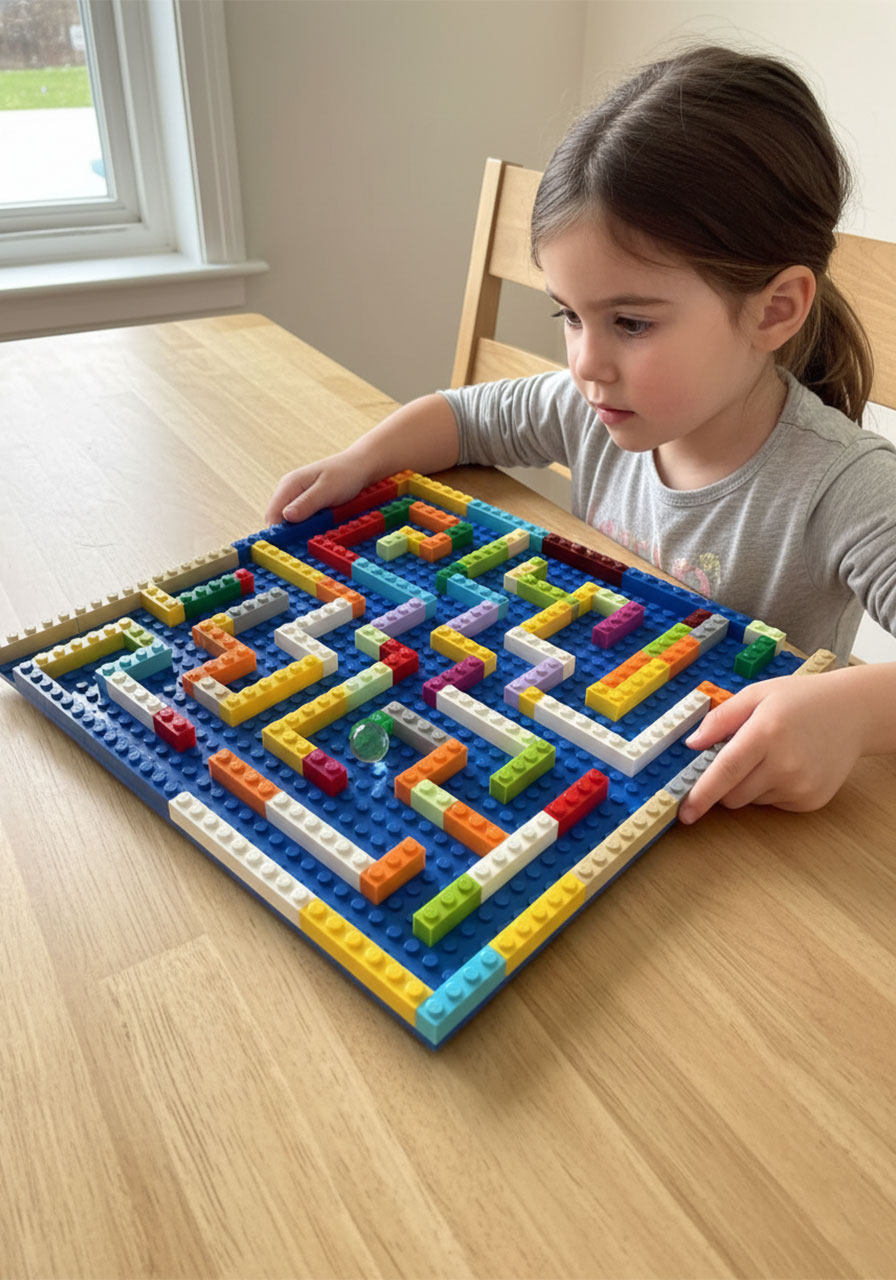
LEGO Marble Maze Ideas for Every Age
One of the best things about this activity is how easily you can adjust the difficulty. Here’s how to match the maze to your kid.
Beginner Maze (Ages 4–5)
Keep it simple and set your little one up for a win.
Build one clear path from start to finish with no dead ends at all. Make the paths 3 studs wide instead of 2 so the marble has plenty of breathing room. Keep walls low – one brick high is enough. The goal isn’t solving a tricky puzzle; it’s getting the marble from Point A to Point B. That alone takes real focus and coordination for a preschooler, and the look on their face when it works is priceless.
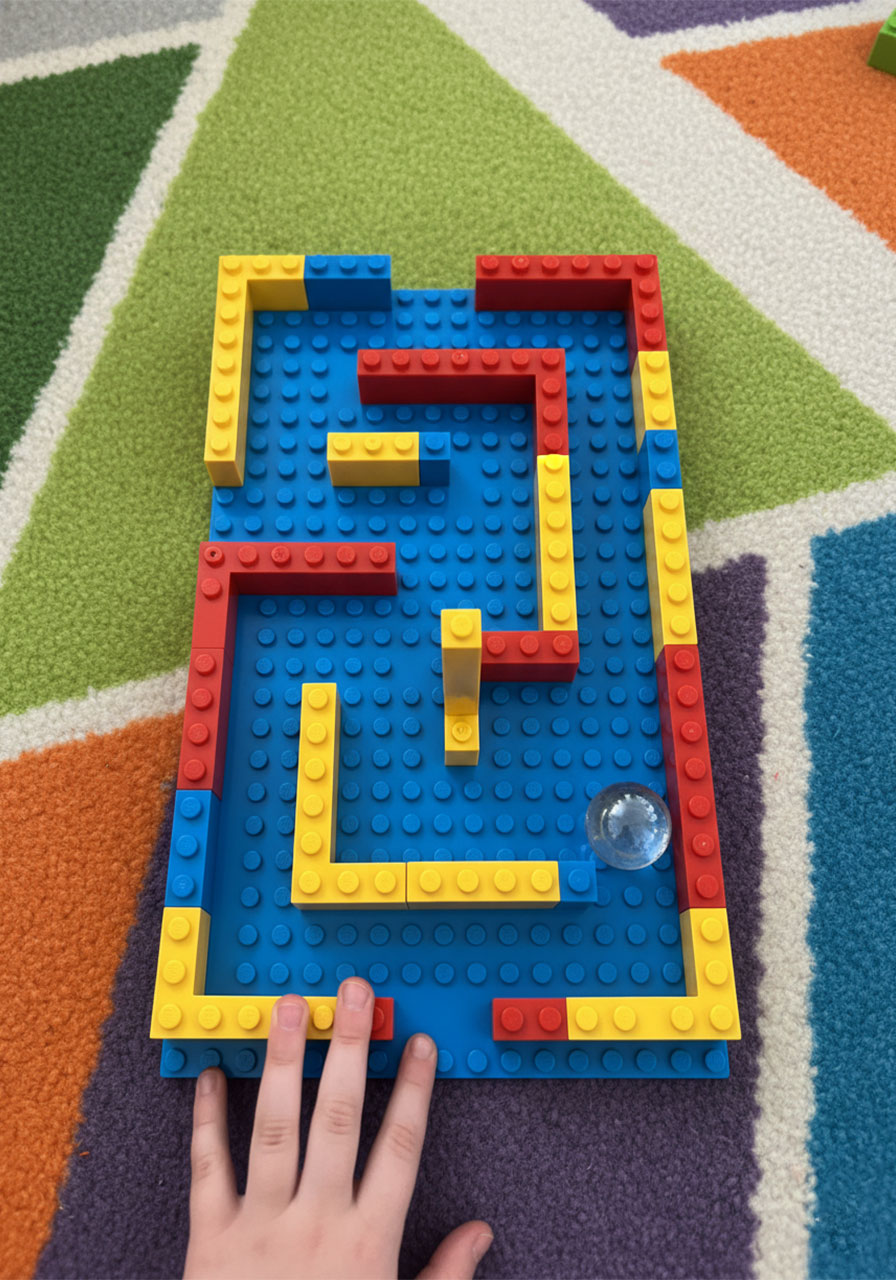
Intermediate Maze (Ages 6–8)
Now we’re getting interesting.
Add multiple paths with several dead ends. Standard 2-stud-wide paths work great at this age. This is also the perfect time to introduce tunnels – just place a brick or flat plate across the top of a path section so the marble rolls underneath it. Once your child has solved their own maze a few times, time them and see if they can beat their own record.
Advanced Maze (Ages 9+)
Time to seriously level up.
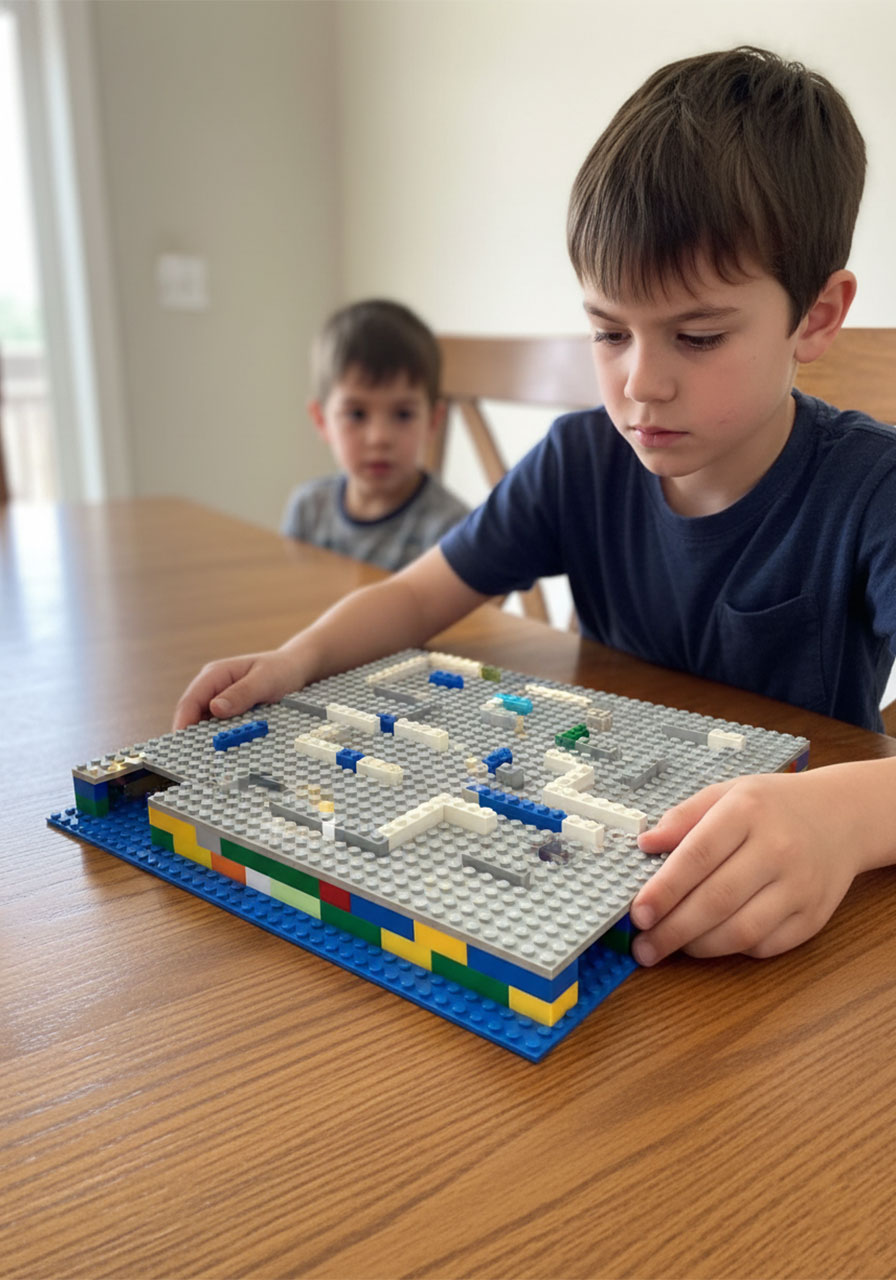
Build the walls higher and add bricks across the top to cover the entire maze – now your kid can’t see the marble at all. They have to navigate entirely by feel and the sound of the marble rolling. (This is what we call the “Blind Maze,” and it is genuinely hard. Even adults struggle with it.)
For the ultimate challenge, have your child design a maze specifically designed to stump a sibling or parent. Competitive maze building gets surprisingly intense – and incredibly fun.
9 Creative LEGO Marble Maze Challenges
Once your kids have the basic build mastered, try these challenges to keep the activity fresh for weeks:
1. The Blind Maze
Cover the top of the entire maze so the marble is completely hidden inside. Navigate by tilting and listening for the marble to roll. This is harder than it sounds – even parents get humbled by this one.
2. Holiday-Themed Mazes
Build a heart-shaped border for Valentine’s Day. A pumpkin outline for Halloween. A Christmas tree shape for December. Swap in seasonal brick colors – red, white, and blue for the 4th of July is always a crowd-pleaser.
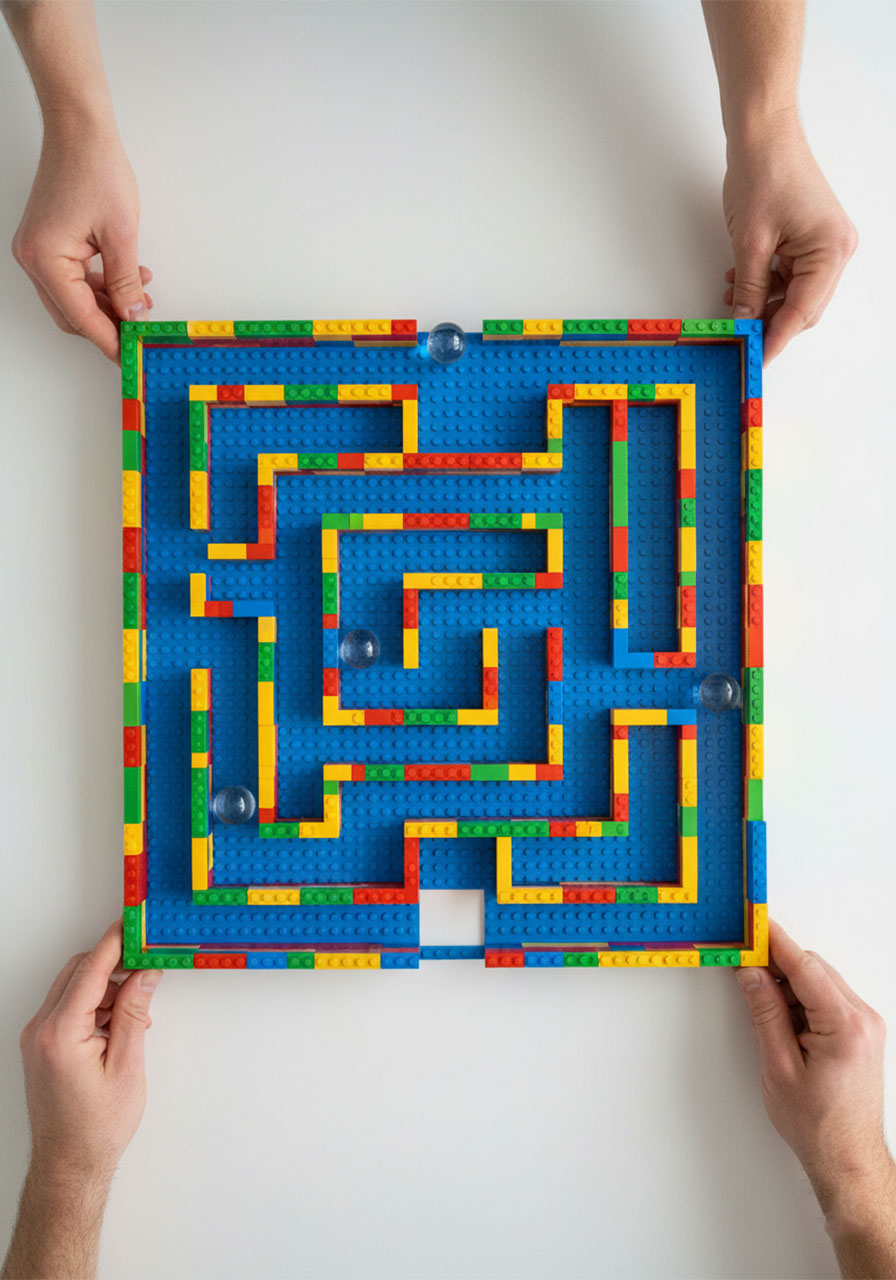
3. Multi-Marble Madness
Drop 3 marbles into the maze at once and try to get all of them to the exit without any falling off the board. This requires incredibly slow, controlled, deliberate tilting. Patience: required.
4. Speed Run
Time each family member solving the same maze. Keep a leaderboard on the fridge. Fair warning: this gets competitive very quickly.
5. Maze Swap
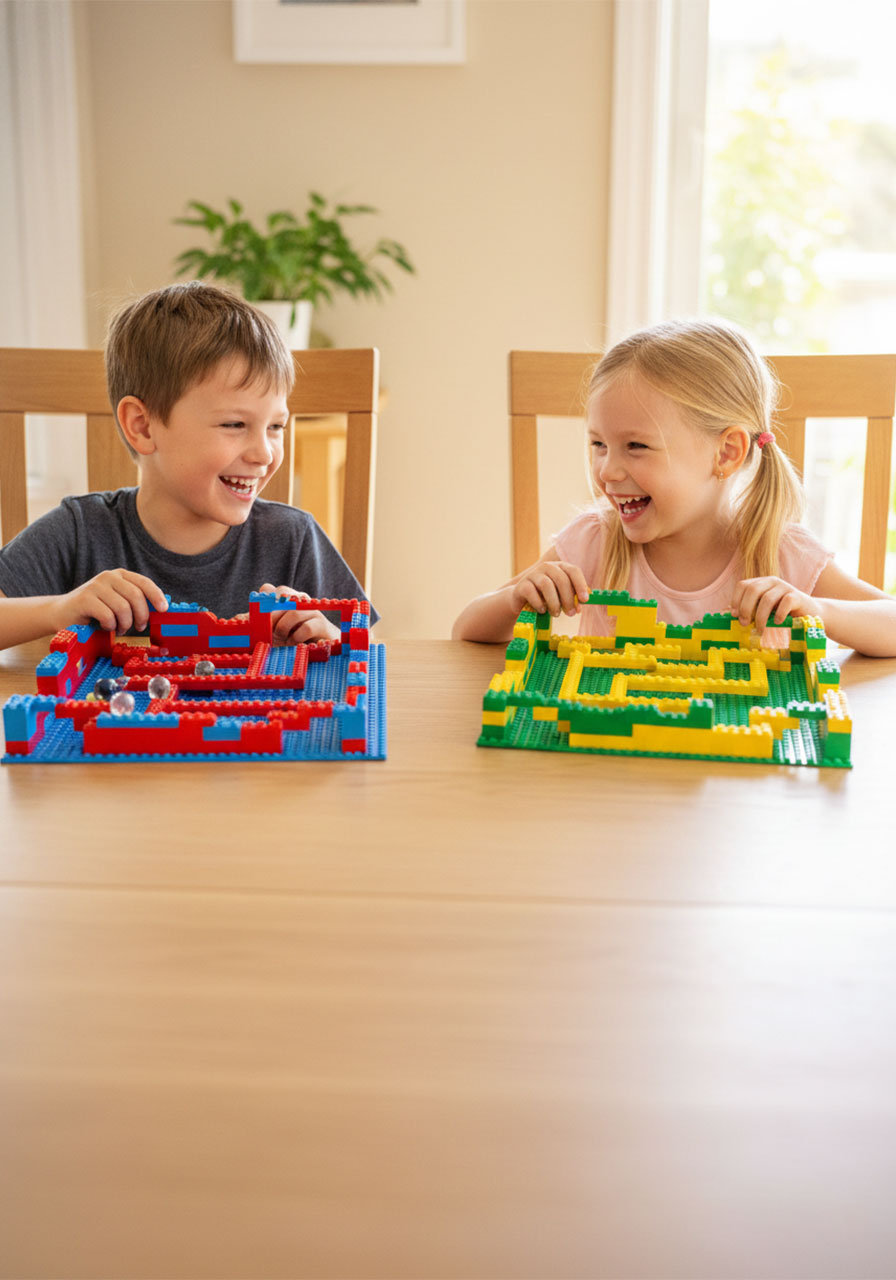
Each kid builds their own maze, then they swap and try to solve each other’s. This is fantastic for playdates, LEGO clubs, or classroom STEM time – and kids take extra pride in designing a maze they know someone else has to beat.
6. Color-Coded Paths
Build multiple routes using different colored bricks for each path. The challenge: can your kid get the marble to follow only the blue path? Only the red path? Requires careful reading of the maze before tilting.
7. Obstacle Course Maze
Place LEGO minifigures, trees, or tiny animals inside the maze as obstacles the marble has to navigate around. Bonus creativity points if your kid builds a little story around why the marble needs to avoid them.
8. Giant Maze
Connect multiple baseplates together to build a mega-maze. You’ll need a helper to hold the other end steady while you tilt – which makes this a fantastic teamwork challenge.
9. The Impossible Maze
Design a maze that’s intentionally, ruthlessly difficult. Tiny paths, sharp turns, dead ends everywhere. Then challenge the whole family to solve it. Whoever gets the marble to the exit first earns full bragging rights – which, in our house, are taken very seriously.
Troubleshooting Your LEGO Marble Maze
Not every marble maze works perfectly on the first try – and that’s actually the whole point. But here are the most common hiccups and exactly how to fix them:
The Marble Keeps Getting Stuck
The path is probably too narrow. Most standard glass marbles need at least 2 full studs of clearance to roll freely. Move a wall brick over by one stud to widen the problem path and test again. If the marble is getting stuck at corners specifically, widen just the turn area – 90-degree corners are tight, and marbles need a little extra room to swing around them.
The Walls Keep Popping Off
You’re almost certainly stacking bricks seam-on-seam instead of staggering them. Overlapping the seams between bricks on each layer locks everything together. If you stack bricks directly on top of each other without staggering, the connection is weak and they’ll pop right off when the baseplate gets tilted. For the outer border especially, consider doubling up the bottom layer for extra stability.
The Marble Keeps Flying Out Over the Walls
Two possible culprits: walls that are too low, or tilting that’s too aggressive. Stack another layer of bricks on top of your walls to increase the height. And remind your kid – and yourself – that you need very little angle to get a marble moving. Slow, gentle, controlled tilts win every time. It’s not a race to see how steep you can go.
My Kid Is Getting Frustrated
Simplify. Pull out a few dead ends, widen the paths, and let them experience a successful run before adding the challenge back in. It also helps enormously to encourage testing in sections while building, rather than waiting until the whole maze is finished before the first marble rolls. Early wins build the confidence to keep going when things get tricky.
And remind them: real engineers test and fix things over and over. Getting stuck and figuring out a solution isn’t failing – it’s literally what designing something means.
What Kids Actually Learn from a LEGO Marble Maze
This is one of those activities that looks like pure play but quietly delivers a serious amount of learning:
Engineering design process. Plan → Build → Test → Improve. Kids cycle through this loop naturally, over and over, without even realizing it’s a real-world skill.
Spatial reasoning. Visualizing paths, predicting where the marble will go, understanding how moving one wall changes the entire route – this is geometry and logic in brick form.
Fine motor skills and hand-eye coordination. Tilting the baseplate just enough to guide the marble without launching it over the walls requires real precision. Great practice for younger kids especially.
Patience and persistence. Getting a marble through a tricky maze takes calm, focused movement. Kids who figure this out here carry that skill everywhere.
Problem-solving and critical thinking. When the marble gets stuck, kids have to diagnose why and come up with a fix. That’s real-world critical thinking in action – with colorful bricks.
Frequently Asked Questions
What size LEGO baseplate works best?
A 16×16 baseplate is ideal for younger kids – it’s easier to hold and tilt with small hands, and the smaller surface keeps the build manageable. A 32×32 gives older kids more real estate for complex designs with lots of dead ends and twists. Both work great; it just depends on the builder’s age and ambition level.
What type of marble works best?
Standard glass marbles work for most designs. Always test your specific marble before building too much – some glass marbles are slightly large for 2-stud-wide paths. Small steel ball bearings (available at most craft stores) tend to roll the smoothest and fit more reliably in tighter paths.
Can you use DUPLO bricks instead?
You can, but you’ll need a larger ball since DUPLO paths are wider. Standard LEGO bricks give you far more design flexibility, but DUPLO works fine for toddlers who want to try a super-simplified version of the activity.
How long does it take to build?
A simple beginner maze takes about 15–20 minutes to build. A more complex design with tunnels, dead ends, and multiple paths can easily keep a child busy for an hour or more – and then there’s the playing, testing, and redesigning, which can stretch an entire afternoon.
Can multiple kids build one together?
Absolutely – and it works really well. One child can design the path while another builds the walls. Or each kid builds their own maze and then swaps to solve each other’s. It’s a fantastic activity for playdates, LEGO clubs, or classroom STEM projects.
Final Thoughts
A LEGO marble maze is one of those rare activities that ticks every box: screen-free, endlessly replayable, genuinely educational, and – most importantly – actually fun. Kids build something they’re proud of, solve a problem they created, and then immediately want to build a harder version. That’s the loop you want.
And the moment your child finally tilts the marble all the way from entrance to exit on a maze they designed themselves? That look of pure satisfaction is worth every LEGO brick scattered across your floor.
Happy building!
More Kid’s Party Ideas to Keep the Fun Rolling:
What Melts in the Sun? The Easiest Science Experiment Kids Will Beg to Do Again
How to Use LEGOs to Make Pictures in Playdough (It’s Easier Than You Think!)
LEGO Charades, Pictionary & Creationary: The Ultimate Hands-On Game for Kids & Families
DIY LEGO Pom Pom Maze: The Ultimate Rainy Day Activity Kids Will Beg to Do Again
16 Genius Colour Sorting Activities for Toddlers & Preschoolers
22 Pinterest Ideas Every Parent (and Teacher!) Will Actually Want to Try
The Easiest Math Activity for Preschoolers (All You Need Is a Cardboard Box!)
15 Cup Stacking STEM Challenges That Will Keep Preschoolers Busy for Hours
