

You know that moment when you’re about to toss an empty tissue box into the recycling… and then you stop yourself? This is that moment. Because with a few foam sheets, a pair of scissors, and about 30 minutes, that ordinary tissue box is about to become the coolest DIY toy car wash your kid has ever seen.
This craft is a total win on every level: it’s budget-friendly, it uses materials you can grab at the dollar store, and the finished car wash is genuinely fun to play with. Little ones can push their toy cars through the fringed entrance, past the spinning brushes, and out the other side – over and over again. Trust us, they won’t want to stop.
Whether you’re a parent looking for a rainy-day project or a teacher hunting for a creative activity that doubles as imaginative play, this one’s a keeper. Let’s build it!
What You’ll Need
1 empty tissue box (cube-shaped works best)
Foam sheets – red, yellow, and orange
2 foam sticks (the Dollar Store is your best friend here)
Hot glue gun + glue sticks
Scissors
A pencil or marker (for tracing lines)
A marker to write “CAR WASH” on the sign
Best for: Kids ages 3 and up (with adult help for hot glue). Great for one-on-one parent-child time or a classroom craft station.
Time to Make: About 20–30 minutes


How to Make It: Step-by-Step
Step 1: Prep Your Tissue Box
1. Take your empty tissue box and decide which two opposite sides will be the entrance and the exit.
2. Using your scissors, carefully cut out both of those sides completely so you have two large open openings – one for cars to go in, one for cars to come out.
3. Next, cut out the bottom of the box too, so it’s open underneath. This lets kids push toy cars straight through from one end to the other. You’ll end up with a tunnel-style box that’s open on both sides and the bottom.
Pro Tip: A cube-shaped tissue box (rather than the flat rectangular kind) works perfectly here because the openings are big enough for most small toy cars to fit through easily.
Step 2: Make the Car Wash Curtain (Entrance)
This is the fun part – those classic dangling car wash strips that kids love to push their cars through!
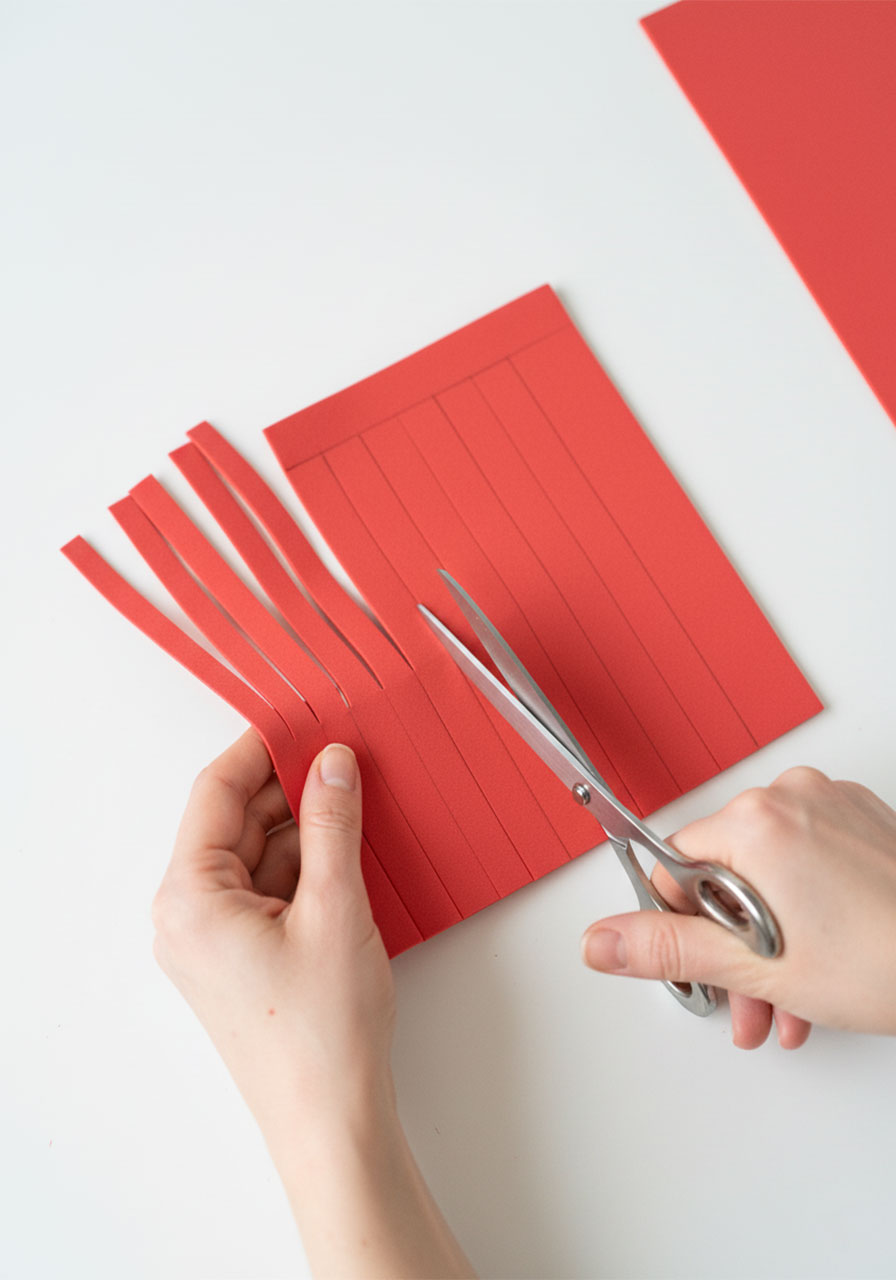
1. Take two red foam sheets and trim them down so each one fits the width and height of your entrance opening.
2. Using a pencil, draw vertical lines across each sheet, spacing them about half an inch apart. These are your cutting guides.
3. Cut along each line from the bottom of the sheet up, stopping about an inch from the top. You want the strips to hang freely but stay attached at the top – just like real car wash curtains.
4. Apply hot glue along the top (uncut) edge of the first foam sheet and press it firmly to the inside top of your entrance opening. Hold for a few seconds to set.
5. Repeat with the second foam sheet, layering it directly on top of the first. Two layers = a fuller, more satisfying curtain effect.
Pro Tip: Gluing from the inside of the box keeps the outside looking neat and clean.

Step 3: Make the Sign
1. Cut a strip of orange foam sheet wide enough to span the top of your entrance opening.
2. Use a marker to write “CAR WASH” in bold letters across it.
3. Hot glue it across the top edge of the entrance opening on the outside of the box. This is your car wash sign!
You can also glue small strips of orange foam along the sides of the entrance opening to frame it and give it that “car wash building” look.
Step 4: Make the Spinning Brushes (Exit)
This is the showstopper. These brush rollers go inside the exit end of the car wash and they look incredibly realistic – plus they’re flexible enough for toy cars to push right through.
1. Take two yellow foam sheets and cut each one into three pieces: two larger pieces of the same size, and one smaller piece.
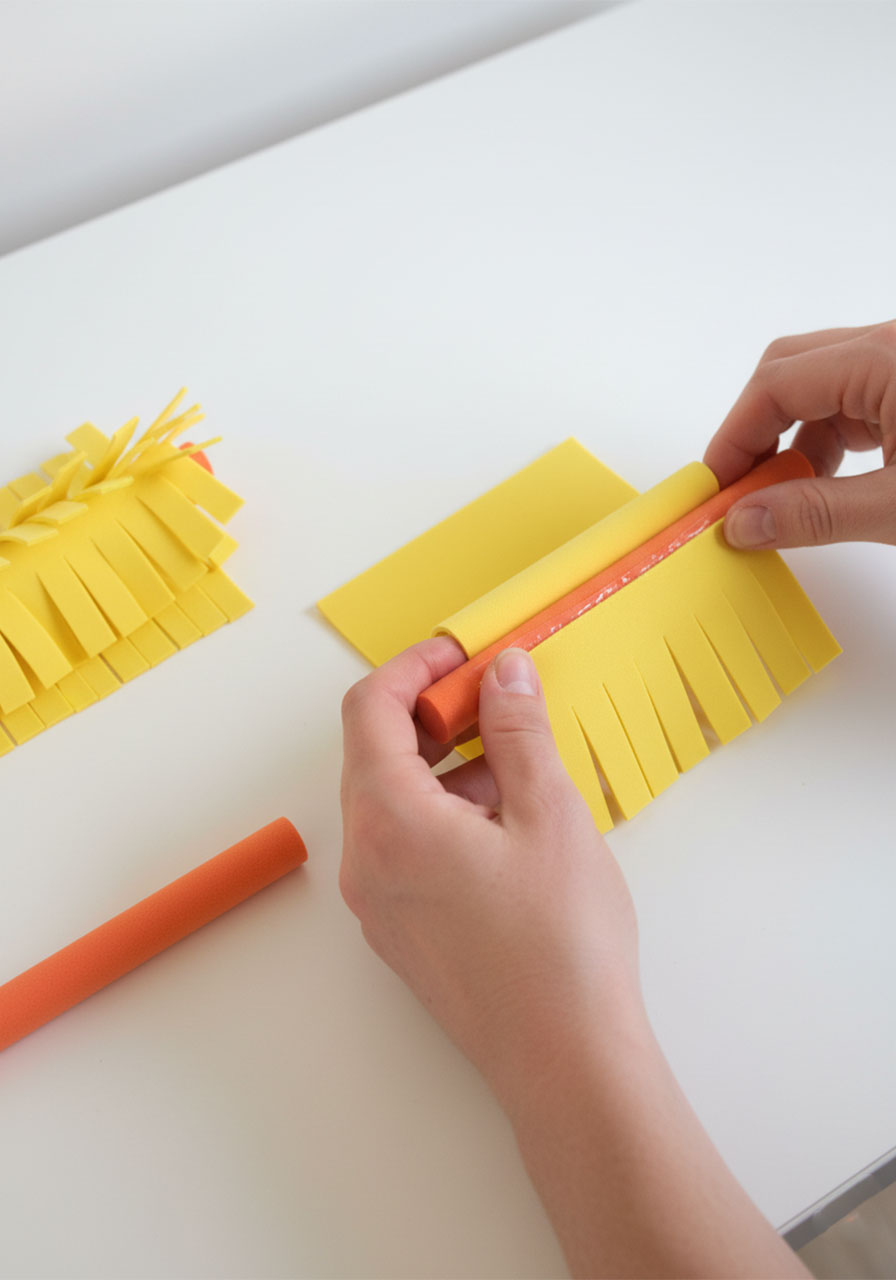
2. Take one of the larger pieces and cut a fringe all the way across it – snip strips from one long edge almost to the other, leaving about half an inch uncut at the top to keep it together. Repeat this for all six pieces (both large and small pieces from both sheets).
3. Take one foam stick. Apply a small dot of hot glue to one end of the stick, then press the uncut edge of a large fringed piece onto it and begin rolling the foam tightly around the stick – like you’re rolling up a tiny carpet.
4. Once you’ve rolled the first large piece all the way around, add the second large piece and keep rolling. Finish with the smaller piece at the bottom of the brush. Add a tiny dot of glue at the very end to keep everything from unrolling.
5. Repeat the entire process with your second foam stick so you have two fluffy brush rollers.
6. Hot glue one brush roller to each side of the exit opening on the inside of the box. They should hang down and slightly overlap in the middle, so cars have to push through them.
Pro Tip: Foam sticks are ideal because they’re flexible and springy – but if you only have wooden dowels or pencils on hand, those work great too! The brush will still look awesome.
Step 5: Final Touches
1. Glue a strip of orange foam across the top of the exit opening to match the entrance sign. This ties the whole look together.
2. Give the whole car wash a once-over and glue down anything that’s lifting or loose.
3. That’s it – your DIY Tissue Box Toy Car Wash is officially open for business!
Time to Play!
Hand your kid their favorite toy car and watch their face light up. They’ll push it through the curtain strips at the entrance, roll it under the brush rollers at the exit, and then… do it all over again. And again. And again. It’s one of those toys that’s genuinely more fun the simpler it is.
This craft is especially great for making together – there’s something about building a toy with your child that makes them treasure it so much more than something that comes out of a box. Once you’ve built it together, they’ll often take over and play independently with it for a surprisingly long stretch of time.
Fun Variation: Make two tissue box car washes and set up a full toy car town! Add a cardboard road between them and let kids create their own neighborhood garage scene.
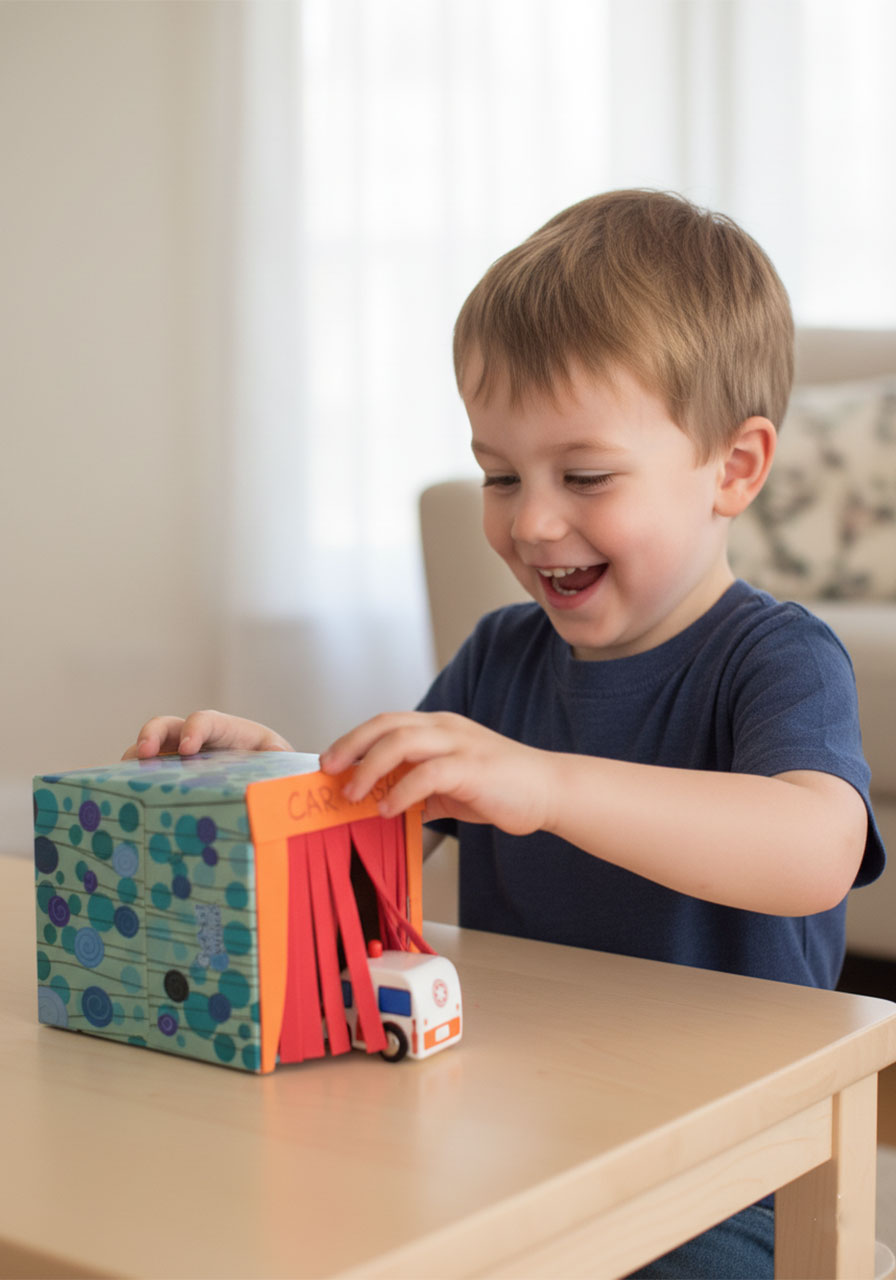
With a tissue box and a few foam sheets, you just created something genuinely magical. That’s what we love most about simple crafts – the materials are humble, but the fun is huge. Save this one for your next rainy day, classroom craft session, or anytime you need a quick activity that delivers big smiles.
Because the best toys are the ones you make yourself.
More Kid’s Party Ideas to Keep the Fun Rolling:
Shaving Cream Sensory Play: The “Decorate the Cake” Activity Kids Go Absolutely Wild For
Q-Tip Push: The Crazy-Simple Baby Activity That Buys You 30 Minutes of Peace
The Muffin Tin Letter Sounds Activity That Makes Learning ABCs Actually Fun
How to Build a LEGO Marble Maze (Step-by-Step DIY for Kids of All Ages)
What Melts in the Sun? The Easiest Science Experiment Kids Will Beg to Do Again
How to Use LEGOs to Make Pictures in Playdough (It’s Easier Than You Think!)
LEGO Charades, Pictionary & Creationary: The Ultimate Hands-On Game for Kids & Families
DIY LEGO Pom Pom Maze: The Ultimate Rainy Day Activity Kids Will Beg to Do Again
